Showing posts with label Rainbow Scrap Challenge. Show all posts

Wednesday, August 27, 2025

Aqua--Rainbow Scrap Challenge Blocks 2025


Starting the process
Whew! I BARELY completed goal number two on my August list which was to make the Rainbow Scrap Challenge blocks for the month. This month, we worked with Aqua. We have two more months to make blocks. Because we are nearing the end of the year, I cut the remaining background pieces so piecing the next blocks will go a bit quicker. 

Finished blocks

Then I stitched the blocks. Finished is great! Linking with Finished or Not Friday, Patchwork and Quilts, Scrap Happy, Oh Scrap and Show and Tell.

Sunday, July 6, 2025

Purple Rainbow Scrap Challenge Blocks 2025 Complete

Making purple blocks
Goal number one on my July list was to make the blocks for the Rainbow Scrap Challenge. This month, Angela chose the color purple.  When I pulled out the squares, I learned I was one set short. I made another set of four squares and constructed the blocks. I almost made a grave error as I almost forgot to stitch the squares along the selvage edge as I had only glued them! Whew, I avoided a journey that would not have been fun!!

Purple selvages in blocks
Linking to Oh Scrap and Scrap Happy and Sew and Tell.

Wednesday, June 4, 2025

Orange Rainbow Scrap Challenge 2025 Blocks Complete--post 4

This month, I completed making the Rainbow Scrap Challenge (RSC) blocks even earlier than last month! I like this trend! Angela at So Scrappy chose orange a the color for this month. I pulled out my selvage squares and started piecing the blocks. In no time at all, I was finished. I hope I can be as proactive next month too!

Orange Rainbow Scrap Challenge blocks
Making these blocks was goal number five on my June list. Linking up to Alycia at Finished or Not Friday; Angela at So Scrappy and Frédérique at Patchwork and Quilts.

Wednesday, May 14, 2025

Green Rainbow Scrap Challenge Blocks--2025 --post three

Green selvage squares
Goal number six on my May list was to make the green blocks for the RainBow Scrap Challenge. Angela at SoScrappy, picked green as the color for May. THIS month, I wasn't going to wait until the last day to get the blocks sewn!

Block ready to be stitched
The small challenge I had was that I thought that I had made four sets of selvage squares; but, in fact, I had sewn only three. It was back to the selvage bag to make another set of four squares. I forgot to take a photo of the selvages.

Green blocks complete
While I was concerned that the green background would blend with the green selvages, the background worked great. There are enough varieties of green to be able to get a contrast. Now. . .if I can get the June blocks sewn at least as quickly next month. My fingers are crossed!

Linking to Alycia at Finished or Not Friday!, Frédérique at Patchwork and Quilts and Angela at So Scrappy!

Wednesday, March 12, 2025

2025 Rainbow Scrap Challenge Yellow--post 2

Daffodils blooming in the yard
Angela chose yellow as the color for March in the Rainbow Scrap Challenge. Honestly, when I think of the color yellow, I think of daffodils. These are such happy flowers which always make me smile!

Sewing the yellow selvage squares
For the scrap challenge this month, I was ready! I pulled my yellow selvage squares and began stitching them into blocks. Finishing the blocks was goal number six on my March list.

Yellow blocks completed 

Now that I'm organized, in no time, I had finished piecing the blocks.I wanted to see the yellow blocks with the pink and blue blocks. I arranged them all on the design wall. I liked what I saw.

The finished blocks
Then my little squirrel, Gertie, began swishing her tail and chattering. She wants to know how these will be set because she thinks there aren't enough! I told her that I didn't know what layout I would use. I told her that I was okay with making more blocks . . .maybe next year. . .well. . .She harrumphed me big time!! She obviously wants to see this finished sooner rather than later! LOL

Linking to Alycia at Finished or Not Friday and Angela at Scrap Happy!


Wednesday, February 26, 2025

2025 Rainbow Scrap Challenge Blocks--post 1

Selvage squares with the background
I'm behind with this project. I had good intentions. I purchased the background fabric in January. I even pre-washed it; but, didn't move further than that! 

Pink squares laid out
Last year for the Rainbow Scrap Challenge (RSC), I made selvage squares. At the time, I couldn't figure out a background fabric so I decided that year I would make the squares and the following year I would sew the squares into the blocks following the monthly color.

Pink blocks
Now that it is the end of February, I decided I needed to make some progress!!! Pink was the color for January and blue was the color for February. Surely, I could put together eight blocks before the end of February!

I cut a two yard piece of the background fabric and starched it. I let the starch dry and then I ironed the fabric. I cut strips; then squares and finally half square triangles. I laid out the block parts and started stitching.

Layout blue block
It didn't take long and all of my pink blocks were stitched. The blocks are supposed to be 10 1/2 inches. These were right on the mark. Starching the background fabric helped! I pulled the blue squares and stitched those. Again, the process went without one hiccup!

Next month, the color is yellow. I will make a few more blocks. It feels good to get caught up with the RSC! 

All the  blocks went together easily. I like the blocks in the straight setting. The pattern, however, had them set on the diagonal!

Blue blocks
Catching up on the RBSC was goal number one on my February list.

Linking to Alycia at Finished or Not Friday and Angela at Scrap Happy.


Sunday, December 15, 2024

Rainbow Scrap Challenge Quilting--2021 Project Finished

Block ditch quilted
Goal number one on my December list was to finish the quilting on this Rainbow Scrap Challenge (RSC) that I started in 2021. One day when my oldest granddaughter was visiting, she saw the string blocks on the sewing table. Miss K asked if she could make some blocks with strings. 

She liked piecing the blocks. Then she asked if she could have the blocks. She laid out the blocks and stitched them into a top. She pieced a back. We pin basted it  In July, she started ditch quilting it. Although she hasn't said a negative word about quilting, I could tell it was difficult for her. I could also tell she wasn't confident with quilting in the ditch. Stitching in the ditch is hard!

Circle template from Sue Nickles
Last month, I decided that I would quilt it for her. I spent parts of three weeks completing quilting in the ditch. Originally, I thought that would be enough quilting. 

When I finished the ditch quilting, the quilt asked for more. I pondered the request for a few days. I decided to quilt a few circles on the blocks. I used two rulers from Sue Nickle's circle wedge set. For the inner circle, I used my two inch circle ruler from Westalee's starter sampler set.

Circle motif addition
I chose a yellow 40 weight polyester thread produced by Superior Threads for two reasons. First, yellow is Miss K's favorite color. Second, she likes a little glitz and the
polyester has a bit of a sheen.

I did have some thread shredding. When I switched from a size 80 topstitch needle to a size 90 topstitch needle, the shredding disappeared. There were a lot of starts and stops. In the end, the effort was worth it! The quilting provides texture and a little "specialness." Even though I spent parts of another two weeks on circle quilting, I'm glad the quilt talked to me. I'm also glad that I listened!

Quilting rulers used in the project
In the black area, I quilted straight-ish lines. Once the quilt is washed and the quilt takes on that rumpled look, the straightness or lack of straightness isn't going to show.

When I free motion quilt, I don't see much of the quilt as it is scrunched and mushed so that I can access a particular area. Honestly, it feels like eternity quilting because it doesn't feel like I'm getting anywhere!!! 

Adding some stitching to the sashing areas
To ensure that I give my body good breaks, I set the timer on my phone or watch for 30 minutes. Once it goes off, I get up and walk around for 5-10 minutes. Then, I return to quilting. When my knee is too tired for more, I stop. Sometimes that can be after a couple sessions and sometimes that can be after many sessions. I take a break to stretch and heat my knee and leg. Sometimes, I can return to quilting and sometimes I can't. 

When I finished quilting, I cut, prepared and attached the binding. The last two times that I have machine applied the binding has been successful. I found the best set up for me is to use the number 34D foot; set the needle position at 2, place the foot on the fabric edge so it s scant of the 3/8 inch
marking and carefully stitch the binding to the quilt. When I topstitched the binding to the quilt front, I found this combination worked the best.

Binding front view
Miss K wanted a hanging sleeve so I attached it. She selected an extra block as a label. I will let her fill out the label. I will help her attach it to the back of the quilt. Once the label is in place, the quilt is truly finished!

Binding back view
This quilt measures 77 x 93 inches. Many of the strings came from my friend Martha's stash. The link will take you to the projects that I have made with her strings and bits. We purchased no fabric for this project.

Back

I sure hope that she is okay with my finishing her project and my choice of designs for the quilting. Time will tell! 

My favorite memories of this project are: *When she was curious about the string piecing and making blocks in a specific color. *The expression on her face when saw the blocks in that color way on the design wall.

*The time she took to layout the blocks exactly to her liking, *The way she measured the project to ensure it was going to be large enough for her. (She laid down next to the blocks. If her body was outside of the blocks, the project needed to be bigger!) 

*How she checked every seam I pinned to be sure she was sewing the blocks as per her layout. (I pinned them in the wrong order multiple times until she took over quality control!) 

Front
*The absolute joy she had on her face when she completed piecing the top and the back! Her insistence that her quilt had a "hangy thingy." ("Hangy thingy is otherwise known as a quilt sleeve!) She was so fun to sew with!!! I hope we can do it many more times.

This project used 16.5 yards of fabric from my stash, bringing the total used 24.5 yards this year. While my total is paltry, I am thankful that I have a net loss! Next year, I'm planning to document how much fabric I purchase as well as how much I use. This year, as I purchased, I deducted that amount from what I used.

I was intrigued to begin this project because Allison over at New Every Morning had posted about making a string quilt. Her project didn't have the constant black fabric. I asked if I could copy her idea and she said yes! Quilters are generous people! Thank you Allison!!

Previous posts: Yellow Strings; Green Strings; Blue Strings; Red Strings; Purple Strings; Blue or Brown; Aqua; Orange; Lime Green; Granddaughter Time; Quilting w/two Granddaughters; Sleepover; Pinning Strings;

Linking to: Alycia at Finished or Not Friday; Frédérique at Patchwork and Quilts; Angela at Scrap Happy; Cynthia at Oh Scrap.


Wednesday, November 20, 2024

Knee Update

KT cream
October 1, I had my left knee joint replaced. Since I had challenges with the right knee joint replacement, I figured this time would be easier. . . Hah. . . .was I ever incorrect!!!!

The surgeon said that my surgery went just as well as the first. For me, I had much more pain at the three internal incision sites. While the external incision healed well and the joint replacement parts continue to function well, those other painful areas stopped forward progress. 

Pumpkin snickerdoodle cookies
First, the area on the inside of my knee was so sore, barely touching the area with my finger tips caused me pain. The surgeon makes a half moon internal incision in that area to access where the leg bones attach to the joint. It made sense to me why this area was so sore. 

Pumpkin scones
Massage and laser treatments at PT provided a little relief at the appointment. By the time I returned home, the area was back to being painful. I had a body massage which helped that area. I tried KT cream, which is a magnesium and arnica cream. The cream did help relax the muscles. The product is made in the USA. Also, I found taking a magnesium glycerinate supplement helpful to relax the muscles.

Second, I was unable to lift my leg with a straight leg raise until last week. The surgeon makes an internal incision through the quadricep muscle to access the knee cap. We tried all sorts of ways to wake up the nerves. Some days, while my husband was doing the leg lifting, the muscle would try to work. The result would make me laugh because the leg would shake, swing erratically or just suddenly lose all movement. My husband thought I was playing around!

Starbucks-like pumpkin bread
Third, the area on the outside of my knee, where the ligaments are reattached, was super sore. The surgeon makes an incision in this area to be able to reattach the ligaments. Last time, I had some of the same results; but, the pain was much less because from mid thigh to mid shin, that area was numb. This time, I have a lot more active nerves.

Fourth, pain under my knee cap made movements like heel slides and squats too painful. Swelling caused the knee cap not to be able to slide so that was the reason for the pain. 

Using heat during the day, I stretched the muscles and walked gingerly around the house. I needed to use the walker because walking heel to toe caused me a pain range of 5-7 depending what part of my foot touched the floor. Shoes on or off. . . it didn't change the pain level. At night, I used ice to try to sleep through the pain. 

Pumpkin sourdough bread

I could sit in my chair with my leg somewhat elevated. Elevating it any higher caused me too much pain. I could lay in bed in two side laying positions. I could gingerly walk around; but, that was it. The position and the continual pain didn't work for reading, hand stitching and even watching tv sometimes was a no go. I even had to forgo reading and replying to blog posts!!

Water exercise with my friend, Wendy, in her home pool
Ditch quilting on a RSC project
Even though it was painful, every day, I tried to do my previous exercises. Most days were epic fails. Week six, PT moved me from the walker to the cane after I had some relief from the pain on the inside of my knee. I found I could turn my knee to the neutral position which I had been unable to do. Late in the week, I could do five to 10 leg raises on my own. I also did some walking in my friend Wendy's pool. I sure have missed the water!!!

Week seven, I was able to do a set of 20 leg raises on my own. I practiced standing by baking pumpkin recipes. My granddaughters were over the previous weekend. We opened a large can of pumpkin puree to use half a cup to make pumpkin sugar cookies. I didn't want the puree to go to waste! 

The first recipe I made was Soft Pumpkin Snickerdoodle cookies which used half a cup of puree. I had to take a break putting together the wet and then the dry ingredients. Once I mixed the cookies, I found I needed to sit to shape the cookies. I rested before I did the clean up and later that day, my leg had lots of pain.

Once the pain abated some, I tried working on my sitting skills. I did some ditch quilting on a Rainbow Scrap Challenge (RSC) project. Gosh, it felt good to Zoom with my Friday group and make progress on a project!!! I stood up and walked a bit every 30 minutes and I took a couple hour breaks. I was able to hang with the group for about six hours.

The following day, I made Pumpkin Scones which used three quarters of a cup of puree. I did better standing while mixing the ingredients. While the scones were baking, I mixed up a batch of sourdough pumpkin bread. It needed to raise overnight. The bread recipe used three quarters of a cup of puree. 

A few more neutrals ready for the mystery 
When the scones came out of the oven, I decided it would be a good day to share a few with my friend, Wendy. I also wanted to try driving. I did drive and made the delivery. . .I asked for a few hugs which were given and felt so good!!! I'm glad my friend lives fairly close as that was far enough with a break for my first foray. It means that I'll be driving myself to PT. Driving means freedom for both me and my husband!! I did not try sitting and quilting as my knee was too sore.

The third day, I made a batch of pumpkin bread that is supposed to taste like what is sold at Starbucks. The recipe called for a cup of puree, I was probably a quarter cup short. I made the recipe anyway! It looked good and smelled good. How it tastes will have to wait until Christmas. After it cooled, I froze it. Our London daughter likes Starbucks pumpkin bread so I wanted her to do the taste test. I also baked the sourdough pumpkin bread. I finally used all of the puree!

This morning to practice standing, I ironed a few of my neutral fabrics for the upcoming Bonnie Hunter The Old Town mystery. I have a lot of neutrals ready for the first clue. I still feel unsteady walking with the cane; but, every day I see and feel improvement . . .at LAST! 

I'm off to do some ditch quilting. Goal number six on my November list was to continue with my knee PT. Goal number 11 on my November list was to do some ditch quilting on a RSC project. 


Wednesday, November 6, 2024

Brown--Rainbow Scrap Challenge

Brown selvages
Goal number nine on my November list was to catch up with the blocks for the 2024 Rainbow Scrap Challenge (RSC). I wasn't able to make the brown blocks last month so I put them on the list for this month. I didn't think that I had enough "brown" selvages as brown is not a color I often use in my projects.

Some of the selvages
I pulled selvages that were some shade of brown. I decided that I had enough so I cut some selvages to length and began gluing them into blocks.

Lots of segments ready for stitching
I began gluing the bits together. It wasn't too long and I had a bunch ready for stitching.

A few selvages
This is the first activity I've done since my knee surgery on October 1. I needed to take a lot of breaks. in fact, I waited a day to do the actual stitching!

A few more selvages
It felt great to be back in the studio! Linking to Alycia and Finished or Not Friday and Angela at So Scrappy. 

Wednesday, September 18, 2024

Rainbow Scrap Challenge

My plan yesterday was to make the squares for the color of the month which is dark for the Rainbow Scrap Challenge. All was going according to plan until we lost power. 

Fabric line names
Turns out the internet company cut our power line while providing an internet line to a neighbor. We were the only ones affected. At first the power company said we'd have power in 1.5 hours. Then it was that we would have power by 3:30pm; then it was 6:30pm and the final estimate was 9:30pm. The power returned about 10pm.

More fabric lines
While I was able to glue the strips together it will be another day or so before I can stitch the squares. I also cut some pieces for a special back that I'm piecing for our challenge quilt. Other than that, I spent the day reading. . .until it was too dark to see! 

We weren't able to leave because the power company had to excavate the power lines which run across the drive way. They excavated a ditch to access the power line. I'm glad we had leftovers that were okay to be eaten cold! We were without power for 12 hours. I understand that we are on the list to have the underground power lines updated. These have been in place since the mid 1970s.

A few more fabric lines
This was goal number number seven on my September list. It won't take long to stitch the strips together so I'm calling it goal met! Linking to Angela at So Scrappy.

Wednesday, August 7, 2024

Orange Selvage Squares for the Rainbow Scrap Challenge

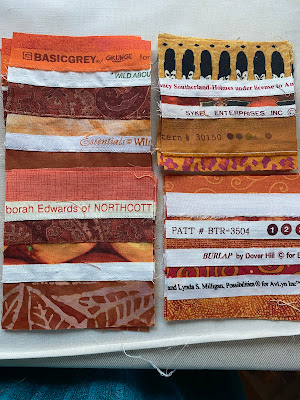
Orange selvages
Goal number five on my August list was to make the squares in the color for the Rainbow Scrap Challenge this month. Angela chose orange, so I pulled out my orange selvages. I didn't have as many as I thought that I did! I contemplated putting out an S.O.S. to you; but, in the end, I was able to construct four sets of four squares. I did use the unprinted selvage edge to be able to create enough fabric for the squares.

More selvages--note the unprinted selvage
A question from Anne Marie of the blog, Stories from the Sewing Room, was how wide I cut the selvages.  I cut at least a half inch into the fabric and as wide as an inch. Some selvages, which were given to me, were cut with a quarter of an inch into the fabric. These selvages ,when put into a project, won't show the print of the fabric. There are some projects where none of the print shows so it isn't "wrong" to cut solvates where none of the print shows. You can see in the photos of the selvages, how the printed space of the selvages differs. Some selvages sport a narrow band, while other selvages sport a wide band. Thanks, Anne Marie for the question!

Orientation of the squares
Melisa of Pinker N Punkin Quilting and Stitching and Jane from Australia asked why I glue the selvages. I use glue to tame the selvage edge from crawling. I'm not using a stabilizer for this project which would help the edge from slipping. A leave in stabilizer would add bulk to the project which I didn't want. I could have used newsprint and then removed the paper; but, I didn't want to go to that trouble either! Also, there have been a few instances where I didn't like the arrangement. It was easy to gently lift the edge of the selvage to remove it, re-glue and place it in a different arrangement! I use tiny drops of Elmer's School Glue. This is a washable glue and it works great!

For set of orange selvage squares
Next year, I plan to figure out a background fabric and sew the squares into blocks. I'll have four blocks of each color. Linking to Angela at So Scrappy.


Wednesday, July 24, 2024

Rainbow Scrap Challenge Squares in Aqua

Some aqua selvages
Goal number nine on my July list was to make the squares in the Rainbow Scrap Challenge color of the month which is aqua. 

A few more aqua selvages
I pulled my aqua selvages--there were more than I remembered. I selected enough to make four sets of four squares.

Four sets of completed squares
Laying out the selvages always takes time. I glue baste them, press them and then stitch next to the selvage edge. This time, I noted how long it took me from selecting the selvages to stitching the edges. It took me about two hours.

Linking to Angela at So Scrappy.


Wednesday, June 19, 2024

Blue Selvages--Rainbow Scrap Challenge

Some blue selvages
Goal number two on my June list was to stitch enough squares for four blocks in the color of the month for the Rainbow Scrap Challenge. I have a lot of blue strings.

Even more selvages
I sorted them into a blue/green pile, a light/bright pile and a dark pile. I noted I had some teal and some aqua strips too!

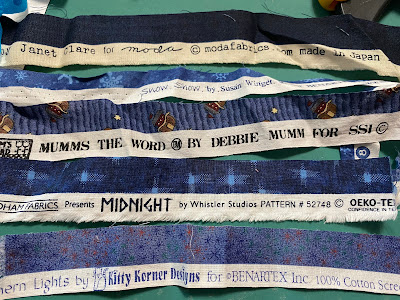
Some of the wording on the selvages
This month, I remembered to snap a couple photos of the selvages before I started to cut them into segments for the blocks.

A few more selvages with wording
I could have stitched more squares since my pile didn't decrease much after I had finished making enough squares for four blocks. 

Squares in process
We had a bonus Zoom sew day on Monday. A member of one of my small groups moved to Kansas. To stay connected, we've been zooming one Monday a month. It's fun to hear what she found in her neighborhood and who she's met in the quilting world. 

Finished squares
We shared stories and laughter. I finished all of my squares. I'm linking to: Angela at Scrap Happy, Carol at To Do Tuesday.