Showing posts with label scrap saving system. Show all posts

Wednesday, December 4, 2019

Frolic--Clue #1


Bonnie Hunter's Mystery Mavens group
Fabrics for Frolic from my stash
How many of you are participating in Bonnie Hunter's "Frolic" mystery this year? I am. Bonnie released the fabric requirements at the end of October. I combed through my stash and found much of the fabrics. I did purchase some. . .I needed the aquas and a couple of lighter blues. I purchased two and a half yards.

At a Mt. Hood Quilters guild meeting, I put the word out that I was planning to participate. I asked people to let me know if they wanted to play too. I hoped we could form a group. Eighteen of ladies joined our private Facebook page. Fourteen of us met on Monday to work on the clue that was released last Friday.

I chose to include the word mavens because it sounded like it fit. Wendy asked about the choice because it is a Yiddish word. She wanted to know if the person who chose it was Jewish. (I'm not Jewish.) She said it was a great word. . .which sent me to find out what she meant.
Laura's fabrics

Google's explanation was:
Whether it's in fashion, or food, or forensic science, someone who really knows his stuff about a topic is a maven, or a person particularly skilled in the field. The word maven comes from the Yiddish meyvn, meaning "one who understands." You don't become a maven overnight. Maven is a great term for all of us!

Ruth had already completed the clue. She came to cheer us on, to explain how to spin the seams, press, rip. . .well, how can life get better than to have a sewing buddy to help you make progress!!!
Ann cutting strips

There was cutting, stripping and pressing with lots of discussion and giggles as we progressed. Bonnie's hints and tips are helpful for consistently capturing that quarter inch seam. We are all spinners now meaning we can spin the seams in our four patch block to reduce bulk! One person, who came just to see what was going on, decided it would be fun to participate.

Jane sewing strips

It was fun to see all the different fabric choices. Lots of attendees shared fabrics. Carol brought a bag of beautiful fabrics that matched the fabric chips with the caveat, "cut what you need!" I am loving this group for their generosity and giving spirits!

Some people came with their strips sewn. Other people came and sewed strips. Some people came to press their strips. Others came to stitch their segments. The point is that no matter what stage we were, we all applauded each other for what we had done so far.

I snapped a photo of Jane stitching her strip because her nails coordinated so beautifully with her fabric choices!

Carol pressing strips
At the end of the day, some had completed stitching their four patches, some had even spun and pressed the seams. It was a nice day. We are planning other get together dates. Our long range plan after all the clues are released is to continue to get together monthly to sew so that we will finish our projects!

Denise sewing segments
I teach swimming lessons on the days that we picked to meet so I got to leave early. I've been sewing a little every day. I've made progress on my four patches. Like a number of ladies in the group, I've a project that has a "deadline." It is the "Leaves" project. I'm at the quilting stage. I've been working on that project most of my quilting time.

I have made a bunch of the four patches. I am well into the clue. Bonnie suggests to make some of each clue so that when you come back to the project, you will have a sample of what you were doing.

Ruth sharing how to spin the seams
A number of the group by this posting finished the first clue and are waiting clue number two! Kudos to them!  Bonnie cautions us that this is a journey and not a race which I love. Stuff happens.  Sometimes, we get to go on an alternate journey which is okay. Sometimes, those alternate journeys become places we want to explore more.

Wednesday, October 2, 2019

Becoming a User--Bust Your Stash post 2

Scraps from Martha's floor sorted into like sizes
In September, I listed some ideas about inspiration behind a design. I hope you have an idea of what you want to create or at least have narrowed your options for the Bust Your Stash challenge! This month, our topic is where to procure our scraps. 

The easiest resource is from past projects! For many years, I purchased my fabrics according to the pattern that I was making. I had one background, one medium, one dark and one light fabric. These days, I may choose a range of fabrics that represent medium, dark and light values. I find the various fabrics make the finished quilts sparkle and these quilts are an ode to the quilts our ancestors created from the scrap basket.
Sorted and bagged into the scrap saving system

The hardest fabrics to collect are the darks. The ones I’m low on the most are the lights! When I started quilting, I was determined not to have leftover bits. As I finished projects, I tossed the leftovers less than 1/4 of a yard or less than a fat quarter size.

Then I got to thinking. . .those smaller bits cost just as much as the bigger bits. I wondered how many possible quilts I had thrown away over the years. So, I started saving smaller bits using Bonnie Hunter’s scrap user’s system. When I’ve finished a project and before I work on the next project, I sort all the remaining bits. I cut the bits into useable sizes and store the pieces into like sizes by color. For example, I have ziplock bags of 2” squares and 2” strips in a variety of colors.
One block cut and ready to sew from the precuts
When the bag gets full, I try to use the fabrics in a project. Our challenge came about because I had many two inch squares. I wondered if others were in my position! Over the years, I’ve been pleasantly surprised when a pattern would call for cutting strips of a certain size and I’d go to my scrap saver system and pull those fabrics needed.  I love it when this works because I’m that much closer to stitching!

When I first started the scrap saving system, I went through past bags of leftovers. I had shoved the fabrics into a plastic bag and crammed the bags into a drawer or a container never to see the light of day. It took some time and it was nostalgic cutting fabrics from previous finished projects.  It was great to have like fabrics together. I was surprised at how much more space I had once I done the cutting and sorting!

If I want to try a specific color combination or I want to stitch a practice block, I’ll go to my “pre-cuts” looking for the sizes of fabrics that I need. As I’ve played with my pre-cuts, I’ve also noticed I’m making better fabric choices regarding value. 

If you are new to quilting, haven’t accumulated scraps, and belong to a quilt guild, check the free table. Often, there are some bits that might fill in the holes in your scrap system. Sometimes, friends will “gift” you chunks that you can use. You can also cut into your yardage that you have stashed. The point is, we all have enough fabrics stashed in our sewing spaces to create lots of projects. So stop petting and start cutting! Using, in this sense, is GOOD! Next month, our topic will be fabric choices.

Remember, comments are welcomed here as well as on instagram at #2020bustyourstashchallenge

Sunday, July 28, 2019

From The Cutting Room Floor--A Start!

Contents of the bag after a rough sort
My friend Martha loved to sew scraps.  When I learned she had died, I thought I would like to have her scrap basket. She put her scraps in a wire basket that was about 20" x 12". In our daily e-mail conversations, she would tell me how messy her sewing space was. I, however, only saw her space neat and organized. When I asked her where the mess was, she would report that when I came over, she put it in a bag; put it behind a door; put it in a closest; dumped it on her bed. Then, she just giggled. When I stepped into her sewing room that first time after her death, I discovered her mess. I chuckled.

She was true to her word. There were scraps, parts and projects everywhere! As I cleared fabrics, I'd encounter more scraps. The more scraps I found, the more I giggled! The couple grocery bags that I thought I would have turned into much more than that! For this post, I'm sharing what I did with one plastic grocery bag of her scraps.
Packaged after cutting

From that scrap bag, I removed the neutral strips and chunks as well as any fabric that fit for the Bonnie Hunter mystery last fall. I gave my friend, Gail, some bits of blues and purples for her to add to a background she wanted to make for a special project. Miss K pulled fabrics from the bag for her mermaid project. After all that removal, the contents of the bag continued to spill out on the floor. I'd pick it up only for the spillage to occur another time.

It was time to divide and conquer the contents of that bag using Bonnie Hunter's scrap saving system! I dumped the contents on the cutting table and began putting like pieces together. I had a pile of strings that were about 1-1 3/4 inches wide. I bagged these for a string project. There was a group of 2 1/2 "ish" inch strips that I also bagged.  Finally, there were some larger strips and chunks that were in the 4-5 inch range. I also put those in a bag. It was time to sort and start cutting the remaining bits into useable pieces. I wish the photo showed how high these scrap piles were! The photo makes it look like there wasn't much in the bag!
(Left) Ready for the project bag and (Right) ready for storage

The first day, I cut for a couple of hours. I had a pile of: 3 1/2 inch squares, 2 inch squares and 1 1/2 inch squares. I also had a few 2 1/2 inch squares. There were a lot of 4 1/2 inch chunks. I decided that if I had a plan, the more likely the pieces would become a finished project. I have so many in process projects and projects that I want to start that I didn't want to go that route. Instead, I decided that I would do a leader/ender project.

Since this bag of scraps contained some large print florals, I decided I'd prepare Jewel Box Stars as the project. (Martha had a lot of floral fabrics in her stash.) This pattern uses half square triangles that finish to three inches. It is a free pattern on Bonnie's website. I spent a few more days cutting. Total cutting time was 10 hours. If I could have cut two or three layers at a time, I would have spent less time cutting. Most of the pieces were odd sized so cutting them one at time was the best way to get the most out of the fabric pieces.

When I finished, I had a bag of triangles of various sizes. These probably were waste triangles from other projects. Some day I'm going to make a tiny paper pieced flying geese block project. I'll need many triangles to stitch it. I also had a few three inch squares. I didn't cut these down. I might use them in a particular project soon. We will see! As I cut, I ended up with a large amount of 1 inch by 3-4 inch strips. I saved these because I think I will make a paper pieced string border to sash this quilt.
First block finished

My inventory after sorting/cutting and in addition to the string bag and two strips bags was:
--a small bag of pieced bits which could be starters for crazy pieced blocks. I also added parts for a few nine patch blocks.
--a small bag that contained fabric that was backed with fusible. Martha liked fusible backed fabrics for applique. I may cut some shapes with the fabrics during some future play time.
--a small bag that contained all the squares but the two inch squares.
--a small bag that contained all the two inch squares plus I raided my neutral two inch squares.
--a small bag that contained all the HSTs. I also added enough neutral HSTs so that I will have enough to cover all the HSTs that I cut!

A lot of these scraps were the leftovers she had after piecing her project. After I finish a project and generally before I work on the next project, I take some time to cut the scraps into usable pieces using Bonnie's system.  In a few minutes, I have the pieces cut and sorted.

In this manner, I have accumulated bags of squares and strips. I stopped cutting the bricks because if I want those, I can cut them out of strips and I have less parts in my scrap inventory! I do not have bags of scraps. I do have bags of color coded "precuts" instead!

Second block ready for stitching
It is great to go to the scrap bags when I need materials for a project. Having "precuts" at my finger tips is nice! I cut what I could out of the bits. I didn't count how many parts I cut. I did cut backgrounds from my stash of neutrals. Now, my plan is sew and see how many blocks I have. When I need more chunks, I'll break into that bag of 4-5 "ish" inch strips to cut more. Martha wanted variety so she cut her strips at at different widths. When she miscut a strip, she slipped it in her scrap bag! So those are the reasons behind the width variety!

I laid out a block and took a photo of it. Those HSTs remind me of butterflies! I have no idea how close I will come to stitching it nor do I have any idea how long it will take me to make the blocks because, I plan to stitch these parts while I piece other projects. The parts will be the leaders and enders instead of scrap fabric. I'm going to make two quilts at one time! Perhaps, once a quarter I will update my progress. I think this would make a great "I Spy" quilt because of all the variety. Believe me, there is a lot of variety!!! In each block, there are 32 two inch squares and 16 three and a half inch half square triangles.

The projects I make from Martha's scraps will be called "From The Cutting Room Floor." I'm curious as to how many quilts I will stitch from her little bits! Stay tuned! For now, I'll report that storing a closed two gallon plastic zip lock bag that is less than three quarters full is a huge improvement!  It is so much easier to use parts from it too!  I'm no longer tripping over spillage from that plastic grocery bag!!!

Wednesday, January 30, 2019

Bonnie Hunter Mystery (Good Fortune)--post 1(Clues 1-4)

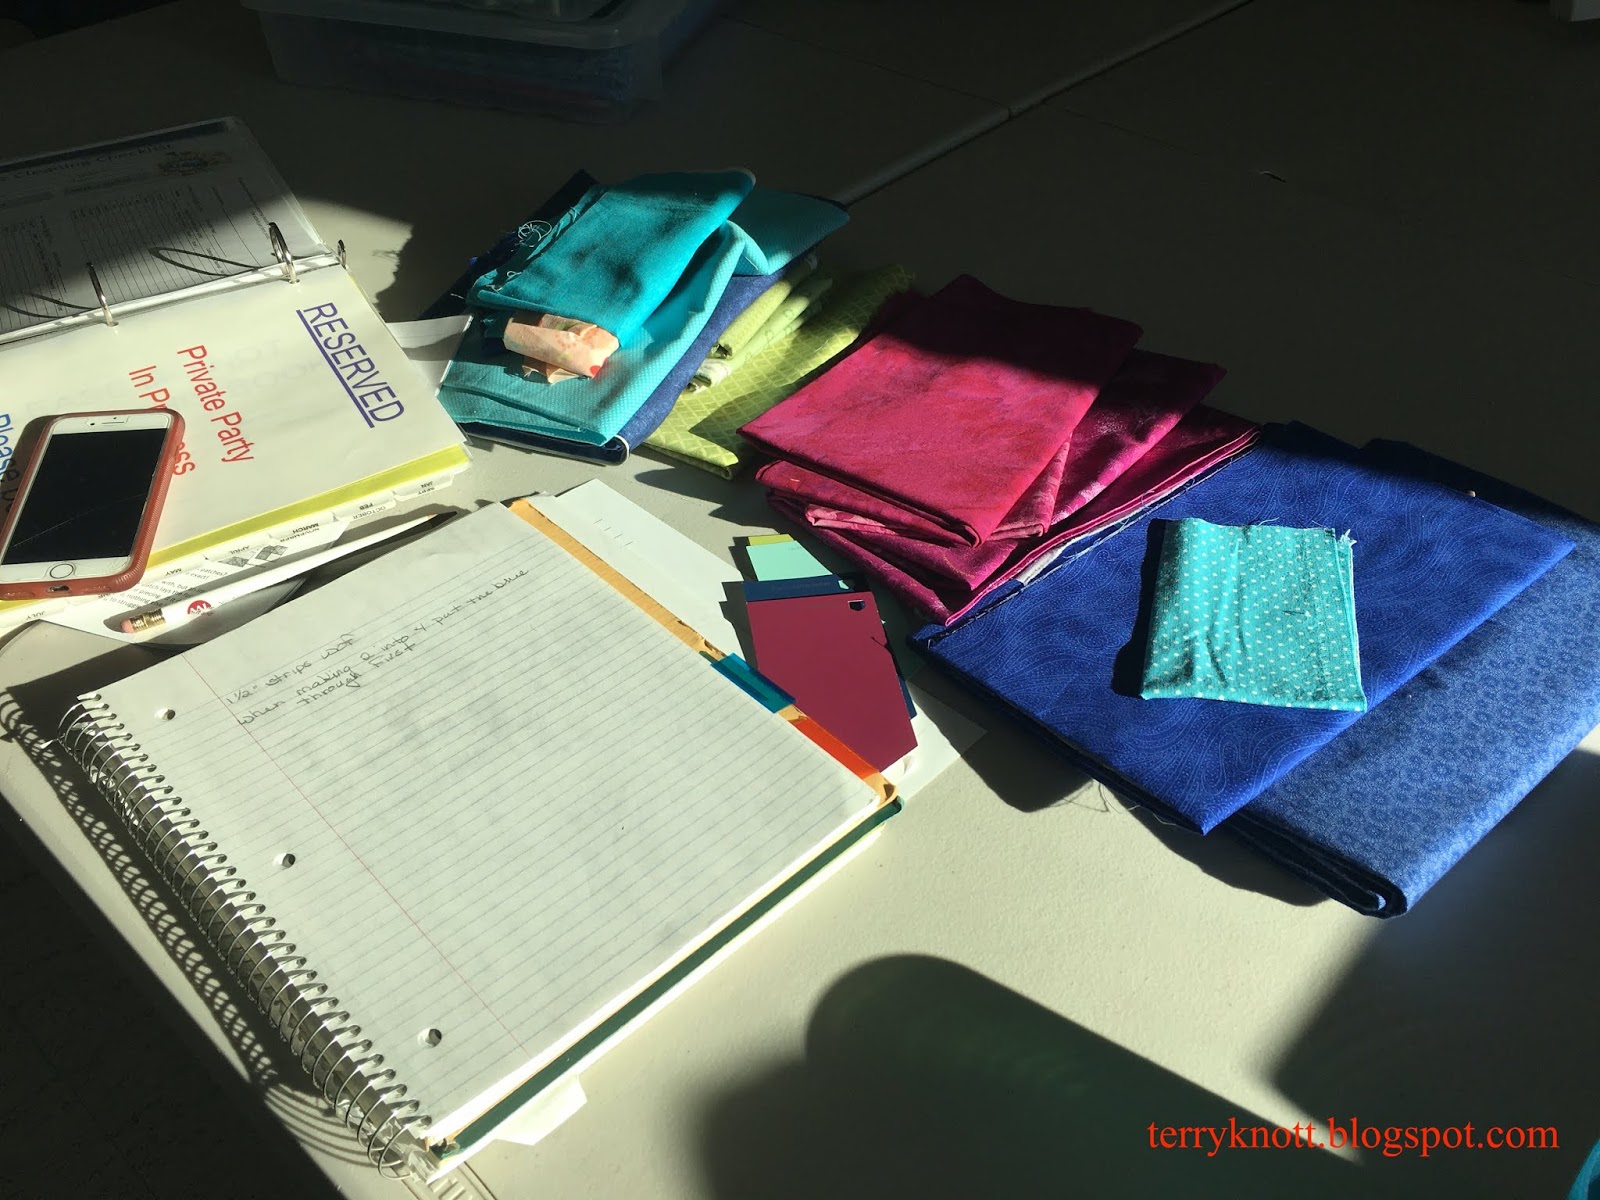
Fabrics selected for the project
For at least the last five years, I've thought about joining in on the Bonnie Hunter mystery. This year, it is Good Fortune which was influenced after her trip to China. Each year, I got hung up on choosing the fabric. This year, I decided that I would change my thought process of "This picking fabric is so hard--it is impossible!" to "I will have all the fabrics I need in my stash and it will be fun!"

Bonnie releases the first clue on Black Friday and then each Friday until the holiday, there is a new clue. After Christmas, the clues come as they come as even the delivery of them and how many clues there will be are all part of the mystery!!!
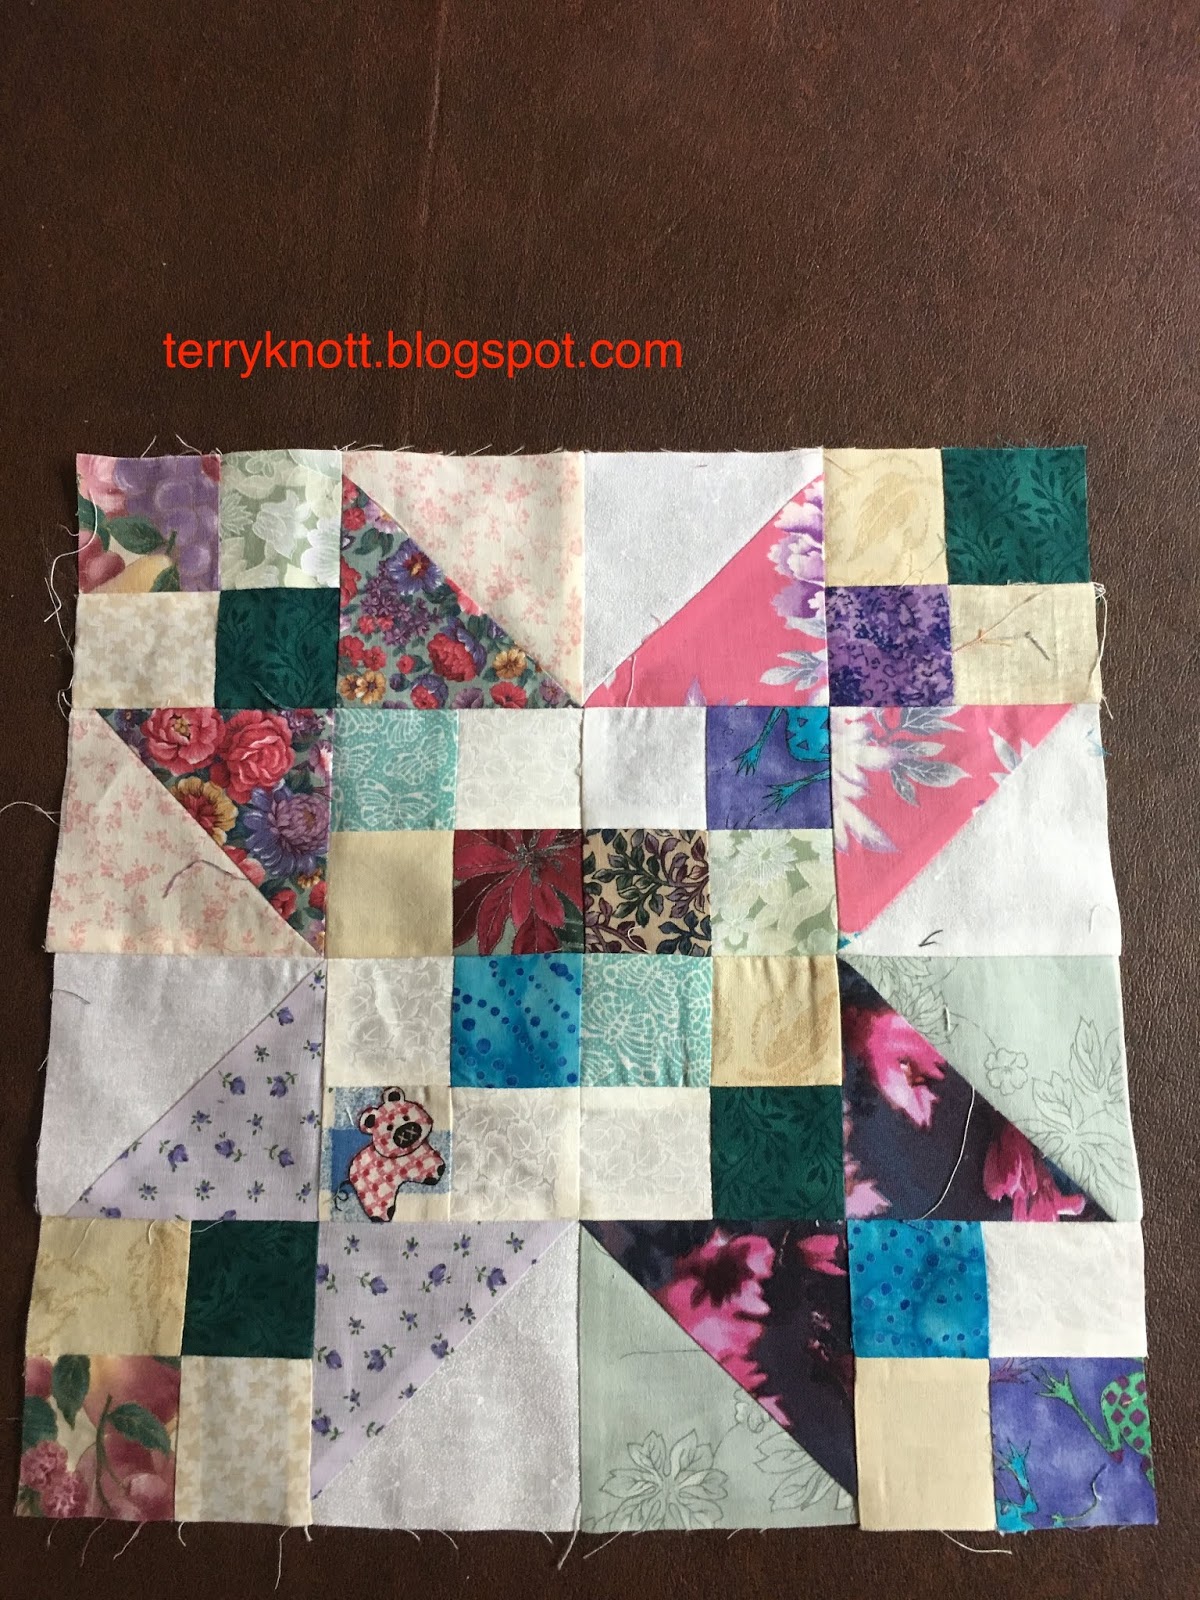
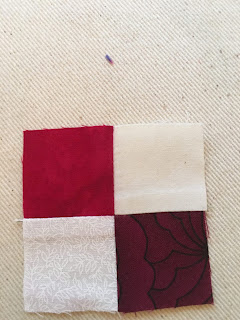
Part way through clue #1

So her followers are ready for the first clue, around the end of October, she releases the fabric amounts and a list of colors. I like that she use paint chips as her color palette for all her followers to see and to access. Changing my thought process enabled me to choose fabrics that were close to her her paint chips and it was a fairly easy process. Actually, dare I share these next words--the choosing process was actually FUN!

I'll admit, I may not have enough yardage. I hope I'll have enough precuts in my scrap saving system that I follow of Bonnie's to fill in the gaps! If not, I could. . .gasp. . .purchase some fabric! The not pictured bag of neutrals are parts that I've picked up from the guild free table. I added one fat quarter to the mix.  Again, if I need more neutral fabrics, I can cut some yardage from the stash!
Bleeding before the treatment
When she released her first clue, I was busy with Black Friday shopping with my oldest daughter, Amanda. It is an annual event that I look forward to each year.  Bob, my husband, and I also attended a college football game--the Civil War for our state. (Our team lost by a landslide.) Sewing didn't happen until Sunday.
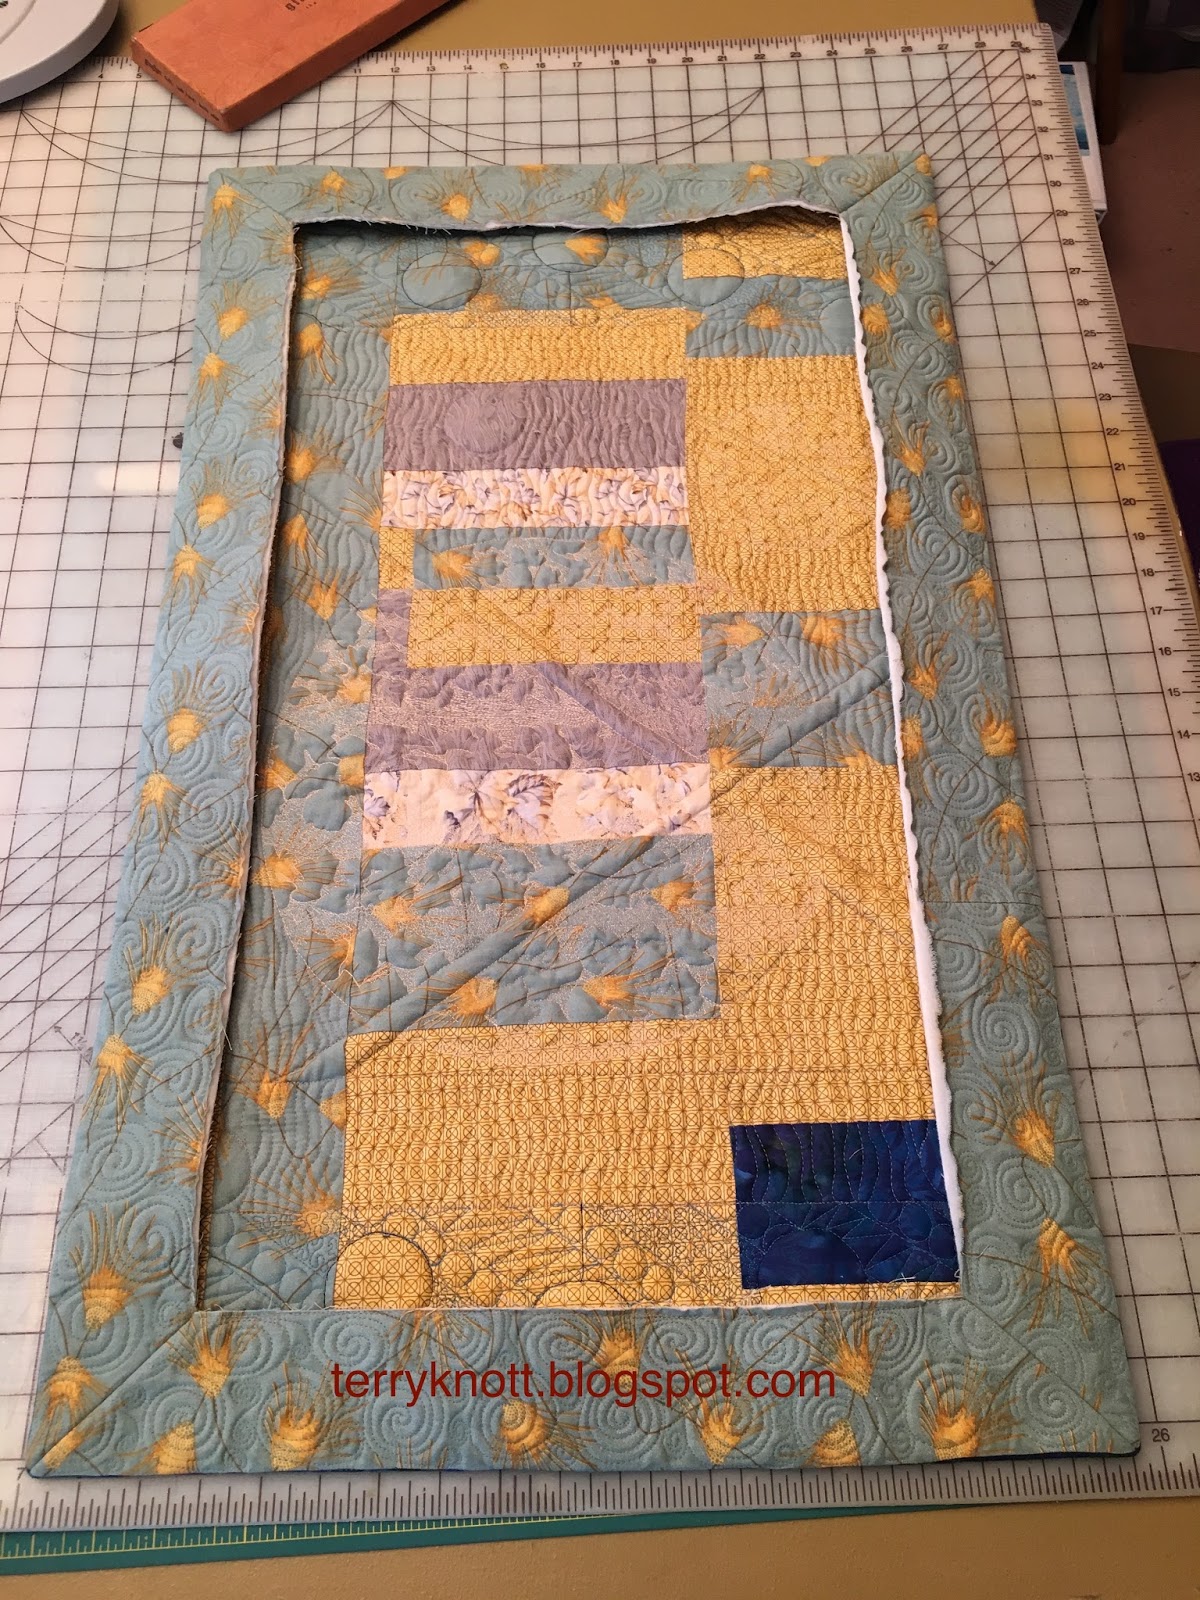
After the treatment

Bonnie suggests that you try to do at least half of the clue each week so you will know all of the steps. I'm going to try to do at least that much and if I can complete a clue in a week, I'll pat myself on the back!

I'm inserting a side note: This is a free mystery and anyone can join in at any time. Bonnie asks that unit numbers and sizes not be listed so I will do my best to honor her request. If you want to participate, know that the link isn't for always. She will take it down and gives advance notice of this happening.
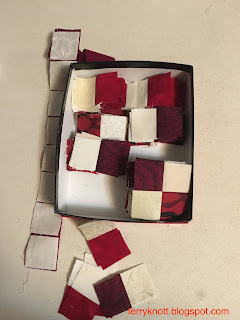
Water and color catcher during the process

For the first clue, we were to make a bunch of four patches with the red and neutral fabrics. Luckily, I had about half of the neutral fabrics either cut into the correct size square or cut into the correct sized strips. I had about a quarter of the "paint chip" red fabrics in the right sizes in my scrape saving system.

So I started stitching. Stitching this step went fairly fast. I had stitched about a third of the four patches when I spilled some water on a four patch. The batik I was using bled. This batik fabric is in my Ruffled Roses top. I did prewash it so I was sick to see this. I reviewed my options:
--*I could remove that square which would mean I would need to purchase some fabric to take its place. Removing the many squares would take time.
--*I could try rewashing the square in Synthrapol. I decided I would try the synthrapol treatment. It worked. So I rinsed all the squares. I also rinsed the chunk again and any strips that I had cut. I used Shout Color Catchers.
HSTs finished for clue #2

It was shocking to see how much red was in the water.  The color catchers came out a beautiful hue of pink. Two red squares in a four patch had a bit of bleeding on them after treatment; but, not enough to be super obvious.

I don't know what I will do about that fabric in the skinny border of the Ruffled Roses project. At least, I have a heads up about that fabric.

After about 15 hours of stitching I finished the first clue. Had I cut my fabrics from strips, it would have been faster. I had the right sized squares in my scrap neutral and red scrap bags so I used those first. I like the extra variety that I had using the bits!
Clue #3--Chevrons and more HSTs

I finished the first clue the same day as Bonnie released the second clue. For this clue, we made a lot of blue half square triangles. (HST)

After the red fabric incident. I re-washed the blue fabrics. One fabric bled a bit; so I treated that one with Retayne because it was a print fabric and not a batik. I cut 2 1/2 inch strips from my scrap neutral bag. It is surprising how quickly I've depleted the contents of that bag!  I spent about 10 hours on this step. I used about five blue prints in this step, the value is about the same so it resembles one fabric.

For the third clue, we stitched chevrons using the green fabric. From the bonus triangles, we stitched more HSTs. The seam allowances are skinny; but, it is great to be able to use all of the fabric. Miss K helped me sew a few. She kept asking me questions like:
Clue #4--Orange strings
--How do I stitch the blocks together?
--What kind of design do they make?
--What was the quilt going to look like?
--What was the quilt story going to be?

She thinks I'm crazy to stitch when I don't know what it is going to look like. She sees no "fun" in this mystery!!!!

Miss K sorted the remaining neutral scraps. She wanted to know where the rest of the fabric from the bag went and was surprised how much fabric it took to make the backgrounds in all the previous blocks! She pulled out a piece of fabric that was a sewn sleeve and she asked how I was going to use it. I showed her how to rip out the stitches. She ironed the sleeve and then I rotary cut strips and squares out of it. She thought that the person who left the bag on the free table had really left a treasure. I told her that it is only a treasure if you USE it!
Segments ready for use!

For the fourth clue, we string pieced a bunch of orange units. I didn't have many orange fabrics. At the December guild meeting, someone left a bunch of neutral and orange scraps on the free table so I loaded up! It was a serendipitous moment!!!

Some chunks were close to a fat quarter size. There were about a dozen 2 1/2 inch strips that were about 12 inches long. The scraps were great to add to this quilt project. I did have a few strings in my string bag that I retrieved to add to the mix. After I had pieced the orange units, I spritzed a bit of Mary Ellen's Best Press on each before I cut the units to size. After I stripped off the paper, I decided the Best Press was a good choice.

Although, I had finished the third clue before receiving the fourth clue, I had stitched less than a third of the units needed before Bonnie released the fifth clue. It is all a process and as long as I'm making progress, I'm happy. I am pleased that I'm staying close to being caught up with this project!!


Wednesday, June 6, 2018

Circling the Sun post 3 of 3--Fifth Finish 2nd Quarter Finish-A-Long 2018

The look I wanted to achieve


It was time to turn that quilted border to the back of the quilt and turn it into a facing.  First, I squared up the quilt. This was the easiest process that I have had. Second, I pressed that border, which now became a facing. I was impressed with how easy it was to press to the back of the quilt.

This method didn't work

Third, I experimented with how to miter the corners. In the beginning, I thought that pressing the edges then marking the fold line was the way to proceed. It wasn't the best approach. The thickness of the fabric caused the chalk marks to not be accurate enough for the miters. It was however cool to see that the corner could come together!

Pressed and ready to stitch
Next, I pressed the angle and made sure the edges were aligned. I used a friction pen to mark the sewing line which gave me the best results. I checked the corner and only once did I need to restitch. I trimmed away some of the bulk and pressed the corner. It was nice and flat. The corners are, in judges' terms, square or slightly rounded.

Ready for the edge finish
Finally, I needed to figure out how to finish the raw edge of the facing. Honestly, I thought it would be way more difficult to achieve this miter!

If I had thought more about this finish step, I should have stitched the finish fabric to the raw edge before I had stitched the corners.

If I do this technique again, I will enclose the raw edge first. It was a challenge to stitch this strip without stretching the facing. This strip came from the backing that I trimmed away from the quilt. I started with a 1 1/2 inch strip, I used a 1/4 inch seam and stitched close to the corner.

Then I pressed the seam with the bulk towards the strip. Next I turned the raw edge toward the facing and pinned it in place for hand stitching.

 I like how the piecing added to the interest. I was sad that the little piece of blue in the top of the finished strip would be covered with the sleeve. The corners were also a challenge.

Label
Before I hand stitched the edge to the quilt, I inserted the label. This label was one I picked up off the guild free table. I added some gold fabric to the edges and put a piece of fusible interfacing on the back of it. Then, I used a micron pen to write in the information. This time I tried a finer pen. It was a .05. Next time, I'll use a less fine pen because the line was too fine. I like how it appears like I inked this label; but, I didn't!

I like how the piece looks. I love the back and I love the interest the facing adds to the back. It could be a conversation piece of how does the quilting show there; but, not on the front? Although, most likely the only people who will know about it are you and me!

Oh and the pieces left to trim in useable bits using Bonnie Hunter's scrap saving system? Not many remained at all!
Finished back

Leftover bits ready to cut into squares and rectangle


I used about 2 1/2 yards of fabric in this project. I used four fat quarters from my stash for the front and the back came from my "chunk" drawers that had way too many gold and too many green fabrics to close. Each drawer closes now! I have used 11 1/2 yards from my stash and I have 38 1/2 yards to go to achieve my goal of using 50 yards from my stash this year.

This was goal number four on my second quarter Finish-A-Long list. If you missed the previous posts, you can click the links below to read them.
Circling the Sun post 1
Circling the Sun post 2

My next project will be stitching up four kitchen dish towels. I probably have supplies to make more than four; but, I'll reassess after I stitch the four!

Finished front

Thursday, January 19, 2017

First Finish--QAL 1st quarter

Finished front view of Winter Ice
Winter Ice is finished! It was the perfect project to have had available to stitch as I have started to implement my dad's last wishes.  It was good to have a quilting plan and all I had to do was execute it. I'm glad I didn't have to make any real decisions!!

You can click this link to review my list that I posted earlier this month regarding the FAL2017! I do have the sleeve and label to hand stitch; but, it is at the "useable" stage so I'm counting it finished now! Note that most of the wave is gone from the border. I put the binding on just like Luann Fischer from Let's Create Today suggested in the comment she left on my last post. I've shared it below with you! Thanks again Luann!

"Luann FischerJanuary 16, 2017 at 3:11 PM
Well executed quilting! This quilt is getting lovelier by the stitch. 
For the binding might I suggest the following. Determine the measurement you want each side to finish at. Cut this exact length of twill tape, for each side. Mark half points, quarter points, and as many more as you may need. Then pin your marked piece of twill tape to its corresponding side, matching up your integral markings. You can use a basting stitch or regular to stitch it into the 1/4 inch seam allowance. Then when you attach the binding, just keep the twill tape encased in that seam allowance area and it will tame the edges. I hope I've made this clear, if not, let me know and I'll try to better explain it. The point is, twill tape does NOT stretch, so if it is cut to the desired size, you may be easing the quilt edge into it, but it won't be wavy when finished."

Winter Ice label
I've started to track how many hours it takes me to make a project as well as what items go into the project. Every quilt has a story and this information just adds to the story line!

I used three marking pencils, two chalk refills, 10 sewing machine needles, one hand sewing needle, six spools of thread, one 80/20 queen size batting package and 24 yards of fabric of which 20 yards came from my stash! (Already, I am well on my way to meeting my yearly goal of sewing 50 yards of fabric from stash!) The cost of the materials was $266.

What were the hours that I spent prewashing fabric, ironing, cutting, piecing, quilting and binding it into the project? The answer is 132 hours! Amazing isn't it? That number doesn't count the time I searched for the background fabric. It doesn't include all the time I spent drawing and auditioning quilting designs as well as fabrics for the project!


The pillowcase is stitched for the project. I try to stitch a pillow case for each project as a way to store the project. It also doubles as a gift bag when I give it away. In this case, I didn't have a large enough "scrap" piece for the main body of the pillow case; but, this a print fabric coordinated well with the other fabrics I used!

Pillow case for the quilt
I've been piecing the back to use as many of the leftover pieces of the projects as possible after I have finished the top. Piecing the back, sure makes great use of the remaining pieces. Yes, it can be time consuming when there are a lot of pieces. The back for this project took about a day to piece.

Any pieces left from piecing the back, I cut following Bonnie Hunter's plan. I'm beginning to collect enough like sized pieces that I might be able to use some in an actual project. How cool will that be to have precut pieces! When that happens, I'll share it in a post. In the meantime, this is the finished back.  This was one of those times when I contemplated making the back a top; but, in the end, I decided it would be better to have one finished project than two unfinished ones! 😊

What I liked about this project:
-- how I was able to divide and conquer the quilting designs for the different quilt sections.
-- how cool the ruler worked for the cross hatching design in the outer border!
-- how my fabric choices worked in this design!

What didn't work so well with this project:
--the straight line ruler work in the middle of the quilt.
I decided that before I give up, perhaps, I needed to take a class and perhaps, I needed to try a different design of rulers. At the end of January, Quilting Delights is hosting a ruler class so I signed up for it. It meets once a month for the next eight months. I'll reassess my ruler skills at the end of that time!
--thread tails. I should have buried the threads!
Finished back view of Winter Ice

What I thought would work; but, didn't make a difference with this project:
--I was careful about ditch quilting and adding the dense quilting after I had quilted medium or light areas. I thought that this tactic would greatly reduce the wonkiness that happens to my projects by the end of quilting. I can't say that I noticed a big enough change to say that tactic worked well which was a disappointment! Perhaps, there isn't a way to get around that wonkiness when quilting on a domestic machine.

What I did do that I surprised me: I was able to crawl around on my knees to block and mark the edges of the quilt. The gel injections I had in November are working. It has been four days since I was on my knees and I'm still recovering though. No way would I have been able to do this before the gel injections!

Eventually, this will end up on someone's bed; but for now, I'm going to enjoy it.


Friday, August 14, 2015

Clean Up

This week, I wanted to share what happens after I finish a project. Previously, I would just start the next project. When I ran out of space, I'd bag up the scraps, fold the larger pieces and shove the pieces in a drawer. . .all rarely to be seen and used again!!! 

Case in point, I had a bag of blue scraps that I tried to use over 23 years and wasn't successful until I stitched them into Dad's Stars! Getting the fabrics out of the bag and into a project was so liberating! 

About two years ago, I watched Bonnie Hunter one evening on her quilt cam talk about her scrap saving system. I decided to try it. So, before I tackle the next project, I collect all the pieces from the finished quilt. 

Using Bonnie's system, I start cutting. I cut strips from the larger pieces; I cut squares and rectangles from the smaller pieces and any piece less than an one and a half inches goes into the string pile. Pieces smaller than an inch, go to the crumb pile! 


The pieces are stored in zip lock bags that are marked by size and color. When I need a certain size strip/square/rectangle, I use these parts and the beauty is that they are ready to sew!! Also, the usable parts take up less space than all those chunks did!!


I also piece the batting. If the pieces are small, I'll use the batting for a bag, placemats or a project that seams in the batting won't matter. This is what I started with: and this is how large the piece was when the I finished piecing.


Finally, I prepare a slide show using a template from smilebox to document the process of that quilt's journey.

Next time, I'll share a "free" project I made from the reclaimed scraps and batting. Honestly, I only bought the thread! 

Sunday, July 12, 2015

Sawtooth Stars

In 1992, I made a wall hanging that used a lot of blue fabrics. Over the years, I have tried to use the scraps in a variety of projects. Rarely, did any of the scraps make it into the project. I was tired of looking at the bag and was inspired by Bonnie Hunter to cut the pieces into useable parts. Before I started cutting, I happened upon a photo of a quilt with lots of 6" sawtooth stars. I thought, what a perfect way to use these scraps! 

So I started cutting and kitting the parts. It didn't take long before I had used all the neutrals on hand for the background. At a guild meeting, someone left some neutral strips on the free table so I snapped those up! This was a great project for cleaning out small pieces in the blue scrap drawer too. The drawer that I couldn't close, closes easily now. 

I cut squares, strips and rectangles too ala Bonnie's scrap saver system. It was a lot of work; but, in addition to cutting 36 sawtooth star parts, I cut a lot of other "ingredients" to use for future parts!


Last February, I went to a retreat sponsored by my guild and making these stars was one of the projects I took with me. I was just making stars. I didn't have a plan other than to use up those old blue fabrics!

I had fun putting stars together and visiting with fellow retreaters. I made quite a few and had lots of questions about where they were going.
Of course, at that time, I had no idea!


Just check out the selection of fabrics! As I stitched, I thought about using some red to compliment all that blue and white! I didn't have a plan for all those stars until the end of March and then I needed to make more!