Showing posts with label original design. Show all posts

Wednesday, July 29, 2026

Stars and Stripes Guild Challenge Quilted--post 2

Stitching in the ditch
Goal number eight on my July list was to begin quilting the Stars and Stripes challenge. I started stitching in the ditch. I used matching thread in the needle and bobbin to complete the ditch quilting.

Straight lines for the top and bottom of the project
At the top and bottom of the project, I stitched straight lines. I had planned to use a blue silk thread and stitch the lines vertically. I abandoned this plan because the thread wanted to lay on top of the fabric and the stitches looked like the tension was incorrect. The vertical lines looked odd because they didn't line up with the striped fabric. I quilted vertical lines on the side borders. I chose to use white thread on the needle and bobbin to quilt horizontal lines that were a quarter of an inch apart.

Quilting lines in the stripe
In the stripe, I quilted more straight lines following the print of the stripe. I again used white thread.

Quilted vertical lines in the star center
In the center of the star, I quilted vertical lines using blue thread. I continued the theme of a quarter inch spacing for the lines. I had planned to divide the space into quarters and quilt the lines in a "V" shape; but, the vertical lines created the better texture.
Quilting curved lines

The quilting remained was the background of the star. I chose to continue the quarter inch spacing and the white thread. I chose a curved quilting ruler to stitch the lines. For the most part, I was able to join the lines from one section to another. 

Evidence of bleeding
It took me about 14 hours to complete the quilting which seems over the top because the piece measures 20 by 31 inches! I blocked it and  some of the red fabric bled. I wet the project again. I started with Dawn detergent and scrubbed the bleeding areas. The bleeding areas lightened; but, were still visible. I tried the Synthrapol detergent process next. The bleeding is mostly out. It is what it is. I can live with it.

Bleeding area after treatment
I quilted this project with cotton thread. I matched the bobbin thread to the color of thread in the needle.
Thread used to quilt the project
I added a facing and mitered corners. I hand stitched the loose edge of the facing to the quilt back. I added the hanging sleeve and label. 

Label
I used a yard and a half of scraps to complete this project. I've reduced my stash by two yards this month. I have a net loss of 75 and three quarter yards of stash used this year! With five full months remaining in the year, I'm close to meeting my annual goal of using 100 yards of stash. 

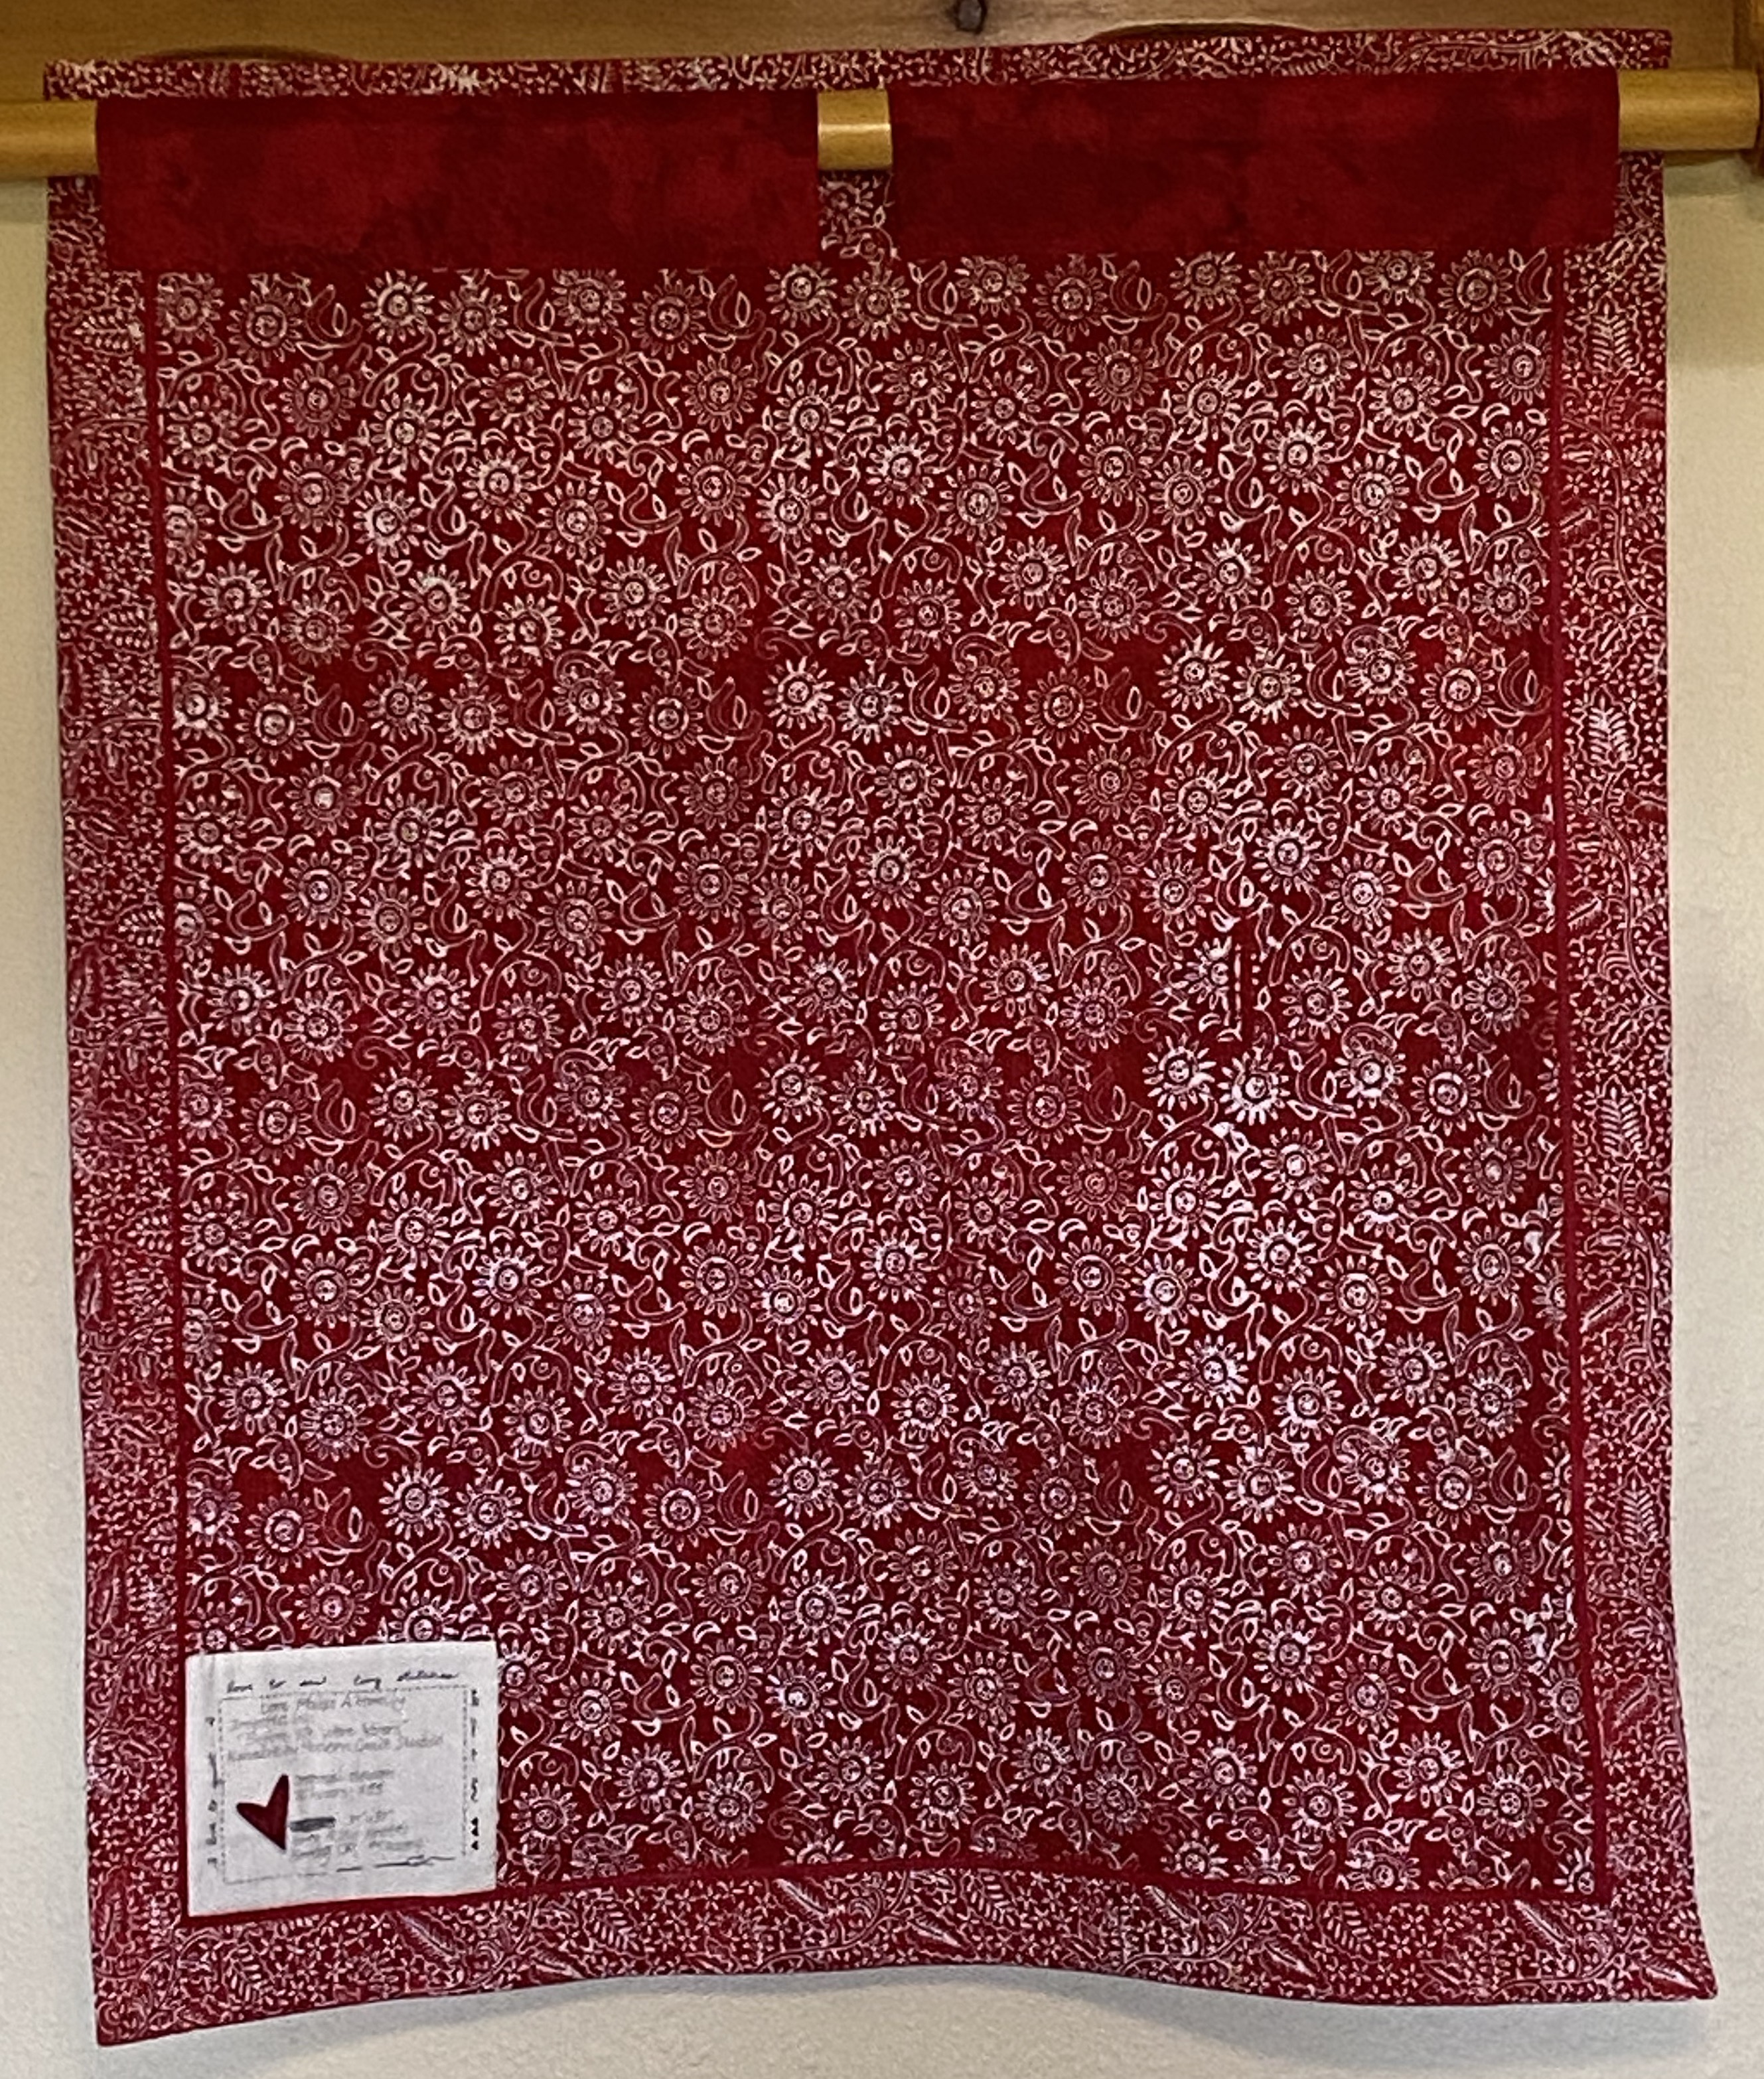
Back of project
Photos of the front will be shared and this post updated in October after the quilt has been shown in the guild quilt show. 

Linking to I Quilted This, Finished or Not Friday and Patchwork and Quilts.

Wednesday, July 22, 2026

Garden Flowers--post one

Fat quarter, parts and scraps
Goal number nine on my July list was to determine what to do for our book club quilt project. We are discussing "By Her Own Design" by Piper Huguley. It is the story of Ann Lowe, a black woman dress designer, who created Jacqueline Kennedy's wedding gown. Lowe was truly an artist when it came to dress design. From the time she was a young girl, she liked to make fabric flowers and attach them to the dresses.

Fussy cutting the flower motifs
In the stash, I had a fat quarter that was printed with large flowers. I decided to use it as well as some green strings, pink half square triangles (HST), a few leftover parts from a previous project and pink strips. I fussy cut the whole printed flowers. I was able to cut out six flowers.

Possible layout
After fussy cutting, I started to work on a layout. Because the flowers were different sizes, I used a variety of pink strips to frame the flowers. Then I trimmed the blocks to one consistent size. I continued to arrange the blocks as if they were photos on a wall.

Flowers framed
After seeing all the pink, the project needed green! I thought the green bits I had were crumbs; but, it turns out they were strings. I started piecing two and a half inch strings strips of fabric to use as sashing. I also pulled the leftover pieces from a previous project to audition into the mix.

Leftover parts to possibly add to the project
I added a few HST to the layout as well as a yellow background fabric. I made an X from four of the leftover parts. I changed the layout so the flowers circled the X.

Adding a background fabric and changing the layout
I decided that I needed one 4 1/2 inch string strip to be placed at the bottom of the project. I pieced that strip. Maybe half of this strip will be on one side of the triangle leftover with the other half on the other side of the pieced part. 

Center block on point, adding HSTs
Looking at that center block, I decided it needed strings. I pieced more strings. These strings are two and half inches wide. After contemplating the layout yet again, I turned the center block on point and auditioned the pink HSTs as a border around the center block. 

Additional flower block added
I needed another flower block. I was able to piece one from the scraps of the fat quarter. In the photo below, you have to zoom in to see the piecing line! The design needed the additional flower block.

Pieced flower
I've created a math challenge for myself. I want to piece the flower blocks around the center. How to make the design work will be a challenge for another day! I hope to be able to inset the flower blocks around the center block with straight forward piecing.

Wednesday, October 15, 2025

Stitch By Stitch, The Finish--post 4


Lots of sort of straight lines
This project was inspired by the book: The Dressmaker of Khair Khana by Gayle Tzemach Lemmon. The book is about how one women helps her six siblings survive and thrive when their parents and older brother leave Afghanistan during the first Taliban takeover.

More diagonal lines
I began the quilting by quilting in the ditch. This is tedious; but, it is a good way to secure the layers. My goal with quilting this piece was to add texture and to keep it "modern."To that end, I quilted a lot of sort of straight lines. I used a thread that matched the background.

Oval motif for background; vertical lines on letters
I repeated quilting diagonal lines in several areas of the quilt. The diagonal lines represent how the women were "allowed" so few areas to be out in public. Of course, they had to have a male member of their family with them. If not, they were subject to being beaten.

View of the various quilted lines
Vertical lines on the letters represent the strictness of the Taliban. The oval motif in the background of the letters represent the decorative stitching the women did one the higher end dresses.

Cotton and polyester monofilament threads completed the quilting.

Thread used to quilt project

The horizontal lines in the piece represent what a women wearing a burka can see. The area is small, two and a half inches by about five inches. I can't imagine not tripping over the hem or an uneven sidewalk let alone picking out food from the market with such a narrow field of vision. 

View after completing the quilting

I made a quilted facing for this project. I used bias tape from my grandmother's stash to finish the inside edge of the facing. 

View of the back
I removed a seam from a pieced pinwheel that I didn't use on the front. I put one half of the block on each side of the label. 

Label
There was almost enough fabric for the hanging sleeve; but, not quite. I found a strip in the green chunk drawer that was large enough. This piece is 41 by 58 inches. I used four yards of fabric for this project. This brings the total net fabric used from stash to 45 yards this year.

Finished front
Previous posts were: Strings from a Scrap Bag; It's a Flimsy; Piecing the Back. Goal number six on my October list was to document the finish of this project. Linking to Finished or Not Friday and Patchwork and Quilts.

Wednesday, June 25, 2025

aMAZEd is Finished--post 3

Backing and top 
Goal number eight on my June list was to get the backing, batting and top to the longarmer. In May, I purchased a wide back for this project. I prewashed the fabric and took it as well as the top to an in person sew day. I spent the first part of my time, ironing the fabric. My plan was to come home; trim the back; cut the batting and take the bundle to the longarmer the following day.

Pantograph quilting pattern on the back
Tomme was at the sew day and said she would take the bundle to the Senior Center. I decided I would pay for the batting as this would save me a trip. We talked about quilting patterns and batting. I chose a pantograph that reminded me of a maze. I haven't tried a polyester batting so I chose that.
Front view of the quilting pattern
At the end of the week, Tomme let me know it was quilted so I picked it up from her house on a Sunday morning! The polyester batting wasn't big enough for the quilt so I got 80/20 batting which I love! I liked the quilting pattern too!

The label
I created a label and cut the binding from the leftover backing. I machine sewed the binding to the quilt. I used a lot of scraps in this project! I did purchase a wide back. I'm finding it so easy to deal with the quilt bundle using a wide back! 

The back
This project, which measurers 64 inches wide by 95 inches long, used 21 yards of fabric! 

Finished front
Fabric in this month: 12 yards  (I bought two three yard wide back bundles.)  
Fabric in year to date: 38 yards
Fabric used from stash this month: 28 yards 
Fabric used from stash year to date: 83 yards
Net loss/gain this month: 28 yards
Net loss/gain year to date: -45 yards  

I exceeded goal number eight on my June list. I had only planned to get the project to the longarmer. Finishing this project was goal 2e on my annual list.

The design is a true maze. There is one way in and one way out! 

Previous posts: post one; post two.
Linking to Alycia at Finished or Not Friday and Frédérique at Patchwork and Quilts.

Sunday, May 25, 2025

Love Makes A Family. . .FINISHED!-post 4

Blocking the piece
Goal number five on my May list was to finish Love Makes a Family. Since my previous post, I finished quilting the straight lines in the background. I buried all of the threads. . .UGH! Watching a TV program and listening to a guild meeting while I worked made the task tolerable. 

Next, I made an effort to block the piece. I trimmed the excess backing and batting. I stitched the bias tape to the edge of the project as it is a good way to finish the edge. 

The bias tape came from my grandma's stash. Fifteen cents was a great price! I still have many packages of bias tape from her stash. I have no idea why she "needed" so many packages. She did make placemats and aprons. She finished the edges and or trimmed those projects with bias tape.

What looks like a border in the first photo is actually my facing. It's been a long time since I used this technique. I thought that I had come up with on my own; however, I happened across a well known international quilter who had posted about the technique much earlier than me! Like minds were thinking alike!

Bias tape--15 cents is a great price
I pressed the facing to the backing. It looked so nice! 

I'm glad I posted about the process because I couldn't remember how I had accomplished mitering the corners. It isn't difficult; but, when I get to the step to trim the excess fabric, I get sweaty palms!
One corner
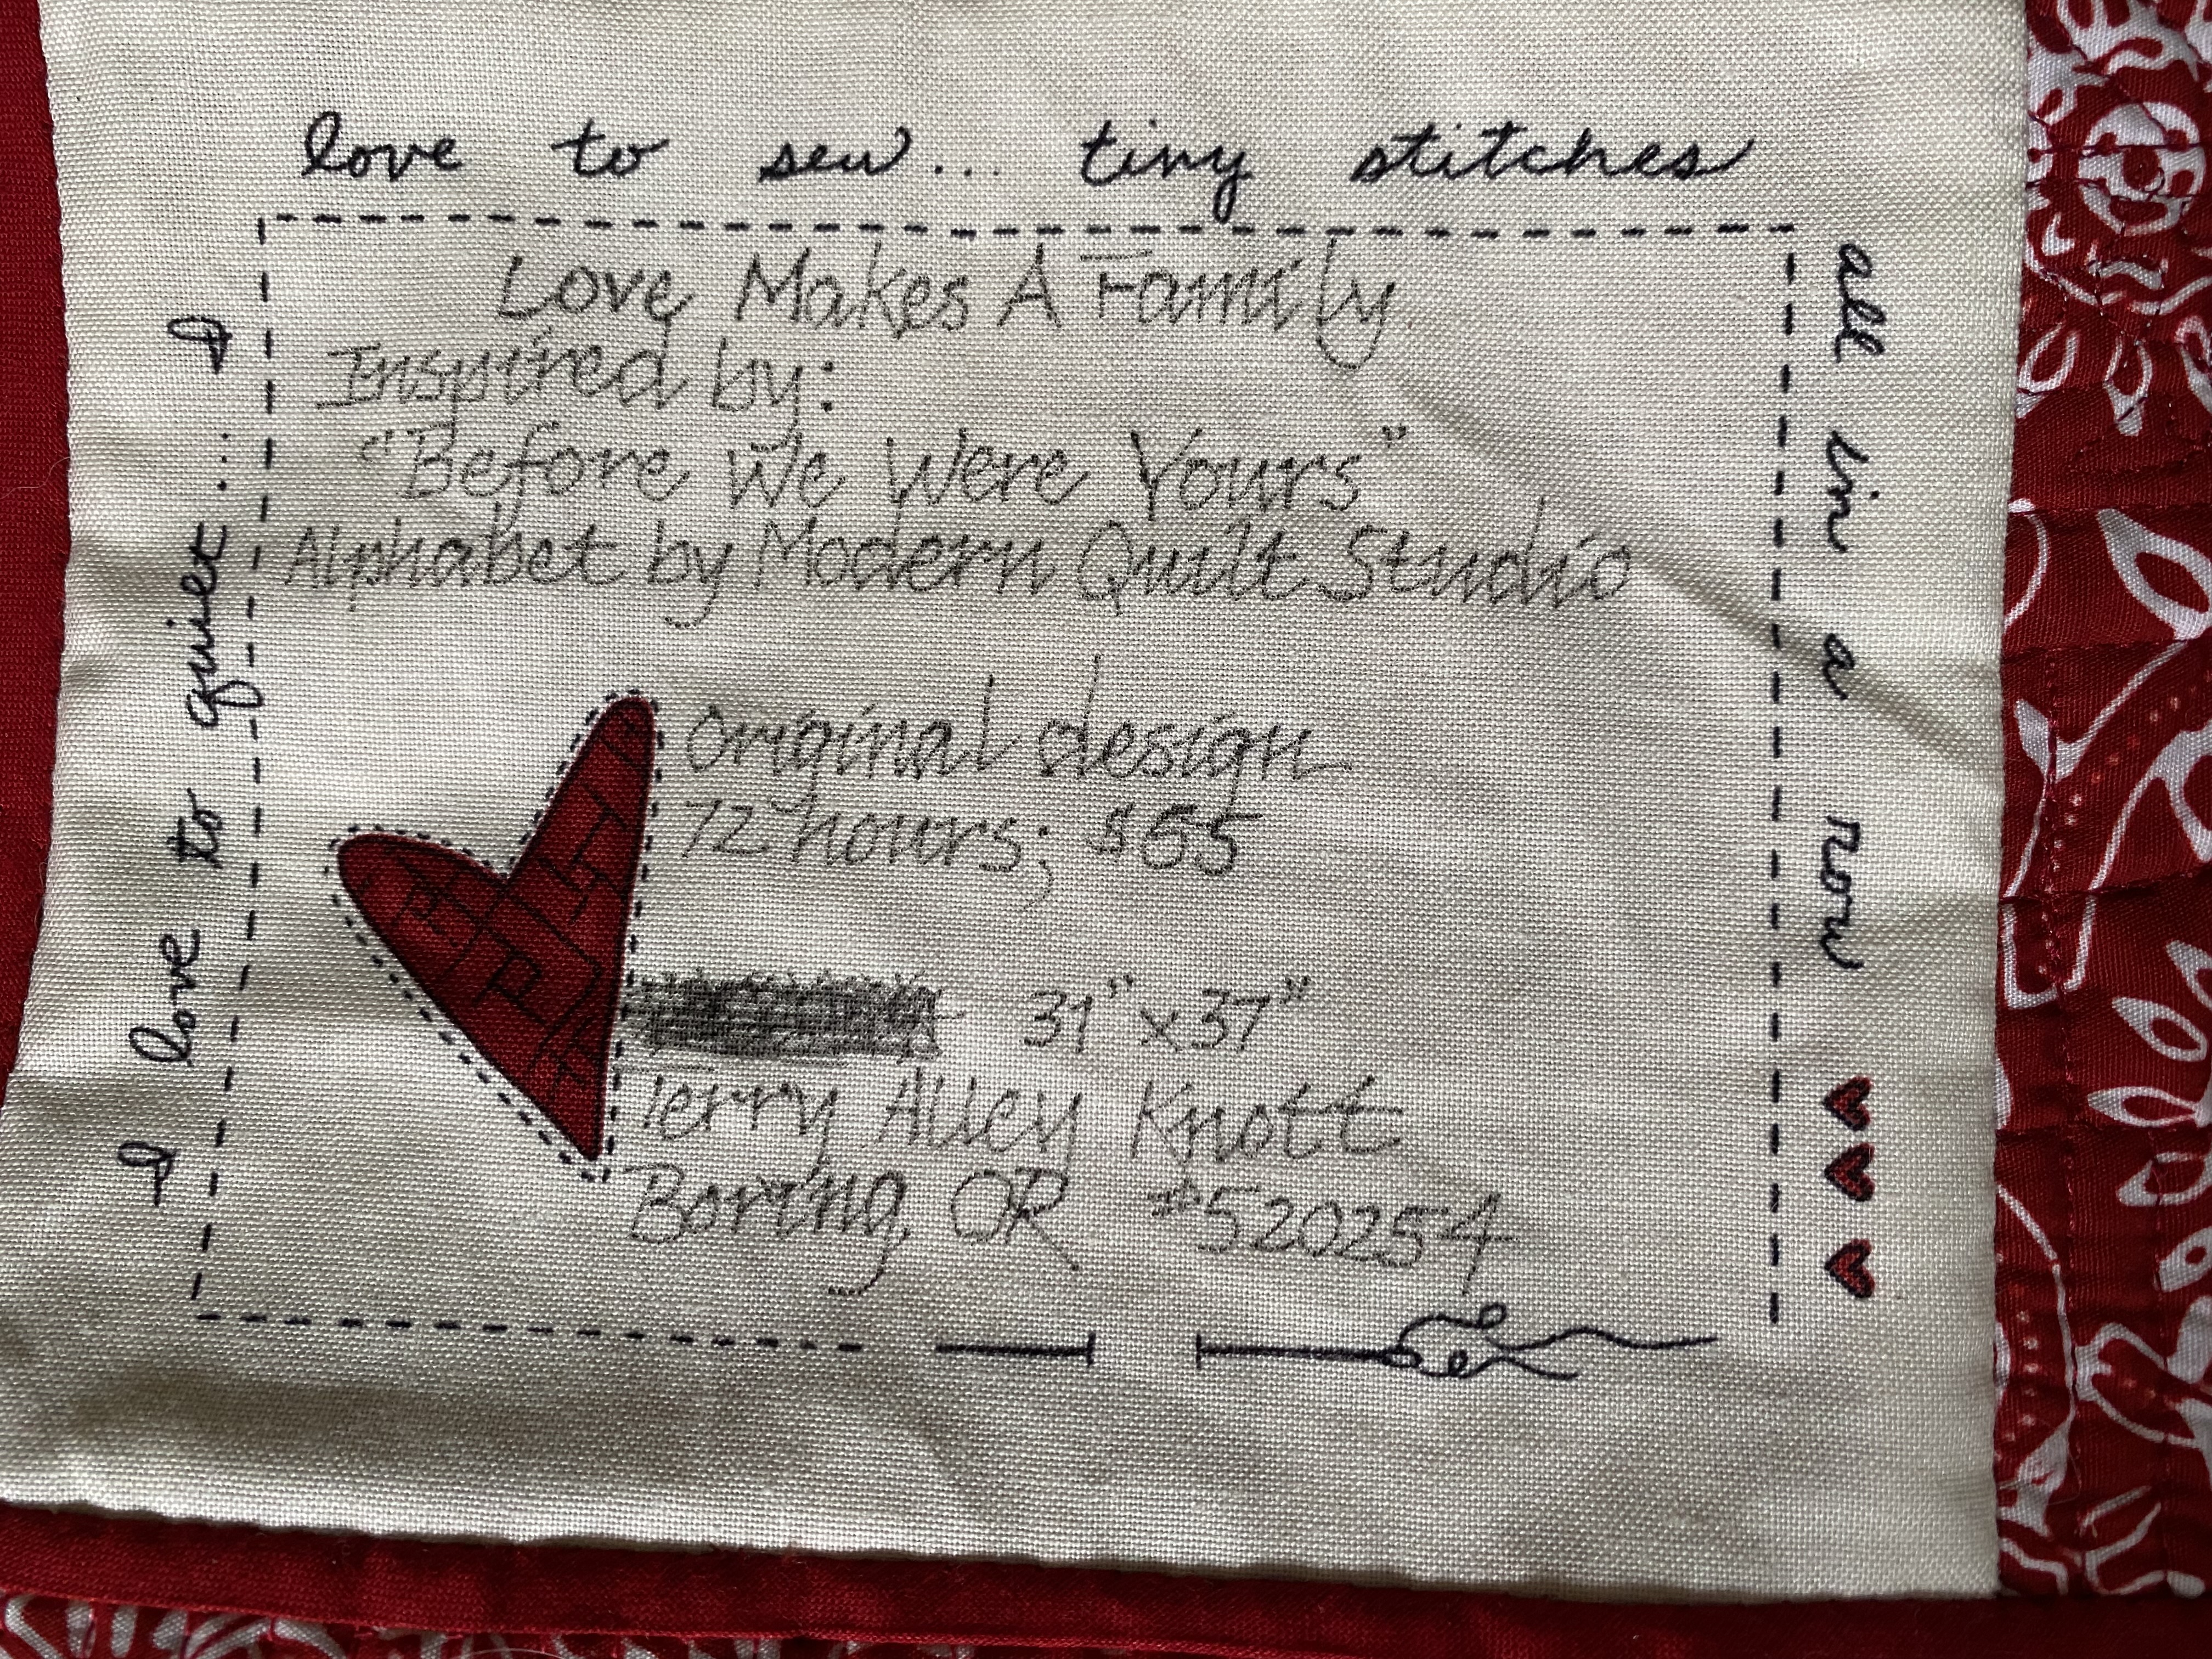
I wrote the label and made an error. I crossed it out and continued. . .I'm okay with the "adjustment." The pertinent information is documented.

Label
The hanging sleeve came from my scrap bin. It could have been a bit wider; but, it will work! I also decided to split it. In other words, make two pieces so if there was a gallery hanging, I could hang it with their hanging system. Also, a wooden dowel could be held in place on s wall with a thumb tack. 

Hanging sleeve
I used monofilament, cotton and polyester threads to quilt this project. I like taking a photo of the thread on the project to document the array I used!

Thread used in quilting
If you missed a previous posts, check out the following links: Post 1; Post 2; Post 3.
Fabric Summary:
Fabric in this month: 12 yards  (I bought two three yard wide back bundles.)  
Fabric in year to date: 26 yards
Fabric used from stash this month:23.75 yards 
Fabric used from stash year to date: 44.5 yards
Net loss/gain this month: -11.75 yards 
Net loss/gain year to date: -18.50 yards 

View of the back
Linking to Cynthia at Oh Scrap!
View of the front


Sunday, May 11, 2025

As Noted--Unveiled!

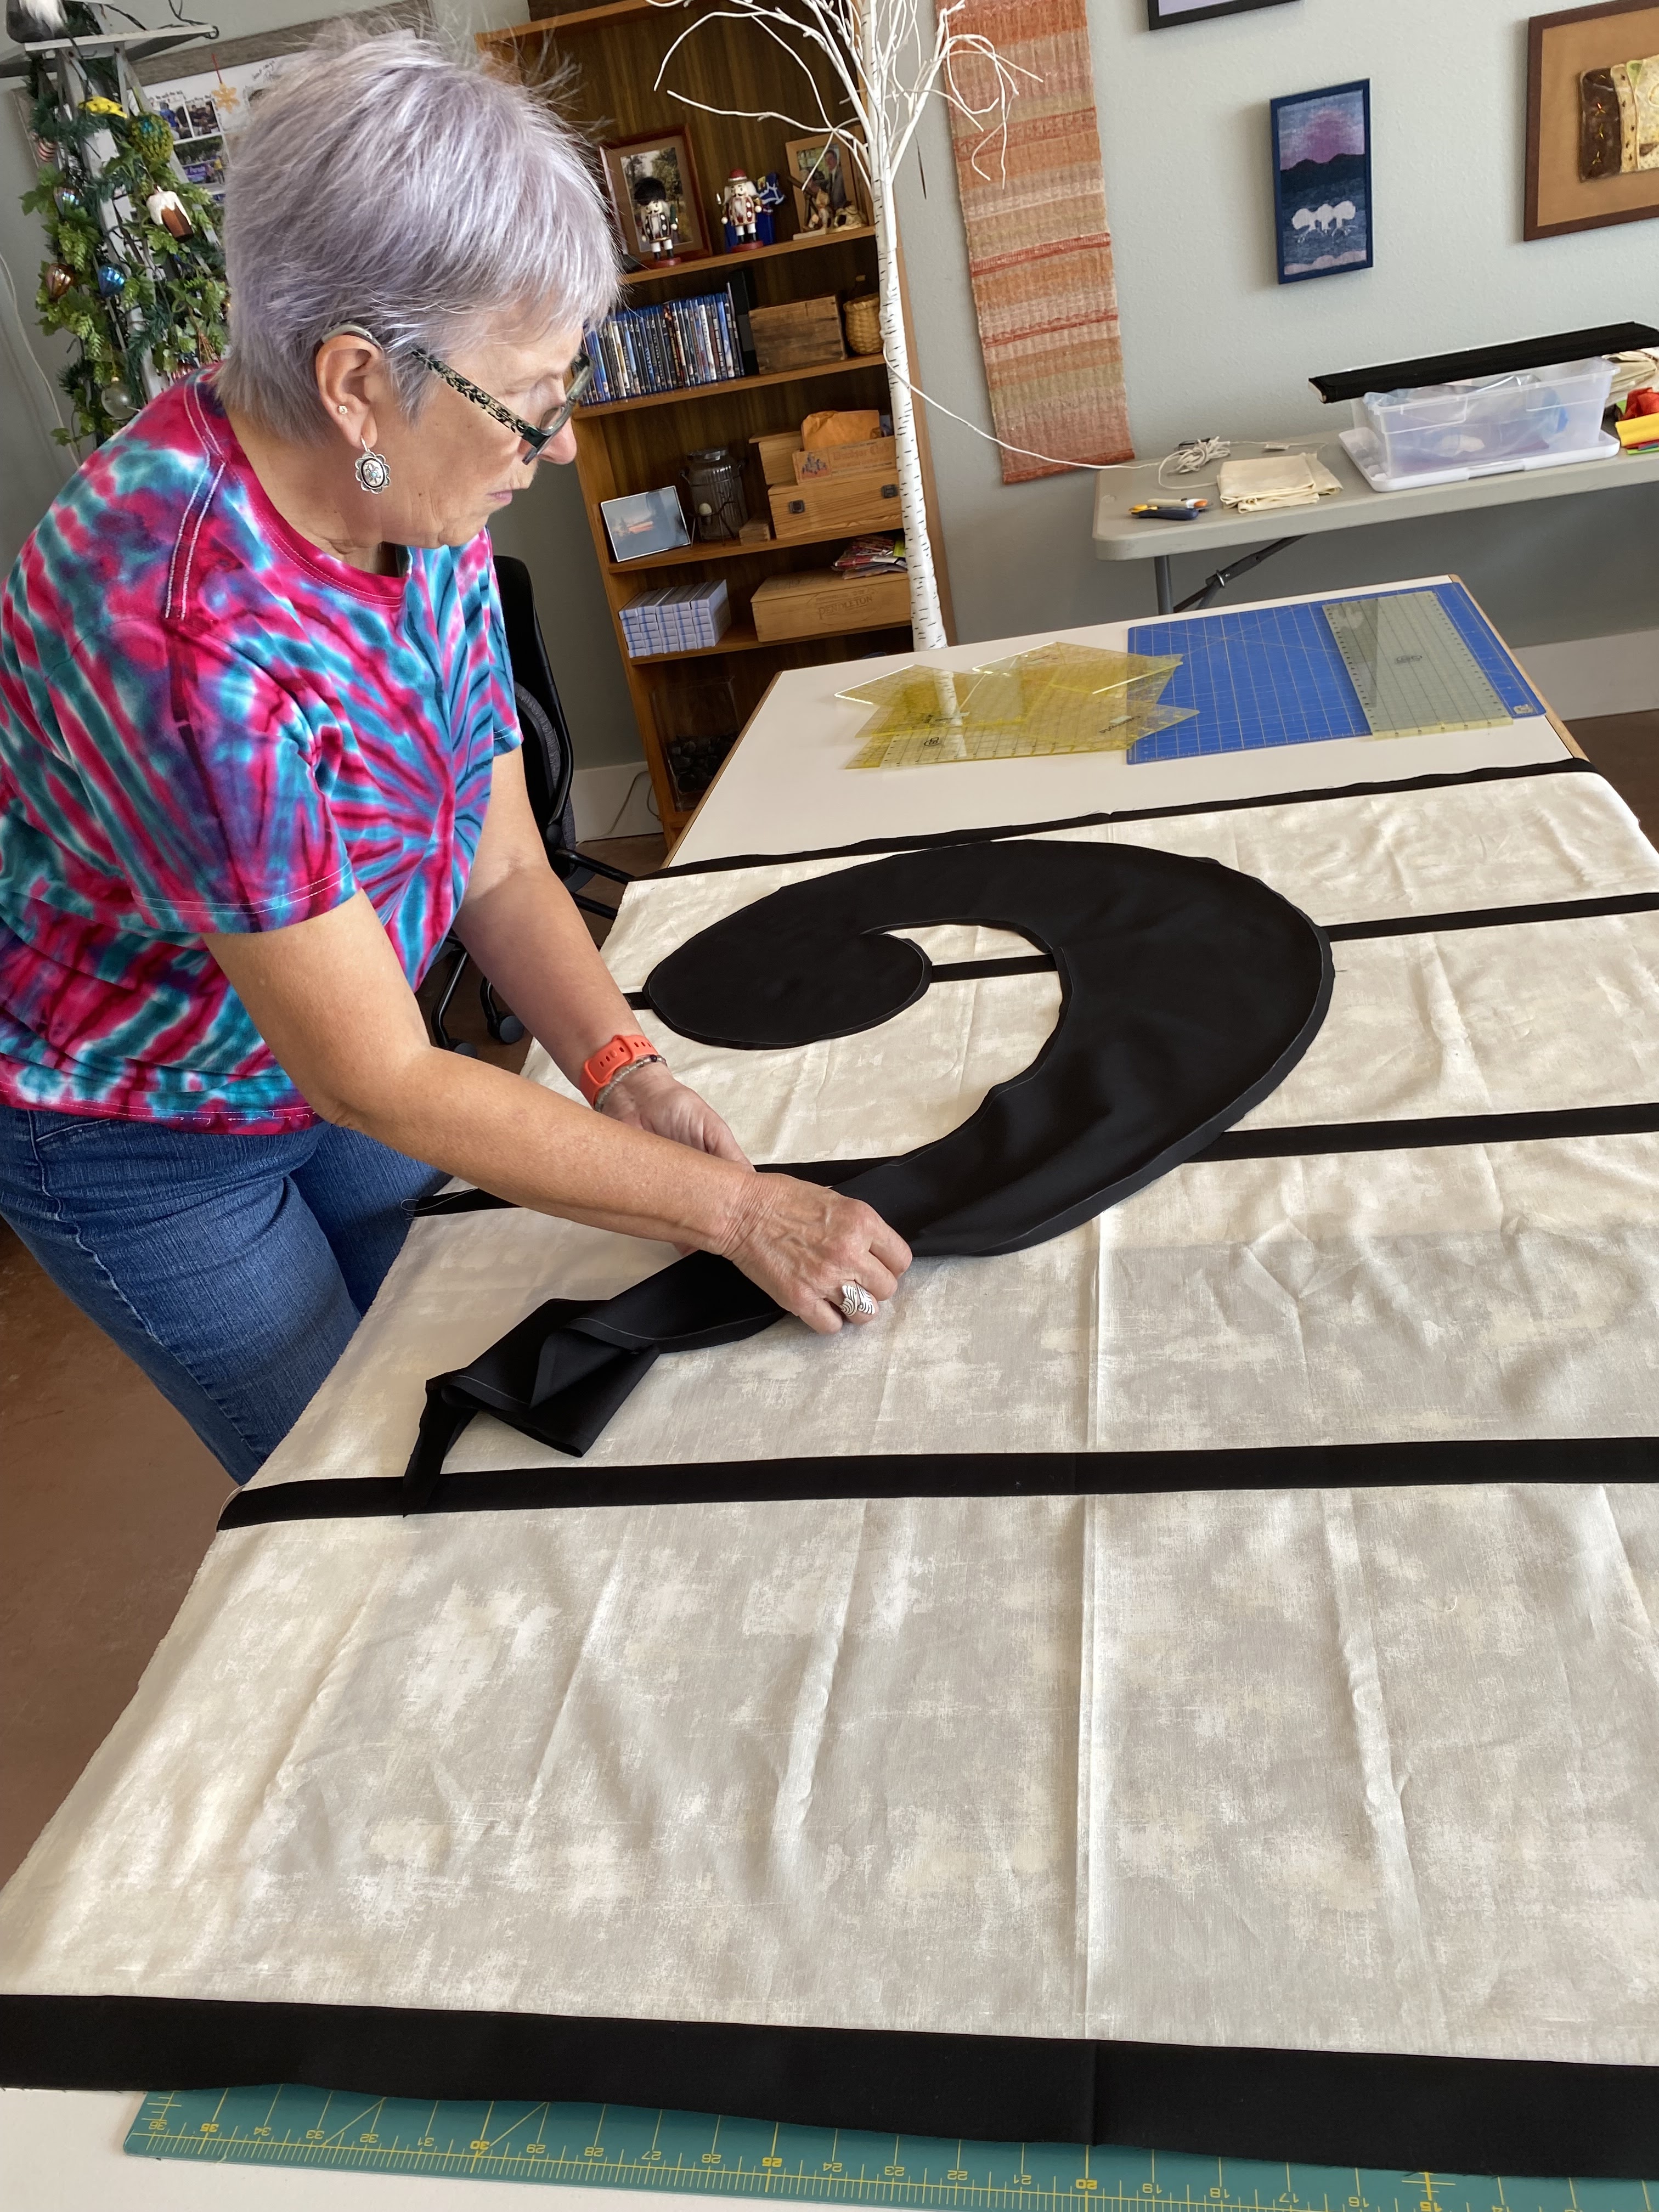
Linda H. placing the bass clef
Last summer, I shared the blocks that our members made for the guild block challenge, "As Noted." The rules for the challenge was to make a block with a musical theme. If you used notes or words, these should be in black. The background should be cream, off white. We received 56 blocks which were made by 31 people. These blocks became the opportunity quilt for 2026. (Members choose a 501(3)c charitable organization to support. The ticket sales go to that organization.

Su S. placing the dots
In that post, I also shared how we were sashing the blocks. We pieced various widths of strips of solid fabrics which we cross cut into various widths that we sewed to the blocks. At the beginning of one sew session, we drew the bass clef on freezer paper. Once we had the shape and size we wanted, we cut it out of freezer paper. We then adhered it to our black fabric.

Placing the blocks around the staff
We used round household items to audition the size of the dots we needed. Su S. stitched the dots into perfect circles. Linda H. hand appliquéd the bass clef and the dots. Linda P.  figured out the math needed for the staff.After we had this section of the top together, we began placing the blocks around the bass clef.
Getting closer to a top
We did need to take a few of our four patch blocks apart because our top was approaching 110 inches in length. We then had to add more of the solid fabric sashing. Determining where that sashing was placed to get the blocks to fit together was quite the puzzle! We moved some blocks to another position. We used some solid black, some solid colors and even a musical print to fill in some of the spaces. We high fived one another when we had a "section" together. We totally improv pieced this top!

Sharron B. pressing a section
From the beginning, we planned to machine appliqué two blocks to the staff. Linda P. hadn't done this before; but was game to give it a go. Linda H. stitched the last seam.

Linda H. stitching the last seam
We were gifted a bunch of musical fabrics. From those donations, I pieced a back. You can read the post here. You can also view the label that Su S. wrote.

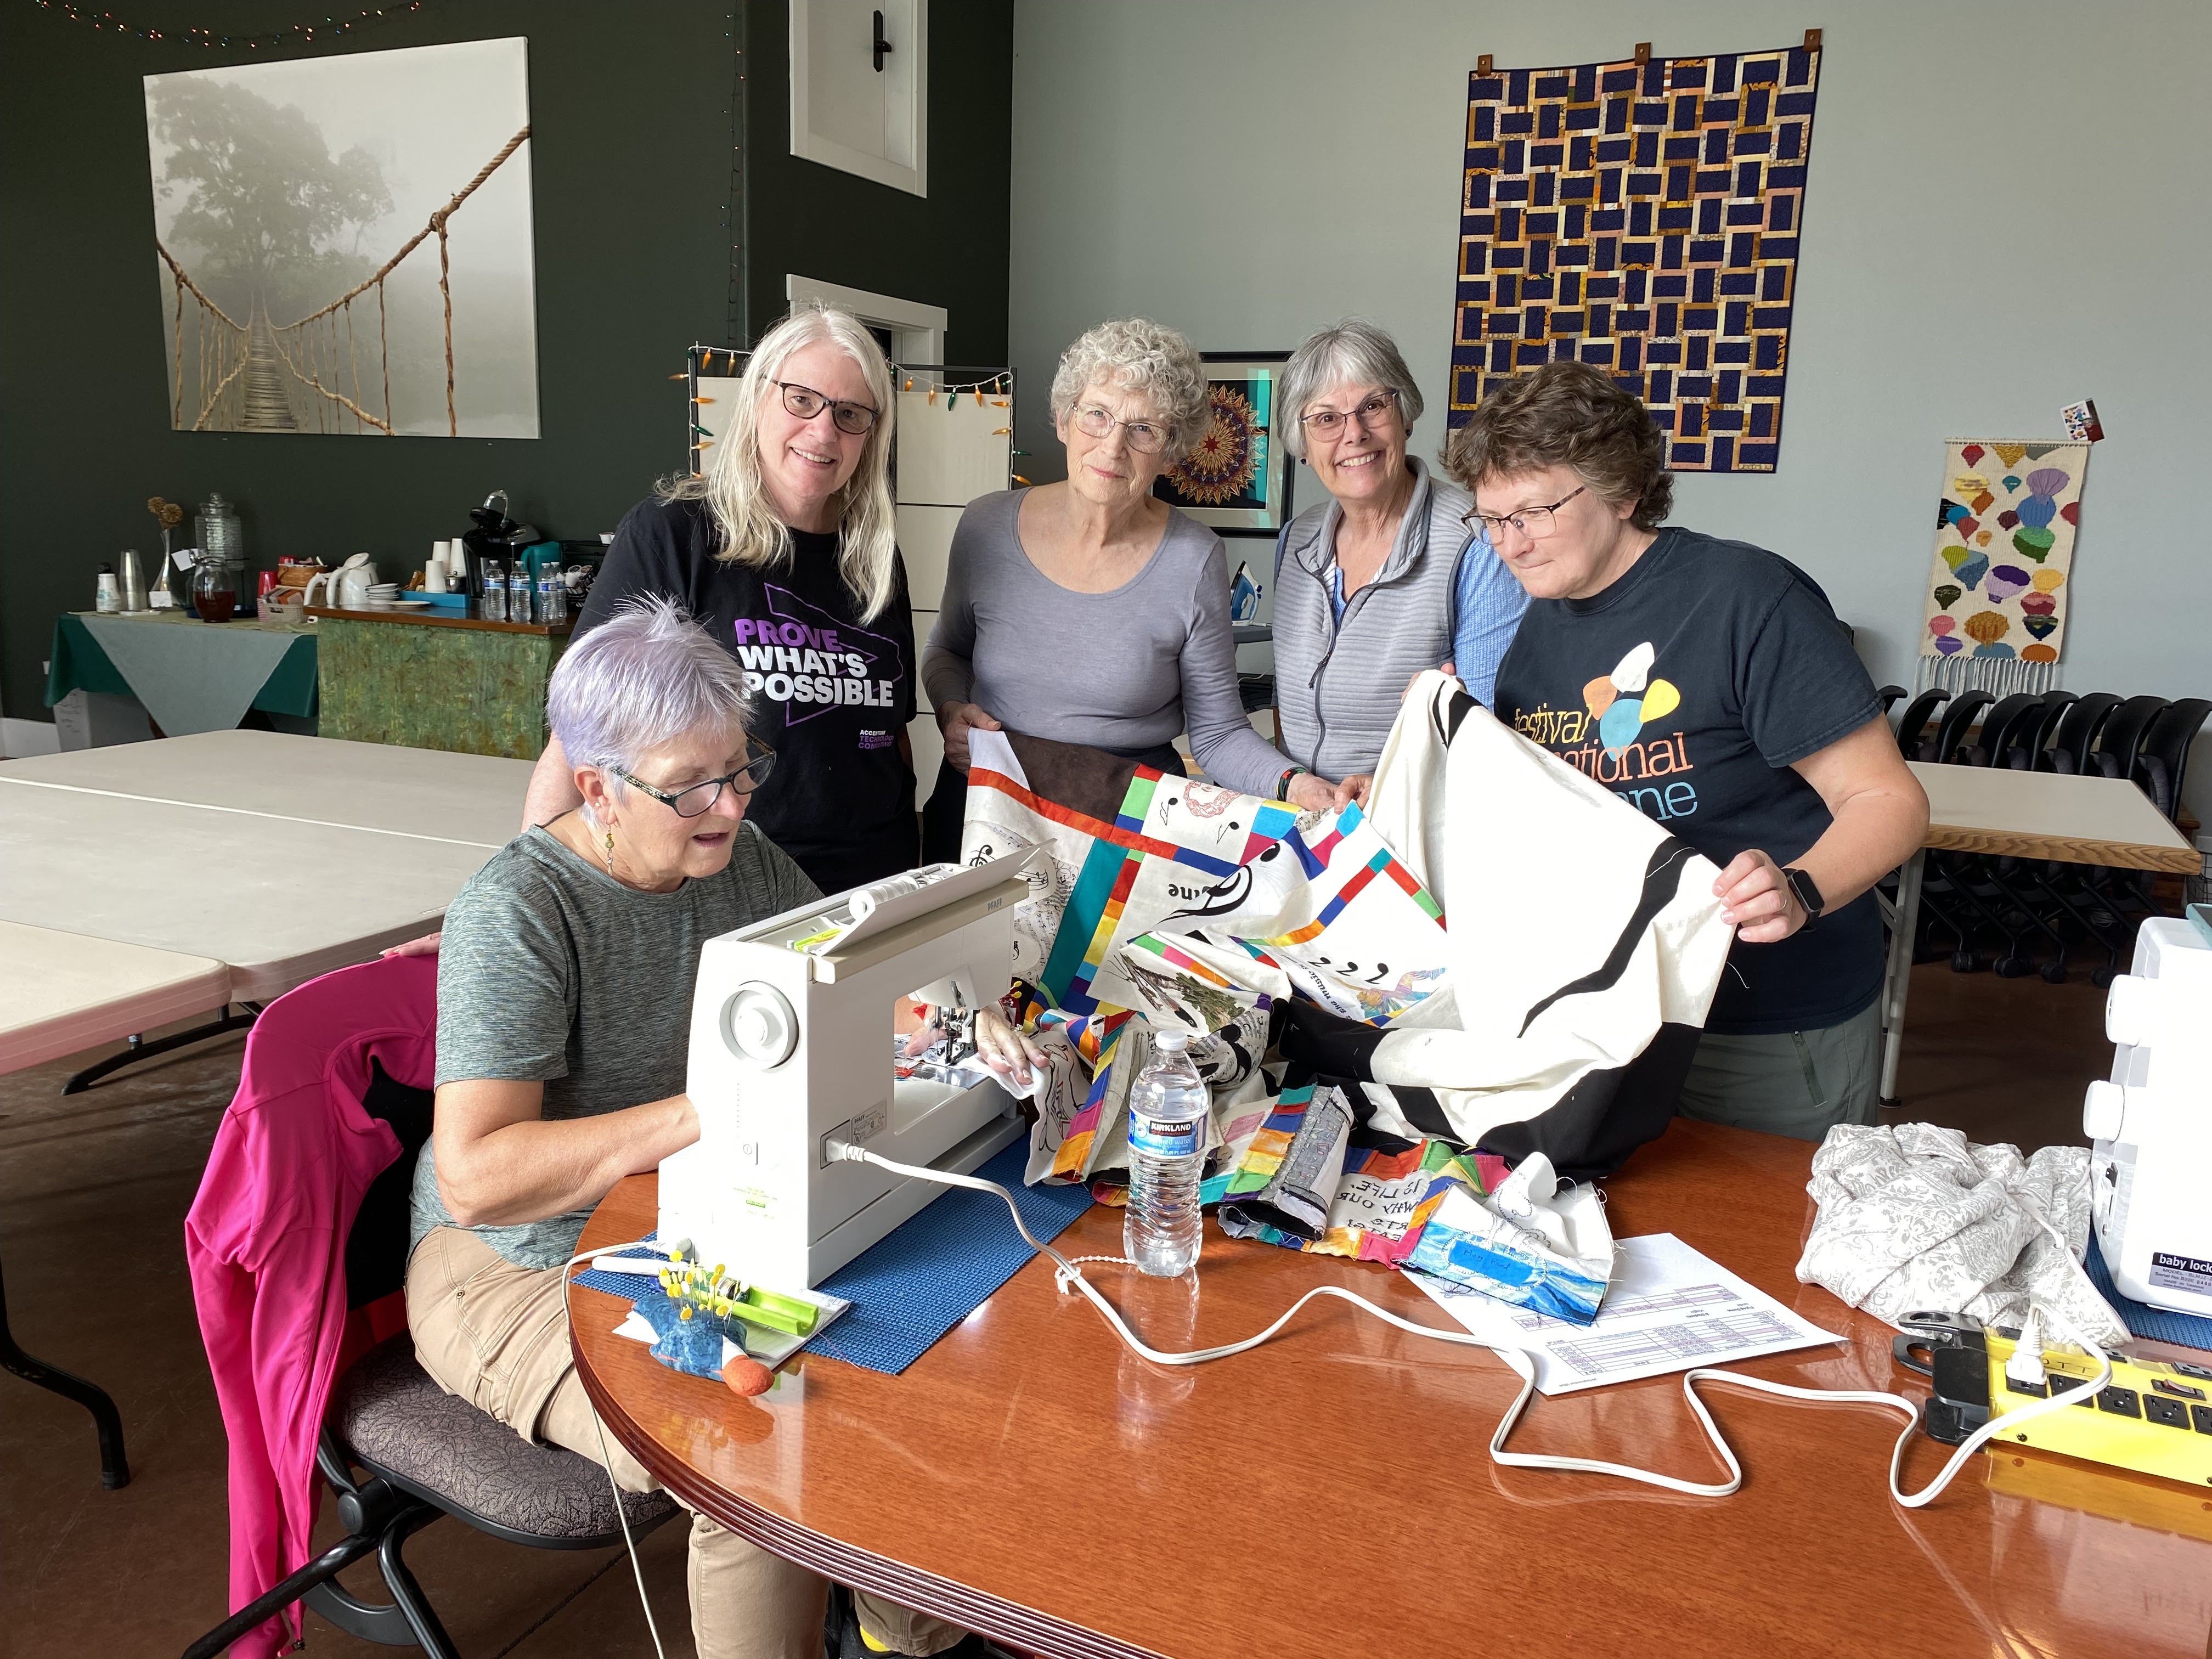
Finished top: Su S., Linda P., me, Sharron B. and Linda H.
We asked another Linda P. to quilt it on her long arm. We encouraged her to let the blocks inspire her to quilt the top. 

Quilting sample
She did an awesome job. 


There is so much to see on the project. 


Each block is quilted a little bit differently. 

A few of the blocks are included in this post.
Note the musical instruments quilted to the left of the block
She said she went on the internet to capture free clip art of musical instruments which she quilted in the staff.

The detail of the quilting is evident from the back too.

Detail of the quilting from the quilt back

Once the quilting was finished, Su machine stitched the binding to the front. Then Su, Linda H., Linda P. and Sharron B. hand stitched the binding to the back. Sharron B. added the sleeve and made a pillowcase to house the quilt when it isn't being shown at various locales where tickets will be sold. 
Binding
Finished quilt.
Ticket proceeds will go to the West Columbia Humane Society located in Washougal, Washington.

I so enjoyed working with these women. When any thought was on the table, the response was positive with comments about how to fine tune or improve the idea. That they chose one of my ideas as our initial start, was especially touching to me. I hope we will sell all the tickets.

We unveiled our finished quilt at the April guild meeting. We had so many positive responses. Ticket sales will begin late Fall or early Winter.

Sharing this project was goal number four on my May list.

Linking to Frédérique at Patchwork and Quilts and Cynthia at Oh Scrap! Happy Mother's Day to all you moms of two legged and four legged kids!