Wednesday, July 31, 2019

Gingham Skirt--Fourth Finish 3rd Quarter FAL 2019

 Stitch a skirt with this fabric
This quarter, I wanted to finish a number of projects that have been on my FAL list for a long time. I have listed some of my projects for years! Sometimes, I get side tracked and I start a new project. Starting a new project is fun. There is nothing wrong with beginning new projects! Usually what happens between my goal setting session and finishing the project is that finishing the project takes longer than what I had estimated!

I picked up the fabric for this skirt from the guild free table a year ago last fall when it was in a plastic zip lock bag. At first, I had planned to work the fabrics into chicken scratch embroidered designs. When I opened the bag, I found that the  gingham fabric was a polyester and cotton blend. It was thin. It wasn't quilting quality fabric. I decided this bag, would be made into clothing items. Last summer, Miss K and I made a skirt out of some of the scraps.

After I made the discovery of the fabric content, I decided to make a gathered skirt. I had planned to make each tier a different color. Bernina's We All Sew posted a tutorial on their blog about how to construct one. I pulled the leftover fabrics. Wouldn't you know it, the remaining pieces weren't large enough for my original plan. Had I been willing to piece the sections or cut the fabrics some on the crosswise grain and some one the lengthwise grain, I might have been able to have cut enough strips to make the skirt. I wasn't confident about how the garment would wear if I I cut strips on the crosswise grain.
Finished skirt

There was however, enough of the green fabric to make a whole skirt. So I did! I had the opportunity to change the thread on the serger and adjust it from rolled hems to regular stitching.The serger is be ready for the next clothing project I decide to stitch.

I stitched this skirt for Miss J. I used a yard of fabric. I have now used 58 1/2 yards of fabric from my stash this year! This was goal number three on my 3rd quarter FAL list. It is my fourth finish for the quarter!


Sunday, July 28, 2019

From The Cutting Room Floor--A Start!

Contents of the bag after a rough sort
My friend Martha loved to sew scraps.  When I learned she had died, I thought I would like to have her scrap basket. She put her scraps in a wire basket that was about 20" x 12". In our daily e-mail conversations, she would tell me how messy her sewing space was. I, however, only saw her space neat and organized. When I asked her where the mess was, she would report that when I came over, she put it in a bag; put it behind a door; put it in a closest; dumped it on her bed. Then, she just giggled. When I stepped into her sewing room that first time after her death, I discovered her mess. I chuckled.

She was true to her word. There were scraps, parts and projects everywhere! As I cleared fabrics, I'd encounter more scraps. The more scraps I found, the more I giggled! The couple grocery bags that I thought I would have turned into much more than that! For this post, I'm sharing what I did with one plastic grocery bag of her scraps.
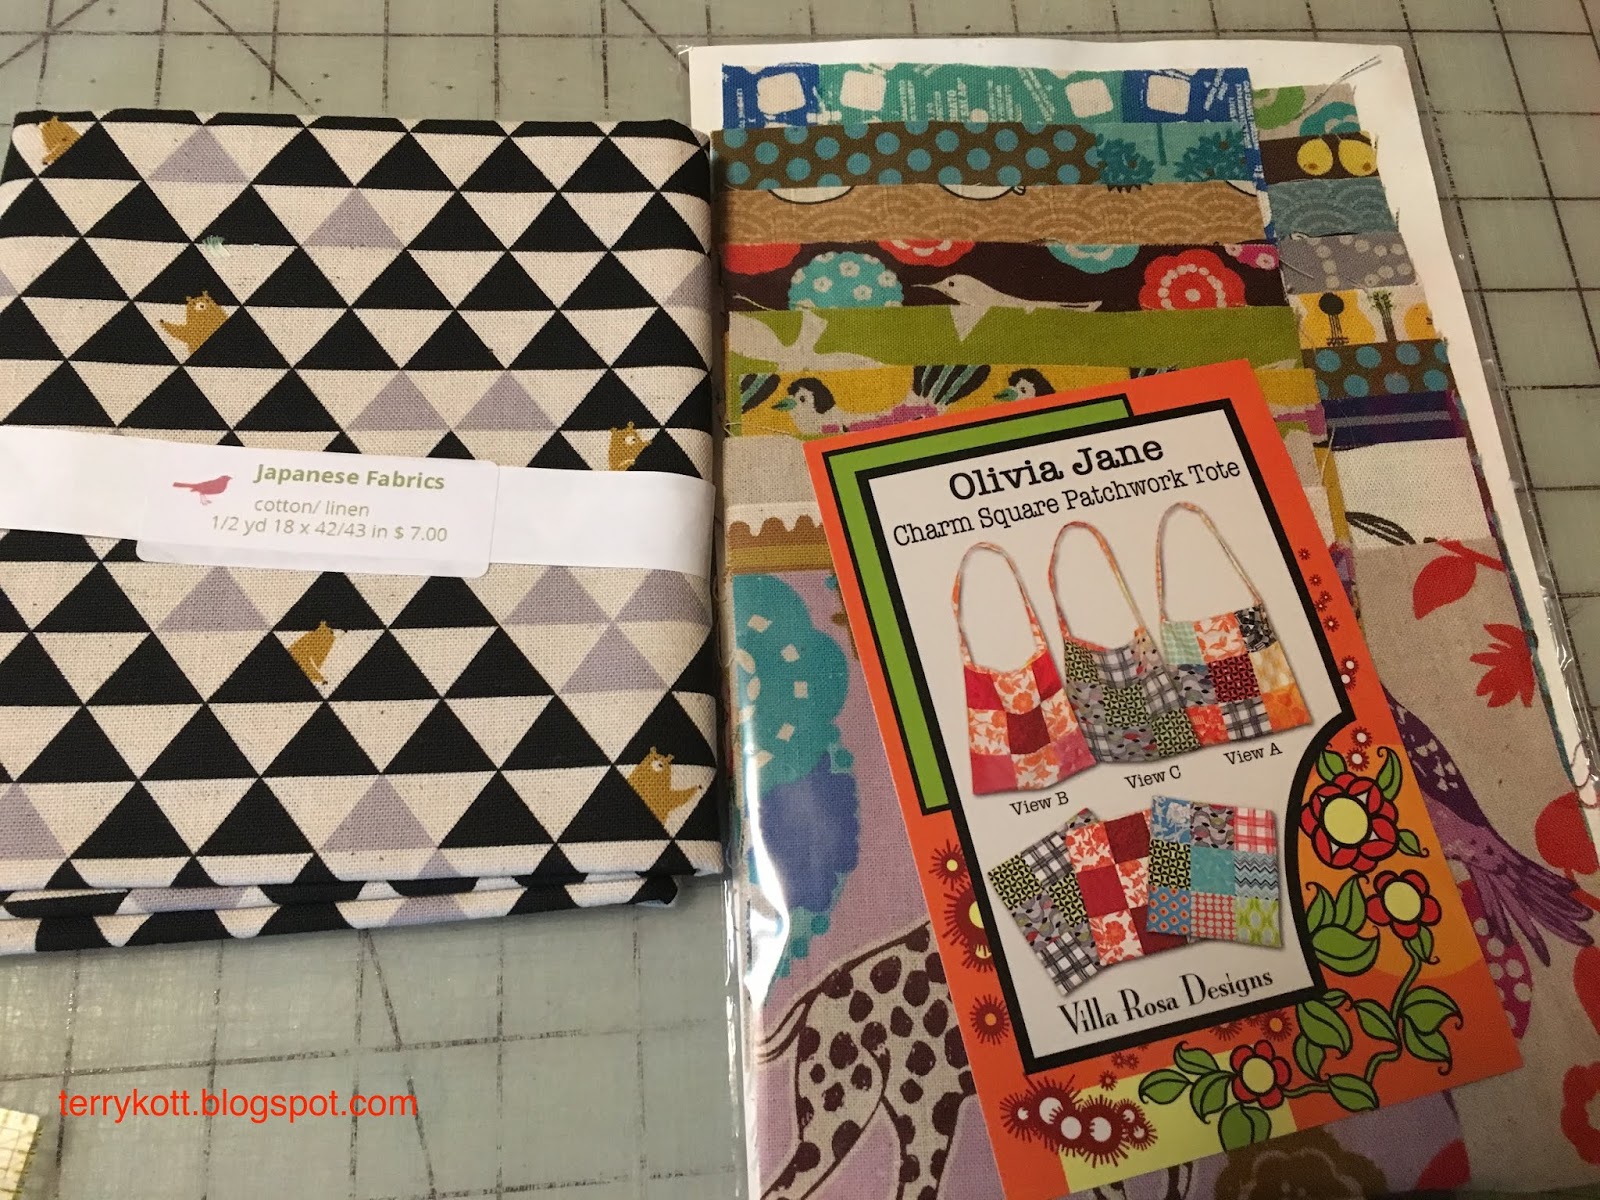
Packaged after cutting

From that scrap bag, I removed the neutral strips and chunks as well as any fabric that fit for the Bonnie Hunter mystery last fall. I gave my friend, Gail, some bits of blues and purples for her to add to a background she wanted to make for a special project. Miss K pulled fabrics from the bag for her mermaid project. After all that removal, the contents of the bag continued to spill out on the floor. I'd pick it up only for the spillage to occur another time.

It was time to divide and conquer the contents of that bag using Bonnie Hunter's scrap saving system! I dumped the contents on the cutting table and began putting like pieces together. I had a pile of strings that were about 1-1 3/4 inches wide. I bagged these for a string project. There was a group of 2 1/2 "ish" inch strips that I also bagged.  Finally, there were some larger strips and chunks that were in the 4-5 inch range. I also put those in a bag. It was time to sort and start cutting the remaining bits into useable pieces. I wish the photo showed how high these scrap piles were! The photo makes it look like there wasn't much in the bag!
(Left) Ready for the project bag and (Right) ready for storage

The first day, I cut for a couple of hours. I had a pile of: 3 1/2 inch squares, 2 inch squares and 1 1/2 inch squares. I also had a few 2 1/2 inch squares. There were a lot of 4 1/2 inch chunks. I decided that if I had a plan, the more likely the pieces would become a finished project. I have so many in process projects and projects that I want to start that I didn't want to go that route. Instead, I decided that I would do a leader/ender project.

Since this bag of scraps contained some large print florals, I decided I'd prepare Jewel Box Stars as the project. (Martha had a lot of floral fabrics in her stash.) This pattern uses half square triangles that finish to three inches. It is a free pattern on Bonnie's website. I spent a few more days cutting. Total cutting time was 10 hours. If I could have cut two or three layers at a time, I would have spent less time cutting. Most of the pieces were odd sized so cutting them one at time was the best way to get the most out of the fabric pieces.

When I finished, I had a bag of triangles of various sizes. These probably were waste triangles from other projects. Some day I'm going to make a tiny paper pieced flying geese block project. I'll need many triangles to stitch it. I also had a few three inch squares. I didn't cut these down. I might use them in a particular project soon. We will see! As I cut, I ended up with a large amount of 1 inch by 3-4 inch strips. I saved these because I think I will make a paper pieced string border to sash this quilt.
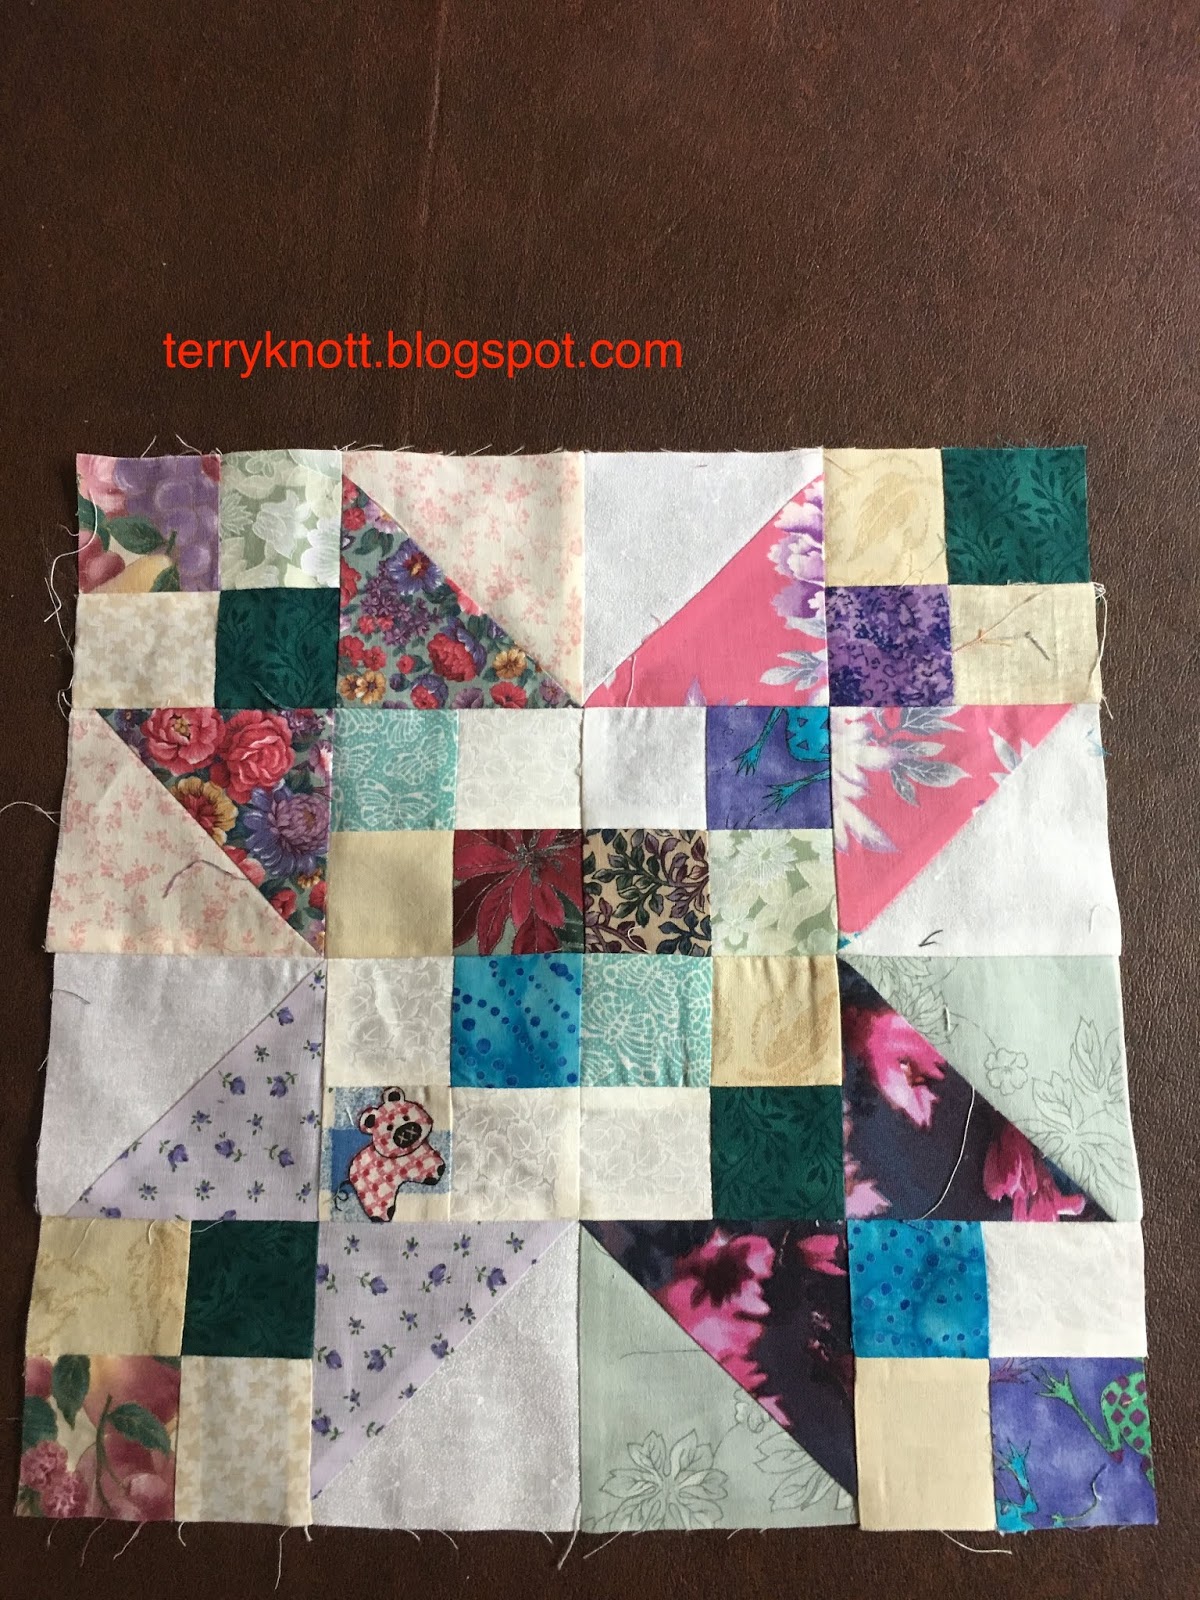
First block finished

My inventory after sorting/cutting and in addition to the string bag and two strips bags was:
--a small bag of pieced bits which could be starters for crazy pieced blocks. I also added parts for a few nine patch blocks.
--a small bag that contained fabric that was backed with fusible. Martha liked fusible backed fabrics for applique. I may cut some shapes with the fabrics during some future play time.
--a small bag that contained all the squares but the two inch squares.
--a small bag that contained all the two inch squares plus I raided my neutral two inch squares.
--a small bag that contained all the HSTs. I also added enough neutral HSTs so that I will have enough to cover all the HSTs that I cut!

A lot of these scraps were the leftovers she had after piecing her project. After I finish a project and generally before I work on the next project, I take some time to cut the scraps into usable pieces using Bonnie's system.  In a few minutes, I have the pieces cut and sorted.

In this manner, I have accumulated bags of squares and strips. I stopped cutting the bricks because if I want those, I can cut them out of strips and I have less parts in my scrap inventory! I do not have bags of scraps. I do have bags of color coded "precuts" instead!

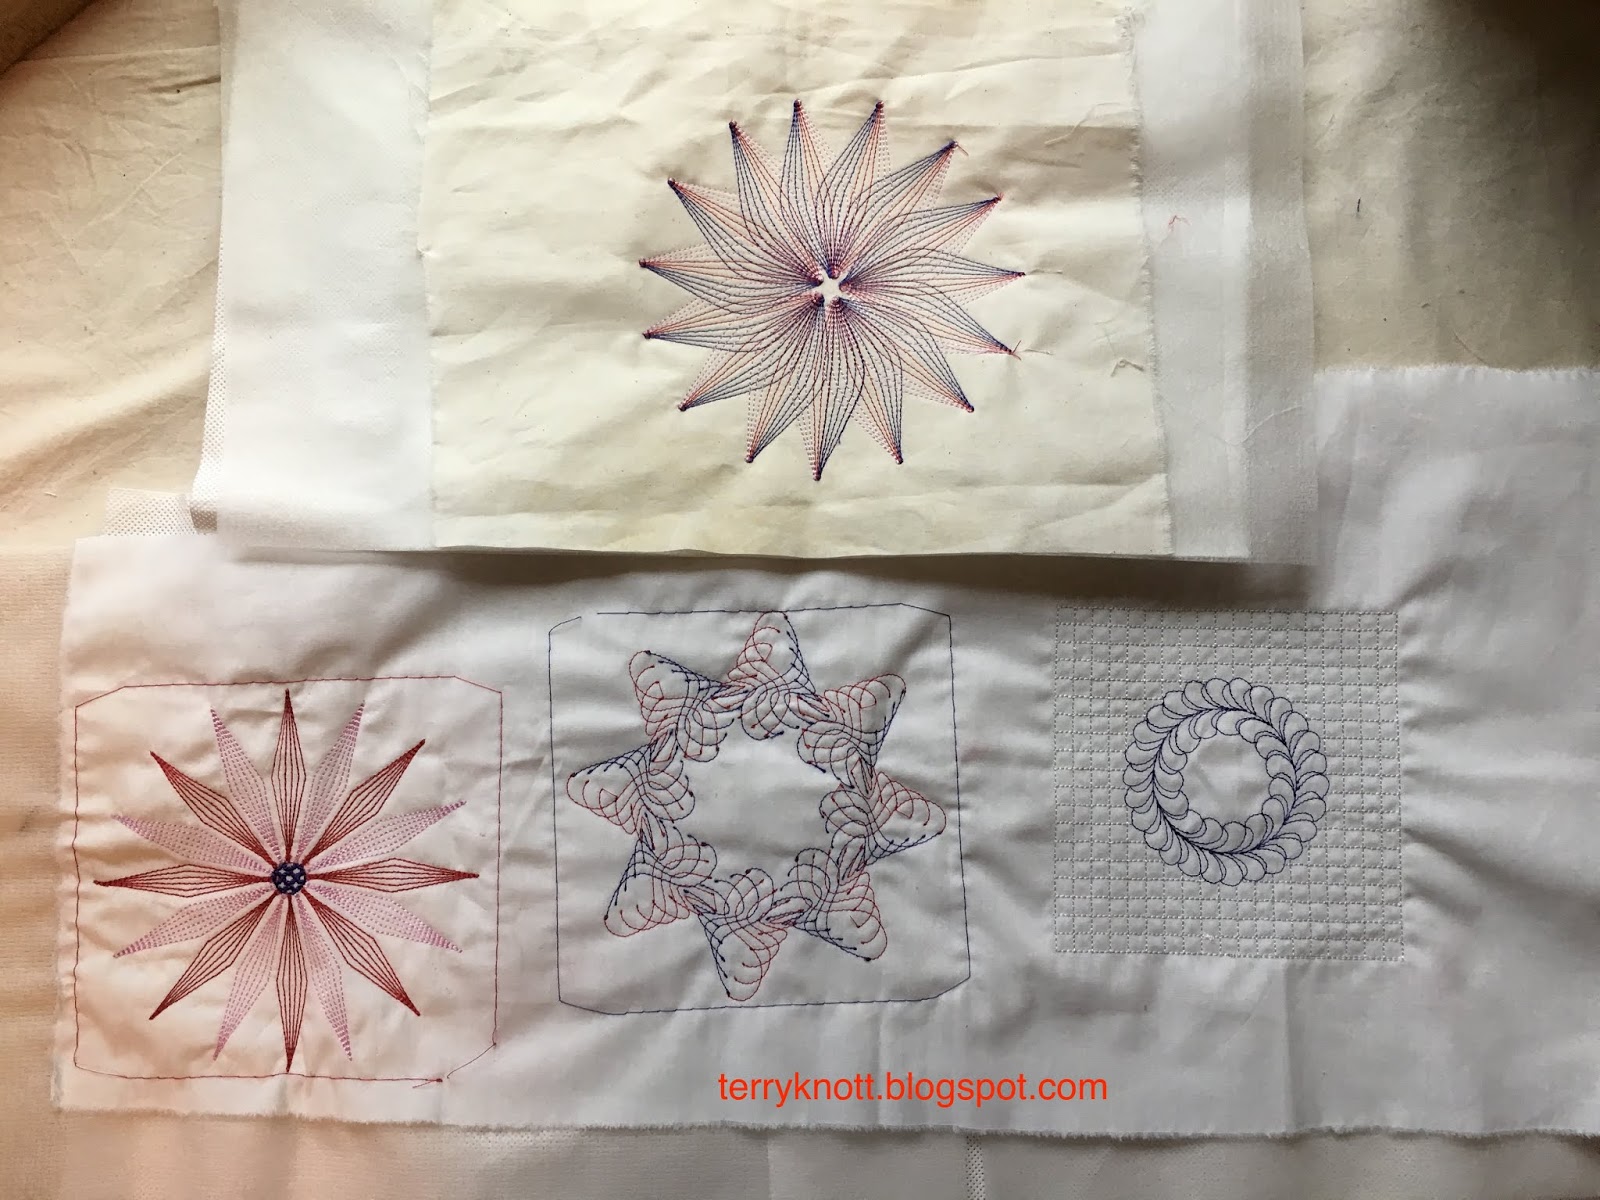
Second block ready for stitching
It is great to go to the scrap bags when I need materials for a project. Having "precuts" at my finger tips is nice! I cut what I could out of the bits. I didn't count how many parts I cut. I did cut backgrounds from my stash of neutrals. Now, my plan is sew and see how many blocks I have. When I need more chunks, I'll break into that bag of 4-5 "ish" inch strips to cut more. Martha wanted variety so she cut her strips at at different widths. When she miscut a strip, she slipped it in her scrap bag! So those are the reasons behind the width variety!

I laid out a block and took a photo of it. Those HSTs remind me of butterflies! I have no idea how close I will come to stitching it nor do I have any idea how long it will take me to make the blocks because, I plan to stitch these parts while I piece other projects. The parts will be the leaders and enders instead of scrap fabric. I'm going to make two quilts at one time! Perhaps, once a quarter I will update my progress. I think this would make a great "I Spy" quilt because of all the variety. Believe me, there is a lot of variety!!! In each block, there are 32 two inch squares and 16 three and a half inch half square triangles.

The projects I make from Martha's scraps will be called "From The Cutting Room Floor." I'm curious as to how many quilts I will stitch from her little bits! Stay tuned! For now, I'll report that storing a closed two gallon plastic zip lock bag that is less than three quarters full is a huge improvement!  It is so much easier to use parts from it too!  I'm no longer tripping over spillage from that plastic grocery bag!!!

Wednesday, July 24, 2019

Bread Bag--Third Finish 3rd Quarter FAL 2019

Parts ready for stitching
My niece announced her engagement last month. I thought that I had better get the bread bag supplies out and completed because it along with the chicken placemats would make a nice shower gift. The pattern and fabric for the placemats was a gift from my friend Martha.

This bag is designed to hold the rolls at the dinner table. Because it has batting, it will also keep the bread warm. There were many small pieces to this bag. I thought it was cute because of the placemat of the chicken appliqué. I read the directions and I thought that I had followed the directions. . .but, I didn't. These days, pattern designers use the least amount of paper possible to produce patterns. One way to conserve space is to limit the directions and illustrations. One of my talents is carefully interpreting the directions in a different way than was intended!

I could have saved myself some time had I placed the comb/wattle/feathers and beak behind the chicken appliqué body rather than inserting each into the appliqué body. Oh well, once I had
Finished bag
stitched it, I wasn't ripping! In the end, it looks great. I love how whimsical the bag is.

I had picked a couple fat quarters from my stash for the lining and outer bag; but, I needed two pieces that were about 15 inches square for the lining and two pieces that size for the outer bag. A fat quarter wasn't large enough! I needed half a yard of fabric for the bag and the same amount for the lining. I looked through my yardage stash and found a piece of fabric that featured shades of gray and black circles printed on a lighter gray background. There was a little more than a yard. The circles reminded me of eggs and I thought the print would make the ensemble more modern so I chose it.

Once I had stitched the appliqué, constructing the bag didn't take long. Then, I decided the napkin rings were too cute not to make. I cut out the pieces and stitched them together.  The directions were to stitch the shape. Cut a slit in the back of a single layer of fabric. Turn the fabric right side out. Whip stitch the opening closed. I stitched the white this way; but, it was difficult turning the white right side out with this method.
The ensemble ready for gifting
For the yolks, I stitched around the outer edge and left a space to turn the shape to the right side. Once I turned it, I pressed and slipped stitched the opening closed.  This was the better technique. Of course, once I had finished the napkin rings, I needed napkins too!

I wanted to purchase a linen napkin in the placemat colors--black, grey, red and yellow. I looked on line. I did some shopping in stores because I thought that I could find single linen napkins for a few dollars each. Anyone who knows me, knows how much I enjoy shopping. . .NOT! I was unsuccessful in my search. I rummaged through my stash and found a dotted fabric which was barely enough for four napkins. I made those and called the project FINISHED!

I used 2 1/2 yards of fabric for this project. I have now sewn 57 1/2 yards of fabric from my stash. My goal in January was to sew that amount of yardage out of my stash. I'm excited to have met this goal!!!!!!!!!!!!!!!!!

It will be interesting to see how many total yards I sew this year! This was goal number 12 on my 3rd Quarter FAL list.

Sunday, July 21, 2019

June Embroidery Lesson

The June embroidery lesson was about having fun with fonts. It took me a long time to complete the software part of the lesson. I had a difficult time navigating the directions with two of the eight letters!! In fact, I had so much difficulty that I worked about four days trying to figure out how to achieve those sections of the lesson. I got to the point where my failures caused me laughter. Seriously, I believe I failed every way possible before I succeeded!
Completed stitch out with some flannel scraps
Again, I liked the results. Playing with fonts is definitely a rabbit hole in which I could disappear! When I started the stitch outs, I sure could see all the letters together as a panel for a baby quilt. In Martha's stash contained some flannel bits that would make a cute baby quilt. I don't know if there are enough "bits" for a quilt top; but, just in case there are, I stitched the letters with thread colors that were similar to the colors in the flannel prints.

Then, I placed the stitch out amongst all the flannel scraps. . .It would be a perfect panel in a baby quilt. Making a baby quilt won't be easy as the scraps are small. . I'm putting it on my list for a future project.


Wednesday, July 17, 2019

May Embroidery Lesson

I was stitching the May embroidery lesson when Joie decided not to raise/lower the pressure foot. She got to go in for a spa treatment with Aaron at Quilting Delights. He found that with all the quilting that I do, I had worn out the part that lifts the pressure foot up and down! It took about a week for the part to arrive and then I was stitching other items so it was a while before I got back to this lesson.
June embroidery lesson
This year, I my goal is to complete the monthly lessons so that I will have a better handle on the embroidery software as well as have more confidence about using it! I might be more inclined to delve into machine embroidery if it weren't such an ordeal to reset the machine. I must lift it and move it to another part of the desk. It isn't far, it isn't hard; but, it is a pain in the . . .to do it! Then, once I move the machine, I can't do other projects. Consequently, I try to work on the embroidery in between other projects.

The May software lesson was straight forward. I was thankful that I was able to maneuver through the steps. Sometimes, I have difficulty achieving the results in following the directions. It amazes me how I can interpret the directions in a different way than they were intended! Sometimes the results are cool; but, most of the time. . .it is frustrating!

This lesson was about blending and using the blend tool to achieve the results. It was fun to play with the tool and to create the blocks. I think that these stitch outs would make nice blocks for a projects. I like the way the thread colors blended. I used the same thread colors for the blocks and like how the design revealed itself! For now, the blocks will be filed with the lesson handout.

Sunday, July 14, 2019

Purse--Second Finish 3rd Quarter FAL 2019

Pattern pieces fused to stabilizer
After stitching the hat, I had planned to stitch a skirt for Miss J. However, those kitty print scraps were calling me to see if there was enough fabric to squeeze a purse out of the leftovers. It took some careful placement of the pattern pieces, some adaptations to the pattern and piecing some sections of the fabric to make a large enough piece to cut out the pattern pieces.  After cutting out the pieces, I threw the remaining small scraps away. Miss J loved this fabric. She loves unicorns, butterflies, kitties, the colors blue and orange so I know that she is going to be excited about a purse that matches her skirt and vest!

I again used the orange fabric as the lining. This time, I used a lighter weight fusible to stabilize the purse pieces. I liked the lighter weight stabilizer. I also adjusted the handle width as I didn't have enough fabric to make the one that the pattern suggested. I wrapped a piece of the cat print around a piece of webbing. I like the way the handle feels and I know that it will hold up well to the wear that this bag may experience.
Slip stitching the turning space in the lining

I constructed the outer bag and then I constructed the lining. I almost forgot to leave a space open in one of the lining seams so that I could turn the bag right side out when I attached the lining to bag. I did remember so I didn't have to rip! WHEW!!!

I spent parts of three afternoons constructing this purse. When it was time to add the tab closure, I had a partial packet of round velcro closures in the color navy from Martha's stash. I used one pair to adhere the tab to the purse front.

Finished bag
I used 1 1/8 yard from my stash to make this project. I have now used 55 1/8 yards from my stash. I have 2 3/8 yards left to stitch before
I've met my goal of stitching 57 and one half yards from my stash this year.

This was goal number seven on my 3rd Quarter FAL list. I plan to gift Miss J both the purse and the hat at her birthday next November. I am going to have fun looking for items to put into her purse!

Wednesday, July 10, 2019

Hat--First Finish 3rd Quarter FAL 2019

Stabilizer applied and ready for stitching
There weren't enough scraps left to make the entire hat so I cut most of the lining pieces out of a yellow/orange batik.  This is the same fabric that I used when I stitched a kitty vest for Miss J.

I cut the hat out at the end of June. I planned to squeeze one more finish into the month; but, it didn't happen! I'm okay with a July finish though because every finish is fantastic!

After cutting out the hat, I still had a couple chunks left that could become a purse. I decided to add that project to my 3rd quarter list! (I'm curious as to all the "bits" that can be made out of the scrap of that loved fabric Miss J chose so long ago--like October 2016!) We purchased the fabric for a skirt which she still wears. She still likes this fabric!
Pieces in process

Miss J loves kitties, unicorns, butterflies, the color blue and orange too! Fiddling with the bits and repositioning the pattern pieces. . .took time and using scissors to cut is work! Hm m m. . . . perhaps, cutting out is yet another reason I rarely make clothing!!! Seriously, the rotary cutter was a terrific invention.
Finished front view

Once I had cut the pieces, I fused the stabilizer to the back of all the pieces. I used a heavy weight stabilizer because I want the hat to have form. I wasn't pleased with the way the stabilizer aged in the hat. As I scrunched the parts to sew the crown to the band, the stabilizer crinkled and re-ironing/fusing didn't make the fabric smooth. I remembered to snap a photo when I had sewn the crown to the band and joined the lining to the outer fabric. It was fun stitching the brim and the tie.
Finished back view

Joie, my 790 Bernina, stitched the layers well. In between other commitments and over a period of about three days, I finished the hat. This hat will look great on Miss J! I ought to get the purse cut out while the remaining scraps are on the surface of the cutting table. Time will tell if I get that far though!

I get a kick out of creating something useable out of scraps that I would have tossed. I also get a kick out of creating an item using up what is available in the studio. Better yet, I am slowly working my way through a container of projects. Soon, I'm going to be able to easily close the lid on that container!

I like having a variety of projects available on my to do list. Sometimes, I want to quilt and sometimes after finishing a bigger quilt project I want to do anything but quilt!

This is my first finish of the quarter and number six on my 3rd quarter FAL list. I used 7/8 yard of fabric which means that I have stitched 54 1/8 yards of my 57 1/2 yard goal for the year. I have 2 3/8 yards left to stitch to meet my goal. I am so close!!!


Sunday, July 7, 2019

Do You Want To Play Along?---Bust Your Stash Challenge


Sample to promote the challenge
Last month at the Clark County Quilters guild meeting, I shared the challenge for the coming year. Members had wanted to get a head start over the summer. I posted about the challenge. A few of you asked me to share the rules here. So. . .I am!!

I hope you will play along. I think we can have our own quilt show! Plus, we will reducing our stashes! Beginning in September, I'll have a monthly post regarding the challenge. My September topic will be design inspiration. It will be fun!

2019-2020 Challenge
Bust Your Stash—
Two Inches At A Time
  • 1. This challenge is to create a project from your stash using two inch squares which finish to one and half inches. 
    • You can use a commercial pattern or create your own pattern. No kits, please!
    • You can applique, piece and/or paper piece other elements into your design. 
    • Embellishments are encouraged; but must compliment design. No craft glitter please!
    • Although there are no requirements for how many two inch squares must be included in your design, the two inch squares must be an integral part of the design.
    • You can use squares of different sizes, however, the two inch squares must be easily recognizable.
    • You can also purchase fabric for your project; but, you won’t be reducing your stash if you do! 
  • 2. Your entry must be a minimum 96 inch and a maximum 360 inch perimeter, have 3 layers including batting and you must quilt it either by hand or machine. No bags, wearables, or home décor, please.
  • 3. Your quilt must have a four inch hanging sleeve and a label on the back which includes your contact information.
  • 4. Your entry must have been created between June 2019 and April 5, 2020. 
  • 5. You will post a photo of the front, back, label and a close up of your entry to instagram with the hashtag #2020bustyyourstashchallengefinish by April 5, 2020.  You will write a brief description of your inspiration and how/why you used the techniques you did Your description will be a minimum of 50 words and a maximum of 100 words.
  • OPTIONAL—share your progress on or instagram (#2020bustyourstashchallenge) or my blog (https://terryknott.blogspot.com) the first Wednesday of the month. This is going to be fun!

-Mostly Traditional—Time tested and still as wonderful as ever.
-Totally Untraditional—Unique, unusual or outside the box. Pushing the envelope using quilting or quilt making techniques innovatively.
-So Whimsical—Fun use of design, color or embellishments.

A small prize will be awarded to the winner in each category. Additionally, each entry is eligible for the “Busted—Most Stash Used” award.

Wednesday, July 3, 2019

3rd Quarter Goals FAL 2019

#1. Quilt this top
#2. Complete trio of sisters


#3. Stitch a skirt with this fabric
#4. Get this project out of the fabric phase
I plan to continue my journey of finishing projects that I began; but, haven't finished. . . yet! I will add a Martha's project to each quarter and will review her "bits" to include in my future projects.

#5. Bonnie Hunter Mystery
#6. and #7. A potential purse and hat
I will start new projects and continue to have fun along the way. I anticipate trying a new technique or two. Perhaps this year, my "cold" daughter will finally be warmer!

Last quarter, I finished six of the 22 projects that I listed. Six finishes was good progress. I liked seeing the space develop in my project box. Seeing it empty would be fantastic!

#8. Appliqué, quilt and bead
#9. Raw edge applique
 This quarter, I planned to list fewer projects. I rolled the unfinished goals from the second quarter forward. I planned to add a couple projects. Then I dug around the studio and "found" a few more. I managed to have about the same number this quarter as last!

#11. Skirt for Miss K to sew
Will I complete the list? Honestly, my answer is a resounding NO! I have found that I make more progress when there is a lot of variety in the projects. I also have several projects going at a time so that when I'm stumped, I can play with another set of fabrics while I think about options for the other project! If I can complete ten projects this quarter, I will call that SUCCESS!!
#10.  Potholder project

I've listed 20 goals for the third quarter of the year.


#1. Finish this piece. I called it "New Beginnings." It was the machine appliqué project in a Karen Kay Buckley class May 2018. Last winter, I finished the top. At the end of last quarter, I picked a backing fabric. This fabric came from Martha's stash. Now to get it basted, quilted and finished!
#12. Finish the bread bag
#2. Finish the trio of sisters that I started last winter. This is a book club quilt. It is the first time that I've drawn a figure and then painted the details on cloth. I had great help from my five year old grand to draw the faces. Last quarter, I made a plan for the border. My plan is to quilt the trio and to add the border after the quilting.

#13. Maybe a pillow using this embroidery
#3. Stitch this gingham fabric into a skirt for one of the grands. It's been on the list for two years.

#14. and #15. Embroider T-Shirts

#4. Make some progress on this project. It's been in the fabric stage for over two years.

#5. Finish Bonnie Hunter's Good Fortune Mystery. This is the first year that I have participated. I enjoyed the process! Last quarter, I worked on it three times. Perhaps, I'll make more progress this quarter!

#6. and #7. I made a skirt and a vest out of this fabric for one grand. I cut out the hat last quarter. I still have leftovers. I plan to sew the hat this quarter and stitch a purse for the youngest grand.

#8. Finish the appliqué, quilt and bead this piece. It has been on the list for too many quarters to count!

#9. Continue progress on the butterfly piece began in September in a Susan Carlson class.

I have at least three other quilts with a butterfly theme that need to be finished. Perhaps, I can make some progress this quarter on this project!
#16. Make a jacket or vest with this minky

#10. Finish the other five potholders that were a Martha project. I stitched five last quarter. I thought that there were at least enough supplies for four. She sure could pack a project bag! To honor her spirit, I will donate some of these to the Mt. Hood Quilt guild bazaar which will be held during the quilt show coming in September.

#11. Stitch a skirt with Miss K. This looks like a fun project and the supplies were given to me.

#12. Make the bread basket to accessorize the placemats I made last quarter. I might even make the napkins and napkin rings that were part of the pattern. My niece became engaged last quarter and this bread basket and placemats would make a great shower gift.

#13. Maybe make a pillow out of this embroidery. Maybe it will be a small wallhanging. I completed this embroidery in 2014 and slipped it into a box. Time to stitch it up!!!

#14. and #15. Add embroidery to these two t-shirts. . .one for each grand. It will be a good exercise for me regarding embroidery placement. It will be my first experience to embroider on a knit fabric.
#17. Stitch this bag

#16. Make a jacket or a vest out of this minky fabric. It is so soft!

#17. I picked up this bag kit from the free table last fall. I think it might be an item that could be sold at the quilt show next fall.

#18. Use this leftover corduroy zigzag and this hand painted fabric to create a small wall hanging with a river as my inspiration. I had a brainstorming session and now have a plan of how to proceed!

#19. Work with Miss K to finish this original design. She is almost at the quilting stage.
#18. Stitch these materials into a project

#20. Finish the star Christmas ornaments. I think that there are enough supplies to make three more Christmas stars.

#19. Help Miss K finish her original design
I believe that there is a enough variety to keep me busy if I'm stumped on another project. The list includes, clothing items. I've been "gifted" clothing fabrics that I need to use as I just don't have space to store those fabrics. I also have no desire to store those fabrics either! Finding a use for these fabrics terrific! Perhaps, next quarter, I'll list a couple clothing projects that will use more yardage!
#20. Make a few more Christmas ornaments