Wednesday, March 30, 2022

Recap March and April Goals

Goal #1 for March complete
My goals for March were:

✔1. Finish piecing the Rhododendron Trail mystery blocks into a top. Determine the backing fabrics. Construct the back. Maybe find time to quilt it on the longarm. 

✔2. Continue making progress on the heart table runner. A finish would be GREAT!

♥3. Work on the next book club quilt. Perhaps, the leftover bits of the String of Lightening quilt can be the fodder for this project. I hope to be able to read enough of the book to at least get an idea before I leave on my trip.

4. Begin quilting the Lone Star on my domestic machine. This will be my One Monthly Goal. 

✔5. Continue making progress with the Rainbow Scrap Challenge (RSC) blocks.

Exceeded March goal #10
✔6. Continue making progress with the 2022 Temperature quilt.

✔7. Make a Ring Sling for my daughter.

✔8. Make a gift for my granddaughter's birthday.

✔9. Maybe make a fabric bowl.

✔10. Start a baby quilt. 

✔11. Quilt three to four days on the longarm this month. (I quilted three days!)

My April one monthly goal
This is the first month in at least 15 months that I haven't met my monthly goal. While I thought about pulling out the lone star and while I would tell myself, I'll do it on (insert day/time here), I didn't. 

Likely, I'll get back to this project in August. I am happy with all that I did accomplish in March. I actually finished some gifts and a baby quilt much more than I thought that I would do at the beginning of the month!

I did come up with an idea for the next book club quilt. It does not use my leftovers from the string of lightening quilt.

Books Read: Island of the Saints/Andy Andrews 4; When Lightening Strikes/Kristen Hannah 3.5; The Fox Hunt: A Refugee's Memoir of Coming to America/Mohammed Al Samawi 3

The hands of mama and daughter
Audio Books: A Great Reckoning/Louise Penny 4; Glass Houses/Louise Penny 4 

I helped 30 people earn their American Heart Association Basic Life Support CPR certificates.

My goals for April are:

1. Piece all the days of February together for the 2022 Temperature quilt. Maybe, I'll get a bunch of the March blocks together too! I'd like to be caught up with this project by May. Although, I may not have enough of one of the fabrics to stay caught up. Time will tell! This will be my one monthly goal. Check out others' goals at Elm Street Quilts One Monthly Goal April Link-up

2. Write four posts that feature book club quilts from the past.

View for the next few months--
watching river traffic on the Thames

3. Write a post about the virtual Saturday Workshop classes that I've taken since January. There are five classes I haven't shared!

Last Sunday, I arrived in London, UK for an extended visit with my daughter and new granddaughter. My newest granddaughter arrived March 11. She weighed 5.93 pounds and was 19 1/4 inches long. Miss A gives the best snuggles! I look forward to many hours of the two of us getting to know one another.

I did not pack a sewing machine and my daughter does not have one. I'll be working on hand work projects in between other activities. 


Sunday, March 27, 2022

Finished Baby Quilt Using Gentle Curves Technique

Gentle wave quilting and threads used
Friday afternoon, I delivered the finished baby quilt that I posted about on Wednesday. It took me about six hours to quilt it. I first stitched in the ditch and then I used the walking foot to quilt a gentle wave design on the fabrics. 

I stitched with a 40 weight gray polyester thread made by Glide and a 40 weight light yellow polyester thread made by Floriani in the needle. I used matching 50wt cotton thread made by Superior in the bobbin.

Label
It was fun to watch the quilting design develop. My quilt sandwich contained the pieced flannel top,  80/20 cotton/polyester batting and a flannel backing. The binding is also flannel.

This quilt is soft and cuddly. The back could become a track to race cars in the child's land of make believe. That gray back won't show the dirt as much as a light color would have so this quilt can also be a cape, a tent or whatever the child needs on that particular day!

Finished back
At 39 inches wide and 42 inches high, it is a great size for a baby quilt. My neighbor loved it. The way that I had wrapped the quilt, she first saw the label. She thought the label was "really special." I showed her where she could add her baby's arrival date and name. She thought those additions knocked the present out of the park!

Then she unfolded the quilt and looking at the back exclaimed how much she liked the simplicity of it. I told her that I had intended that side of the quilt to be the back. If she loved that side, however, she could make it the front. After all it was her quilt and she could do with it what she wanted!

When she turned the quilt over, her eyes grew wide and she exclaimed, "CURVES! How absolutely perfect and wonderful! I love the colors! My nursery is that aqua color."

Finished front
This quilt is in a good home! I estimate I spent about 14 hours to piece it, 12 hours to quilt it and an hour and a half to finish it. (Machine stitching the binding and hand sewing the label and corners.

There was a small amount of scraps left from the project. I can again close zip the plastic container that holds my leftover scraps from Martha again. Hooray! I figure that there at least three more baby quilts to be made in that bag.

I used about two and half yards of stash in this project which brings my total yards of stash used this year to 36 and three quarter yards. This is finished project number 12 for the year!

Wednesday, March 23, 2022

Baby Quilt--Saturday Workshop #6 (Free Hand Cutting Gentle Curves)

Fabrics for the baby quilt
Next month, I'll begin posting about the other virtual Saturday Workshops that my guild has held this year. 

Before COVID, Saturday Workshops were held one Saturday in January at a church. Members led the classes. There was always a great variety of classes. Some were three hours and some were six hours. At most you could take two classes. A half day class cost $10 and a full day class cost $20. The fee went toward facility rental.

Last year, we had virtual classes every Saturday in January. It cost $5 for a half day class and $10 for a full day class. While it was fun to be able to attend all those classes, it was also exhausting! (Kudos to those instructors who figured out how to make their classes virtual!) 

This year, we had three classes in January. From February through June, one full day or two half day classes are scheduled. Class fees are the same as last year. 

Second cut
If you renewed your $40 annual guild membership by March 31, Saturday Workshops were free. (The board thought this would encourage members to sign up early.) I paid my membership and was money ahead. There were eight half day classes and three full day class scheduled. Each class that I've attended has been fun. I've picked up some great tips! 

Last Saturday in a three hour virtual technique workshop, Rosanne H shared how to create and to stitch gentle free form curves. I've made these before; but, I always learn tips. I had two take aways after class: 1. You can't go wrong, it's only fabric. 2. I've practiced enough now that I will no longer be tentative about how to place the fabrics to be able to stitch the curves!

I had planned to only listen to the class because I wasn't feeling well. Gertie, however, was not satisfied at all with that approach. I didn't want another project. Gertie wanted to play. I didn't. She suggested that I could start the baby quilt and use this technique to construct the top. I sighed. I told Gertie "Okay."  She did back flips of joy!

Center panel of top finished
A neighbor, who lives across the street, is expecting a little girl in July. Some of these fabrics were in my friend Martha's stash and some came from my friend JoJo. I purchased the two gray flannel fabrics.

My favorite fabric is the duck print. I considered cutting it into two sections; but, Gertie suggested it would make a bigger impact if I left it in one piece. I had to admit that I agreed with her.

I pieced the yellow to make it wide enough to fit the area I wanted to fill.  I loved being able to use the larger chunks of the scraps. With about 40 minutes left of the three hour class, I had pieced the center of the top. At this point, Gertie reminded me that if I were making a pattern, I might have a few blocks stitched!

Top at the end of the first sewing session
I did share my progress with Rosanne and she shared my photo with the class. It was fun to see all the different fabrics, orientations and curves that people constructed. The variety was amazing!

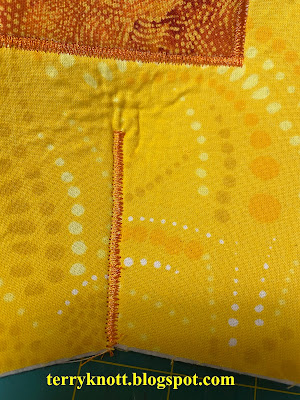
It was tricky to cut a curved border that was longer than my cutting mat. I found using a pin to hold the layers together above the cutable area allowed less shifting of the fabrics.

About 40 minutes after class ended, I had pieced the top. I stopped for the day at this point. The last border on one side had ripples. I wanted to think about how to fix it over night.

The following day, I tried making a deeper curve; but that didn't help the ripple issue. What did help was to take a few seams in the strip. In the end, I managed to remove most of the wave in that border.

Pieced back
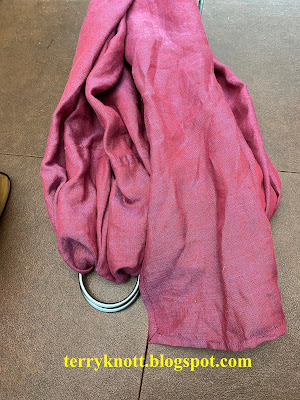
I pieced the back. I knew I wanted to use the grey dotted fabric for the binding. To ensure that I had enough to go around the quilt, I cut the binding before I started laying out possibilities for the back.

Because I hope the child will drag this quilt everywhere, I used the plain gray flannel fabric for the back. Gray won't show the dirt as much as yellow would have! Of course, I didn't have enough grey fabric. I also had a curved edge on one side the grey flannel.

I needed all the fabric I could get, so I laid a yellow strip along the edge; but, it wasn't long enough. No problem, I pieced it with a piece of the dot print. I still was a few inches short of having the back wide enough. I was able to cut a strip of the gray dotted fabric. When I added it to the back, I was relieved that it was big enough for my top! 

Backing ready to receive pieced batting
If I had had another brighter fabric chunk, I would have pieced another curve into the backing. I love the interest effect the curve provided for the back. 

Next, I pieced some chunks of 80/20 batting to make a piece large enough to cover the top. I piece the leftovers of my batting together. I'd rather purchase thread or fabric so I use every bit of the batting leftover from a previous project possible.

I laid the backing on my kitchen table. When the backing is larger than my table, I use clamps all around. When the backing is smaller that my table, I use masking tape to hold the backing in place. 

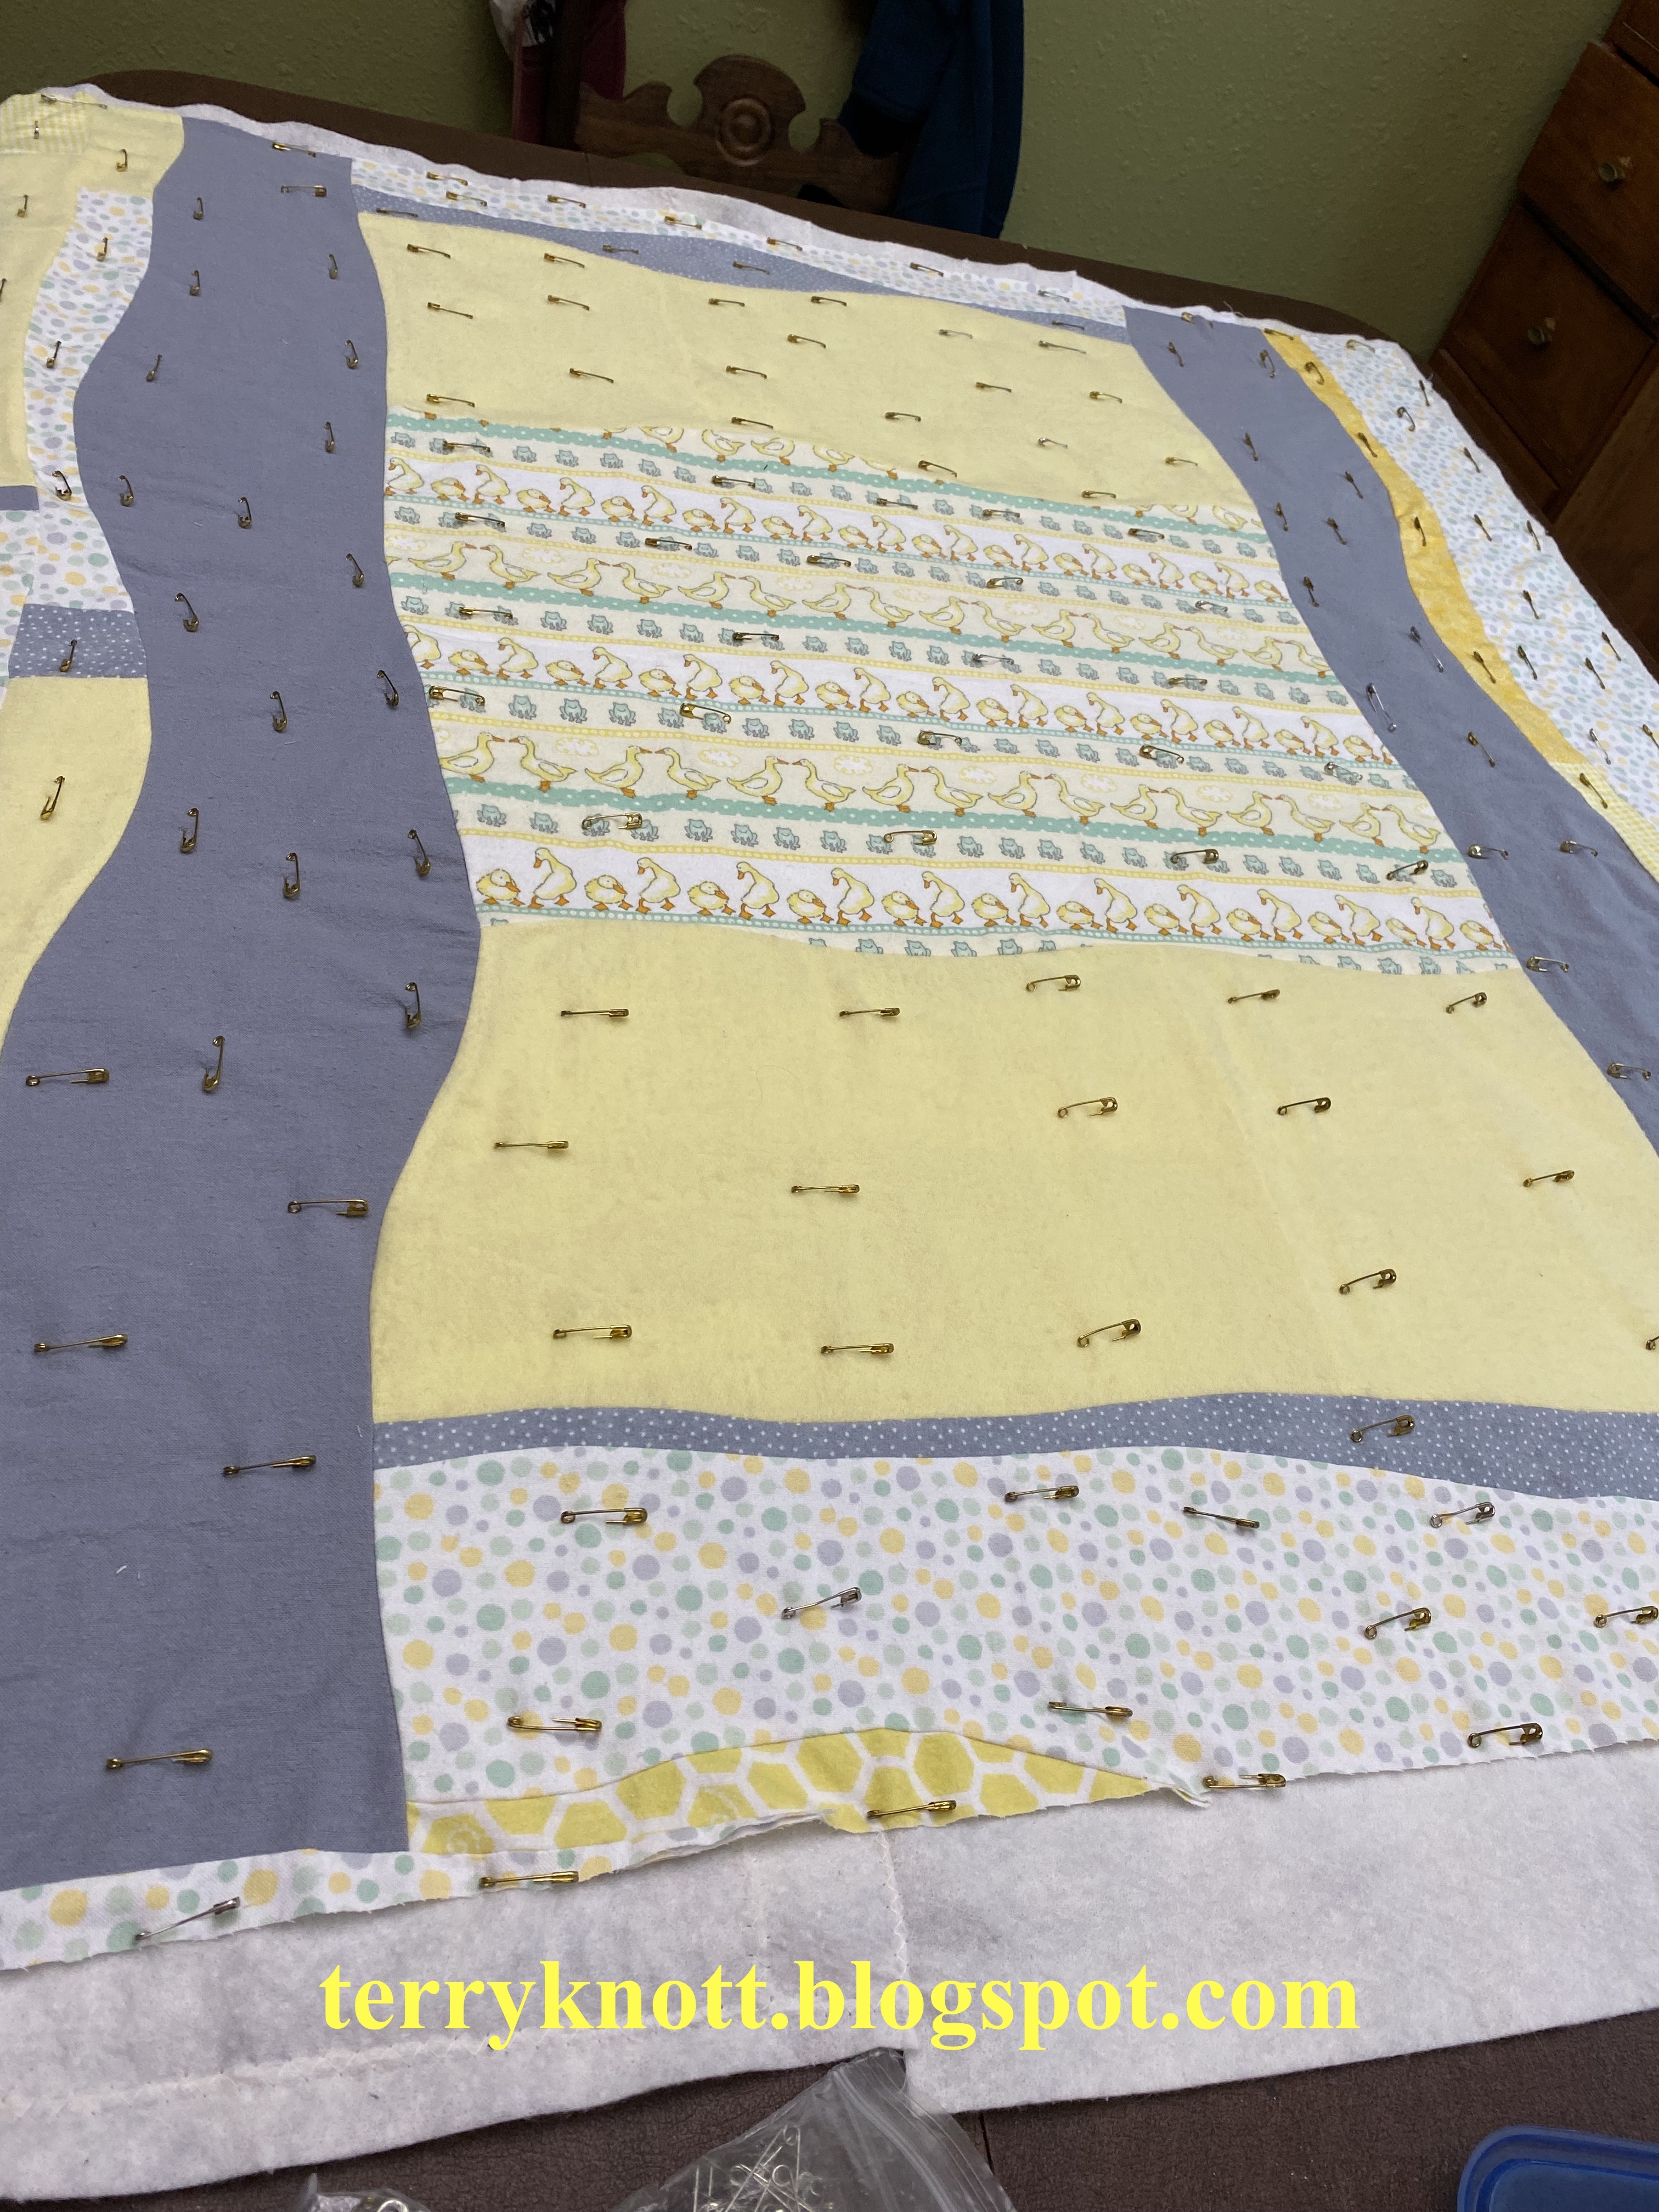
Basted and ready to quilt
In this case, the backing was a little larger than my table on one side. I used a combination of tape and clamps to hold the backing in place! I laid my batting on top of the backing and smoothed it in place. I laid the top on top of the batting and smoothed the top again. I got out my basting safety pins and pinned all the layers together at medium intervals.

In about an hour, I had pin basted this 40 inch x 42 inch top! Perhaps, over the next couple of days, I will complete the quilting. My plan is that the quilting will be simple and add texture.

I plan to use my walking foot to stitch wavy lines as the quilting. I think that a yellow and gray thread would blend well in the light and dark fabrics respectively. I plan to use polyester thread in the needle and cotton thread in the bobbin.  My goal is to keep the quilt soft and snuggly.

This was goal number 10 on my February list. It has been a fun and a relatively quick project. I definitely will use this technique again! Thanks Rosanne H for sharing the curved piecing technique!


Sunday, March 20, 2022

Reversible Fabric Bowls--Gertie Writes

Hi--I'm Gertie, Terry's inner squirrel. Today, I'm writing her blog post!

At Terry's virtual quilting retreat last month, Linda P provided a demonstration of how to make a fabric bowl. She did a great job making the process look simple and the retreat committee provided the stabilizer along with several fat quarters to make one bowl.

Marking placement for the opposite side
During the retreat, I tried to convince Terry to stop working on her "important" project and sew this bowl. She ignored me. I chirped in her ear. I swished my tail for three days to no avail. Terry stuck to her project. I pouted for three days after the retreat ended.

Inner square fused

After my pout, I continued to "encourage" Terry to make a bowl. When I told her that a bowl would be a good hostess gift for the trip she is about to take, Terry decided to stitch two. Hallelujah! I got to pick the fabrics. Terry cut two 10 inch squares and two three inch squares for each bowl. I chose fabrics that contrasted. 

Marking and cutting the darts
She fused the inner bowl fabric to the Pellon 72F Peltex Ultra-firm stabilizer. Terry repeated the process to fuse the outer bowl fabric to the same stabilizer. This product is fusible on both sides. It is a firm stabilizer. . .similar to the brim  in a man's ball cap. Terry used Steam-a-Seam 2 as the fusible on the three inch squares.

Darts cut in second bowl

She marked and cut the darts. I encouraged her to change the placement of the darts as well as the varying the length and the width of them in the second bowl. Surprise, she listened to me!

First stitching of zigzag on the darts 

Terry satin stitched the three inch squares to the center of the bowl. She found that using a three width and a .5 length worked well for the first stitching. She then re-stitched the section again using a four width and .4 length zigzag stitch. I liked the way the stitch looked after the second stitching.

Second stitching of zigzag on darts
Then she zigzag stitched the darts together. It was so exciting to watch her gently pull the edges of the dart together and stitch. As she stitched the bowls began to take shape. I liked seeing how the dart placement affected the bowl shape. I started talking to Terry about stitching "wonky" darts on the next bowl; but, she said two were enough. . . for now! She also stitched the darts twice using the same stitch length and stitch width that she liked stitching the three inch squares.

Inside of finished bowl with darts in the center
of the 10 inch square
She trimmed the outer edges to ensure the edges was smooth. Finally, she finished the edge with satin stitching the edge twice. She used an orange Floriani 40 weight polyester thread. This was goal number nine on Terry's March list

Inside of finished bowl number two
with darts on the edges of the bowl

The bowls are reversible. I think that she should make lots more of these fabric bowls. Terry said she might make more if I could determine a use for them. Sometimes, Terry is too darn practical! For now, I'll settle for the might because she didn't say no!

Finished bowls upside down with the thread used 
for the satin stitching

It took her about an hour and a half to construct the bowls which includes selecting the fabric and thread. She used about a quarter of a yard of scraps which brings her total fabric use from her stash to 34 and one quarter yards this year. 

Side view of the bowls
Thank you Linda P for demonstrating how to make fabric bowls. I plan to "encourage" Terry to stitch more! I'm linking to Cynthia and Oh Scrap/Quilting Is More Fun Than Housework. I'm planning to give my tail a rest and enjoy all the scrappy projects there for awhile. I hope you will join me.
 

Wednesday, March 16, 2022

Happy Hearts Table Runner #2 Is Finished!

At the end of February, I attended a virtual retreat through one of my guilds. My first goal was to piece together the top of the heart table runner. 

Note to self: Don't wait more than a year to pick up a project in process to make progress! I couldn't remember how I planned to construct the top. 

I pieced the heart blocks with a light background. While I liked the light background for the small blocks; I didn't like it for the large hearts. I removed the light background and added a dark background. I liked this look better.

I added a bright pink strip in a couple places to give the top a more modern feel. I did piece more dark background between the sections to finish the top of the runner.

Bright pink accents

My second goal was to piece the back. I started this project in January 2021. I used the remaining background fabric, pink accent fabric and a 2 1/2 inch strip of a print to construct a back large enough for the top. I cut enough of the dark background fabric for binding before I pieced the back together.

Finished top and finished back

This week, I layered and pin basted the layers together. I used 80/20 batting leftover from previous projects that I had pieced together. 

Ready for quilting

Quilting in the ditch was how I began the quilting. I stitched around some of the motifs in the small heart blocks. 

Stitching around a motif of the print

I quilted a free motion design in the light backgrounds. 

Background swirl filler stitch

In the pink accent strips, I used the walking foot to quilt straight lines.

Straight line quilting with the walking foot example

I used a Westalee two inch simple circle template to quilt the dark background. I did use the foot attachment to decrease the size of the circle. I used the same color cotton thread, navy in the bobbin for all the quilting. In the needle, I switched cotton threads to match the fabric color. I wanted the quilting to add texture and not become a design feature.

Thread used for quilting and view of the back

I used about a yard and a half of fabric from my stash to finish this table runner. I have now used 34 yards of fabric this year from my stash. This is the second table runner I have made from the virtual Saturday Workshop I attended in January 2021! I gifted the first table runner to my oldest daughter. I plan to gift this table runner to my youngest daughter.

Label

This heart pattern is from Cluck Cluck Sew. The pattern is under the free tab and is the multi-sized heart pattern. 

Finished runner

This was goal number two on my First Quarter goal list. It was also goal number two on my March goal list.

Pieced back of runner


Sunday, March 13, 2022

Yellow Blocks Stitched for the Rainbow Scrap Challenge

Angela picked a great color for March. Yellow is such a bright and happy color. I pulled my yellow drawer of scraps. I cut the pieces needed for two 11 inch blocks and one 22 inch block. 

Yellow fabrics ready to sew
The last two months, I told myself that I would also cut the backgrounds so piecing the blocks each month would go faster. I didn't get it done. This month, I made time to cut all the remaining background fabric for the remaining blocks. That meant I cut backgrounds for 20 small blocks and 10 large blocks. I used clips to group the backgrounds in groups of four.  

Backgrounds cut and organized
When I return from my trip, it will be faster to catch up with the months that I miss since I won't be sorting my background fabrics and cutting strips. The reason I didn't cut those backgrounds earlier was that I didn't enjoy cutting the strips and then sub cutting the strips into units. Cutting was boring and Gertie, my inner squirrel convinced me to leave that job for another month!

Yellow blocks

Gertie, my inner squirrel, wanted to see all the blocks together. I'm glad that she encouraged me to view the blocks together. I like how they are playing together!


I am enjoying the reveal of each block as I finish stitching it.  I'm linking to Angela and the Rainbow Scrap Challenge at SoScrappy. Since these are all scraps, I'm linking to Cynthia at Oh Scrap/Quilting Is More Fun Than Housework.

Wednesday, March 9, 2022

Ring Sling and Granddaughter Gift--Finished

Finished Ring Sling
Last month, my daughter asked if I would make her a Ring Sling for carrying her new baby. I hadn't heard of one. Google came to my rescue. I saw Ring Slings for sale. Next, I Googled tutorials for making one. I found a tutorial at The Sewing Things blog. I made two slings for the price of one on the internet. My neighbor and one of my nieces are both expecting babies. So if my daughter likes the ring sling, I may make a couple more!

Parents use a Ring Sling as a carrier for a baby up through a toddler. I used a medium weight linen that I prewashed in hot water. It did bleed; but, I liked the softer hand of the fabric much better after washing. Since I prewashed, it shouldn't bleed anymore! 

I purchased the rings at this site. I found the tutorial straight forward. It took me about two hours to make both slings. One is now in the packing pile of my oldest daughter. She is arriving first to spend time with the baby.

Love Bug pillows
I used 2.5 yards of fabric in this project; but, I purchased it. I didn't add this purchase to my stash so I won't subtract the yardage from my stash either! This was goal number seven on my March list.

My nine year old granddaughter will have a birthday while I am across the pond. I try to make an item for the granddaughters' birthdays. I had a lot of options; but, went with a Love Bug pillow instead. It is a free pattern download through Moda. My friend, Connie, shared the pattern with me last summer. The wings and head are "pockets" which could hold a note or a small book or pajamas. It takes five fat quarters to complete a bug.

Scraps cut into useable strips and squares
For the first pillow, I followed the printed directions. I wasn't that excited about trying to attach the eyes after I had stuffed the pillow. So I fused the eyes in place. For the second pillow, I watched a Shabby Fabrics You Tube video that walked me through the process. I made a second pillow because my eight year old granddaughter will have a birthday next November and she will want her own pillow!

On the second pillow, I attached the eyes before I sewed all the layers together. It took me about three hours to make both pillows. I used 10 fat quarters or two and half yards of stash fabric for this project. I used a 20 ounce bag of poly stuffing for each pillow. I used bias tape for the legs. This tape was in my grandmother's stash. She would be tickled pink if she saw me using her tape in a gift for the granddaughters. She was all about kids! This brought my fabric use from stash total for the year to 32 and a half yards. This was goal number eight on my March list.

I plan to slip a few items into the fold areas of the pillow to make it a "gift" pillow. It was fun to make. Another time, I might try slipping a piece of batting into the opening and then stuffing as the filling didn't fill the edges of the pillow as well as I would have liked. 

I cut the scraps into strips and squares and added to them to my scrap saving system. 

Sunday, March 6, 2022

Rhododendron Trail Is A Top!--post 3

Clue 4--Hour glass blocks
The last time I posted about Bonnie Hunter's Rhododendron Trail Mystery project was the beginning of December. I shared my progress through clue number three. In clue number four, we made a lot of hour glass blocks.

In clue number five, we made sets of four components. It was fun to ponder how these would be used. In clue number six, we made blocks. In clue number seven, we set the hour glass blocks into nine patch units. Clue number eight was the reveal.

Clue 5--Component sets
Again this year, I kept up with the clues. After the reveal in January, there were a few weeks that I didn't work on the project as Gertie, my inner squirrel, had me working on other projects.

Last month, I did put in a lot of time stitching the center of the top. I appreciated that with this mystery, in two of the clues, we assembled  blocks. Although at the time, I didn't realize that they were blocks. Bonnie is so good at building components. While I liked the blocks, I assumed that there was more to come!

Clue 6--Making blocks
When Bonnie revealed the quilt, I was surprised that the blocks were really blocks! It was nice to have a big part of the puzzle completed. There were some corner units to make and side setting units to produce. These didn't take that much time or effort although as with every clue, it was important to check the orientation of the pieces and to review the directions!

In a relatively short time, I was ready to arrange the blocks into a top. What took a lot of time was stitching the narrow sashing and corner squares to the blocks. I thought that I would have the top together in a day. . .well, two and a half days later I did!

Clue 7--Making hour glass nine patches
Again, it was important to review each row for orientation before I stitched it. Slowly, the top came together. I was glad that this was the main project I worked on during my virtual retreat. 

Hearing people chatting during the time I was piecing helped me stay on course. I was concerned with the bias edge after I had trimmed the edge of each setting triangle. I drew the line and I stay stitched the edge. Then, I trimmed the edge. I didn't have an issue stitching the skinny border like I could have. 

The day after retreat,  I began stitching the pieced goose border together. I was elated to find that I could piece the borders to the top using only the skinny connector component.  By the end of the day, I had stitched the pieced borders to the top. Bonnie ended her project at this point. My top measurements and her finished pattern measurements were close to hers! 

Beginning to piece the blocks together
I chose to add a four inch border of the sashing material. I like the effect it added.I had intended to use the sashing fabric as the binding fabric; but, after using it in the border, I didn't have enough left. I had a piece of a red print that I decided to use instead. I've cut the binding and prepared it. 

I've been preparing the binding when I finish the top. Having the binding ready to apply helps me finish the project after I complete the quilting. I've been stalled in the past because I had used the binding fabric in another project!

Finished top
This is the first time that I went with a different color way in Bonnie's mystery. I'm pleased with the way the quilt looks. I sure didn't know in the beginning that I would like the fabrics in the top so much!

I have auditioned fabrics and pieced them into a back. This post is long so I'll save the photo for a future post. Perhaps, I will be able to quilt this project next week and be that much closer to a finish!  I'm linking to Cynthia and Oh Scrap/Quilting Is More Fun Than Housework.

FYI--Blogger continues to thwart me when I try to leave comments on others' posts. I've cleared my cookies, I've checked my profile and I cleared and re-entered my profile information. Other bloggers have suggested these options to solve the issue.

Sometimes, I can leave a comment and sometimes I get the blogger Whoops notice. It is odd to be able to comment on some posts and not on others. I'm so not a techie so if you haven't had a comment from me on your blog in a while, I likely wasn't able to leave one.