Wednesday, February 27, 2019

End of the Month

A couple heart blocks
Tomorrow is the final day of February. Where the time goes. . .I don't know!!!

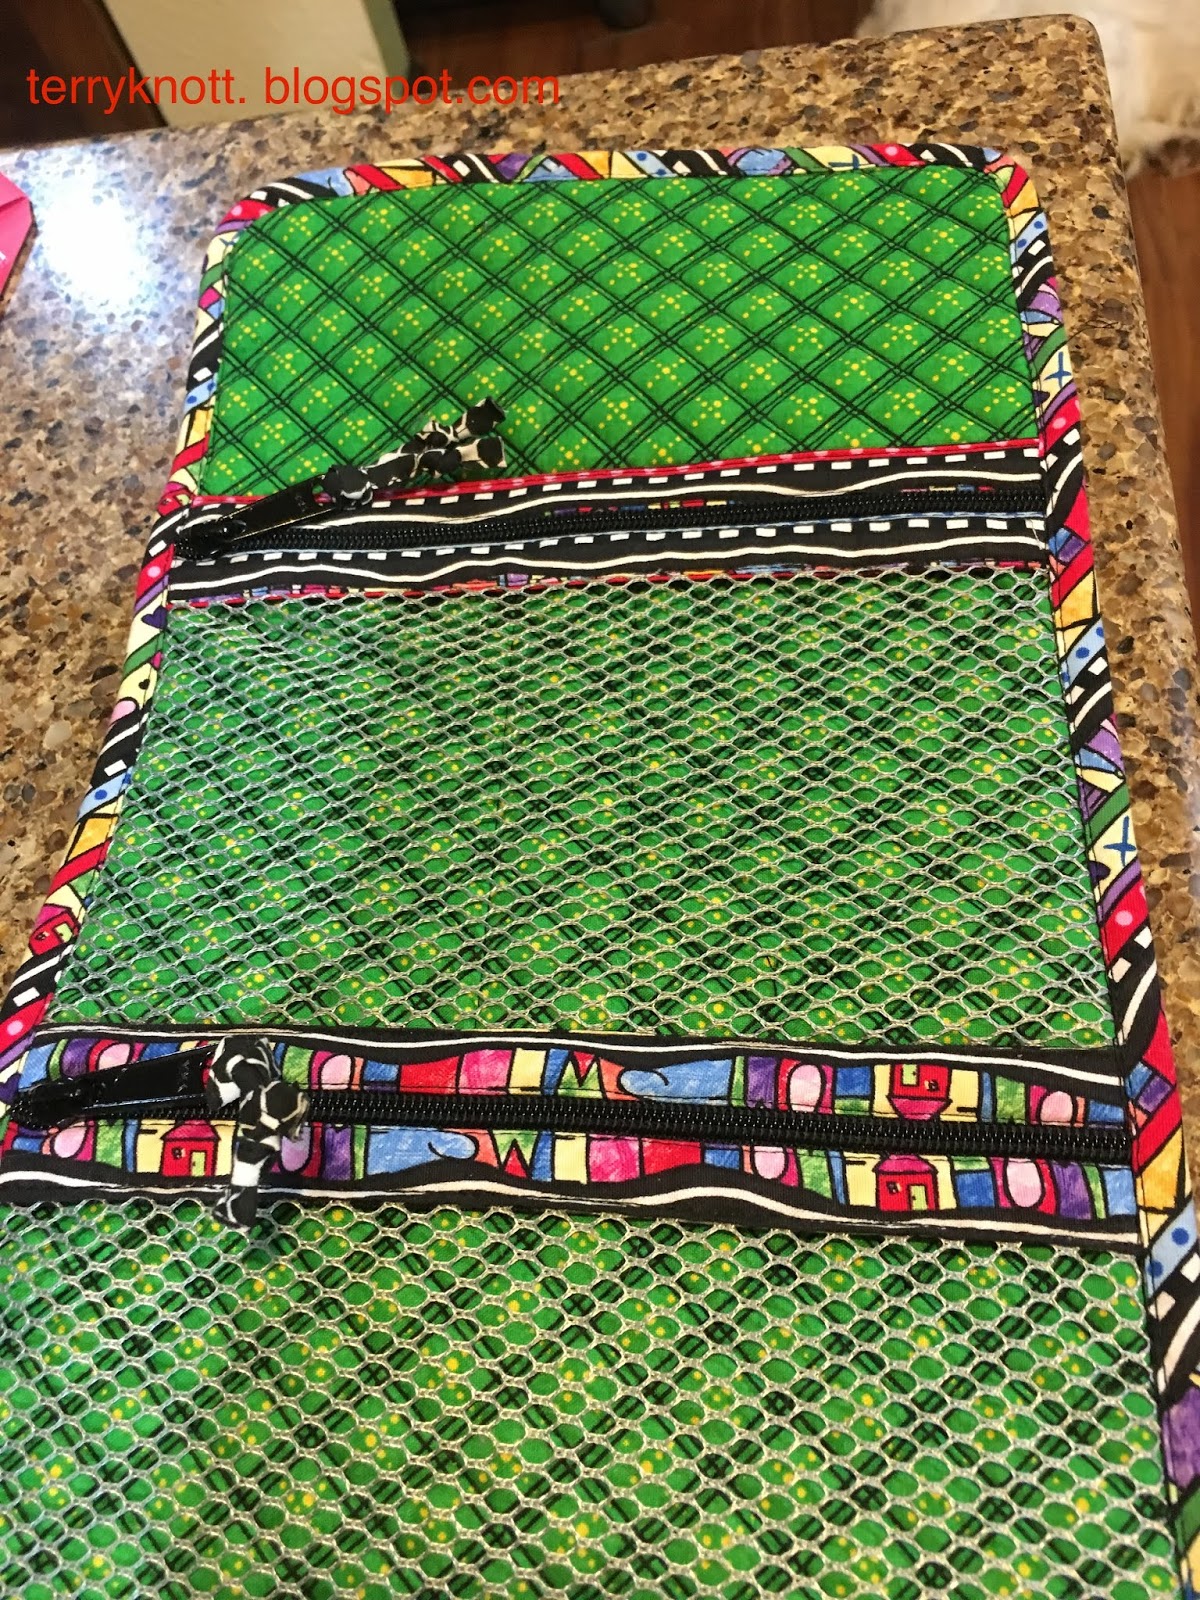
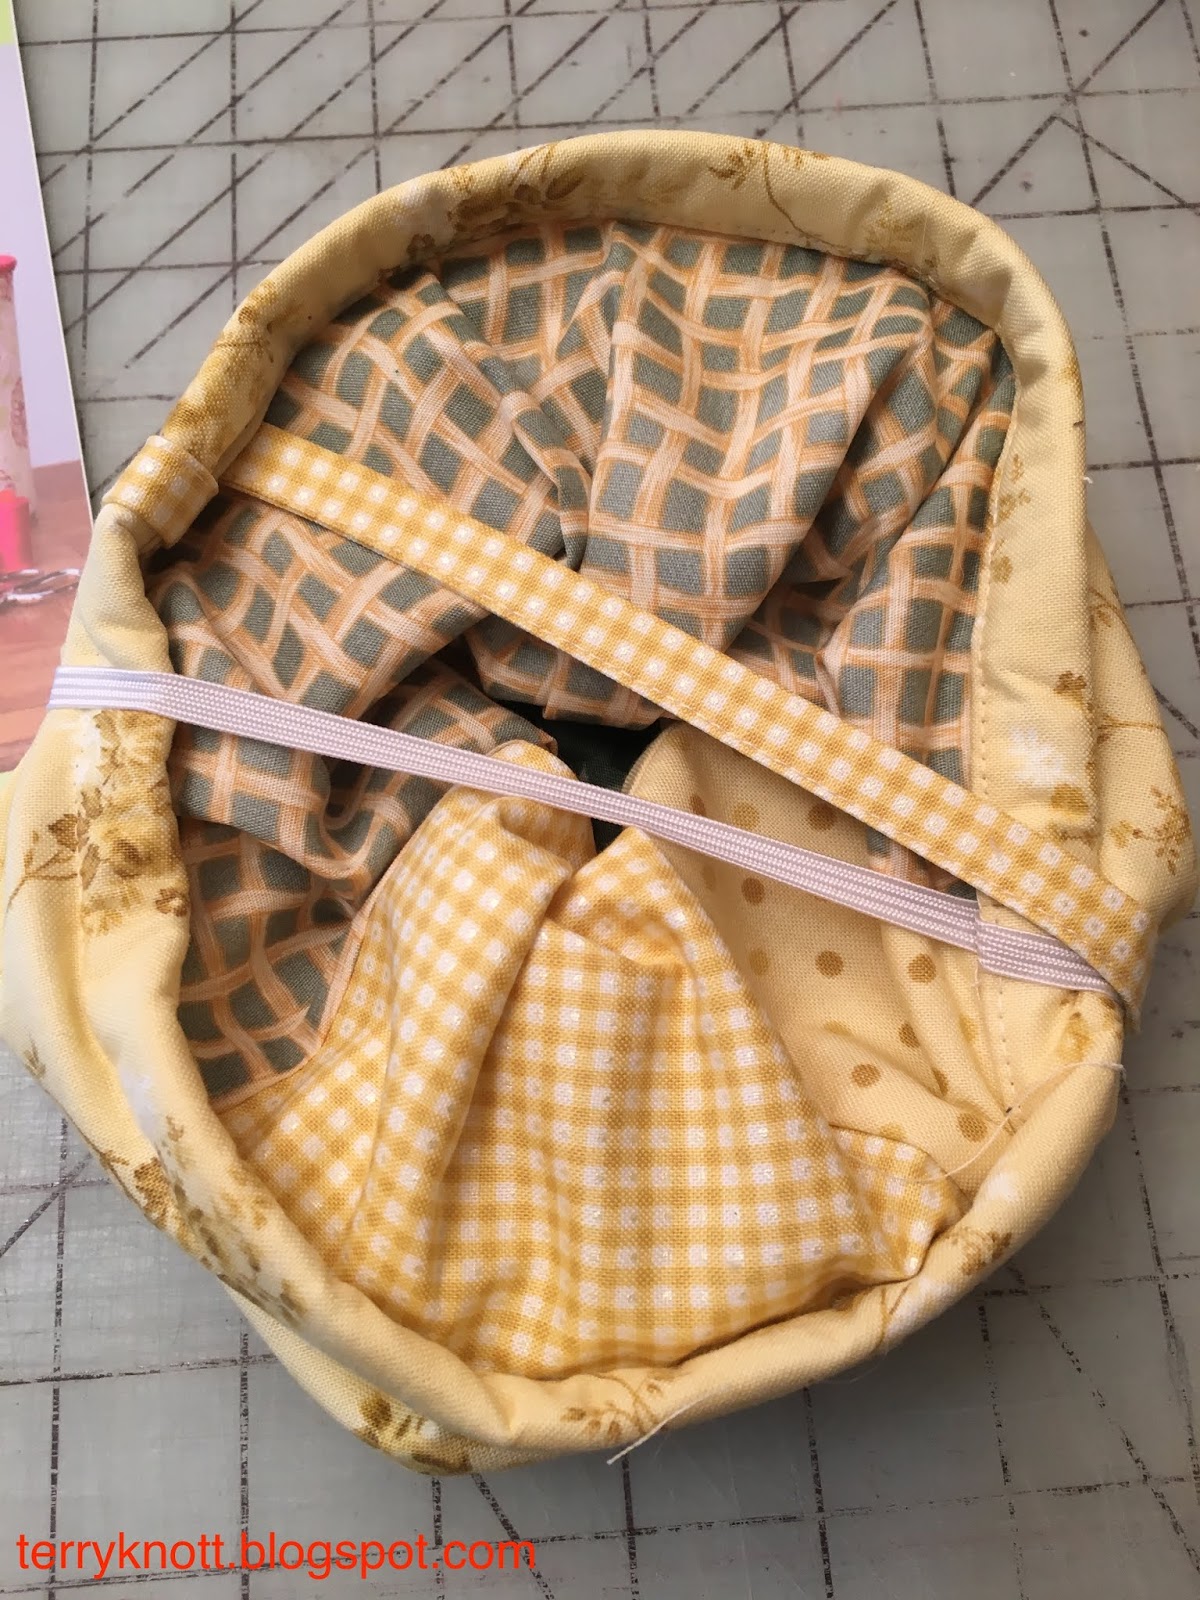
I finished four projects this month. One project was an online mystery quilt that I started in 2015! If you missed that post, you can read it here. I have a pop up and a bag ready for gifting. I'm again practicing regularly with my machine embroidery software.

I stitched two quilt blocks. One block was supposed to be a heart in bright fabrics including some purple that measured 6 1/2 inches square. The other block could be any design that measured 8 1/2 inches square using browns/earth tone fabrics. I looked at Pinterest for inspiration for the blocks. I found several and decided to give one pattern a try.
Star Patch--layered and pin basted

It is interesting that these are the same blocks, with sashing added to the top block. I like both blocks. Miss K has talked about making a heart quilt so she might like this block pattern. If you want to make a block, the directions are here.

Last week, I layered and pin basted Star Patch. I'm not sure when I'll begin quilting it; but, it is waiting for me!! First, I plan to stitch in the ditch ESS (every stinking seam)! After that, I hope I have heard what the quilt is wanting so I'll know where to start stitching!
Fill stitch manipulation exercise example

The embroidery software lesson this month was about manipulating fill stitches. I enjoyed working through the lesson. Miss J thought that it was interesting as she provided input on which manipulations looked the best to her. The end stitch sample may become a quilt label. I think it would be great for a youth quilt.

I also embroidered the word for the dog wall hanging. I'll save more information regarding that process for a later post. Of course, during the process, the project wanted a different approach. I am having fun playing with different options. Miss J offers her opinions too which has made this project extra special. While it felt great to see progress, I will be a little sad when we finish it!

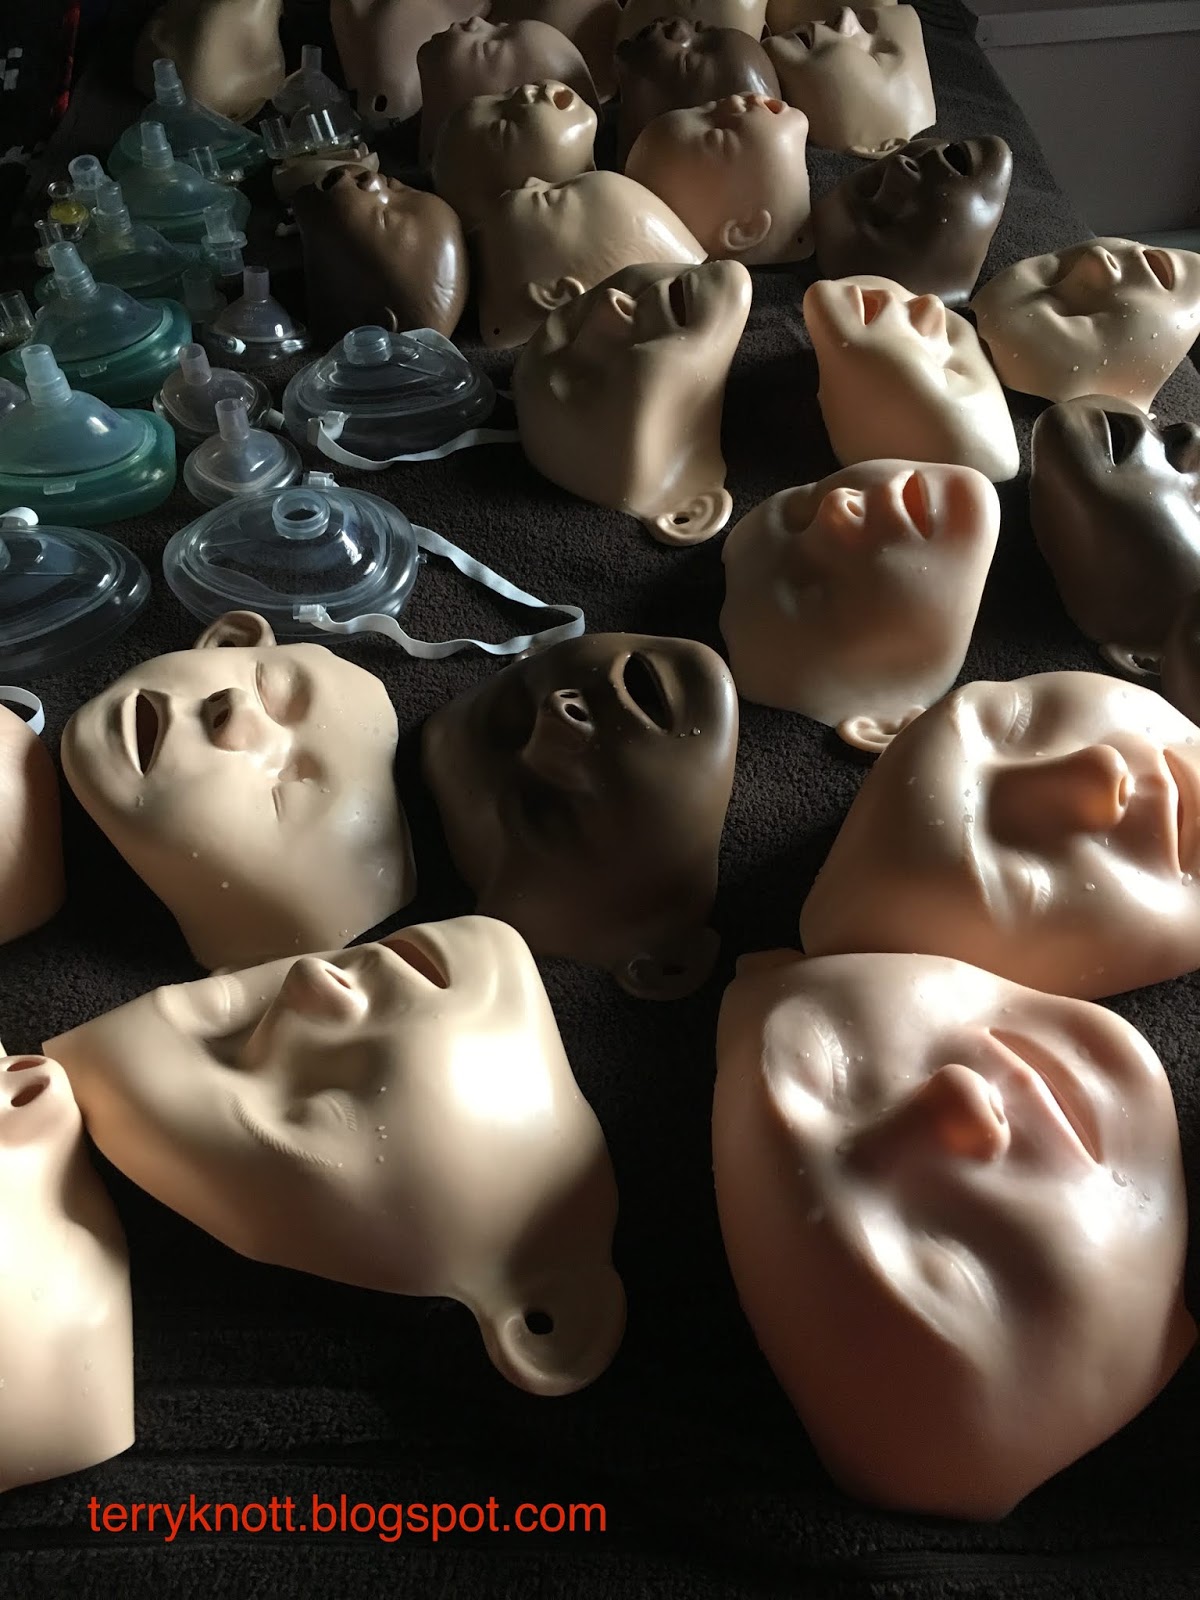
Laundered faces drying for the next class
In February, I trained: 9 in Lay Rescuer CPRs; 6 as Lifeguards; 9 as Lifeguard Instructor/Trainers; 27 in Basic Life Support CPRs for a total of 51 people. (Year to date, I've trained 160 people.) When I teach classes at the community center, I get to clean the faces and the pocket masks too. I'm including a photo of the supplies drying. I suppose some may find the view creepy; but, I wanted to share the amount of supplies it takes for a class. This class had nine participants attend with 11 participants enrolled. It is funny looking laundry!

We did postpone the community center class because the day before I was to teach, about four inches of snow fell on top of a thin layer of ice. It is rare for Mother Nature to provide us with snow that sticks so late in the year.

This week, she even provided us with a couple days of either no school or late starts because of snow and ice! Because snow/ice is rare for our area, people aren't prepared to drive in it. When they venture out, accidents that clog the roadways happen. Basically, it is a mess! It is smarter and safer to stay home and quilt!

In a few days, I will be speaking to a small guild--My topic is "Finding Your Artist." I'll be showing my challenge and book club quilts as I talk about the how I was inspired to create each one.  This will be a first for me. I'm nervous; but, in a good way!

Also next month, I plan to continue working through my list of projects for the quarter. I am using my
bullet journal. I still find it helpful to review my monthly goals daily. I completed all but two goals that I had listed. I haven't done as well with my habit tracker; but, I plan to do better in March!  All in all, February was a great month.


Sunday, February 24, 2019

Stash and Go bag--Fifth Finish 1st Quarter FAL 2019

Vinyl pocket on bag front
I thought that I would stitch this project before Christmas. . . well, I guess I did . . .but, in another year than when I had planned. Hey, in the end, it is all good!!!!

The first two bags I stitched, I had access to a series of posts that the pattern maker had posted. The photos were helpful. Unfortunately, the photos are no longer visible on those posts. I struggled with the written pattern directions. I ripped many of the steps and several steps I ripped three or four times!!!! Perhaps, I should not take an eight month break between projects!

To cut costs, patterns are produced with the minimal amount of printing; but, more photos and directions would have been helpful when the links in the pattern directions became inaccessible!
Inside of bag

For this project, I used the soft and stable that Annie recommends. I like the firmer end product so I will use it again in the future. When I was cutting the accent pieces, I took time and fussy cut the strips so that the words or a graphic design was featured. I liked the results.

One of the pattern features that I like is the vinyl pocket that is on the front of the bag. It is the perfect size for a card or a boarding pass. It is a challenge to line the pocket stitching up to the mesh pockets; but, I was close enough!
Finished bag ready for gifting

I used the zippers on a roll for this project. While I didn't find inserting the zippers, difficult, I never did figure out how I had applied the binding in my first two bags. In the end, what I did worked. I'll do some more searching. Perhaps, I will find a binding tutorial that will refresh my memory as to what I did the first time!!

This time I used gray mesh for the pockets. I like the look and am pleased with the overall project. Next time, I would make a larger curve on the corners as it was tricky stitching the binding around those tight corners. I still need practice with the binding application. I suppose another bag is in my future!

I didn't have many leftover scraps. What did remain, I cut into useable units following Bonnie Hunter's scrap saving system.

I used one yard of fabric from my stash. My goal this year is to use 57 1/2 yards of fabric from my stash. With this project, I have now used 27 yards and have 30 3/4 yards left. This was goal number 12 on my 1st quarter FAL list. It is my fifth finish for the quarter.


Wednesday, February 20, 2019

January Embroidery Lesson

Stitch out of class exercise
The January Bernina embroidery software lesson was all about reshaping letters and words. I worked on the first part of the lesson many evenings. It looked to me to be the most simple of the lessons. Using an outline of a fish shape, the goal was to insert the word fishing into the shape. It was an exercise to practice shaping the letters into the shape. I wasn't able to get the N to look as nice as the finished file; but, I did practice a lot!!!

One of the participants in class made a little bag that said fishing for change and she embroidered a small fish on the bag. It was really cute!

I thought the second exercise of stitching words at various angles would be the most difficult. Actually, it was easier than I had thought. Again, the finished file looked better than my attempt; but, I actually had fun with this part of the exercise.

One of the participants made a double heart shape and inserted all sorts of Valentine worthy words. It was such a cute design!

The third exercise was shaping the letters by blowing them up. It was an interesting part of the exercise. One of the class participants made a Valentine card for her husband with the design.

I was impressed with how nice the letters stitched. My solo attempts didn't stitch as well as these letters. I'll be working on adding a few words to a book club quilt project now that I finished the mammoth quilt (AKA Gardener's Mystery).

I don't know that in a couple weeks, I could repeat this lessons; but, I am pleased I completed it!

Now on to the February lesson!


Saturday, February 16, 2019

Pop Up--Fourth Finish 1st Quarter FAL 2019

View when collapsed
At least a couple years ago, I purchased this Pop-Up kit at a quilt show. I remember thinking that the sample sure looked doable as well as making a nice gift. I read through the directions and then I put it away. . .which was a bad move because when I took out the directions to start, I didn't feel nearly as confident as I did when I bought the product!

I cut out the pieces from fabrics that I had previously selected. For small projects, I've been trying to use fabrics from my fat quarter collection. These pieces were parts left from a previous project. I thought that I had enough; but, was short one six inch square for the bottom. I had to do a little searching but, I found a fabric that would work. I also needed to piece the fabric that I had selected for the inner part of the pop up. I like the extra sparkle the pieces added.

After I had cut out the pieces, I cut the leftover scraps into useable pieces using Bonnie Hunter's scrap saving system. I now have a few squares and a couple 1 1/2 " strips ready to be placed into a future scrappy project.
Finished Pop-Up

The Pop-Up went together well and I ripped nothing. . .which is rare! I thought that cutting and piecing the circle would be a challenge. I found that cutting the exact circle size with my circle ruler worked great.

The ties or the elastic are used to close the Pop-Up for transport. For this project, I decided to attach both the ties and the elastic strip to it. I didn't know which would work the best. I also thought it might be nice to have a choice!  I think that I like the tie closure best.  I also decided that I wanted the ties to be on the inside of the pop up. Another time, I might choose to put the ties on the outside for a more decorative look. This Pop-Up might be gifted. It could be used as a thread/scrap catcher when sewing with a small group or going to a class/retreat.

Although the pattern calls for two fat quarters, I used about a quarter yard of fabric. My goal this year is to use 57 1/2 yards of fabric from my stash. With this project, I have now used 26 yards and have 31 3/4 yards left. This was goal number 18 on my 1st quarter FAL list. It is my fourth finish for the quarter.

Wednesday, February 13, 2019

Gardner's Mystery Reveal--Third Finish for 1st Quarter FAL 2019

Quilt label
When it comes to preparing the quilt edge for binding, usually, I mark the line for the outer edge of the quilt and stitch it.

Sometimes, I add a piece of twill tape to stabilize the edge before I stitch the binding. After I've stitched the binding the first time to the quilt, I trim the excess. This time, as I basted the outer edge line, I kept catching the backing fabric.

After ripping and restarting a number of times, I managed to still catch the backing in several spots. Rather than rip and repair, I trimmed the edge before I stitched the binding. It worked well enough that I might follow that same process another time!

Although I enjoy hand work, I decided I needed to improve my machine binding sewing skills. It is faster to stitch all but the corners via the machine! This time, I set my needle at 1. I used the 39D (a dual feed foot) and stitched using the edge of the foot as a guide for the first stitching.

I had cut my binding at 2 1/2 inches. When I start stitching the binding to the quilt, I use a basting stitch for the first six to eight inches. Then, I check to see if the folded edge of the binding is going to cover the stitching line during the second step. If it is, I restitch using my regular stitch length. If it isn't, then I change the seam depth and do the test again.

Finished back
For the second step of the machine stitched binding, I glue basted the binding in place. I like running a little bead of glue on the binding and then pressing it into place. This step helps me top stitch the binding in place without pins. I used the 10D foot with the needle position at 2 to complete this step.

I created the label and the sleeve. Some time ago, I picked up a bunch of labels from the guild free table and this one seemed to be "just" the one for this project.

The label is important. I try to include the usual information: who it is for, the inspiration and materials used. Lately, I've been including how much the materials cost and how many hours I spent. Generally, people have no idea how much actually is involved in making a quilt. Also, I like knowing what batting went into the project, what thread I used, etc. Once it is documented, I can remember more of the story! I hope all of you label each one of your quilts. A simple date and your signature will suffice.
Finished front

I hand stitched the label and the sleeve into place and wella. . . .A FINISHED project. This project began as an online mystery BOM (Block of the Month) in September 2015. You can read the various posts here:
Piecing Posts: BOM Updates, BOM Update, Stitching the Clues
Quilting Posts: Quilting the Mystery, Quilting the Center, Square in a Square Border, Stitching Sunshine, Log Cabin Background, Shadows and Final Border

It looks great on a bed although you will have to take my word for it because I can't take a photo of the whole quilt as there just isn't room! I still like the back and think it could be a reversible quilt! I used 25 yards of fabric from my stash in this project. I've "petted" some of the batiks for more than ten years so seeing the fabric in a quilt instead of on the shelf is wonderful!

My goal this year is to use 57 1/2 yards of fabric from my stash. With this project, I have now used 25 3/4 yards and have 31 3/4 yards left.

This project was goal number 1 on my 1st Quarter 2019 FAL list. It is my third finish for the quarter. I will be gifting it to my mom for her birthday in January 2020!

Sunday, February 10, 2019

Quilting the Mystery--Sixth Step Shadows and Final Border

Large square pebbling
Since the last post of documenting this project, I finished quilting the narrow pink border. Since red thread was in the machine, I decided to quilt all the areas that required that thread color. I pebbled the center circles of the flowers. Pebbles are also in the center section of the quilt so this was a way to unify the quilting. There were two sizes of squares in this quilt. It took me about 10 minutes to quilt each of the larger squares and about seven minutes to pebble each smaller square.

I also pebbled the brown squares. My thought was the viewer, when standing in front of the quilt, would see the pebbles. When the viewer was nose close to the quilt, they would see that the pebbles were the center of a flower motif.

Loops added to the square in a square blocks
Once I had completed quilting the shadow in the squares, the quilt was telling me that it wanted a little more "something" in the square in a square border. When I have trouble figuring out what the "something" is, I look at other parts of the quilting to see if there is a "part" that could be repeated.

I decided a loop type filler would work. I used a silk thread that blended into the background. The additional quilting seemed the answer. It took me about three minutes per block to stitch the additional texture.

Getting ready to block
The large brown border was the last section to quilt. Originally, I had envisioned feathers in this section or some extra large pebbles stitched in a pink 40 wt thread. . . the quilt didn't want that plan. I decided to repeat quilting straight lines. The quilt was happy with that decision! Again, repeating what I did in the inner brown sashing made this decision work well.

I laid it on the floor expecting a lot of bumps and wonkiness; but, it wasn't bad. It actually measured fairly close to 89 inches square. There were a few lumps. Because I am unable to be on the floor more than a few minutes and because I no longer have floor space large enough for a quilt this size, I decided to steam the lumps on half of the quilt as that was the amount that will fit on the floor. I repeated the process several hours later with the other side.

Measuring it after most of the lump removal revealed the quilt was still about 89 inches square. I'm moving on to the binding, sleeve and label.


Wednesday, February 6, 2019

Bonnie Hunter Mystery (Good Fortune)---Post 2(Clue 5-7)

Clue number 5--three triangles
After working with the orange strings I was happy to see clue five which was piecing an orange and neutral fabric together with a blue fabric. It was a good break from stitching strings.  Stitching a few hours a day, I finished clue five the day that Bonnie released clue number six.
Clue number 6--neutral strings in two sizes

Clue #6 was all about paper piecing neutral strings. I had a few neutral strings so I pulled the ones out that would work for this project. It was great to be able to save my "neutral" chunks! For these strings, I followed Bonnie's directions about stitching on the phone book page as my pages were similar in size to the pages that she used.

I do save the fabric bits that are left when I finish stitching a page. Sometimes, I make a smaller sheet of strings or I piece the strings together.  I'm liking this string piecing. I like the look of the strings.
Clue number 7--a combo of parts

I need to play more with strings this year! I like the mindlessness sewing to paper piece these. I also have a lot of string materials from Martha's stash.

New Year's Day, Bonnie released clue number 7. What was fun about this clue is that I got to use the blue HSTs that I pieced in clue number 2. It is fun to guess at what might be the next step with these parts. I also got to put together the four patches I made in clue number 1.

After participating in this mystery, I understand why people do this each year. I would like to do this again next year! I do know that I'll be sorry when this mystery ends!


Sunday, February 3, 2019

Miss K's Cross Stitch--Second Finish 1st Quarter FAL 2019

Miss K stitching on her project
Floor games with Bowdee as "Head Licker"
Miss K came close to finishing the stitching on her little cross stitch project during her recent Monday visit. We had a great time stitching. Had we not had to do some unstitching, she would have finished. I marveled at how she can stitch in interesting body positions! I marveled at her concentration! Getting the needle into the hole you want is hard!!!


We took a little break and went on a field trip to visit JoJo and her puppy Bowdee. Both grands LOVED meeting Bowdee almost as much as he LOVED meeting them. He got to play chase. He got to lick and love them both.

There was a lot of giggling and comments like how soft his hair is. Throughout our visit, he would look at JoJo as if to say, "Hey, Mama. . .I want one of these toys!!

Photo shoot with Bowdee

Bowdee was the perfect gentleman. Both grands look forward to a return visit. I understand that he took a long nap after our visit!
Progress at the end of the day


Back at our place, Miss K returned to stitching. At the end of our time together, she was excited to pose with her project. She has two more colors of thread left to apply. She looks forward to putting it in the little frame that came with the kit. I think she likes it so much because it is a shade of pink!

Finished ornament
Yesterday, we stitched together and finished the leaves and flowers.

It was tricky getting the embroidery work into the little frame; but, we managed! After we were admiring her framed work. Miss K said it needed a hanger. So off to the studio we went in search of an appropriate material to make a hanger.

I thought she would choose a pink ribbon. . .was I ever incorrect! She saw that little strip of pearls and I knew the search was over. We wrapped some thread around the beads to tie the ends.

I sure hope that her friend appreciates this gift. It is so cute in person. She plans to gift it for Valentines Day. This was goal #15 on my 1st Quarter FAL list and my second finish for the quarter.

Finished ornament with the maker
Miss K was so proud of her creation.  I'm so proud of her work. She has a great eye for color and texture. I look forward to working with her on her next project. We re making a wall hanging out her mermaid drawing.

Like last year, I will be posting at either the end of the month or at the beginning of the month the participants that I trained. Last month I taught 27 participants in Basic Life Support CPR, 18 participants in Bloodborne Pathogen training, 42 participants in swimming lessons and 22 participants in an inservice training for a total of 109 people.