Sunday, December 31, 2017

Piecing the Clue-Happy New Year!


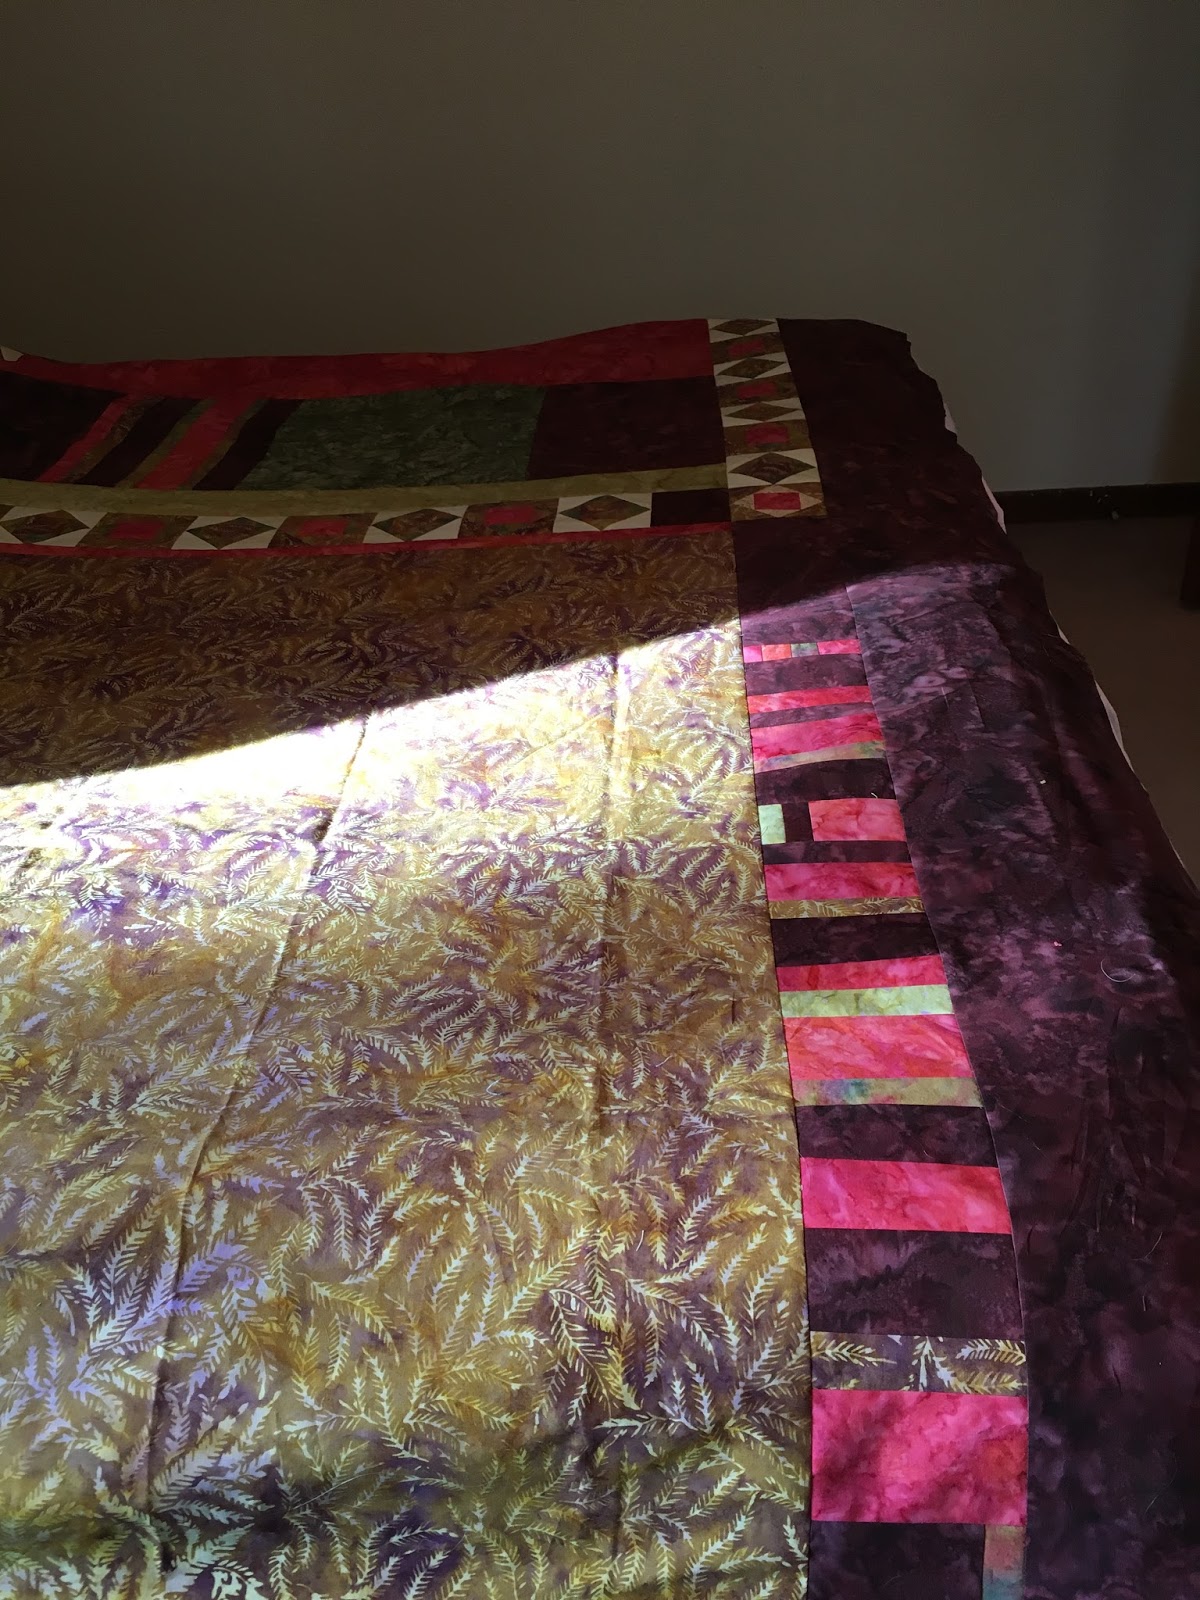
Finished top--measurers 92 1/2 inches x 92 1/2 inches
Happy New Year! I hope that all your celebrations are fun and safe! I can't believe how quickly this year has flown. I suppose that I was too busy in the studio as well as hanging with the family to notice how quickly the time went!

I imagine 2018 will go by at least as fast. Tomorrow, I'll begin thinking about projects to complete and goals to accomplish. Today, I'm sharing my progress with the mystery online block of the month (BOM).

When I posted my quarterly goals regarding finishing this mystery BOM project, I thought I just had one clue left to piece. Turns out that I had two clues! The first clue or clue number nine was to put the blocks together and add the pieced border to the top. I was psyched that my points ended up okay and that the border size was the same size as the top!

The second clue or clue number 10 was to add two more plain borders. I cut the fabric. Next I stitched it to the top. That process went well. It just took longer than I envisioned. It is 92 1/2 inches square so long seams are involved!

It is too big to photograph anywhere in our house. In my finished photo, there is a 4 1/2 inch dark brown border outside of the pink border which is too dark to see.

Then it was on to piecing the back. I like to use the leftovers from the top so the "remains" don't go back in my stash. Sometimes, I have leftover parts which I incorporate into the design. I like the personality a pieced back adds to the quilt.

Small bits pieced together
into a useable strip
The strip pieced into the back


First, I stitched the small pieces together. Then, I added larger chunks until I had created enough fabric for the back. It is freeing to piece the back.  For example, no one knows if the seams are quarter inch or not! Besides, needing to have six yards of fabric for the back can get expensive. Why not use what I've been enjoying on the shelf?

The pieced section of squares within a square was one of the steps in the mystery; but, I didn't have enough contrast so I remade the step. I saved the low volume strip to add to the back. I love how much interest those strips add!

I did purchase a remnant because I didn't have enough leftover fabrics for the back. The green batik in the photo was a yard of extra wide backing fabric. It worked perfectly with the other fabrics in this back.

The back it too big for me to photograph all at once; but, you can get the idea of what it looks like. When I piece a back, I generally allow a full day to finish the task. It is surprising how long it takes to sew the little bits together and attach to the bigger bits. Then there is a bit of designing that happens as to how the bits will fit together!

Leftover bits
I don't have many bits leftover for cutting into Bonnie Hunter's scrap saving system. I do have a little yardage left of the dark brown batik and a little yardage left of the cream background. Since my stash is low on darks and lights, I planned to have a little leftover!

Pin basting the layers together was a big job. I chose a wool batting by Hobbs for this project. I tried to baste the layers on my kitchen table; but, the process was just not working well. (I was concerned that I wouldn't keep the back square enough in relation to the top.)

I took the top, the batting and the back to the floor. Ugh! Floor work is not for me! My knees, neck and back complained mightily the entire time. After a couple of days, I was over the pain. I did close the pins and trim the excess batting at the table.
Pin basting in process

I think that was the last time I'll be on the floor pinning a huge quilt. I'll either refrain from making such huge projects (probably not a realistic solution since I have at least three more big quilts in the works) or I'll have them basted on a longarm.

I'm pleased the project is ready for ditch quilting as that was my goal at the beginning of the quarter. I did cut the binding and piece it so it is ready when I reach that stage. The sleeve is cut and ready to be applied when the quilting is finished.

This was an online mystery BOM with members of "The Quilt Show (TQS) in 2015. I sure enjoyed piecing the clues and kept up until clue nine! I also enjoyed making a medallion style quilt. For those that wanted a smaller size project, it was possible to stop after you had reached the size you wanted!

Now to be thinking about what kind of fun I'll do in all those sections. Perhaps, I'll incorporate ruler work into the quilting. . .


Wednesday, December 27, 2017

QAYG Finish--13 Finish for 4th Quarter Finish-A-Long (FAL) 2017

The label


Finishing the QAYG was #14 on my 4th Quarter Finish-A-Long list. I named it Skittles and Sherbet because the back
is like a package of skittles candy and the front is like looking at a dish of sherbet! This was a block of the month (BOM) project that utilized Westalee rulers. If you want to read the past posts, I've listed them below:
Month 1, Month 2, Month 3, Month 4, Month 5, Month 6 part 1Month 6 part 2, Month 7, Month 8

The back

First, I inked the label and basted it to the quilt back. I had this premade label in my stash for years. It seems to work great on this project! I've decided that I am going to try to capture the particulars of my finished projects. For instance, how many hours it took or how much money I spent or what kind of batting I used. Maybe someday I might want to know that information!

Second, I stitched the binding to the quilt. I'm getting better at the machine stitching process. I sure like how quickly this part goes using the machine instead of stitching the second part of the binding by hand!

The front


Third, I added the sleeve. I wanted to use the star fabric because I thought it added to the design of the back. The challenge was that I didn't have much left. I managed to piece a number of scraps together to make enough fabric for the sleeve. This is one of those times that I actually like the back better than the front! Which do you like better? The front? Or, the back?

I used 13 yards of fabric from my stash which brings me to 58 1/4 yards used from my stash this past year. I exceeded my goal of using 50 yards over the year!

Sunday, December 24, 2017

Christmas--2017

Stockings hung by the fireplace
My favorite Christmas wall hanging stitched in 1996
T'was the morning before Christmas and all through the house not a creature is stirring. . .not even Bailey the dog! The stockings are hung and ready for St. Nick's visit. Quilted projects are visible throughout the house and provide cheer for the season. The tree is decorated . . .some ornaments I purchased through travels, some I made and some were given by friends and family. Many of the ornaments are hand crafted. Decorating the tree always brings back memories of people, places and activities! This year, the silver walnuts returned to the tree. Bob made these long, long, ago and he would rather that these ornaments would be retired. I like the sparkle they provide so he humors me!

The packages are wrapped and wait under the tree for their destinations tomorrow. Miss K is quite concerned that Miss J has three packages under the tree while she has but one. On closer inspection, she learned that one of the three packages is for her dad, James and one package is for Jérôme. Although she feels better that there are equal packages under the tree for the two of them, she is now concerned that there is only one for each of them out of all that are under the three!
The tree and the packages

Tomorrow, we will be having salmon for dinner. Today, I'm baking a dairy free cheesecake for Christmas tomorrow. I hope the major ingredients--cauliflower, coconut oil, cashews and honey will meld together and be delicious. If not, we will have another memory about Christmas 2017!

This evening marks the year anniversary of my dad's death. I'll be toasting to his memory later this evening. It took 11 months to close his estate as per his wishes. It went as he said it would and I learned a lot about my family.  I continue to regularly check-in with my dad's wife.

My youngest brother voiced his opinions. When he didn't get his way, he stopped communicating with me. My younger brother also voiced his opinions. In the process, he called me many names as well as let me know that Dad should not have given me anything as I hadn't earned it. His words hurt my heart. I didn't engage in the name calling.

Lace bell made by a special friend this year
The two phrases that were the final straws were 'blood sucker' and that I was 'after blood money.' I haven't spoken to that brother since July. I did text both brothers at Thanksgiving and received no response. I will text them in the morning because they are family.

My mother also provided input to the situation and when she learned my brothers didn't get their way, stopped meaningful communication. At no time, did she ask for my side of the situation. She may be over for dinner tomorrow; but, if the roads are icy over the mountain pass; she may opt to be safe and stay home.

I am grateful for the relationships that I have with my two daughters. They each are my favorite! I am thankful that I am building a special relationship with each of the grands. Most of all, I am grateful to my husband for his continued support. He has helped me see the bigger picture and to skip the small stuff. He is my best friend and the love of my life. He brings joy to my life each and every day. Life can't get better than that!

So to all my readers, I wish you a Merry Christmas. May you be making fond memories with friends and family this holiday season!

Wednesday, December 20, 2017

Gift Bag--12th Finish for 4th Quarter Finish-A-Long (FAL) 2017

Finished gift bag
I enjoyed that pristine ironing surface for a couple of days and I kept wanting to press a project! So I decided I'd work on the gift bag project from my list.

I picked up this little gift bag kit at our guild quilt show last April at a vendor booth that always has interesting and fun one of a kind items. This project was goal number 23 on my 4th Quarter Finish-A-Long list. It is my twelfth finish for the quarter! It has been sitting in a basket for completion all this time. It takes two pieces of coordinating fabric 9 inches by 22 inches, four small bells and one 1 inch ring to make this bag. This bag took me a little more than an hour to make.

The little bells jingle and just made me smile when I viewed a finished bag at the guild quilt show last April. I thought this would be a great project to reduce the number of fat quarters that are overflowing a storage container.
Two more gift bags

After I finished this bag, I cut out and assembled two more gift bags. I realized while stitching the first bag, I didn't comprehend the directions as they were intended to be understood! I used to think that I was great at following directions. . . .now, not so much.

Writing directions is an art form as the meaning in what is written can often be interpreted differently from the writer's intention.  These days, fewer words and fewer diagrams are used to convey the instructions so allowing my own thoughts to take over usually result in a different method. It took me about an hour and a half to make the next two bags.

I used 6mm bells for the second bag session; but, I should have purchased 9mm bells because the 6mm bells don't jingle! There should be a law that bells that don't jingle can't be sold!

I have enough small bells to make three more bags which I will stitch to use up those small bells. Yesterday, I purchased a package of 9mm bells. I also am looking for a site to purchase a bunch of rings as well as bells online. If you have a resource, please share it in the comments.

I was thinking Valentine's Day and the grands as I was stitching. I like fabric bags because they are reusable; they are easily stored flat; they don't rip or tear and they are easy to fill!

Two fat quarters will make two bags. I've now used 44 1/4 yards of fabric and I'm inching ever closer to the 50 yard goal. I will be making more of these bags next year!


Wednesday, December 13, 2017

Iron Station Recover--11th Finish for 4th Quarter Finish-A-Long (FAL) 2017


The before photo with the new muslin
Tools for the job
Recovering the ironing station was goal number 20 on my 4th Quarter Finish-A-Long List. This was a job that should have been done several years ago! Removing the staples that secured the fabric to the table surface, didn't take as much effort as I had remembered from the last time that I did this.

B ready to staple the last side of the cover
When I pealed off the old cover, parts of it disintegrated. I shouldn't have waited as long as I did. Next, I laid the muslin fabric on top of the table. I just tore the fabric to the approximate size that I wanted which was fast and easy.

I've several layers of polyester yardage that was in my grandmother's stash as padding for the table.


                                                                      Then I asked my dear sweet husband, B, for the staple gun. He brought me three--each one has a different length of staple. He looked over the project. I showed him how I planned to staple the fabric to the table and asked which of the three did he think would be the best option. As I was holding the fabric to the table, he reached over and selected a stapler. Next, he stapled while I held the fabric taut.

I really appreciated that he stepped in to complete the stapling for me without me asking. He is thoughtful like this every day. He's a gem! It took him less time to staple than it did for me to pull the staples, cut the cover and position it! I really appreciated his help. Plus his corners were much better than mine! If the job would have been left to me, I still might be "in process!"
The after photo
Now, I'm looking forward to pressing on this clean surface! Thanks again B for helping me with this finish!! I used 1 and 3/4 yards of stash fabric which brings my yearly total to 43 3/4 yards. I'm inching closer to my 50 yard goal!

Since finishing this project, I learned another quilter covers her table with an outdoor fabric because she says that it lasts longer. Perhaps, the next time I approach this job, I'll check into that option. Dear readers, what do you use to cover your ironing surface?


Ornament Exchange Results

I shared here what ornaments I was gifting in the exchanges that I was participating in this year. In this post, I'm showing what I received in each exchange.

Game rules
We played a fun game at my neighbor's ornament exchange. The photo shows you the rules of dice game that we played. When all the gifts are unwrapped, the gift in your lap was yours. The game was a hoot! There were wonderful ornaments. It was fun to see who see who would steal for a snowman and who would steal for a santa. I had my heart set on a wonderful free standing lace bell that I stole with every available chance.  But, it didn't end up on my lap when the last present was unwrapped.

Instead, I received a beautiful cross stitched "Merry Christmas." The wrapped box was beautiful and the maker is someone that I have admired for years. For a number of years, she taught a block of the month (BOM) at a local quilt shop of a pattern that she designed. I always appreciated her "done is better than perfect" mantra.

Blue butterflies
The butterfly that I made for this ornament exchange went home with someone who told me the butterfly had a significant meaning. She didn't go into more detail. Throughout the unwrapping of ornaments, if she had a chance to steal, she kept stealing the butterfly which tickled me! At the end of the get together, she asked me if she could pay me to make her a blue butterfly. I sensed the butterfly reminded of her mom who died last Spring. She was super close to her mom so I agreed to stitch a blue butterfly. . .BUT, at no charge. I figure gift giving, even though it is the prime season now, really should happen all year long. I told her she could either pay it forward or help me out in the future.

In the original butterfly, I didn't make too many changes in the thread selection from what was suggested. Don't laugh, but it took me about three days and three tries to come up with a thread selection for her request that I liked. I have a selection of blue thread; but, wouldn't you know it, I didn't quite have enough to get the shading to work. This was a good color exercise for me. I did calculate how long it took me to make the final butterfly. . .about an hour and a half for one!

Items from two of the ornament exchanges
I still have some adjustments to make so that the outline stitching really does fall around the outline. I found that using two layers of cut away stabilizer hooped with one piece the "grain" going horizontal and the other piece going vertical along with two layers of tear away stabilizer improved the results.

Contents of the online ornament exchange
The snowman came from the All Club Christmas party gift/ornament exchange at Quilting Delights. It isn't an ornament; but, rather a charger for your mobile device. It is cute! At the party, we were welcomed with a dessert buffet, and themed decorated tables. In addition to the ornament, we each receive a little gift! My gift was a quilting mystery book which will be a fun read. Thanks, Thea and Robin for putting together such a fun party!

The package arrived from the online exchange. It came from a lady in Ohio who has five children and three grandchildren with one on the way! Her favorite Bible verse is from Philippians--"I can do all things through Christ who strengthens me." The snowman tin contains a chocolate chip cookie. The ornament is really heavy and feels like it is ceramic but it looks like it is wood! The candies were a great cushion to protect the ornament. It all came in a bubble mailer which was a great idea. This activity was a fun way to get to know about someone else!

This weekend, we will put up the tree. I'm waiting for a few more purchases to arrive and I've a few small purchases left to "procure." I've written our Christmas message and the packages that needed to travel have been sent. Last Sunday, I wrapped packages which are now waiting to be placed under the tree. B and I have determined the Christmas menu and I've written our annual holiday message which will go out in the holiday cards in the next couple of days. Today, our youngest grand, J and I are baking a batch of cookies that are J friendly. (Dairy doesn't agree with her.) The holiday is approaching and youngest daughter is arriving on Tuesday. The time with family and dear friends will be over way too fast for me; but that is my favorite part of the holiday.


Sunday, December 10, 2017

Little Gifts and a Whole Lot of Fun

Make and takes
The day after Thanksgiving was the owner of Quilting Delights birthday. This year, she invited her customers to participate in make and takes for a small fee. She had two machine embroidery designs on Friday (her actual birthday) and two designs on Saturday.

The first day, you could choose to stitch a mini stocking gift card holder and/or a small zipper purse. Both machine embroidery projects were completed in the hoop. I made two stockings because I couldn't have a little stocking for one grand and not the other! I relearned how to transfer a design to my machine and how to make minor edits--like changing the name. It was a good project to practice thinking about the order of how the steps should be accomplished! As I finished, I thought that if one added a ribbon loop, the stocking could also be an ornament. Then I decided that I should purchase the design because these would be fun to give as well as look nice as an embellishment to a package or dress up the holiday table as a placeholder.

More mini stockings
The small zipper purse used a lot of thread as the mesh front is all thread. Again, I decided that this would be a good project for future gifts so I also purchased that design too! When I make these, I will play a bit with the process. I think that if the fabric has a little stabilizer, it will feel a bit more sturdy.

I had so much fun playing that I decided to return the second day. We made a gift tag and a scissors holder. I have a similar shaped gift tag that I could add the design that we made or I could make the design into an ornament. The scissors holder is really practical and I may make those as gifts for next year!

Since then, I've made a number of mini stockings which I plan to use as part of the Christmas place setting. I've a few ideas of what can go in the mini stockings; but, need to come up with a few more thoughts! My friend Gail came for a sew day and I asked her to bring four pieces of felt. . .

Gail and her mini stockings!
Long story short, I gave her a couple more pieces of felt and she stitched three mini stockings for her grands! She was as exuberant during the stitching process as Miss A was with the embroidered butterflies. I do understand because watching the needle create the pattern with the thread does feel magical!

These projects weren't part of my fourth quarter list; but, I've given myself permission to start new projects too. These were a fun diversion and this is just the season to be stitching stockings!

Wednesday, December 6, 2017

Rue--post 1 of 4

Hexagons waiting for a design
This hexagon project has been on my finish along list for at least a couple of years. As I've finished other goals on my list, I've been mulling over options for this project. The hexagons were made using different techniques that JoJo over at Through My Hands shared with me at least four years ago.

Reverse side of the hexagons
I machine pieced the large one using Gyleen Fitzgerald's butterfly technique. Fabrics on two of them were preprinted with the hexagon seam line and cutting line printed. The bright blue one I hand pieced; the striped one I machine stitched. On the green one, I fused interfacing to the fabric and then glued the seam allowance to the interfacing. On the darker blue one, I stitched around the hexagon using an interfacing on the wrong side. I slit the interfacing; then turned and pressed each part of the hexagon which made individual pillows. I hand pieced the orange one using the English paper piecing method.

Horizontal view with pieces of net "visible"
I included a photo of the back of the hexagons so can see what I'm trying to describe! Stitching all these hexagons was so much fun! In fact, I found these hexagons to be a little like trying to eat just one potato chip.  . . almost impossible! More on that thought in a future post though!

I decided that I wanted to put all of my samples into one wall hanging.
Our book club read "The Hunger Games" trilogy a couple years ago. In the "Mocking Jay" book, one of the characters, Rue, was captured in a net.

It was that section of the book where I found the inspiration of setting these hexagons in a net because the hexagons reminded me of the flowers that Catniss (one of the main characters in the story) Rue.

Green flower with red ribbon accent
I was stalled first because I couldn't find a background that I liked and because I wasn't sure how to create the illusion of a net.

The background that I eventually chose, I like. Now that I have Joen Wolfrom's color class behind me, I realize that this background is a bit brighter than the other one that I had auditioned. The other one was more grey so now I know why it wasn't working for me!

I purchased a half yard of an orange print fabric for the "net" strips. Then I couldn't decide how to apply the narrow strips to the fabric. I could slice the fabric and insert the strips. But, if I wanted the strips to cross, matching the cut edge would be tricky. Plus, cutting the background would make the background smaller. Since I was limited with the background fabric, smaller wouldn't be good. So I decided to machine appliqué the fabric strips. 

Interestingly, I didn't use the fabric that I had set aside for the "net." Again, the fabric I had selected was a little too gray! No wonder that I wasn't excited about cutting into it! Instead, I used some leftovers from my QAYG project. I used the orange as sashing in that project.

I stitched the orange strips together, pressed the strips in half, stitched 1/8 inch from the cut edge and then pressed the cut edge along the stitch line.

After I had auditioned the strips and selected where I wanted to place them, I used a little bit of Elmer's glue and temporarily, fused them in place.

Blue flower with yellow ribbon accent
Auditioning the strips took some time. At first, I created an overall grid; but decided that approach gave me more orange in the piece than I wanted. So I channeled a little of Miss K and removed some of strips and shortened other strips. I liked how this approach gave the piece a more modern feel which is a direction I want to explore. I glue basted the strips in place and then machine stitched them into place.

While I was auditioning the strips, the piece seemed to want to go horizontal instead of vertical so I turned the piece horizontal.

Auditioning ribbon
The next step was stitching the green and the blue hexagons together. I had considered letting some of the "petals" separate from the flower; but, decided putting the flower together was better for the overall design. Earlier, I had purchased some narrow blue, yellow and red ribbon to accent the petals in some way.

On the green flower, I used red ribbon to accent the seam joins. My plan was to tuck the raw edge of the outer edge of the ribbon under the flower during the appliqué process. I liked how the red zigzag looked around the center so I didn't cover that area with ribbon.

Vertical orientation
On the blue hexagon, I zig zagged the edges together, then covered the zig zag area with yellow ribbon. When I placed the hexagons on the background, I decided that I needed more lines on my background. I auditioned some narrow orange ribbon which I liked so I appliquéd those.

 Then, the piece seemed to tell me it wanted to be vertical. . .so I listened! As I hand appliquéd the hexagons to the background, the one with the red ribbon wanted the ribbon ends to stick out and be three dimensional so I left it that way. I had planned to quilt more grid lines in the background to create the sense of the net; but, I had an idea of hand stitching some hexagon shapes in the background. I had a heavy weight blue and red thread so I decided to draw a few of these on the top and see if the idea in my head could transfer to the top!

My first few attempts at drawing were awful.  Then, JoJo reminded me that I could cut a template using my accuquilt. I did it. Actually, I cut one of each size and started drawing! This attempt worked!

Hexagons drawn & ready for the next step
I drew a bunch of hexagon shapes of various sizes. Now, I'm thinking that hand stitching this many may take me a year. . . .well, not really, but, maybe hand stitching could take longer than I want to spend. I'm concerned about stabilizer and my stitch length.

Pieced back
I pieced the back and figured out what I want to use as the hanging sleeve which gave the piece time to "talk" to me about what I wanted to do with the drawn lines.

I listed some of my options:
Should I hand stitch the outlines in a contrasting thread?
Should I layer and pin baste and quilt the lines via machine?
Once it is a quilt sandwich, should I try bobbin work?
Should I use a contrasting thread or similar thread to quilt the hexagons?
Auditioning hand stitching using
embroidery thread
What should I do with the spaces that I haven't drawn a hexagon?
Seriously, how much more time do I want to spend on this project?

I decided that I would audition some embroidery thread and some hand stitching to see the result. I decided I liked the hand stitching look enough to keep going. I notice that as I pull the thread through the fabric, the fabric stretches a bit.

Had I planned, however, to hand stitch from the beginning of the project, I would have applied shape flex (a stabilizer) to the back of the fabric as that would have made the stitching easier to achieve.  I think I can continue stitching, carefully, and be able to fill the background with a variety of hand stitched hexagons.

I may not finish this project by the end of the quarter; but, since this project has been hanging about for too many years, I'm pleased that I am making progress!!!


Sunday, December 3, 2017

Ornament Exchanges

Items for the online ornament exchange
This year, I'm participating in three ornament exchanges which is two more than usual! First, I'm participating in an online ornament exchange. In addition to an ornament, the rules were to include an introductory letter and send a Christmas themed item. We were to mail the item between December 2 and December 4. This is the package that is working its way to Ohio. I'll share what I receive when my package arrives. Miss J, the youngest grand, went shopping with me and helped select the items for the package. I especially liked the box and sentiment!

Butterfly ornament
Second, my neighbor who is also a quilter is hosting a get together in a few days. She wrote in the invitation that homemade, silly and simple ornaments are perfect so one of my butterflies will be wrapped for the ornament exchange. It will be a potluck so I need to be thinking of what kind of dish I'll prepare to share! She says we are going to play a dice game as a way of distributing the ornaments. What a fun way to celebrate friendship during the holiday season!

Folded stars
Third, Quilting Delights has an all club Christmas party complete with an ornament exchange in about a week. Many of the ornaments exchanged are homemade. I enjoy getting a glimpse at so much creativity! I'll be taking one of my folded stars that I made earlier in the year.