Wednesday, March 29, 2017

The Chicken Is A TOP!!

Pieced border in place.
Okay. . .I have to admit it. . .finishing the appliqué on the chicken felt great. Although, I was disappointed in how many of the leaves and chicken feathers blended into the background. Oh well, live and learn!

I was ready to work on the two pieced borders. The instructions for each border weren't that detailed. Also, the  line drawing showed less than a quarter of what the border was supposed to look like.  The first pieced border wasn't simple to stitch. The kit was about six inches short of black fabric; but, my small black stash box had just what I needed.

I like the interest that this border brought to the appliqué.


What was AMAZING about stitching this border was that  the border fit exactly on three of the four sides. The fourth side, I "got" to do a little easing. I anticipated having more of a fit problem! (Keep reading, I had a problem; but, I hadn't realized it yet.)

Uh--oh--it doesn't fit!! Why not???
Then, it was on to piecing the second border. Again, I didn't have enough fabric. The kit was the equivalent of twelve 2 1/2 inch squares short. Fortunately, I had some neutrals in my stash which worked.

When I pinned the border in place, the previous border was one inch too short. What to do? I pinned the other side which I expected to be one inch short as well; but, it fit perfectly. How curious to have one side fit great and the other side not!

To start with I had measured and both sides were the same.
Hm m m m m. . . .I counted the pieces. Aha. . .the side that didn't fit the second border was one piece too short.


Next, I looked at the piecing. Then, I saw it. Do you see it too? (I was should have had two cream squares between the two sets of two black squares. I only had one cream square!)

Interestingly enough, this was the first border that I stitched and which I thought fit so well!
Oops. . .missing one cream square!
What to do? I decided to unstitch this border and add the one cream square. In terms of time spent on this project, this bit of unstitching didn't take any time at all.  I added the piece, restitched the border  and then the second border fit. Whew!

The pieced borders complimented the appliqué blocks. I'm glad I stitched them. I am even happier that the project is at the top stage!!!!


So exciting to have a completed top!!!


Backing and binding fabric


A couple months after I started this appliqué project, I saw some chicken fabric at a quilt shop. I purchased it for the back and possible binding. So all five yards of the chicken fabric and the yard of feather fabric has been sitting in my stash for 10 years!

I still like the hen fabric for the backing. I like the feather fabric; but, not for the binding. Right now, I'm leaning toward a neutral binding or perhaps, I will apply a facing to finish the edge instead. I've time to think about the binding as it will take me some time to quilt this project!

For now, the backing is in the prewash phase. The next step is to baste the layers together. I guess I'd better see what batting is available in the cupboard!


Sunday, March 26, 2017

March Madness and Chicken Appliqué

Last section in prep process!
I enjoy college basketball games. Often as I stitch in fall and winter, I've a basketball game on the television. I'm partial to PAC 12 and WCC games. This year, I didn't watch as many games as I have in the past. As a result, my NCAA bracket sure took some hits. For three of the last four years, my bracket has done better than my husband's bracket. This year he has picked more winners than me! :) Besides watching some amazing games, it is fun to banter back and forth with each other about how "our teams" are doing or rather aren't doing!

Over the last few weeks as I watched the NCAA men and women's basketball games, I stitched pieces on the chicken. In my last post, I shared that I had one more section to prep on the chicken. I truly thought I had much more appliqué remaining than that! It felt surreal to prep the last section.

In the photo above, I had to stitch the long leaf that runs under the chicken feet first because another piece was on top of a part of the leaf. Otherwise, the last section wasn't as difficult as I had thought!

All the appliqué in place!
I've spent many hours on this project. I started it as a BOM in 2007! I was caught up until it came to the center panel. Then I was stymied with too many fiddly parts, too many over this and under that pieces as well as just too many pieces!!!

The next step is to piece and stitch a couple borders around the appliqué. It measures 41 1/2x 47 1/2 inches. It is supposed to measure 42x48 inches.  All that appliqué just takes up space! I know I'm going to be challenged with the pieced border! It feels surreal to be at this point. Although it also feels great to be this far!!!!

No, I didn't have a celebratory "nip" yet. I'm saving that for when the sleeve and label are complete and on the back of this project!

Thank you to 2017 Finish A Long to help me toward the finish.

You can read my first post on this subject here. You can read my second chicken post here.

Wednesday, March 22, 2017

A Little of This and a Little of That

Painting details to a piece
I'm still working on my embroidery project. I have finished making the heavy chain stitch which represents branches on a piece. Mary Corbet, over at NeedlenThread, has a tutorial on this stitch. I enjoy her blog and she shares so much of her craft.

With JoJo's help, I used some of her fabric paints and I did a little more fabric painting.

Then I decided that I needed something a little more on the branches. . .so I am adding another embroidery stitch to the branches. Photos to come!  I sure thought that I would have had this project to the finished stage by the end of this month. . .but, it looks like the finish will come next month!  Well, my fingers are crossed on that guess! I will reveal this project soon. For now, I will report that it has been fun!

I finished the prepped portion of the chicken that I posted about here. I thought that I had three or four more sections to do. In reality, it is one section! I'm preparing the pieces and perhaps tomorrow, I'll be ready to begin stitching the final section!

J liked the scissors best in her package
The grands were gifted some fat eighths of fabric and some scissors. (Thanks again, Marla!) They delighted in unfolding, folding and fondling the fabrics. They loved the little scissors that came with the fabric. We had a treasure hunt to find the gifts which was so much fun for all of us. There were a couple of clues that were hard to find and the girls thought that they needed "help." In the end though, a little perseverance scored them the answer.

I can see we are going to need to make a "kit" for them to store their treasures!

K was partial to the pink print fabrics
Tag team approach to cooking
Their cooking has now progressed to a tag team event. One "measures" and dumps while the other cuts in shortening for biscuits. One gets out the baking pan and cutter while the other stirs the liquid into the dry ingredients. They both cut the dough and Bailey, our dog, cleans the debris off the  floor. It all works!!

They like cooking and they love to eat what they cook. We bake cookies, banana bread, muffins and bread. We make cucumber sandwiches and egg salad sandwiches. We make soups and pancakes. Currently, bunny salads are the favorite recipe. . .I think because the bunny tails are marshmallows! Of course, we must have an extra "tail" on our salad! :)

This week, our bunnies had carrot stick whiskers. Last week, our bunnies had almond ears. It is fun to hear them discuss what "ingredients" they need for their salad! The best part is that they eat every bite!

Bunny salads. . currently,
the favorite recipe!
Sometimes we "see" a recipe that we want to make. If we don't have all the ingredients on hand, we "get" to put it on the shopping list and we will make it the next time. Occasionally, we really "need" to make the recipe that day so we will go to the grocery store to pick up what we need so we can have instant gratification!

Besides cooking, we draw, color, read stories and play a lot of make believe. Mondays and Wednesdays fly by when the Grands are visiting. Bailey loves to play with them. Life is good!

Saturday, March 18, 2017

Month 2 of 8 of Quilt As You Go (QAYG)

Block 1 using the spin effects template
These past two weeks, I've been working on the second month of the Quilt As You Go (QAYG) ruler class.

If you missed the first post, you can read it here. Our assignment this month was to quilt the four 12 1/2 inch blocks. The videos that were released with the class gave us three blocks that the quilting was similar in scale and stitch density. The fourth, while a good block in terms of variety, didn't have enough similar characteristics to work with these three blocks. I planned to design my own for the fourth block!

WARNING: This is a lengthy post so grab a cup of something!

I liked using the 5.5 inch spin effects template for the center spinning star. We used the 6 inch arc which worked great. However, I never did figure out how to use the 6" spiral ruler. I couldn't see in the video how the top of the template should be centered. It works and it is finished which is terrific!!!

Marked lines for block 2
The second block used the 5.5 inch spin effect template too. We just made five of them! Marking was going to be the key to the success of this block.

Finished block 2
I don't own the large eight point cross hair square. The directions in the video made the marking seem difficult. But, when I looked closely at the block, it was four motifs around a central motif. So, I marked a 12 1/2" square. From there, I marked the diagonal, horizontal and vertical lines. Then, I divided the remaining space into four 6 1/4" blocks.

I noted that in the video, the non slip tape wasn't applied to the template. I used the template without the tape; but, I'll be adding the tape. The template was still a challenge to hold in place even though I followed the directions and "pinned" the template to the center of the block. I stitched the four outside blocks first.

These went fairly quickly. I was about one stitch off at the beginning and end of the stitching. I'm not sure why that happened. So I imagine it will continue to happen until I figure out the cause! LOL

I liked how the outer design went together. The directions were to stitch this part first! I could envision other applications using this ruler.  This particular design would be a great all over pattern.

It wasn't tricky stitching the center star last. I stitched slowly and managed the back tracking well. The challenge with this design was that it didn't fill the space. So I added some half designs and now the space is more evenly quilted like the first block. JoJo, over at Through My Hands, gave me that idea as that was what she did!

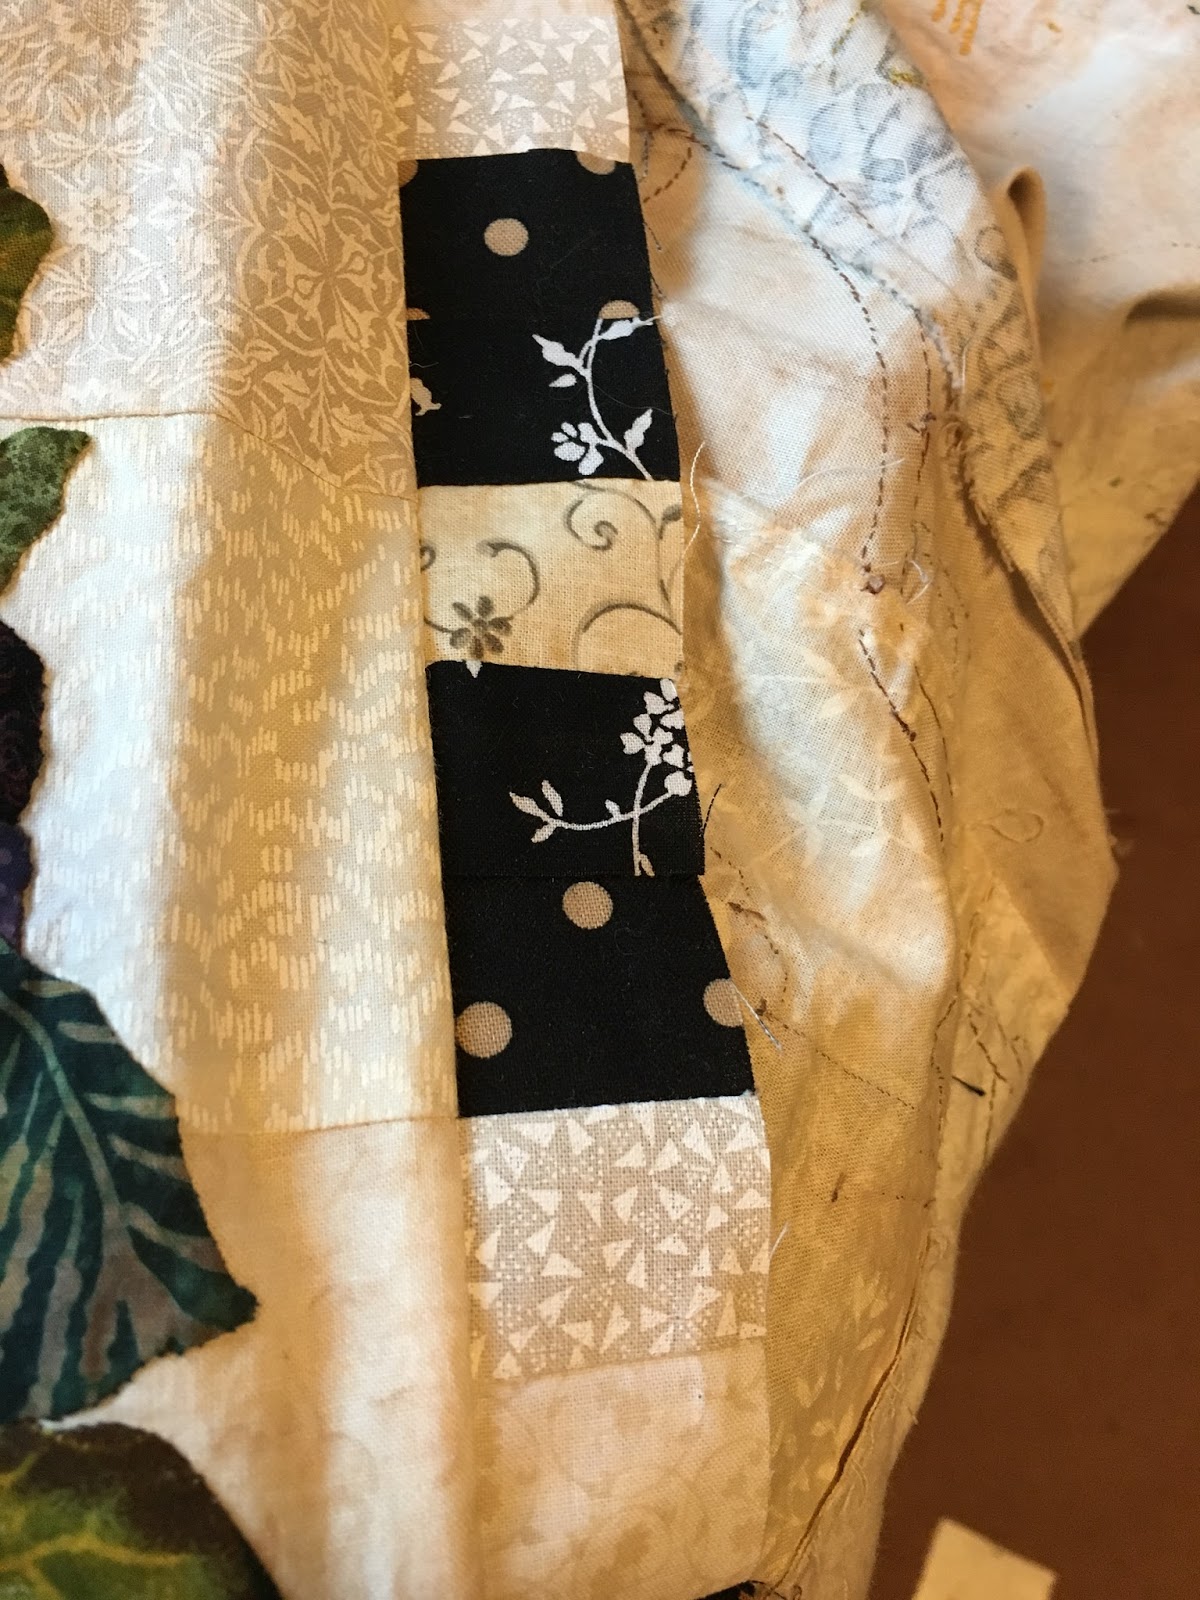
Back of second block


Small section of design added between the larger motifs.


Third block front
The third block was a bugger. It used the 3.5 inch spin effects template.  I had a difficult time trying to see in the video how to line up the template. When I was finished, the space felt like it needed more stitching. I didn't have any ideas so I let it sit for a few days.

Third block back


Third block with a few curved lines


Then, I thought, "Why not add a few curved lines around the outer edge of the design to frame it?" I did and I liked the result!


Suggested design of the 4th block

This was what the fourth block was supposed to look like. While I liked the designs, it didn't appeal to me because it is so different from the other blocks this month. I ordered a set of feather templates through the quilt shop at the previous lesson to use for this block; but, the order didn't arrive until the class meeting. What a bummer on so many levels!!! It is hard to spend money on a product; but, not get it until a month later!

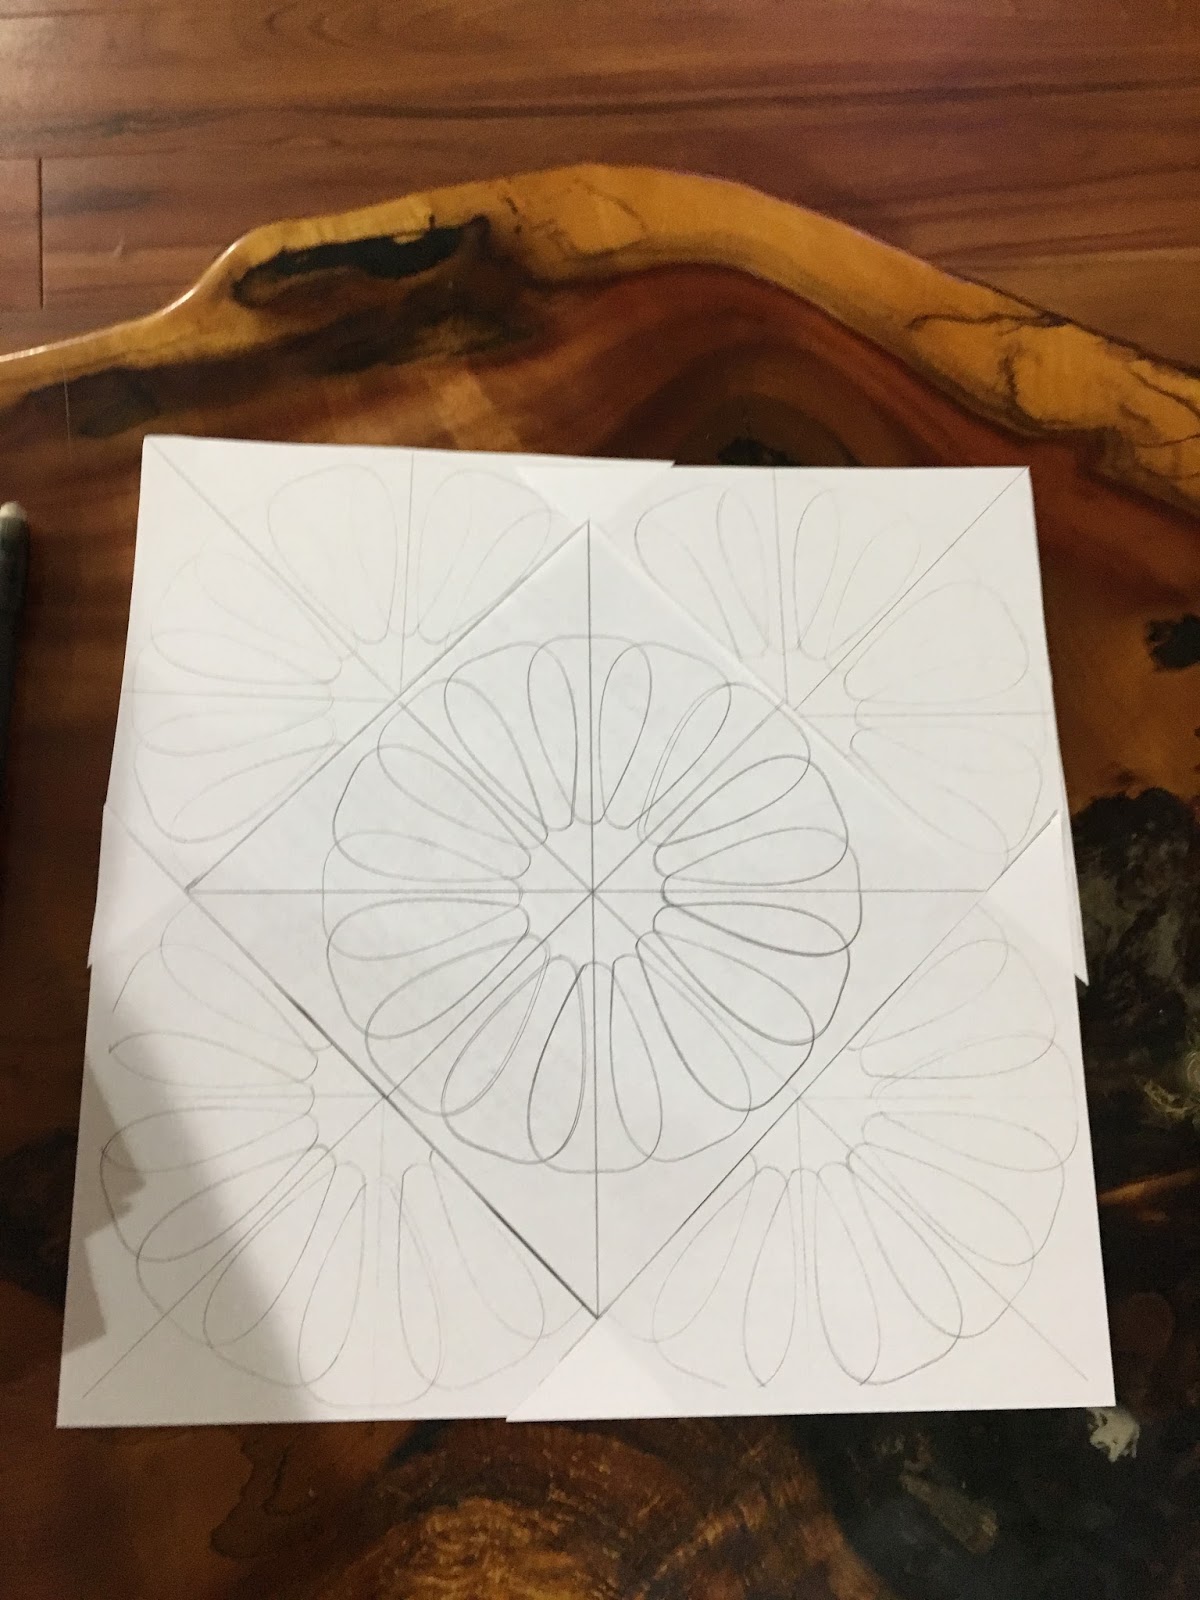
So two days before the QAYG class, I took the template that I had used for the third block and drew a design.

Then, I made copies of the design. I cut some of the copies apart in different ways. I left one copy whole. Next, I played with what designs I could make.

To get an accurate drawing, I need to have a spacer on my pencil so that I draw with the 1/4 inch space like when I stitch! Below are the photos of a few of the designs that I made in paper!

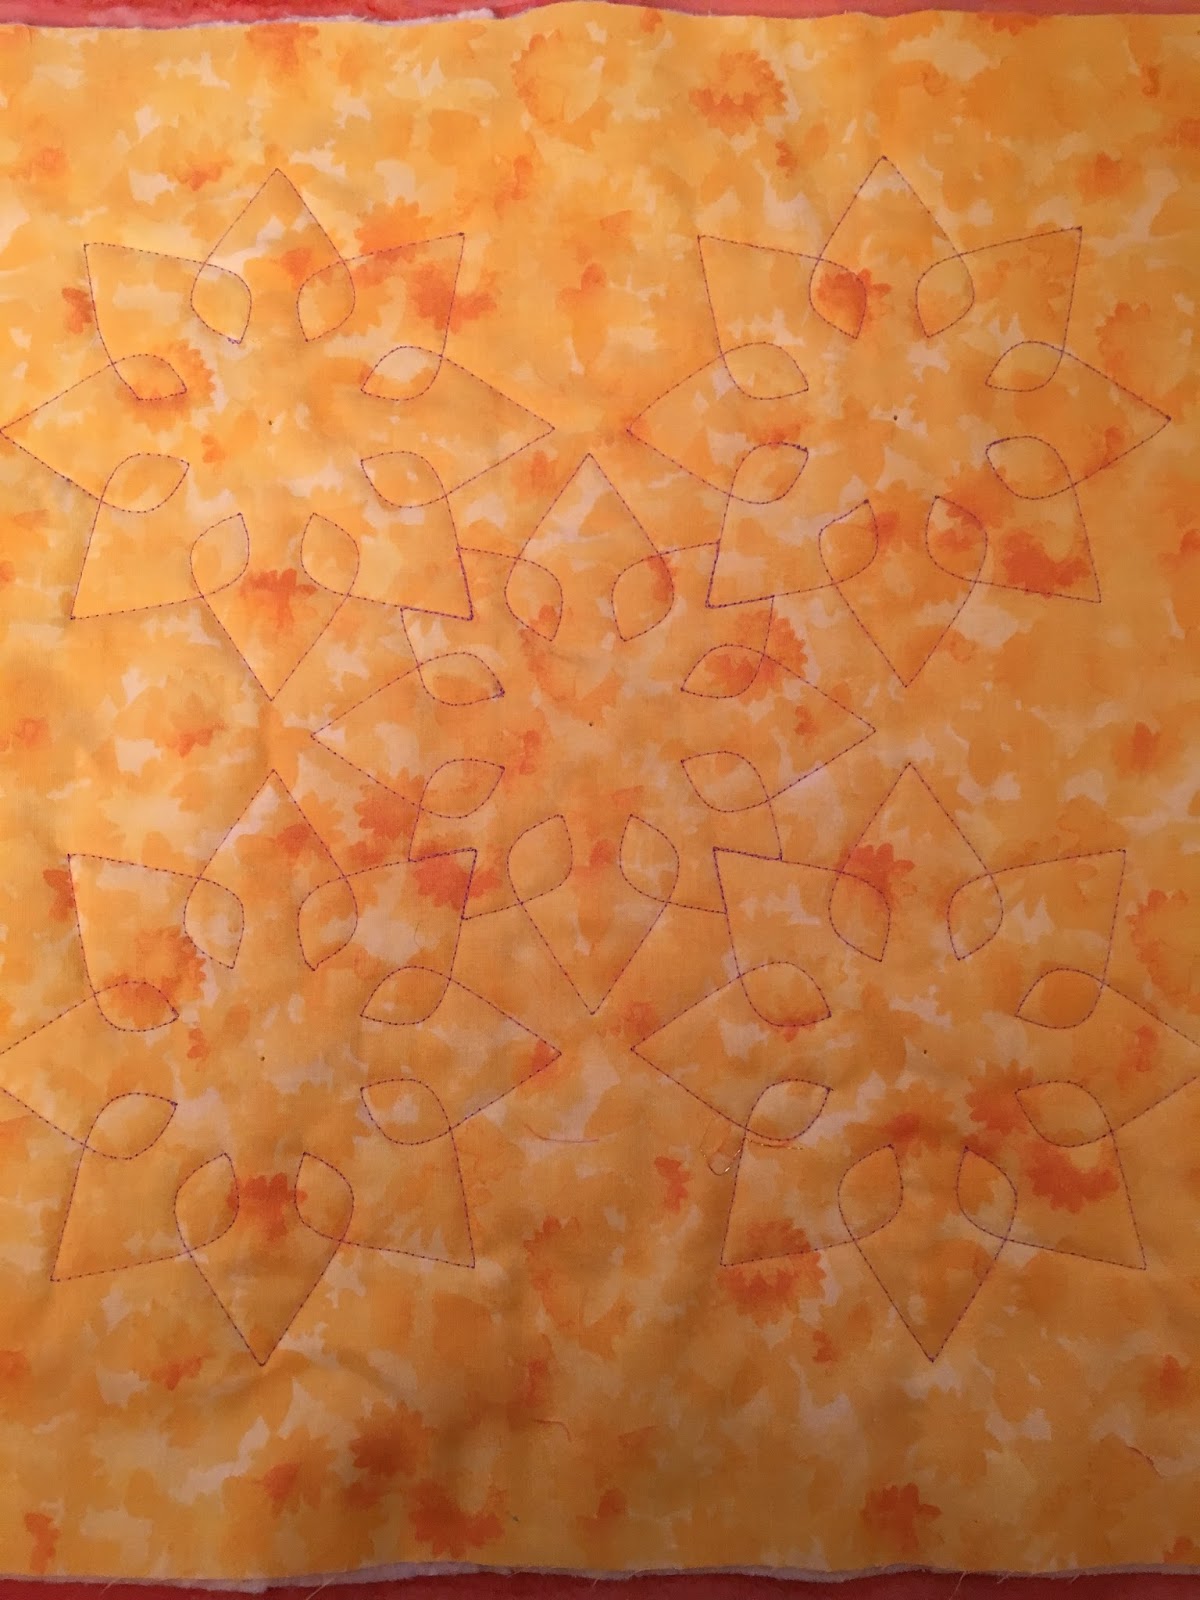
This layout reminded me of grapefruit halves
Hmmm possible border design?

Fractured design. I like the open spaces;
but, this is a little too big.

This was the design I decided to try!

4th block. . .still needs quilting
This block went together relatively quickly. I liked it; but, it didn't quite fill the space. In looking at the design, I could  see that I need to pebble the centers and add a curved line or two to accentuate the open spaces made by the four "flowers" together.

Spaces quilted
Close up of center

I liked what I designed!!! I was almost behind because my template set didn't arrive. I was excited that I could push outside my box and come up with a design. I'm ecstatic over how much I enjoy this block now. This is my favorite so far!


Wednesday, March 15, 2017

Why Not and What If?

Washed and ready for the cut
The last time I had my hair cut was in October. Karen has been cutting my hair for the past 19 years. Every haircut is terrific. I NEVER have those times when my hair is difficult to control after a cut. Often, I can style my hair with my fingers and by pass the hair dryer!

Karen is truly an artist. I'll describe a cut or I'll say what about this?? She will expand upon my thought. This time I said I wanted to grow my bangs and I asked about an  asymmetrical cut. She shared the photos of what she did.

I love the back. If I decide that I'm tired of the longer side, I would like the other side looking like this!

Finished side and back
Other finished side and back
The other side is nice too.

It is nice to shake things up for a change. I've been stepping outside my "box" with quilting projects this quarter so why not step outside my usual "bob" cut? After all, the youngest grand, J, usually asks, "Why not?" instead of, "Why?" I've been thinking more about why not and what if.  Changing my hairstyle seemed to be in keeping with my thought pattern this quarter.

The grands squealed with delight about my hair cut when they saw me for the first time. A number of people ask why I only got half a hair cut, some people tell me that they would never be brave enough to wear a hair cut like that. Some people don't say anything although, they do give me a quizzical stare!


Finished view

When I left Karen's shop, I felt like a new person.

Sometimes, it is good to make a change and see what kind of creativity happens because of the change.


Sunday, March 12, 2017

Chicken -- 2nd section

Dad's new view
Yesterday, we (oldest daughter, her husband, her two daughters, my husband and I) drove about 2 1/2 hours over a mountain pass that was clear to attend my Dad's service and celebration of life. Earlier in the week, there was a lot of snow that fell! I think Dad used some of his "new" connections to keep the roads open!

We  attended the graveside service and then his celebration of life. . . We drove home in the afternoon. It was a long day; but, also a day full of many stories. His wife threw the best party. My dad would have loved it.


Finished first section

Beginning the positioning

Ready to stitch the underneath pieces

Thank you for all the encouragement and kind comments on my first chicken update post. You made me feel empowered to carry on!

Therefore, I had to share with you that I finished the first chicken section. You can't hardly tell which of the purple flowers that our dog chewed! I found that having the pieces prepared for stitching made stitching more enjoyable. I also stitched a thread a day and finished this section in less than a week.  The section is two flowers, two leaves and some stems!
Then it was on to the second section. You can see the amount of pieces that are part of a section. To make it easier for me, I stitched the flower petals together and the bud together so that I just had a flower and a bud to stitch. 

This takes a little time and working with those little pieces takes some fiddling! It is doable though.

Once I get the "under" pieces stitched, I went back and finished basting the long stem in place. It was tricky to squeeze in that flower between the chicken and the words!

I spent a little time each evening working on these pieces. I've  a hand stitching routine which is great! It wasn't long before I had completed that section too!

Second section finished

Three sections to this leaf!
Beginning of the prepped section
So, I spent some time prepping the next section. Again, I stitched some parts together so I had a larger "part" to appliqué. Some of the parts are tiny!!!

Again, I need to stitch a few parts in place and then do the basting. I'm ready for stitching another section. I think I have three more sections of about this size to complete before the appliqué is finished. I'm beginning to feel excited about finishing!

. . . .Well, it has been ten years!!! :)

For me, it is important that I have my chair set up with good light and all my tools so that when I stitch, I'm as ergonomically situated as possible.


My stitching chair
Re-upholstered chair
My sweet husband wanted to buy me a new chair for Christmas.  As I look at this photo, my chair really was in bad shape; but, it felt so great to sit in that I didn't want to give it up!

However, I agreed to shop for a chair. I sat in lots of chairs; but there wasn't one that was as nice as my old chair. So I suggested that we get it recovered. 

My sweet husband agreed and we had it recovered! Gosh, the first few times that I sat in it, I couldn't believe how firm the seat cushion was. I had sure become used to the old worn out cushion! The upholsterer told me that I won't need to recover this chair in my lifetime.

It wasn't an inexpensive process. For a couple hundred more dollars I could have had a new chair had I been able to find one!  I'm enjoying my space and even better. . .I'm making progress on the chicken!


Wednesday, March 8, 2017

Stitching with the Grands

Stuffing the "innards."
The other day, the grands were playing with their doll babies and there was loud discourse over a small pink pillow. This pillow was the perfect size for a "baby"; but, it was only one and they needed another! I asked them about making a pillow and the youngest grand at 3, J, thought that would be a good idea.

K, the oldest at 4 1/2, was all over the project. J picked her fabric. She likes animals. She chose a 13" square piece of fabric that had penguins on it from the stash. Then she chose a coordinating fabric for the back. That was the end to her work on the project for the day.


Yay, the pillow is finished!
Her sister, K, was concerned about the stuffing part of the project. So we found some fabric from the stash that would work as the "innards" and stitched three sides. Then she stuffed it with batting scraps until she thought it was "just right!" I showed her how to fold the ends in on the muslin like bag and how to pin it so the batting would remain in the "innards!" K is thoughtful and asked the best questions! This was where we stopped for the day.

In the stuffing photo, what you don't see is that a long batting strip flips off the table which J, who is sitting on the floor, fondles. She then wraps the sewing table leg with it and as she wraps, the other end pulls out of the "innards." This happened about four times before K figured out what was happening. I managed not to chuckle out loud although just sharing the incident with you makes me smile! Watching the two of them was like watching my own daughters when they were around this age! The next day we worked on the project, K finished stitching the "innards."

Trying out the new pillow
Then K hung out to supervise J on how to guide the fabric to stitch the outer pillow. J had the most fun with the machine when it stitched fast! Her favorite part of the process was using the purple thang and poking out the corners. Then, she was finished with the process so K stepped in to stuff the "innards" into the pillow.

J liked the penguins. Instead of using it as a doll pillow though, she used it for her own head. I had to chuckle as she showed me it would be "just right" for snoozy time!

Dad would have enjoyed this story about the grands.  He had a soft spot for kids. His celebration of life is Saturday. I miss our nightly phone chats. I do chat with his wife regularly. She has organized the party that he requested. I look forward to hearing stories from his friends. 

Sunday, March 5, 2017

Thank You Green Fairy Quilts!

This was the shipping package
In January, I received notice that I was a winner in the 2016 4th quarter Finish-A-Long (FAL)!  Anyone can join the 2017 FAL. At the beginning of each quarter, you list what projects you want to finish along with a photo to a specific link. When you finish a project, you post about it. At the end of the quarter, you link those "finish" posts. Last year, I didn't finish much; but, the whole process has helped me to stay on track with progress to the finish.

When I finish my chicken project that I blogged about in a previous post, it will be because the FAL helped me take the steps to pull the project from the bag and work on it!

My prize arrived on Friday.


The contents of the packag
When I contacted Green Fairy Quilts about claiming my prize, I received an immediate e-mail from Judi Madsen's husband, Clint. He let me know that I had a $25 voucher from their site!

It was difficult to make my selection as there is way too much that caught my eye!  I spent a lot of time perusing their websiteLast week, I made my decision and sent in my order.

I was sent an e-mail later that day that my order had shipped! WOW!! I didn't have to wait long at all!

When it arrived, I was impressed with how carefully everything was packed. I received a flyer about an upcoming quilt show AND a Green Fairy ink pen. What nice attention to detail. What great service!


Judi's signature on the inside cover page
Judi signed the book!  I'll share the inside cover page with you.

I love what Judi does with a ruler and fillers. I enjoy her blog. She quilts on a longarm; I quilt on a domestic; but, I'm looking forward to savoring her latest book. Who knows, maybe you will see some of her influence in an upcoming project!

Thanks, Green Fairy Quilts for supporting the 2016 FAL!

Wednesday, March 1, 2017

A Little Paint

Traced shapes ready to cut out
Earlier this week, I cut some blossoms for a project I'll share once I'm farther along. I fused steam a seam on the back of the fabric. This steam a seam I've had a long time and it is getting close to the time when the fusible could loose its ability to fuse so that was the reason that I used it.

I traced the small, medium and large shapes. Next I cut all 55 out. It took some time.

This kind of repetition was the perfect task for me and life this week.

I took lots of breaks.


Painted pieces drying
The pieces looked fine to me; but, the directions were to paint them. So I purchased some white acrylic paint and dabbed away. I also added some gold shimmery paint too. At first, I was sad that the white paint didn't show so I went back and repainted.

I tried to make each blossom similar, yet different.

The paint added dimension and it was easy to do.


First piece with embroidery
Then the directions called for a little embroidery. Now, I can see what dimension the paint added even if it is so muted! These were fun to make. They reminded me of the lure of potato chips; but, they have loads less calories!

I paced myself and made about 10 a day. I listened to my body. I didn't over do it.  I didn't hurt. I can still hold the needle. Maybe I'm building some muscles? Tomorrow, I should finish this step and will add these shapes to the project. More to come!
Then a few more
Then even more