Wednesday, April 27, 2022

Alice's Roses-

Back of quilt

Our Thread Tales book group read, "The Desert Queen" by Janet Wallach. It is the story of how Gertrude Bell influenced the Arab world. While reading a historical biography is dry and painful, Wallach is masterful at telling Bell's story. I appreciated being able to review how culture and history has shaped that portion of the world.

I'm not into camels; but before my car accident in 2009, I enjoyed gardening. Bell loved roses and developed a rose garden with stock from England. Growing roses was the inspiration for this piece. My friend, Alice, who was moving from the city to the coast, had a group of us over for breakfast one morning. She invited us to take anything that was laid about the house so she didn't have to pack it! 

Label detail
Alice was an avid gardener. Her roses were always beautiful. I always admired that she cultivated beautiful blooms in a climate that produced black spot, mildew and paltry blossoms on my roses. At her breakfast was a box of linens. Among the linens was a pink tea towel with a cross stitched Victorian style lady walking behind a picket fence as a decoration. I picked up the linens.

A week of so after our breakfast, I took a class from Cindy Needham. Cindy is the queen of turning old linens into special works of art. Using Cindy's stencils during class, I drew a design on the tea towel. Of course, I used a rose as the center of the design. I incorporated as many of Cindy's tips as I could in this small project. If you have the opportunity to take a class from Cindy do it. She is a fabulous instructor.

Project front
I used Hoffman's Radiance as the backing. Sadly, Hoffman no longer produces this beautiful fabric. To get the trapunto puff effect, I used two battings--Dream Request which is a thin batting and Hobbs wool batting which produced the loft.

I used metallic threads to quilt the outline of the rose. I quilted the background with silk thread in the needle and cotton thread in the bobbin. 

My oldest granddaughter loved this piece. Partly because she likes the color pink and partly becomes she liked the texture of the quilting. She would tell me that roses are too "prickly!" It is her finger that you see in the photos.

February and March blocks
I quilted this project on my 1630 Bermina in 2011. This is
the fourth book club project that I have documented this month. Documenting four book club projects was goal number two on my April list. If you want to read about the other three quilts, the link is connected to the following project titles: Grandmother's Flower Garden; Ouch and Crossroads.

I've written this before; but, it bears repeating. Belonging to this book club has pushed me outside my "box" when it comes to quilting techniques. I've read books that I wouldn't have considered and enjoyed them. Most of all, I have loved the discussions, activities and reveals that I have had with the group.

On another note, I did meet my goal to finish the blocks for February in the temperature quilt for 2022. I  exceeded my goal. I also finished the March blocks and I've kept up with the blocks for April! For this post, I'm including the photo of my February and March blocks. Next month, I'll write a post about my progress. Please check out the following link to see others who have met their April goals! Elm Street Quilts One Monthly Goal - April Finish Link-up

Sunday, April 24, 2022

Upcycled Apron--Saturday Workshop #2

Using the seam ripper as a guide
Upcycled Apron was a Saturday workshop. I made an Upcycled Apron for each of my granddaughters when they were much younger. They grew out of those. I made them an apron (here and here) out of a tea towel. They grew out of those some time ago. This workshop was the perfect excuse to provide them with a larger sized apron.

Based on my granddaughters' likes for prints and colors, I purchased two size medium men's shirts at Goodwill. I purchased one because it was blue and had an animal printed on it. I purchased the second shirt because it was a dark grey with pink stripes. The two shirts cost $12. I did not pay attention to fiber content although both shirts are mostly cotton. I would have preferred to have purchased a shirt with a breast pocket; but, I chose the print/color over the pocket!

Collar detail
In this post, I will document the process with the blue print shirt. First, I cut up the side seams and around the sleeves. I followed our instructor's tip to leave the flat felled seam , if there was one, on the side seam for stability. Next, I removed the back of the shirt starting at the shoulder seam. Then I ripped the collar apart and removed the extra fabric from the shirt back. I determined a slight curve to the front of the apron. I cut away the excess fabric. I finished the edge of the fabric. Bev, our instructor, used bias tape on her sample to clean finish the front arm edge. 

I have lots of bias tape from my grandmother's stash. In the stash were several packages that paired well with the shirts. Our instructor, Bev, demonstrated how to use our seam rippers as a guide to sew the double fold bias tape. This

Auditioning the outer pocket
positioning tip was genius. I actually stitched the bias tape using one pin at the beginning of the seam!

I slipped the raw edge of the top front back into the collar seam and I restitched the edge of the collar. When I stopped to take a photo of the stitching, I realized this shirt had a pointed collar which was a great design feature.

Then I followed Bev's next direction to stitch on close to the edge on each side of the placket. To ensure that the plackets lined up on top of each other, we pinned the layers together between the buttons. We placed the pins vertically in the placket. Starting at one end of the planet, I stitched to about one and half inches from the bottom of the second button. From that point, I stitched straight across the placket. Then I stitched down the other side.

Closed outer pocket/recycled cuff
I determined where I wanted to place the pocket which was about an inch above the second from the bottom button. Then I cut the bottom two buttons off of the shirt. The ties came from the back of the shirt. I cut the ties to be two inches wide. I used the sleeves to make the large front pocket.  

I interfaced the main pocket because I planned to place an outer pocket on it. I also found that the shirt was made using the wrong side of the fabric. To have more contrast, I constructed the pockets with the right side of the fabric out. Before I stitched the pocket and pocket lining pieces together, I constructed the pocket and placed it on the main pocket. 

A second option to open the pocket . . .
unsnap it. . .
The cuffs on this shirt were constructed so that they looked liked the decorative snaps were cuff links. The group participants gave me ideas about how to reuse the cuffs. Their ideas helped me preserve the snap feature of the cuffs. 

I added bias tape to the top edge of the outer pocket as an accent. I repurposed the flat felled seam of the sleeve. I turned it into loops to hold a tasting spoon or just to be decorative.

I stitched close to the edge of the pocket and then a quarter of an inch away from the first stitching. Along the top edge of the pocket, I stitched next to the inner edge of the bias tape.

Collar detail
Then I constructed the main pocket. I added a wider pice of bias tape to the top edge of the pocket. I centered the pocket over the placket and stitched around three sides of the pocket. I also stitched down the center of the pocket so that there were two sections to the main pocket.

I used the second cuff as a breast pocket. I didn't realize that the cuffs had these decorative snaps. I thought it would be fun if the snaps were usable so I made the pocket accessible by the snaps! 

Regarding the ties. Using the shirt back, I cut a strip that was folded the bias that was about 2 inches wide. This gave me two ties. I pressed the fabric in half, then pressed the edges to the center fold. Next I folded the edges inside and pressed the strips in half. I stitched next to the outer edges of the tie. I tied a knot into one end of each tie.

Finished apron

I inserted the other end into the seam finish and stitched the seam finish in place. This is a great way to finish the ends of the ties.

Although, I didn't use any of my fabric stash in this project, I did use my grandmother's bias tape. She would have said it was a good use of the tape. She would also have been tickled with me making an apron. She wore an apron in her house. That apron was a dust cloth, a carrier for garden produce, a place to put some of the mail in addition to keeping her clothes clean.

I think I'll wait for Christmas to gift the apron to my middle granddaughter. Next Christmas she will be nine years old. She might enjoy getting a cookbook to go along with it. She cooks with her mom and dad. When she visits us, she cooks here too. She likes stirring and enjoys making soups among other dishes. I like her delicious cobbler fillings best.

I'm linking to Cynthia at Oh Scrap/Quilting Is More Fun Than Housework. This was goal number three on my April goal list.


Wednesday, April 20, 2022

Cross Roads--

Placing the strips


Our book club read, "The Time Traveler's Wife," by Audrey Niffeneger. The story is about a librarian who posses a gene that allows him to travel uncontrollably back and forth through time. I was inspired to create the feeling of slowly coming together or slowly disappearing. I had a piece of printed fabric that contained red, black and gray circles. I fused a stabilizer to the back of the print. I cut out strips, but didn't use a rotary cutter in light and dark. 


Grey circles and red diamonds


Once I had a selection of strips, I have myself an hour to arrange the pieces. I gave myself a limit because I knew I'd agonize for days about the placement and I didn't have days to spend on the project. In about fifty minutes, I was finished. I turned the light out in the studio. The next day, I surveyed my layout. I changed two strips. 


Detail of applique and background quilting


Back


Label
After I had fused the strips into place, I auditioned gray circles and red accents. I decided the red accents added the most. I kept those and added more. I removed the gray circles.


Next, I machine appliqued the edges. I used invisible monofilament thread. 


Finished front


The reason the piece is small is because a friend gave me a piece of 80/20 legacy batting to try. This was about the size of sample batting. I was happy to have a test. I decided that the batting was not my favorite. I stippled quilted in most of the background, I found that the background was flatter than I had anticipated.


I do like the view of the quilting from the back of the project. The texture of what quilting can add to a project is one of the reasons that I enjoy the quilting part of the process so much.


I used YLI 100 wt silk thread in the needle to quilt the background. I used Aufifil 60 wt cotton thread in the bobbin. It went together fairly quickly. I made a flange as part of the binding. It was fun to make. I made it in 2011!


Sunday, April 17, 2022

2022 Temperature Quilt---post 2

Getting ready to baste
In reviewing my post from last Sunday, I realized that I hadn't shown the steps in putting the block together. I'll share my process in this post.  There are a variety of methods of basting and sewing the blocks together. While I haven't done a lot of English Paper Piecing (EPP) and only a tiny bit of hand piecing, I find the process meditative. I like having a handwork project going. My friend, JoJo, introduced me to EPP. I'm glad that she did! 

My die cut paper supplies and template came Paper Pieces. I have no affiliation with the company. I have always had great customer service and my orders have arrived sooner than I had expected.

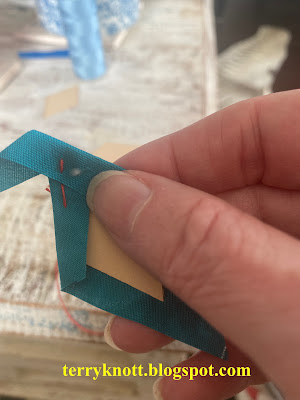
I start with cutting the shape using a template that is about 3/8 inch larger than the card stock paper. I center the paper on the fabric. Using my nail, I fold the fabric over the edge of the paper. I take a basting stitch in the center of one side. I use a double strand of a strong thread. I leave the knot on the right side of the diamond so that it will be easier to remove when it is time to do so. 

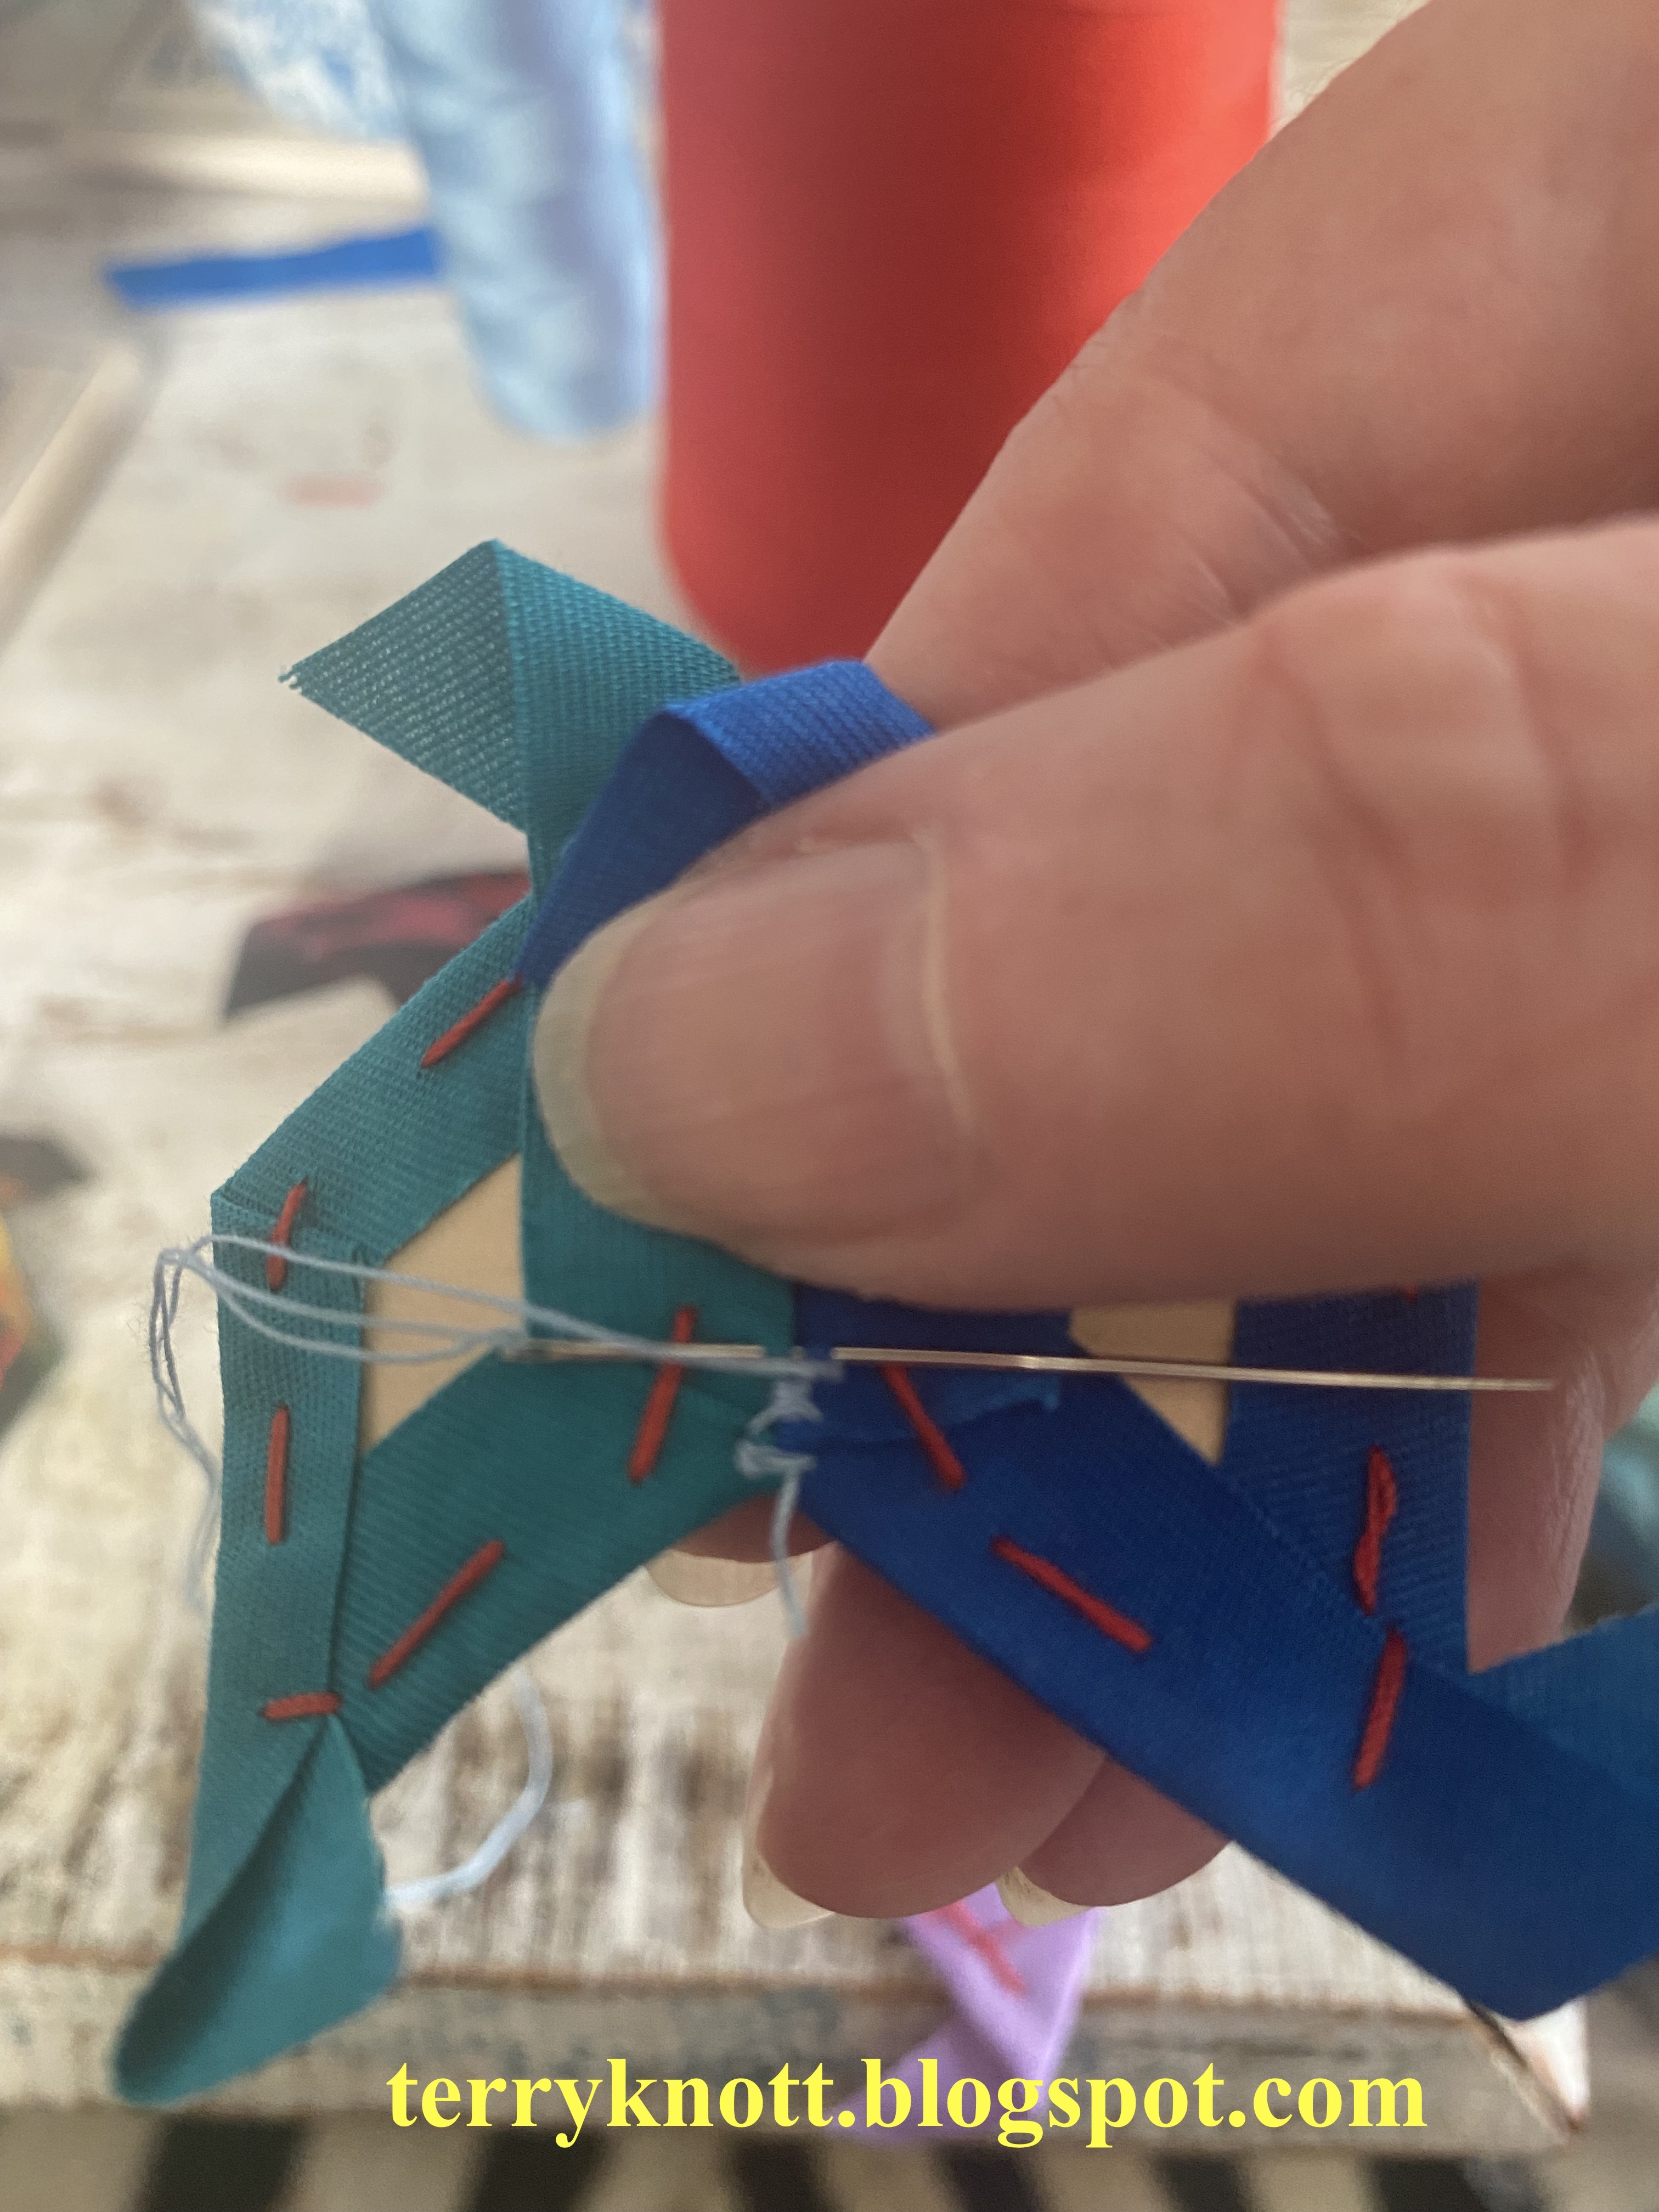
Beginning the basting
I work my way around the edges of the paper so that the entire section is prepared. Then I begin to stitch the edges together. I use a single thread of 50 wt cotton. I don't match the color because rarely does the thread show. I slide the needle into the edges and let the thread say 'hello' to each side twice. Next, I stitch a knicker knot at each corner to begin. These knots are surprisingly strong and are not easy to remove. (I know because from time to time, I attach parts in a new pattern!)

I lay the two edges together in a flat orientation. I slide the needle back and forth in a sort of ladder stitch. When I reach the end, I stitch another knicker knot. If I have a lot of thread, I may walk the thread by stitching under the fabric to the next edge. Or, I may slide the thread under the fabric a short distance and tie it off.

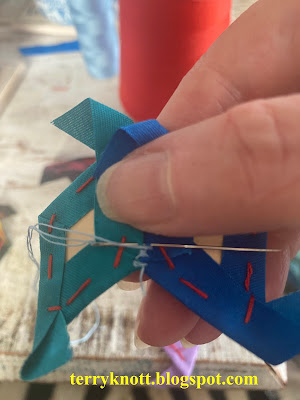
Stitch the edges in a flat orientation
I continue adding parts until I have constructed the block along with a piece of the background. Then I attach it to the month string. It takes me about an hour and 15 minutes to cut and stitch a section to the chain. 

After I had stitched all of January, I put it up on the design wall. What looked great close up, didn't look so great from far away. The value of my background fabric was too close to the value of a number of my temperature fabrics. Now what to do? I wasn't going to rip off all of those background pieces.

Gertie immediate began reiterating that I should've gone with the rainbow background. Again, the variety of fabrics was too chaotic for me. As I pictured the piece on a wall, my eye would look at the background fabrics and not the blocks. 

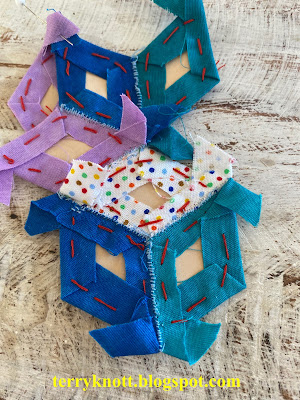
Back view of the blocks

As gently as I could manage, I told Gertie that while she had a point, all the fabrics was over the top. Perhaps, though, one fabric would work. That comment caused her stop chirping and start auditioning! She wanted to use the red fabric, it is our favorite color after all. In her words, "One can't go wrong with red." I agree with her there; but, in the end we went with purple. 

Gertie asked, "Why purple?" First, the background fabric has no purple in it, it has red, green, yellow and blue. Second, there will be few days that any purple will be used in the project. For sure, there will always be a contrast using it. 

This fabric was leftover from last year's temperature quilt project. There isn't enough; but because it is a hand dye fabric from Vicki Welsh, I can confidently order more which I will do. I've had great customer service from Vicki.

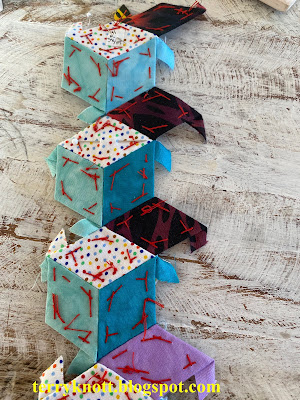
Front view of the blocks
My plan is to have the previous background become a border which floats into the rows. For the top three and bottom three blocks in each row, I'll use the border fabric as the background. I'll also use the border fabric for the first
three rows and the last three rows. The reason that I chose three is that months less than 31 days will have a spacer block which will be made from the border fabric. 

This week, we had a snow day. I can't remember a time when measurable snow fell mid-April. The kids had a snow day off from school and people built many a snowman! My husband said there were six inches at our home. A neighbor about four miles to the east of us had eight inches of snow! The snow was wet and heavy so there was a lot of tree limb damage. 

I write this bit about the weather because I chose to not pack any snow fabric for my temperature quilt! I'll "get" to add that diamond and connect the row when I return home.

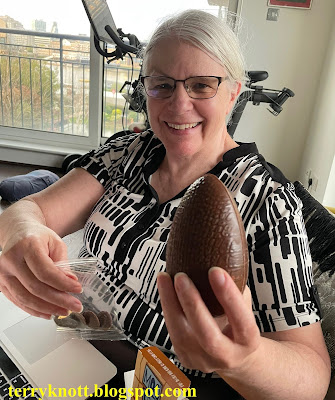
Chocolate Easter egg
This month, I decided that I would sew a block or two to the March row; but, that I would also make a  block a day for April. My one monthly goal is to piece all the blocks for February. I've done that but will save that for post number three about this project.

In the meantime, I'm linking to Cynthia at Oh Scrap/Quilting Is More Fun Than Housework

On Wednesday, I posted about my Ouch quilt. I'm continuing to use Wednesdays as a way to document past Thread Tales or book club quilts.

Finally, happy Easter/happy Passover. May you be enjoying your own traditions today. My daughter introduced me to the tradition of chocolate Easter eggs in the UK for the kids. She has shown me photos of children with boxes of eggs. In the U.S., it is more chocolate bunnies and small brightly foiled covered chocolate eggs.

In the photo, I'm holding a vegan chocolate egg. It is hollow and I'm told that part of the fun is "smashing" it to eat it. I have marveled at the size of the chocolate eggs in the stores as well as the sheer number of available chocolates. I'm fortunate that chocolate isn't a favorite. . .otherwise, I'd be eating way too much of it!!


Wednesday, April 13, 2022

Ouch--

Some of the thoughts I wrote
Our Thread Tales Book Club read "Jane" by Robin Maxwell. I finished this project June  2015.

In the opening chapters of the book, we read that our heroine awakes in a nest feeling bruised and broken. At the time, I was in pain from a tiny cyst that was on my foot. I could relate to the pain. The pain became my inspiration for the quilt.

I also was inspired by the work of Susan Shie an art quilter who writes words, thoughts, messages, and stories in her projects. 

Label
I was and still am drawn to how line creates interest in a quilt. I've a number of quilts that I've made with line in mind. This project was one of them. Gertie, my inner squirrel, thinks I should document them and perhaps I will. . . but, not today or this year! (She is not happy with that decision and her tail is flipping and she is chirping loudly!!)

I drew a leg with a foot attached on a piece of muslin. Because I am not adept at sketching, I used Google to help me learn how to sketch what I needed.

Quilt back
I layered the project with wool as the batting and muslin as the backing. I quilted the project, which is about nine inches by nine inches, using cotton thread. I quilted enough space between the lines so that I could write thoughts in the spirit of Susan Shie. 

Before I wrote on my project, I made a list of statements that I felt regarding this cyst. I wrote about what I missed being able to do, how I felt about dealing with pain every step I took and what life would be like if the pain became my normal. 

I used different marking pens to write my thoughts. Susan liked Sharpie markers for the bold line. I found that brand to run too much for my liking. I liked the micron pigma pens best. I wrote with red ink the words/thoughts that were the biggest triggers for me at the time.

It was cathartic to make this quilt. While I seriously considered foot surgery, I decided the recovery period was worse than my foot pain. In the end, that cyst went away on its own. 

Quilt front

I zig zag stitched black cording along the edge of the project as the "binding." For book club quilts I liked trying new processes or techniques in a new to me way. Sketching, writing on the project and the binding technique were all new to me. 

Although I haven't written or bound a project like this since, another time I would.

Sunday, April 10, 2022

2022 Temperature Quilt--post 1

Cube samples
 Last December, I decided that I wanted to English Paper Piece cubes as my block for the 2022 temperature quilt project. Because I hadn't figured out how to finish my 2021 temperature quilt, I didn't do much more than cut some diamond shapes of various sizes, tape three together and determine what size I wanted to make.

I also put in an order of hand dyed fabrics because I decided that I would use the same dark fabrics I used the previous year; but I would use the light fabrics instead of the medium fabrics this year. I wanted more contrast in my blocks.

Most of the 2022 temperature quilt fabrics
In January, I started shopping for the background fabric, the fabric for the sunny, snowy and rainy days. I thought that I had done well. I prewashed all the fabrics. I began piecing cubes or blocks.

By mid February, I had pieced together about half the month of January, I had a thought. Piecing the month left to right instead of up and down meant the quilt would be wide but short. Gertie, my inner squirrel, thought I would be happier if I had a longer quilt. I agreed. I carefully ripped the blocks apart and started again.

Ripping the hand stitching was hard. . .the knicker knots that I place at every corner were in there to stay for eternity! Eventually, I had the blocks ripped to being singles again.

Not this orientation of the blocks
I did like how the background fabric played with the blocks. My plan was to add a plan border of the background fabric around the finished top.

Gertie thought that I should audition other fabrics for the background. I did. I tried some grays, a yellow that were commercial prints. Then I auditioned all the medium fabrics that I had left over from the previous temperature quilt.

Gertie said that the grays were too blah and the yellow was okay; but, she liked

Auditioning grey and yellow backgrounds

the multicolored approach best. I agreed with her about the gray; but I liked the yellow. I thought that the multicolored background was way too busy. I liked the idea but I thought that all the color in the backgrounds would take the viewing eye away from the blocks. It takes some time to piece a block and I want the viewing eye to see the blocks!

Briefly, I did consider piecing one additional color. I kept piecing the background fabric. She said I would be sorry. I ignored her. Ignoring Gertie generally causes me angst. This time was no different; but, I'll save that for my next post about this topic.

In case you missed my Wednesday post, I'll remind you that my plan is to feature my earlier book club quilts that I haven't written a post. Eventually, I'll publish a page of the quilts that I've made from the books we've read. I made publishing this page my annual goal.

Auditioning multicolored backgrounds
Because I'm using my leftover scraps from the 2021 temperature quilt in this project, I'm linking to Cynthia at Oh Scrap/Quilting Is More Fun Than Housework. I so enjoy a cuppa while I peruse others' scrappy projects!

Cynthia is a master at using it ALL up!


Wednesday, April 6, 2022

Grandmother's Flowers

Label
Our book club read "The Lace Reader" by Brunonia Barry. The story is set in Salem, Massachusetts. Barry gives the reader a glimpse into history while weaving a theme of confused identities into the story. A great aunt who lived in a home full of lace and who loved a garden of flowers has died. The main character, Eva, arrives in her home town at her Great Aunt's home and the story unfolds.  

At the beginning of the book, the author wrote that the aunt hid her house key in a petal of a flower which Eva finds. My grandmother hid her house key next to her favorite rosebush. Thus began the idea for this book club quilt.

Also at the time, our guild had a nine patch challenge. I participated in the challenge. We made six nine patch blocks that measured nine and a half inches. We turned in the nine patches to the challenge coordinator who put the blocks into a brown paper bag. We picked up a bag and made a project with the blocks. We had to use each nine patch block in its entirety.

Quilt back
I spent a long time agonizing over how to use the blocks which I liked. My friend, Martha, suggested that I turn the blocks on point and use them as a background. I made a number of hexagons which I stitched together to resemble flowers. These hexagons finish to about three-quarters of an inch.

Quilt front
I had fun making my bouquet of blooms. I used a batik fabrics to construct the stems and to give the project a 3-D effect, I let the stems extend beyond the bottom edge of the quilt and I let them dangle freely.

Some of the blooms, I machine appliquéd totally to the quilt top. Some of the blooms, I inserted wire into the petals and attached the center of the flower to the top using beads. While I liked the dimension the wire gave to the flowers, it was challenging getting the wire into the petals. 

Close up of the beading details
I tied the stems together with a piece of purple ribbon and tied a key into the stems. The key was one that came with a diary.

I used purple because that was my grandmother's favorite color. I free motion quilted the project with purple thread using pebbles and feathers as the main filler stitches.

I made this project in 2011. It measures 16 1/4 inches wide and 29 3/4 inches tall. It won a second place ribbon in the guild challenge.


Sunday, April 3, 2022

First Quarter Recap--Second Quarter Goals 2022

2022 Temperature quilt parts
My First Quarter Goals were:✔1. Finish Frolic. --I did finish hand stitching the binding, sleeve and label. 

✔2. Finish the heart wall hanging project. I completed the project.

3. Help Miss J finish her Churn Dash project. Had she not come down with a nasty cold and had we not had some snow and icy weather on the days we had planned to stitch, she would have completed her top in December. She stitched one more border and pieced the back. Update: Miss J and I will get her quilt finished after school ends. We weren't able to complete the quilting in March after all. 

 ✔4. Fully finish the hand embroidery project. In December, I completed the stitching. I found a frame and mat in January. Janice over at A Positive Outlook inspired me to take on this project. I completed it and now it is hanging in my newest granddaughter's room.

Three small cross stitch/hand work projects
5. Finish the Lone Star. I thought that I would piece the back and get it sandwiched last December; but that didn't happen! Update: I did sandwich it and pin baste it in January. Since then, I've done nothing except consider quilting options in my head. I'll revisit this project in September.

 ✔6. Finish the String of Lightening quilt. 

 ✔7. Finish two flannel baby quilts. These are for my newest granddaughter who arrived March 11. They are in her room and ready for use!

Some past Thread Tales projects to document
 ✔8. Make progress on the Rainbow Scrap Challenge blocks for 2022.--I've selected a block in two sizes.

 ✔9. Make progress on the Temperature quilt for 2022. In December, I determined the pattern. I ordered the hand dyed fabrics and the materials I need to English Paper Piece the project. In January, I purchased the background fabric and the fabrics that I plan to use for the third side of the cube. 

❤10. Document the Thread Tales Quilts that I stitched in 2009 and 2010. 

Book club project base materials
Summary: I listed ten goals for myself. I completed seven of the goals and made progress on one. I have a plan for completing the other two goals. It was a great quarter!

Second Quarter Goals:
1. Make progress on the book club quilt for this quarter. I have an idea and am taking supplies with me on my trip.

2. Make progress on the Temperature quilt for 2022. Last quarter, I figured out the layout and pieced all the days in January together. I need to piece all the days of February together. I'm still behind; but, I feel like I am beginning to catch up! I'll take some time during the second quarter to write posts about my process and progress. 

3. Work on three small cross stitch projects.

4. Use Wednesdays to document the Thread Tales Quilts that I haven't written a post. I thought that there were four quilts; but there are more than that number. I wouldn't be surprised to learn that there are about a dozen projects that I haven't documented.

5. Document the Saturday workshops that I've taken.

This is the shortest list I've written; but, I'll be spending many hours rocking and snuggling that newest granddaughter! I envision lots of walks along the Thames!