Showing posts with label PAPER PIECED. Show all posts

Sunday, March 9, 2025

2025 Temperature Quilt--post 2

Patterns for the blocks
Ever since I "determined" the house and tree block pattern, I had doubts. My math was wrong and the finished quilt was going to be larger than I had envisioned. I try to keep the size under 100 inches wide and 110 inches long. I spent more time on places like Pinterest; but, I didn't find any other patterns that I wanted to make.

I tried to draft a pattern which was a fail. It wasn't a fail in that I was unsuccessful; but, I couldn't get on board with making 365 houses using that one pattern. January was morphing into February. I was still stuck. I decided a five inch block would be a better size. Good decision although I still hadn't settled on a pattern.

First two days of January
My calendar, which contains quilt block patterns, had a house block pattern that measured five inches. There were two tree patterns that accompanied the house pattern. I decided to go with those patterns. The blocks are paper pieced. 

I liked that there were two different tree patterns. The squatty tree will represent the space in the month where there are less than 31 days. The tall tree will be the space when a month has 31 days and as the start and end of the year. 

Tall tree
This house pattern has windows. I decided I would use a solid yellow from my stash.  I cut a piece of a solid yellow fabric. After auditioning that strip, I decided I didn't want that much yellow in my quilt! I decided that the roof, windows and door would represent the high temperature of the day. The body of the house would represent the low temperature of the day. The background would represent rain, snow or dry!

The first two days of January, the low and high temperatures were almost the same, hence the same color used in the block! I considered using the background as the house; but, in the end, I went with my plan. As I pieced, I realized that I will need to add sashing between the rows so that I don't have to deal with trying to match the vertical seams because these seams won't nest well. 

Stitching some days together
I contemplated purchasing another shade of brown from the Superior Solids line from Benartex. In keeping with reducing my stash, however, I had plan to use a solid brown fabric from my stash for the inch sashing. I reconfigured the number of blocks per row. I'm now planning 19 blocks in a row and 20 rows. The quilt will finish at about 95 inches by 110 inches. Then I realized that the yard of brown is not going to be nearly enough and I likely can't by another like it as I purchased it more than a year ago. So. . .Gertie and I will be considering some other options.

While I pondered what to do about the sashing, I moved on to piecing the trees. I had considered making the trees different shades of green as well as making the trunks a different color. I did not consider what to use for the background. Rather than purchase another fabric, I used a light solid green from my stash. Whew! What a lot of bumps and twists this project has encountered and it is barely off the ground! Maybe this week, I'll piece a few of the trees that will hold the space at the end of the month for those months that don't have 31 days in them.

I'm going to stitch the next row and test how much of a challenge piecing the rows together will be. Then, I'll decide if I'm purchasing more fabric! I hope I've thought through the issues. I hope that the rest of the project will piece into place as I saw it in my head! It is time to piece the blocks. I'll likely not post often about this project other than noting if I'm keeping up with making the blocks. 

Goal number seven on my March list was to piece an average of two blocks per day. It is early; but, I'm on track for meeting the goal..

Linking to Frédérique and Patchwork and Quilts and Cynthia at Oh Scrap.


Sunday, May 28, 2023

Christmas Stocking--A Finish!

Beginning to pair the pieces with fabric
Goal number four on my May list was to sew a Christmas stocking for our youngest granddaughter. I thought that I would make progress on the project last month; but, I only selected the fabric and located the pattern. 

I clipped the ReNae Merrill pattern from a September 2009 issue of a magazine.  I thought that it would take me three days to make the stocking.  It took me about seven!

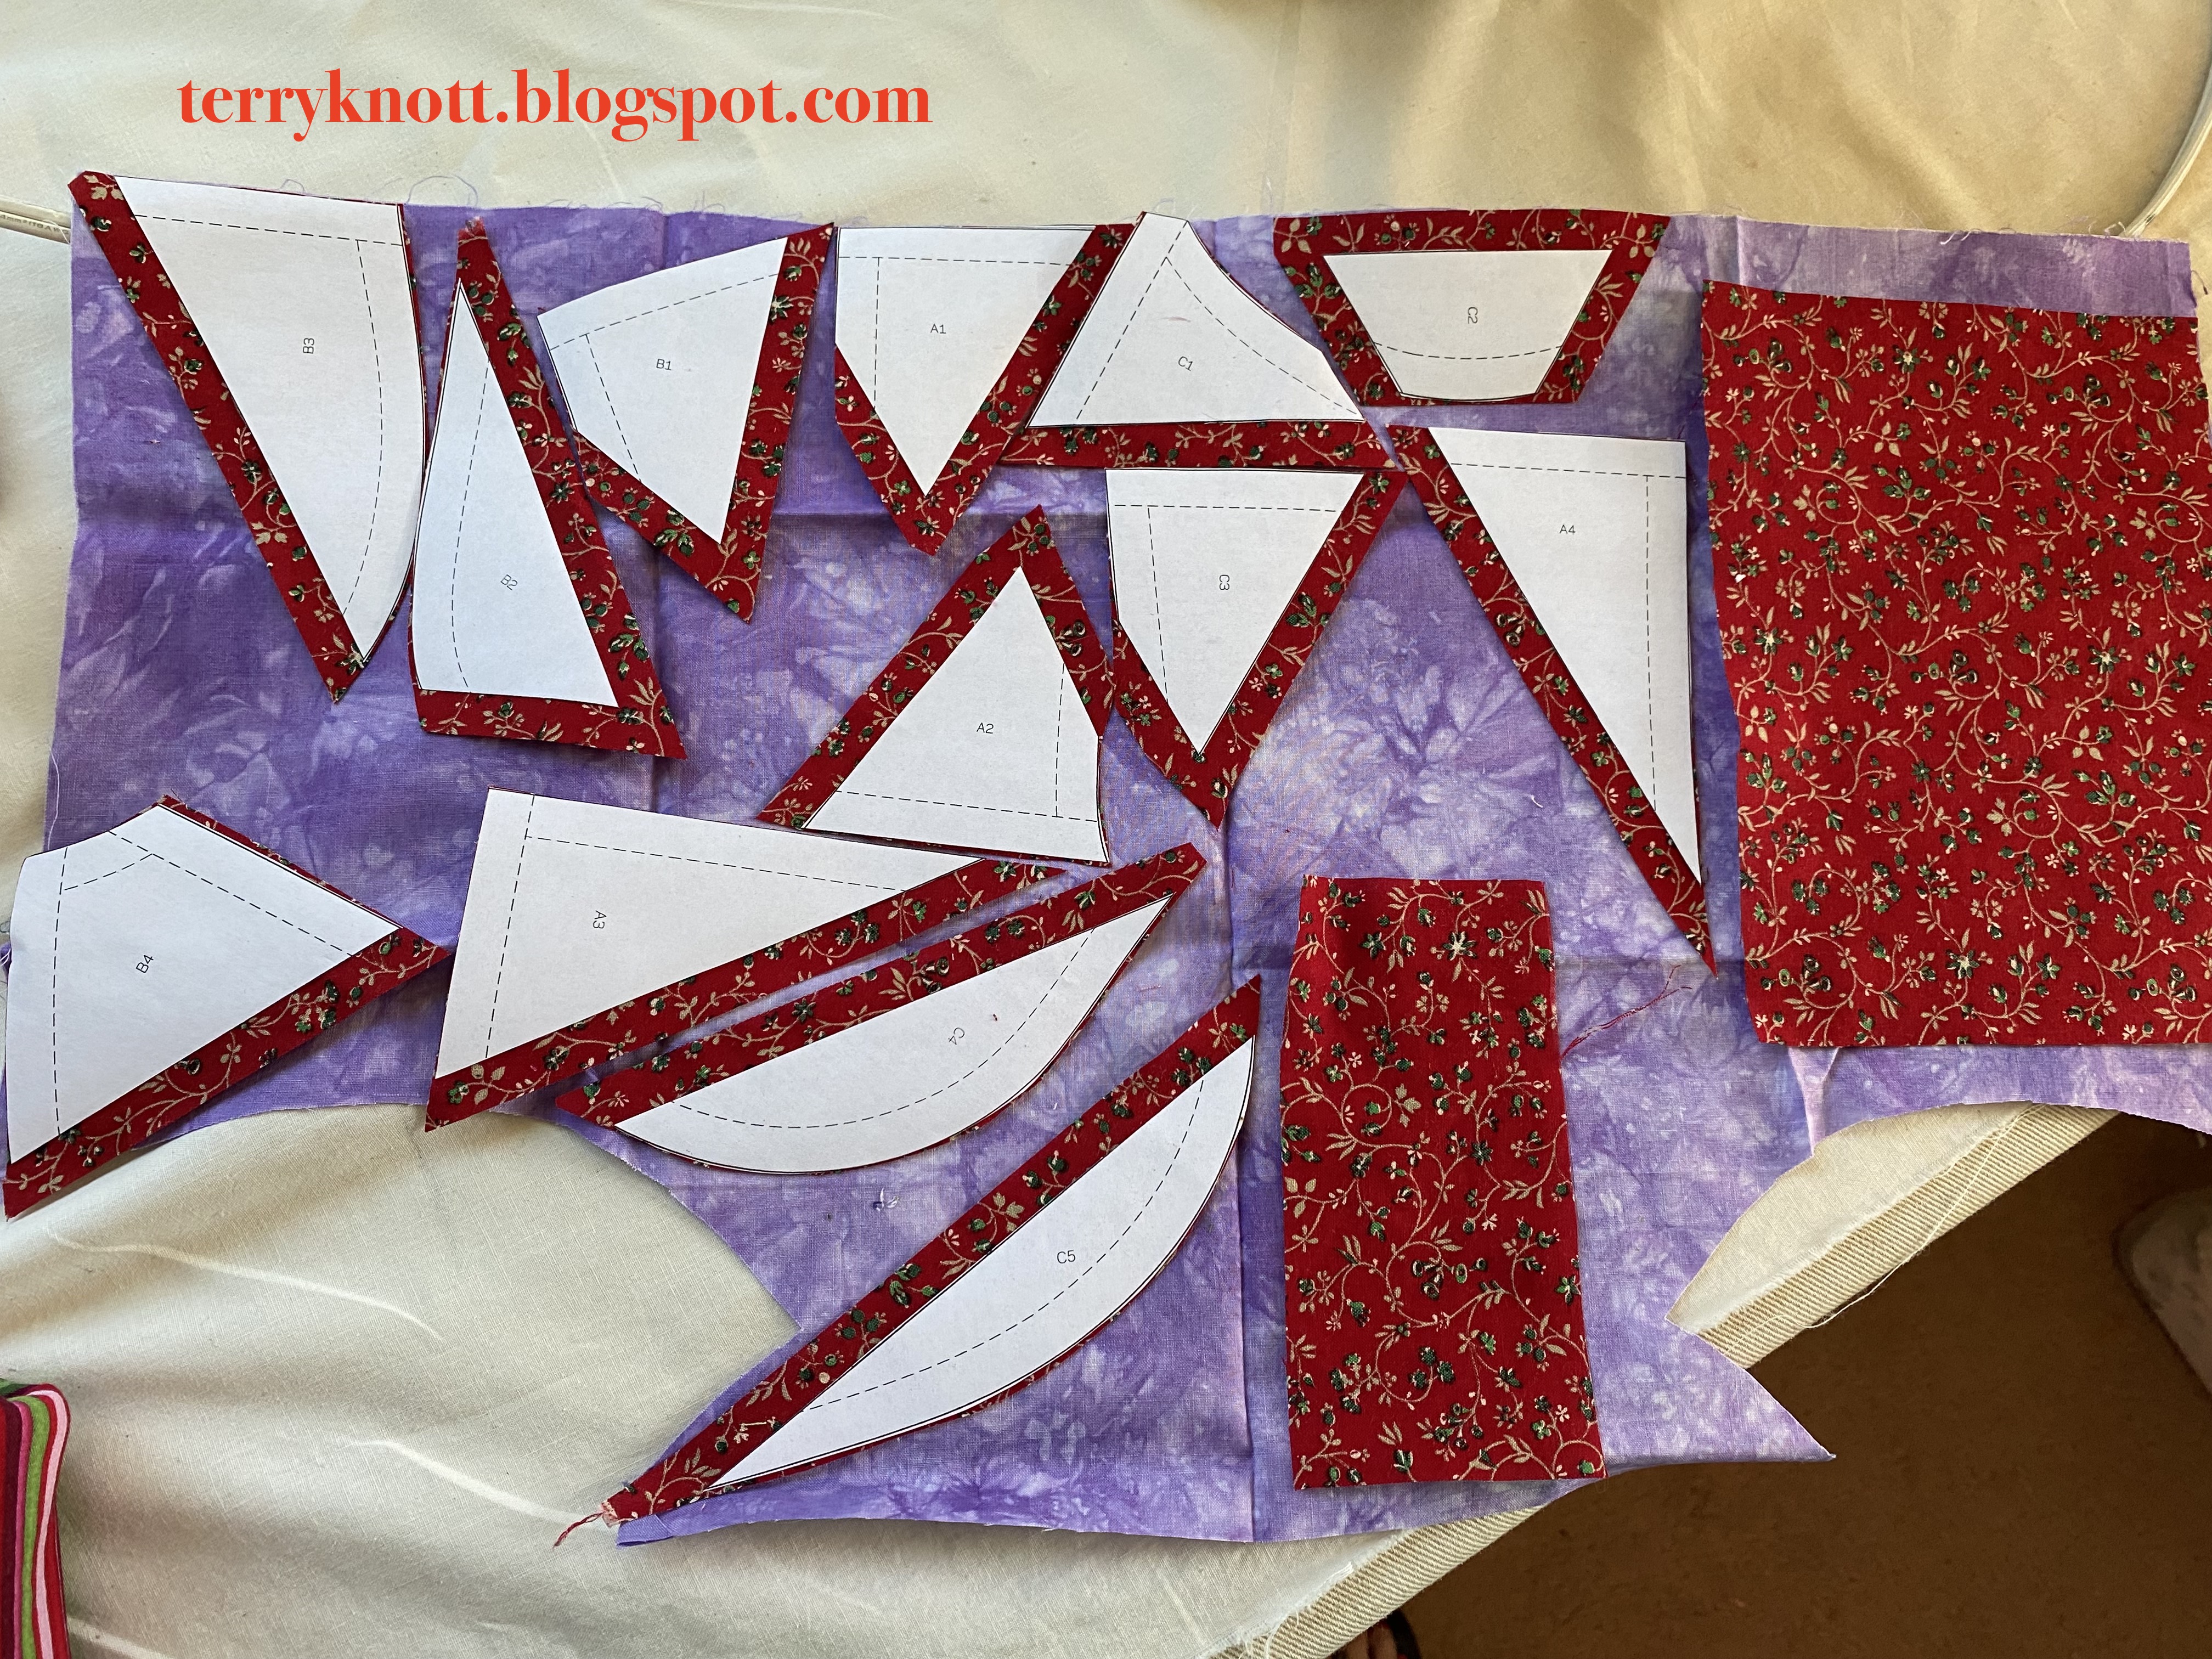
First, I spent a day prewashing the fabric. I spent a day cutting out the fabric. I also printed and prepared the pattern pieces. There are 147 pieces in the spirals. Keeping the pieces organized, sewing them in the correct order was a feat! 

I decided to use a glue stick to adhere the papers to the fabric. I cut the pieces out with at least a quarter inch seam allowance. I tried the Dollar Store brand glue stick, the SewLine glue pen, Elmers Glue stick and Elmers regular glue.

Fabric cut and ready for paper piecing
I liked how easy it was to remove the papers with the Dollar Store brand, Jot, from the fabric. It was, however, a challenge to get the paper to stick to the fabric. The regular Elmers was too wet. The SewLine glue pen and the Elmers glue stick had similar results. I used as light as possible application of the Elmers glue stick.

Cutting a different fabric for the body of the sock
At the last minute, I decided to switch out the red print fabric for the body of the sock, to the purple hand dye. The reason for the switch was I had a plan for the center of the spirals. I decided I would like the end result better if the center fabric matched the sock body fabric.

Slowly creating the spiral
Even though this is a paper foundation piecing project, I decided not to sew through the paper. Instead, I tacked the first piece to the paper. For the rest of the pieces, I folded the paper out of the way before stitching the seam. This technique allowed me to pull the center off the paper foundation. The foundation was intact so there was no paper removal.

Sock ready for embellishment
Once I finished piecing the three sections, I stitched the sections together. The directions used a three eighths seam allowance. This size seam allowance worked well. Next it was time to add the embellishment in the center of those three spirals.

Embroidered letters
Using my embroidery module, I determined the size and font of letter that filled the center hexagon shape. I embroidered a number of letters before I found the font and size I felt worked the best. I had sweaty palms when it came to doing the actual embroidery! The process went well even though it took me all day to embroider three letters!

Back of the finished stocking
Next, I layered the front and the back of the stocking and quilted each. For the back of the stocking, I used the printed fabric lines on the lining as quilting lines. I used a red aurifil cotton thread.

Thread and detail of quilting
For the front of the stocking, I stitched in the ditch in all the seams with a cotton Masterpiece thread made by Superior Threads. For the background of the stocking I quilted spirals and in the background behind the letters, I quilted bubbles in a thread that was close to the color of of the background.

Finished stocking

Once I finished the quilting, I stitched the front and back together. I added the cuff and hanger. I'm considering adding a label somewhere. I used one and three quarters yards of stash for this project. This brings my total of stash used this year to three quarters of a yard! Once I finish some other larger projects, I'll be able to document even more stash usage!

This project was made from scraps so I'm linking to Cynthia at Oh Scrap/Quilting Is More Fun Than Housework.


Sunday, September 25, 2022

Costa Rica Star

Current book club book
Our Thread Tales book club is reading "Color: A Natural History of the Palette" by Victoria Finlay. It is a deep read; but interesting. I've spent some time googling a number of references the author made in the text. 

The cover of the book inspired me with the color palette. In Martha's projects was this Costa Rica star from Judy Mathieson's "Mariner's Compass Quilts--New Directions" book. The colors in the project were what I envisioned. The project had issues.

Why Martha didn't get past the two circle stage was because neither circle was round. That large circle, while beautiful, was full of waves.

The inner and outer circles
She didn't know how to fix it without losing the crispness of the design. She would lament that she had no idea how that happened since she paper pieced the sections. She also would say that she wished that she had left the paper on the sections. She looked at it often; but, didn't work on it. I'm going to finish it using the mantra finished is better than perfect!

After she died, this project was in the pile destined for the landfill. I picked up the bag because there was some black fabric and a couple batik fabric chunks. Was I surprised when I opened the package at home and discovered this project.  

I thought that I would take the circle apart at the quarter marks and restitch it. I was fortunate to have the Mariner's Compass book.

Inner and outer circles together
In the pattern, addressed the waves and said to block the project. I did block it and blocking helped reduce the amount of waves. I was able to get to a more circular shape. I'm glad that I didn't try to rip the sections apart. This star is contracted with the pieces being added to the same side until the circle is complete. Ripping wouldn't have solved my issue.

The next issue was that the hole was too large for the inner star. I considered floating a piece of black background between the two circles. That was a fleeting thought! 

Close up of the seam between two circles 
Instead, I opted to hand baste close to the inside edge of the outer circle. I was able to adjust the fullness enough to set in the inner circle. I basted the edges together because if there were going to be puckers, removing basting stitches was easier than removing regular stitches. 

For the most part, it worked. There is fullness and the edges of the outer circle still "wave"; but, the overall fullness appears to be less. I'm hopeful that the mantra, "it will quilt out" works!

One of the backgrounds that I'm using for my 2022 temperature quilt has the same colors as this star. I thought perhaps that fabric would work in this project too. I also auditioned the plain black fabric that Martha had chosen for the project. 

The pattern has the circle centered in the background, sashed with a selection of fabrics used in the star and then bordered with the background. Gertie, my inner squirrel, liked the plain background the best.

Auditioning the backgrounds 
She also thinks the plain black background fabric is too small because she wants to change the orientation of the star which I think is a good plan. She is drawing thumbnails with layout ideas. 

I've peaked at her thumbnail sketches. I like the one of the star off of the background. Gertie thinks we could pull off an organic edge. Let's see! Gertie also wants to add some bling/beads to the project. I'm not so sure about the beads. Gertie wants to machine piece the piece to the background. I'm leaning towards applique. We continue to contemplate our options!

Martha would be tickled that the two parts of her star are together. I know she would add sparkle or bling to the piece.

I'm linking to Cynthia and Oh Scrap/Quilting Is More Fun Than Housework because Martha made this project with scraps!

I wrote all but the last two paragraphs of this post before the car accident. I still am not able to machine piece or machine quilt because of pain in my upper back and holding the fabric makes my fingers numb.


Wednesday, June 8, 2022

The Book Thief--

Label
Our Thread Tales book club read "The Book Thief" by Markus Kusak. I was inspired by the author's use of color in the opening segment of the book. 

I was inspired by the number of people who banded together to help one of the characters survive the war and the "rules" they lived through. 

Example of quilting
I was inspired by a passage in the book where a farmer has apple trees and some city kids climb over the fence and strip the trees of their fruit before he can. They strip the trees because they are starving.

I had participated in a half square triangle batik (HST) exchange through the
online community of "The Quilt Show" that Edyta Sitar had inspired. I also participated in a HST batik triangle exchange with one of my small groups. These HSTs became the basis for my project.

Finished quilt
To ensure the HSTs were the correct size, we paper pieced them. I used "Thangles" as the foundation paper for my HSTs. I didn't have enough so I used some of my scraps to make the remaining HSTs to finish the tree block.

Inspired by the apple trees and inspired by the sense of community, I chose Sitar's tree pattern as the basis of my project. I've some interesting colors of trees. . .like blue and purple; but, in my world it works. The trunks are a batik fabric I had purchased years ago. I happened upon the green setting square triangle fabric while shopping for another project. I used the tree design in the print to free motion quilt the piece. I stitched continuous curves in the tree leaves.

I had the leaf border fabric in my stash too. It was great to use it in this project. I quilted around the leaf prints. Although, the judges' comments, the two times that I exhibited it in shows, were that the border fabric didn't play well with the top.

I still like the border and all the ways that I incorporated the feeling of many more trees into the piece. I completed this project in 2011. I used wool batting. Because this is a scrappy project, I'm linking to Cynthia and Oh Scrap/Quilting Is More Fun Than Housework.


Wednesday, May 25, 2022

Gold--

Finished quilt after blocking
Our book club read "Tales of the Yukon" by Robert Service. It is a book of poetry. I'm not excited about reading poetry. I've tried several times to enjoy poetry. . .it is not for me! The person who lead the discussions for this book also tasked us to write a poem. For me, writing poetry ranks even less on the scale than reading it does! Sigh. . .

Belonging to the group and participating in the activities has pushed me outside of my comfortable "box" more times than I can recount. In the end, there was one poem in the book that inspired me. It was a poem about the landscape which made me think of stars in the sky against a backdrop of snow. I've considered stars as bits of gold and those thoughts were the inspiration behind this project.

Auditioning the "coverage" strip
I did write a poem:

White snow glows

on a moonlight night.

Beautiful!

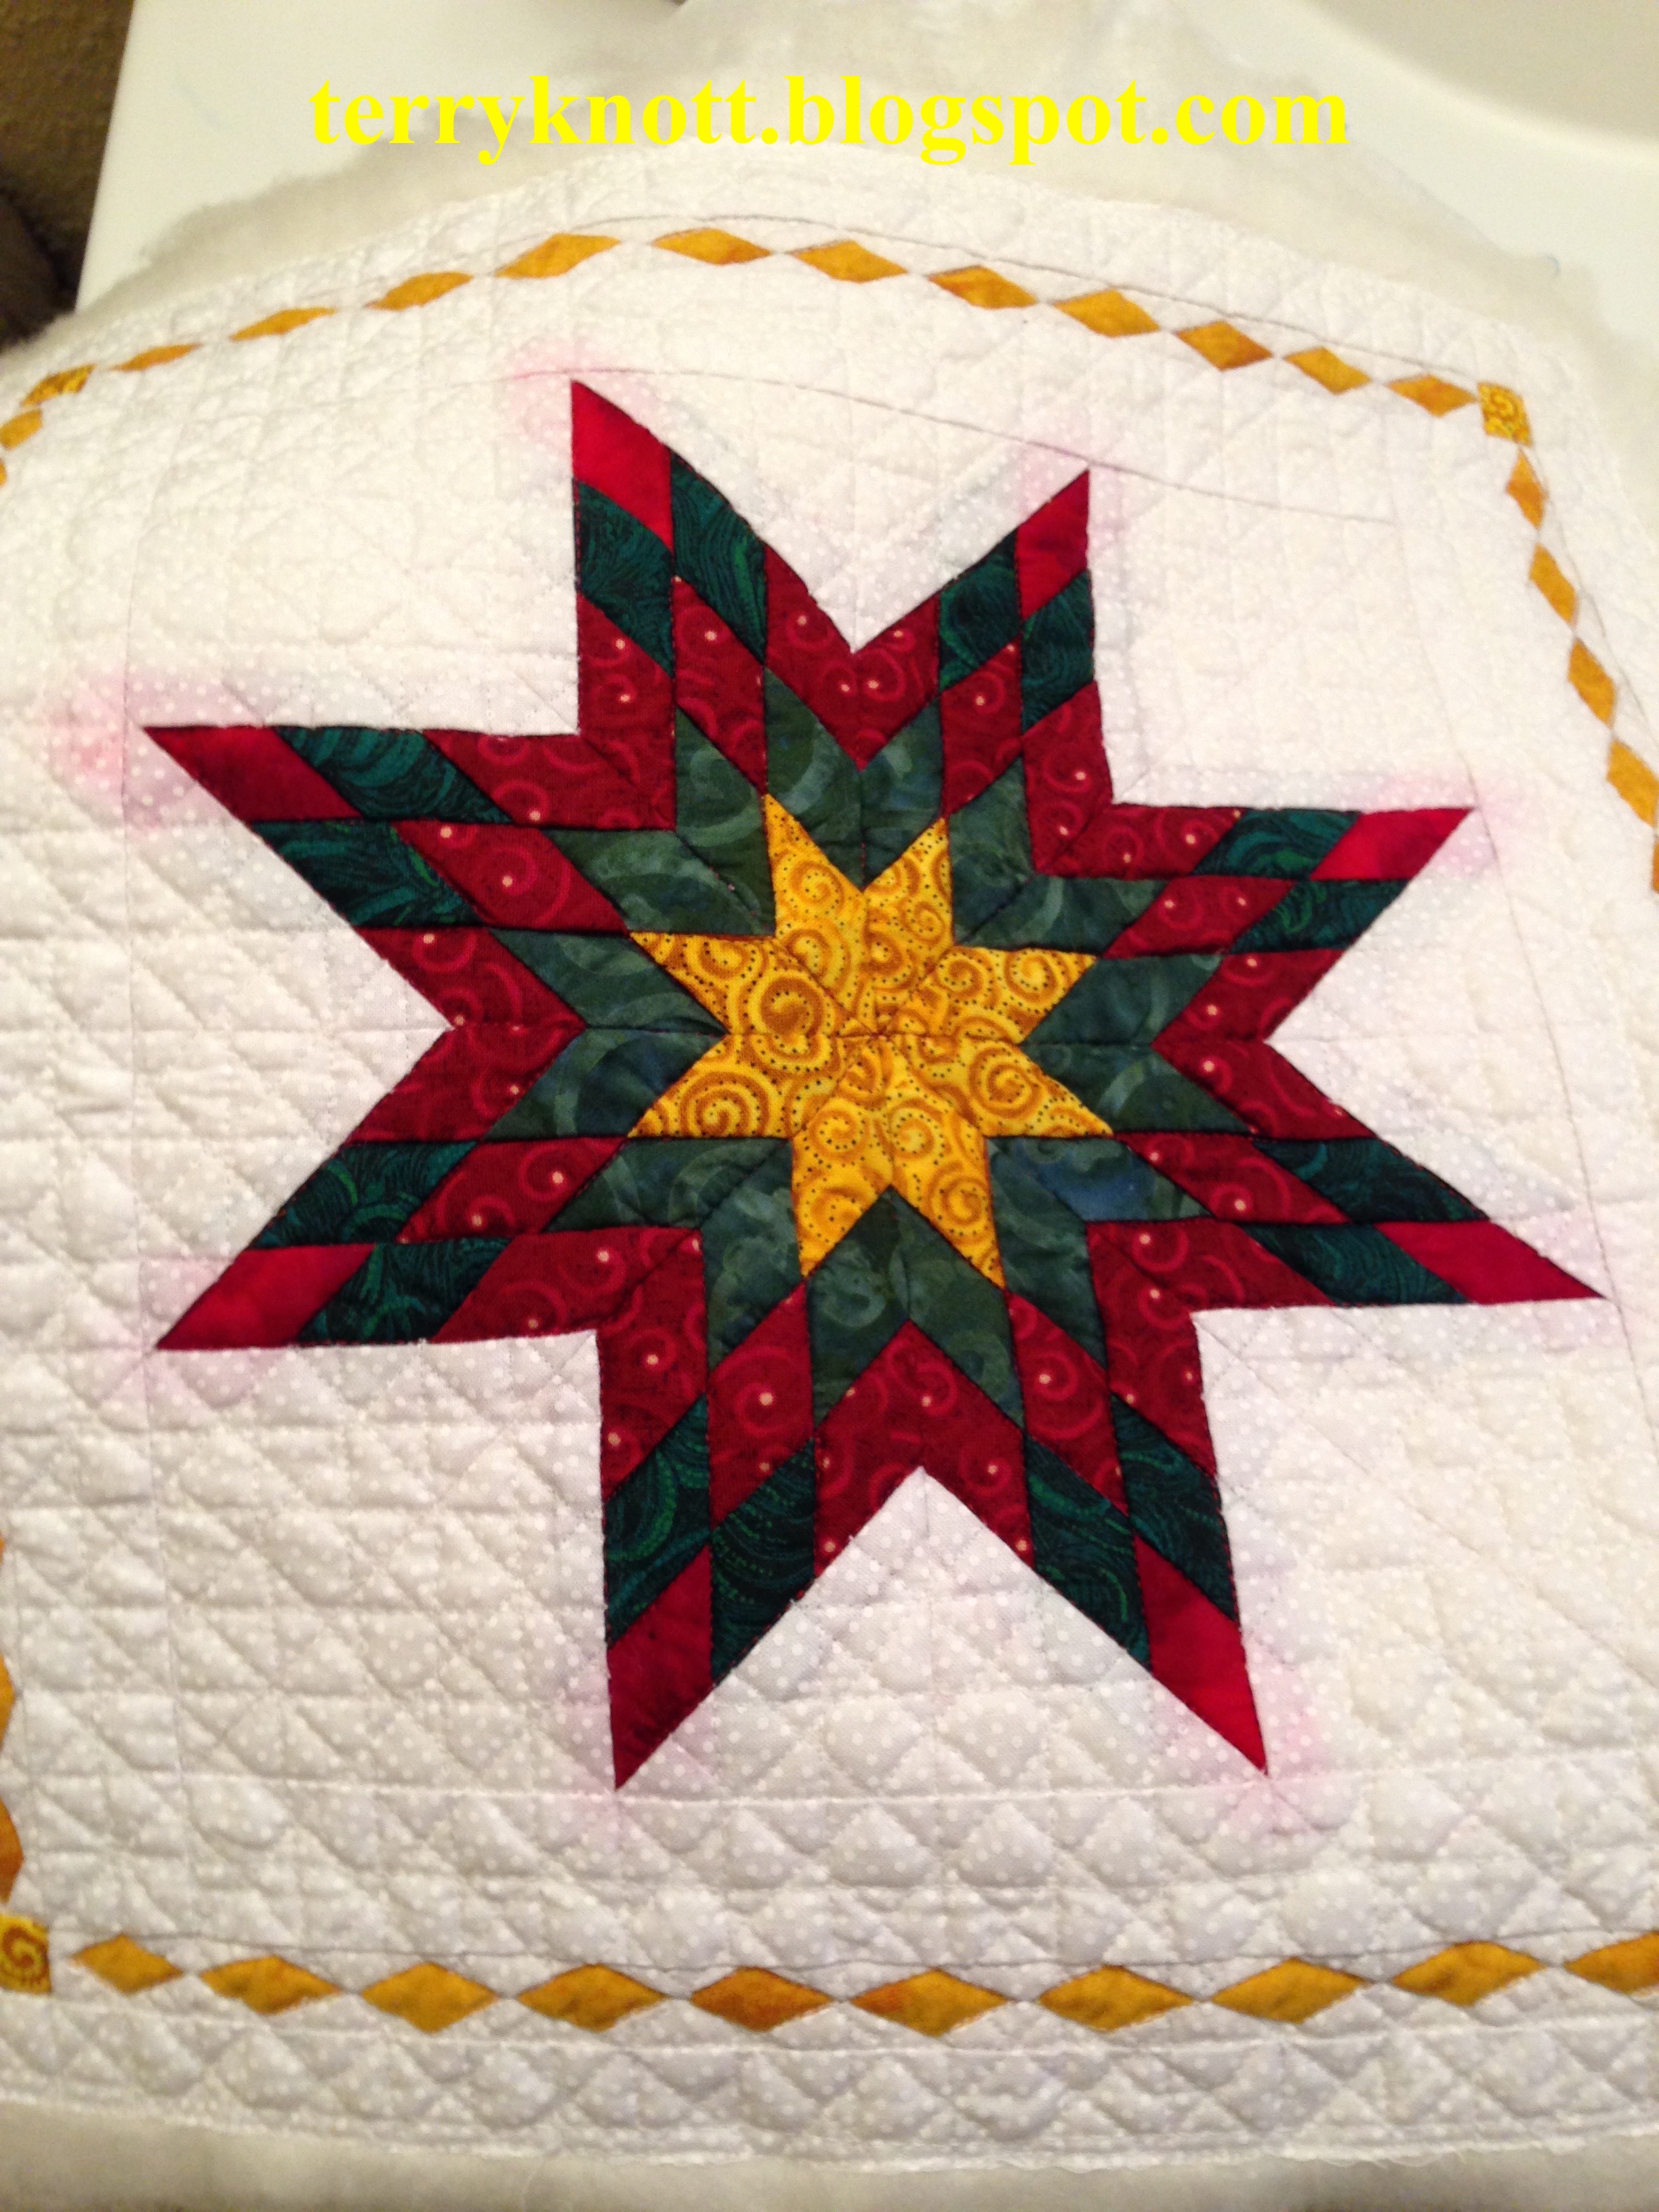
The entire project came from scraps. The design was from "Little Lone Star Quilts" by Lorraine Olson. The star was paper pieced. The diamond border, which is also paper pieced, took forever!

I quilted a grid design in the background fabric. The piece
was a little wonky so I soaked it to block it. The red fabric that I used as the star points bled on the background. I tried a variety of methods to remove the bleeding. While the bleeding was less definite, it was still evident.

Finished front
I considered my options and decided I could put a sashing around the star. I auditioned a variety of fabrics; but, went with a gold fabric. While I would have preferred no strip or a narrower strip, the wider strip covered the majority of the bleeding evidence.

To secure the strip, I hand sewed it in place. I liked how the yellow added to the effect of the star actually glowing. Additionally, the yellow/gold colored strip went well with the gold theme in the book. It was a fix that worked! 

It still was a little wonky; but, I decided a little wonky was better than any more bleeding! The piece measures 13 inches by 13 inches. I finished it in March of 2015. 

Label
I'd always thought that I would make another miniature quilt; but, I haven't! Miniature projects, while taking less fabric than larger projects, still take a lot of time! Accuracy of cutting strips, sewing seam allowances becomes even more important as the pieces become smaller.

I did enter this piece is several quilt shows. It won a blue ribbon (first place) at one show. I share this information because in none of the judges' comments was there a mention of the fabric bleeding. 

Hanging at a show
The judges' did comment that the yellow strip while unexpected added to the overall appearance of the piece. The comments included that the edges should be straight. There was a couple comments that there should have been more space between the gold strip and the diamond border and there were a couple comments that the spacing was good. 

There were no comments about fabric bleeding. It all worked out! 

This is my fourth post this month documenting past book club quilts. If you missed a post you can click the links and read the posts: Old Sames; Reflections; More Than Black and White. Documenting four posts was goal number two in my May list.

Because this project is all from scraps, I'm linking to Cynthia's blog at Oh Scrap/Quilting Is More Fun Than Housework.


Wednesday, May 18, 2022

Old Sames--

Hand embroidery


Our Thread Tales book club read the book, "Snow Flower and the Secret Fan" by Lisa See. The book is about the lives of two girls who are friends throughout their lifetime. In the book, they are "old sames" and that was how I selected the title of my project. 

One girl begins life with little affluence but ends up affluent at the end of the book. The other girl begins life with affluence but ends up without it.


Broiderie perse on the shoes


The girls learn the needle arts: Sewing, embroidery and weaving. They make their own shoes.  They had bound feet and one of the girls achieved the perfect size foot. . . .three inches! I made a "shoe" that was three inches to applique on my quilt.


Fan


The girls communicate with one another writing on the folds of a fan. I designed my own fan pattern and I made a sample which became my label. 


Label


All of my fabrics are leftover from other quilts that I made. This is a technique piece. This project contains a bit of trapunto, hand embroidery, paper piecing, broiderie perse, free motion quilting and more techniques than I can remember.


Back


Since the fan was a central feature of the book, I used a stencil to mark a quilting pattern as well as a batik fabric that was printed with fans.

I was fortunate to have visited China and was impressed with the massive gates that were in front of places of reverence. I made my own sort of gate with the medium blue fabric. This fabric also represented a fabric that the girls could have woven.


Front


I made this project in 2007. It was the second project and second book of our Thread Tales group. My London daughter has this quilt.


Wednesday, February 6, 2019

Bonnie Hunter Mystery (Good Fortune)---Post 2(Clue 5-7)

Clue number 5--three triangles
After working with the orange strings I was happy to see clue five which was piecing an orange and neutral fabric together with a blue fabric. It was a good break from stitching strings.  Stitching a few hours a day, I finished clue five the day that Bonnie released clue number six.
Clue number 6--neutral strings in two sizes

Clue #6 was all about paper piecing neutral strings. I had a few neutral strings so I pulled the ones out that would work for this project. It was great to be able to save my "neutral" chunks! For these strings, I followed Bonnie's directions about stitching on the phone book page as my pages were similar in size to the pages that she used.

I do save the fabric bits that are left when I finish stitching a page. Sometimes, I make a smaller sheet of strings or I piece the strings together.  I'm liking this string piecing. I like the look of the strings.
Clue number 7--a combo of parts

I need to play more with strings this year! I like the mindlessness sewing to paper piece these. I also have a lot of string materials from Martha's stash.

New Year's Day, Bonnie released clue number 7. What was fun about this clue is that I got to use the blue HSTs that I pieced in clue number 2. It is fun to guess at what might be the next step with these parts. I also got to put together the four patches I made in clue number 1.

After participating in this mystery, I understand why people do this each year. I would like to do this again next year! I do know that I'll be sorry when this mystery ends!


Tuesday, December 25, 2018

Christmas Card--Sixth Finish 4th Quarter Finish A Long 2018

Piecing and trimming complete
View from the front
Finished card
My friend, Martha, had a kit in a small plastic bag to make this card. It reminded me of her. I wondered if she planned to gift the kit, give the card and/or make a bunch of cards. I won't know the actual answer since she died last July. I've had it sitting on my sewing table since early September. It is paper piecing, a technique that she loved. I am not as adept at it as she was. Perhaps, that was one reason why I procrastinated with stitching the project. Before I started, I made a copy of the paper pieced pattern and I noted the dimensions of the fabrics in the kit in case that I decided to stitch more.

With six pieces to stitch, it didn't take long to stitch the piece together. I cut out the pieced block on the dotted line. Then I removed the paper. Using an Elmer glue stick, I liberally glued the opening of the card. I placed the pieced tree in the opening. I cut another piece of card stock and glued that in place. Covering the back of the piecing made for a more finished look to the card. To ensure the glue activated, I pressed the paper.

I like how it turned out. If I were to make more, I would need to purchase card stock that either had the center cut into a circle or an oval--there were patterns for both--or figure out how to cut the card stock myself. I doubt that I take on that project. . .but, then again, you never know!

It took me about an hour to make this card. It was goal number 15 on my 4th Quarter Finish A Long list. This is my sixth finish for the quarter. I stitched it Christmas morning.  I plan to gift it next year!

While I stitched the card, I thought about Christmases past. When I was a kid, my brothers and I would wake up early. Mom's and Dad's rule was that you had to stay in bed until it was light. Waiting for the sun to rise was hard! Once we were up, we could open our stockings. We used to bring our stockings into Mom's and Dad's room and open the stockings there. The guise was that Mom and Dad could rest a bit more! Of course, once we were there, Dad would kick us out of their room so they could get dressed. I think it was Dad's way of making the day last longer. Oh, the anticipation I had to see what Santa had left in my stocking!!!

When we picked up our stockings, there often was other evidence under the tree that Santa had been there. . .my brother received a lego toy train one year; I received a doll that was about as big as me complete with dresses that were just like mine; my youngest brother once received a hot wheels set complete with a track. My dad died two years ago on Christmas Eve. He was the one that put together the train and the hot wheels track. It must have taken him hours. He probably had just gone to bed when we were ready to open stockings! I still miss him.

No other packages were opened until my mom's parents arrived. They would arrive soon after the sun had risen. They were laden with packages, appetizers and side dishes for breakfast and for dinner. It was a big deal to me to share the morning festivities with them and then have them hang out with us until after Christmas dinner. It was a part of the holiday that I looked forward to each year. My grandmother would have knitted us mittens and caps and often there was another gift that she had stitched.

She and my grandpa said that they liked to see our faces as we opened gifts. It was always a fun day. So each Christmas, I think of those days. I hope that today brings you much joy and that many happy memories are made.

Merry Christmas!