Wednesday, November 29, 2023

Temperature Quilt--border preparation

Filler blocks ready for insertion
I'm nearing the end of making blocks for the temperature quilt. I'm calling it Deux Ans (Two Years) because I needed to stitch blocks for two years to make a top wide and long enough to cover my body! I've  34 days left to record. With this project, I've managed to keep up or at least not get weeks behind with stitching a block each day.

Last month, I stitched about ten filler blocks for the outer edge. This month, I stitched more. I have 38 that are the block plus a wing. I also have stitched three wingless blocks. I may need a couple more, but, I'd rather need to make a few rather than have a few leftover!

Sample of what isn't going to work
For the side edges, my plan is to applique a piece of purple fabric so that I save all the points. My challenge came with how to handle the top and bottom edges. Because the edges aren't flush, appliquéing a fabric will leave me with a seam which I don't want. 

I've contemplated what to do with the top and bottom for some time. I decided that I would piece a purple diamond in the space. I'd trim the edge to a quarter of an inch and applique the edge to a purple piece of fabric. Last night I stitched four test diamonds. 

Today, I'll be frogging the diamonds. I can't cut the seam allowance because with the way that I've basted the edge, I can't access the seam allowance. I need to cut my papers into half diamonds. I'll do an audition this evening to see how that works.

Sigh. . . .I see lots more stitching ahead!

Sunday, November 26, 2023

Quilting the Lone Star--Filler Stitches (Post 10)

Adding a quilted circle to the geese
At the end of my last post regarding the Lone Star project, I contemplated adding a circle to the center of the flying geese in the top and bottom borders. Using the same thread that I used previously, I quilted a circle. I liked the effect.

Prepping the area to add the strip
Next, I decided that the string border needed to come out to the edge of the quilt. I did have to "reclaim" some of the excess backing fabric to make this work. I did chalk the line and add a few tiny drops of glue in the area. Next, I added the strip with the the quarter inch seam allowance pressed.

The result before quilting
After I had finished tacking the strip in place, I liked the result. 

The extended strips in place
I quilted the extended strips and moved on to finishing quilting the straight lines.

Completed background quilting of the lines
Then, I began adding the filler stitches to the sections I had outlined in red. I quilted larger pebbles in the first section. I used the same thread color as I had the straight lines.

Pebbles in the first section
In the fourth section, I quilted a smaller swirl motif, also in the same thread color. I quilted that section because I was still considering options for sections two and three!

Smaller swirl design
Once I had finished the smaller swirls, I decided that a leaf design would be a good filler for the second section. I like stitching leaves. It was difficult for me to see where I had and hadn't quilted. When I finished that section, I decided I would change my thread color for the remaining two sections.

Leaves
When I left the spaces around some of the shapes, I had thought that I would add organic circles to those areas. I was curious as to how that would look. I quilted a few sections in one leg. Then, I took a moment to step back and "see" how the quilting looked and felt to me. I liked the addition of the red organic circles!
Viewing my work.
In the third area, I quilted a sort of paisley design. The slightly darker thread color works and I like how it fits in with the lighter thread color I had used.
Paisley filler stitch
In the sixth section, I stitched a large swirl design. I had envisioned combining several motifs; but that approach didn't feel right to me so I went with the swirls.
Fifth and sixth section/Pebbles and swirls
In the fifth section, I added pebbles to the center of the design. I used the previous blue thread to stitch these. I threaded the machine with red thread and began filling in all the lines with the organic circles. I'm closing in on the quilting finish although those organic pebbles in red take some time!!! I have three legs left to add those circles.

I thought that I'd finish this, add the binding, label and sleeve before Thanksgiving .I've spent time playing with the granddaughters and daughters which has been so fun. I will finish it next month for sure!!!

Wednesday, November 22, 2023

Following Miss A

Grating carrots
I've already reported on the body measuring session and the swim suits that I held and made for Miss A.

During Miss A's visit, we made a few green salads. I showed her how to tear a lettuce leaf. She tore the first leaf according to the plan. She treated subsequent leaves differently. First she looked at the leaf, then she looked at the bowl. She looked at the leaf. She looked at me. She picked up the leaf and without tearing it, threw it in the bowl. I took it out of the bowl and place the leaf in front of her. She threw it in the bowl and looked at me as if I'd fall off a turnip truck.

Her actions made me laugh because this was the exact response her mama had when she was Miss A's size. Why waste time on the tearing when the leaf was going into the bowl? Just eliminate the tearing and save time!

She did like grating the carrot and needed to taste the shreds to be see if the shreds tasted the same as the sticks.

First hair "trim" with Karen
Miss A had her first hair cut. Karen, our hairdresser for the past 24 years, explained we don't use the term "cut" but trim. So many times kids hear the word cut and think getting their hair cut is going to hurt! Miss A wiggled and Nicole found showing a video helped her move less. Please note, I didn't write stay still! Karen trimmed the tiniest amount from Miss A's hair. Karen dried and styled her hair which Miss A enjoyed. Karen even put a little "color" in her hair.

Cookie decorating
We had a cookie decorating session. Nicole purchased a box kit of already baked gingerbread cookies with tubes of frosting and small packages of items to sprinkle. While the purchase was expensive, $20 for a dozen cookies, the experience was worth every cent. Miss A decorated three cookies before she lost interest.

Tickling the ivories
She took a two and a half hour car trip to visit my dad's wife, Vickie. At Vickie's house, Miss A delighted herself playing the piano. My dad would have loved to have seen and heard her music. She "played" mostly with her index fingers; but, she did use both at the same time and she played all areas of the keys. She amused us all playing the drums on a set of stainless steel bowls and pots with wooden spoons. 

Getting reacquainted with Great Grandma
Then we traveled another hour to my mom's. At my mom's, Miss A took a walk along the canal bank. She found all sorts of knickknacks to make into toys. We also ate lunch. While Miss A liked all visiting, she wasn't all that keen on the travel time. Strapped into the car seat for the more than three hour drive was too long. Miss A travels mass transit in London and she may be in a stroller; but, she doesn't use a car seat often. 

She played soccer with her older cousin, JoJo and she played basketball with her oldest cousin. She adores her cousins. Her cousin JoJo cooked Miss A sourdough pancakes for breakfast one morning, while her cousin Miss K drew pictures and played other games with her.

She even had a play date with a friend from across the street who invited a couple other neighbors to come play. I heard that the snacks the other neighbors brought were the Miss A's favorites. She also liked playing with so many new to her toys.

Today, Miss A is swimming with her mama and auntie at the pool where her auntie has her master swim workouts. Saturday, Miss A is going swimming with her mama and me at my friend's pool. 

Tomorrow, Thanksgiving, we will host the family for dinner. It will be a full house with lots of love shared. Monday, she and her parents return to England. All of them will be missed!


Sunday, November 19, 2023

Swimsuits for Miss A

Measuring
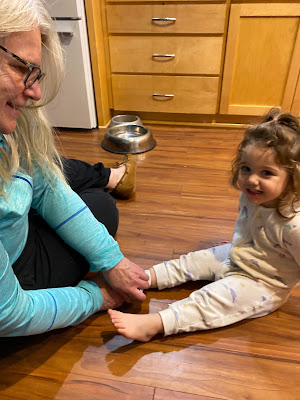
Goal number four on my November list was to sew a couple swimsuits for Miss A. The first step was to measure Miss A so I knew what size pattern I needed to draw from the master pattern. She LOVED being measured. She stood still and patiently waited while I recorded each measurement. Later in the day, she saw the measure tape and wanted another session!

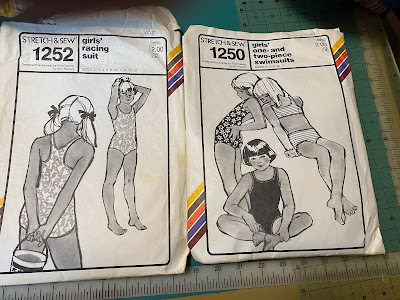
The two patterns
I drew the appropriate size suit on tissue paper. I have two patterns that I purchased when Miss A's auntie was her age. As you can see from the photo, they cost two dollars! I certainly have made money back on the pattern! 

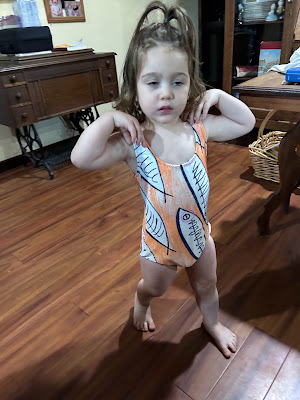
Active pose in the first suit
I looked through my scraps of swimwear and came up with a couple options. Miss A likes animals and orange is a color she often picks first. I had saved the scraps from the suits that I made for our Greece trip last summer. The print was fish on a subtle orange background. The second scrap has been hanging around in my stash for many years. Originally, I made it into suits for Miss A's mama. How fun it was to make Miss A a suit out of those scraps! 

Relaxed pose in the first suit
Cutting out the fabrics went without issue and then it was on to stitching. I used the serger to finish the seams. I lined the front of the suit with another piece of fabric. At the rate she is eating, she will grow out of these suits in no time so I didn't bother to line the back.

Pinning. . .
Miss A visited me in the studio while I was making her suits. She was interested in the buttons on the sewing machine. She sat in my lap while we pinned and stitched the seams for her second suit. It's never too early to hope that she will love fabric and creating with fabric! 

Finished back
It wasn't long and I had two suits finished. It won't be long before we try them out in a pool!

Finished front
I used a little over a yard from my stash of swimwear scraps. This brings the total fabric used from my stash to 21 and 1/4 yards this year. Since I've sewn these two suits from scraps, I'm linking to Cynthia at Oh Scrap/Quilting Is More Fun Than Housework

Wednesday, November 15, 2023

Hexagon Ornament

The hexagons ready for piecing
Goal number five on my November list was to stitch a hexagon ornament. I cut several little kits out of the pictured fabrics last winter to make ornaments. I was teaching an EPP class, I needed some examples of projects that wouldn't take years to complete in order to learn the technique. The hexagons finish at 5/8 of an inch.

Glue basted and ready for stitching
While I've been steadily quilting my Lone Star quilt, the progress I'm making has been slow. I can envision the finish to the quilting; but, it is farther away than I would like it to be! At any rate, I didn't think that between the hand work I've been doing on my temperature quilt and the Lone Star, I'd have time to fit in this EPP ornament project.

Stitching underway
I have several of these kits and my plan was to gift them to friends in Christmas cards. I decided that I would make time on a Friday and stitch it. Fussing cutting the snowman print wasn't difficult. Glue basting the fabric so that the snowman motif lines up relatively the same on each paper foundation was "fiddly." I did manage the glue basting. As I finished basting each hexagon, I checked the placement with its neighbor. 

Front and back hexagons are stitched
When I had glue basted all the snowman fabric hexagons, I glue basted the hexagons with the green striped fabric. I began stitching. I chose a Friday because that is the day I Zoom with a group. I call it my in house retreat day. There is conversation, laughter and progress made on all kinds of projects. 

Finished back
Once I had finished stitching the front and back of the ornament, I glued a piece of ribbon to the inside of the top edge of one side of the ornament. I leave the paper templates in to provide stability. Next I placed a few drops of Elmer's school glue to the edges of the hexagon. After placing the glue dots, I place the other side next to the glued side. I waited a few minutes and then stitched the two sides together. The glue helps the edges stay aligned while I'm stitching.

Finished front
It wasn't long until I had a finished ornament! Next month, I'll stitch another. The finished ornament is about three inches square which will be a nice size on a tree. Now, it is back to more stitching on my temperature quilt and Lone Star quilt. . . little by little. . .I'm making progress!

Sunday, November 12, 2023

Pinning Rainbow Strings

Pinning
Yesterday, Miss K came over for the day. Her mama and her papa (my hubby) went to the Oregon State football game. Our goal was to pin baste her string quilt. She quickly picked up the process. Documenting pin basting her quilt was goal number seven on my November list. Mid-way through the pin basting, it was closing in on lunch. I invited her to go out to eat.

We generally cook together; but today, everyone in her family was having lunch out so when I suggested we go out, her face lit up like a Christmas tree. She wanted to know where we were going, I suggested getting a blizzard with lunch and she let me know that the plan on the way home with her mama was to stop for a blizzard.

Repositioning the backing
I suggested that we pick up lunch at the Mediterranean  Grill which is about 20 minutes from our home. We both ordered chicken shawarma which is a pita sandwich. We each ordered a cinnamon roll. The owner/chef is Lebanese and grew up in Kuwait.  

Closing the pins
After moving to the United States, he worked a lot of years for Dunkin' Doughnuts. There are fresh donuts every day in addition to the Mediterranean offerings. His sister waits the tables and any other jobs that need doing. The sandwiches are huge. We ate half for lunch and the half for dinner! Miss K approved the restaurant choice and wants to return another day. As we ate, we watched Miss K's favorite channel--HGTV. She likes home make over shows.

After lunch, we got out Anne the CPR mannikin. I plan to teach her and her sister CPR and first aid the next time both of the girls are  over. Miss K is slight in the frame. I had her practice five cycles of 30 compressions five times during the day. I wanted her to feel confident with her compressions. 
Writing this post with Bailey providing
snuggles

In the beginning, she wasn't able to push hard enough to make the clicking sound which signifies adequate compression depth. On her fourth cycle, she could perform great compressions. As she practiced, she thought that this practice was enough for me to "give" her a certificate. I let her know that she would come to class and do the work to "earn" her certificate.

She wanted to know how to do the breaths; but, I told her she needed to come to class to practice those! She asked me to show her how to do it, I told her she would learn it in the class. She is excited about coming to class!

Then, we returned to pin basting the quilt. We had a couple repositioning moves remaining. We used lots of pins. Miss K was amazed at how many pins it takes to pin baste a quilt. She decided that she liked closing the pins the best. She was fast at closing the pins! Once we had pinned the entire quilt, we checked to be sure we had no wrinkles in the back.  

Miss K is so looking forward to quilting her strings. She is also looking forward to using her quilt. After we finished pinning, we took another break. Bailey, our dog really needed attention, so Miss K made sure that Bailey received plenty of it! 

We enjoyed watching the Beaver game on TV. The Beavers won which was great! We also looked at my Thread Tales quilts. She helped me select a number of them to show. More on that on another day!

We had a great day together. I look forward to our next sew day! I'm linking to Cynthia at Oh Scrap/Quilting Is More Fun Than Housework.

Wednesday, November 8, 2023

Gathering and Prepping Fabric for Indigo Way--post 1

Fabrics to prewash
Bonnie Hunter's mystery this year is Indigo Way. She released the introduction to the mystery on Halloween. Bonnie will release the first sewing clue the day after Thanksgiving. I have quite a few blue (light and dark) strips in my precuts and leftover from my Rhododendron Trail project. I didn't have the full yardage amount in my stash.

While I have some red fabric, I didn't have a piece that was two and half yards. While I would enjoy going to a variety of local quilt shops to purchase fabrics, my knee pain keeps me from much in person shopping. 

Thank goodness for online shopping! Cotton to Quilts had some cotton rolls and a chunk of red available for sale. I ordered it and it arrived about three days later!

Prewashed, starched and ironed
I spent some time prewashing the fabrics. I expected to have bleeding from the red and dark blue fabrics. I had little! What a great surprise that was!!

Next, I used a ratio of two parts water to one part liquid starch in a spray bottle to saturate the fabrics. I use Stay-Flo liquid starch. I've also put my starch solution in a tub and dunked the dry fabrics. 

Personally, I prefer the spray bottle method. I place the fabrics in the bottom of the shower and spray. The shower is an easy environment to clean up after I've completed starching the fabrics!

I hung the fabrics to dry and ironed them. I use a dry iron and spritz the fabric with water to remove any wrinkles. If I have a stubborn wrinkle, I use a little Best Press which is an alternative spray starch.

After starching, the fabrics are stiff and are more like paper. The stiffness makes it easier for me to cut and sew accurately. I found a video tutorial that shares how to use the dunk method of starching. After I've finished the project, I'll wash it to remove the starch. 

For now, I'm ready for the first clue! Are you following along or joining Bonnie's mystery? Please, let me know your intentions in the comments. Gathering and prepping the fabrics was clue number three on my November list.


Sunday, November 5, 2023

Making the Back for Rainbow Strings

Mixing the wet ingredients into the dry
Miss K had a day off from school and she knew just how to spend it . . .in Gran's studio, quilting. Even better, she arrived late afternoon so we could have an overnight! The best part of her weekend came when we measured her height. She is now 59 1/2 inches tall and no longer needs to sit in a car seat. She repeated "freedom" over and over!

Her first request was to bake mug cupcakes. While those cooled, we worked on piecing the back for Miss K's Rainbow Strings top.

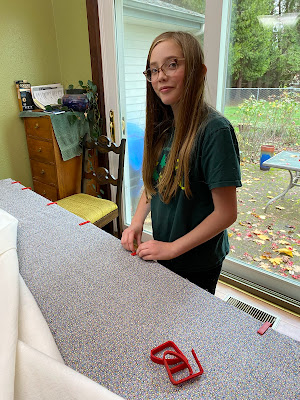
We pressed the fabric with the large dots. Miss K carefully pressed the yardage flat without one crease! She even offered to press some of my yardage that I had prewashed and hadn't ironed yet! I showed her how to trim away the selvages.

We laid out the fabric and while we knew we needed more, we found that we liked the combination of the small dot fabric with a strip of maroon best. We cut lengths of the fabric for the back. She pinned one long seam. We started piecing the back the following morning. 


One scone ready to eat

In the morning, we made scones. Actually, she made them using a new to us recipe. The recipe came from the book, "The Kitchen Front" by Jennifer Ryan. The book is about four women from England who enter a cooking contest during World War II. The recipes that they use have to follow the war time food rations.

Ironing
Miss K thought that it would be hard to cook when you were regulated to how much sugar, oil, eggs and meat each person could purchase in a week. She also thought it was crazy that people had to use coupon books to purchase those items.

Pinning the seams
After breakfast, we started sewing. This time, Miss K sewed straight and true quarter inch seams. We took a lot of breaks because sewing such a long seam feels like forever.

Checking the quilt dimensions
At one break, she wanted to check if the quilt was going to cover her body. Miss K stretched her body onto the back in progress to check. Yes, the size was good. Actually, according to her, it was great because it contained growing room!

The finished back
Slowly, the back came together. Just in time too because Miss K wanted to put the pack and play together for her cousin Miss A who is coming to visit with her parents in a couple of weeks. Miss K and her papa quickly assembled the park and play together When not in use, it can be dismantled and folded away into a canvas like sack.

Pack and play ready for action
Then they played cribbage. It was a fun day for all of us. On her next visit, we will pin baste her quilt. Writing this post was goal number six on my November list. I'm linking to Cynthia at Oh Scrap/Quilting Is More Fun Than Housework. Pour yourself a cuppa and go visit to see what other projects people are stitching!


Wednesday, November 1, 2023

October ReCap and November Goals

Circles added to goose border on Lone Star
My goals for October were:

✔1. Finish the two baby quilts for boys that I started last month. Quilt 1 and Quilt 2 Finishing these two quilts were also my October goal for #WIPsbegone2023 with Leanne at Devoted Quilter

✔2. Post about the Christmas Stocking I finished last month.

✔3. Figure out what to quilt in the outer section of the Lone Star. Post 1 and Post 2

✔4. Continue making blocks and inserting them into the Temperature quilt.

✔5. Begin gathering fabrics for the Bonnie Hunter mystery. Yesterday, I did a little online retail shopping,

Parts for a hexagon ornament
✔6. Write and post how to square a back.

✔7. Make a block for CCQ block contest "As Noted."

It was a great month. I am most pleased about meeting goal
number three!

My goals for November are:

1. Finish the Lone Star. Finishing this quilt was also my November goal for #WIPsbegone2023 with Leanne at Devoted Quilter.

2. Finish the quilting on the Farm Quilt. Finishing this quilt is also my November goal for #WIPsbegone2023 with Leanne at Devoted Quilter. As long as it has taken me to make actual progress on the Lone Star, I think that finishing the farm quilt is too much of a reach; but, who knows???

3. Prepare the fabrics for the Bonnie Hunter mystery.

Sunrise yesterday

(gather, purchase, prewash, starch, iron)

4. Sew a couple swimsuits for Miss A our youngest granddaughter.

5. Make one hexagon ornament.

6. Write one post about piecing the back for a string quilt. Miss K, the oldest granddaughter, made most of the blocks for the RSC in 2021. She had a day off from school.We took advantage of the "open" time with a sleepover and sew day!

7. Write a post about pin basting the string quilt with Miss K.

Writing the goals has helped me make progress on projects. Probing into why I'm not making progress on a goal has also helped me get past stuck places. Although, uncovering the answer(s) can be difficult to wear!

Finally, I'm including a photo of the sunrise yesterday. It was so beautiful. The colors in the sky were amazing. Watching the sun rise, sipping a cuppa,  is a great way to begin my day!