Wednesday, February 28, 2024

Temperature Quilt -- English Paper Piecing Complete

All half diamond shapes in place
Goal number five on my February list was to finish English paper piecing the half diamonds on the other edge of my temperature quilt. 

To meet the goal, I needed to insert one half diamond piece 25 out of the 29 days of the month. I wasn't worried. I started out the month making good progress; but, after the first week, I fell behind. By the fourth week of February, I had pieced a little over fifty percent of the half diamond pieces. It wasn't looking like I'd meet that goal.

Gerite, my inner squirrel, kept whispering to me that I could do it. She told me all I needed to do was piece four shapes each day. 

Close up of lower edge
I couldn't get motivated. Days passed without me stitching even a partial diamond into the top. Daily, I review my monthly list of goals. I look at the calendar. I have talks with myself about which project I could move forward a bit as I approach the end of the month. I also determine what projects will likely languish. I ask myself what is holding me up to work on those projects.

While I had these conversations, Gertie told me that I had
done so well keeping up with this project for the last two years. She said it would be sad if I lost momentum now. The last two weeks, she has been especially vigilant. After all, I was 14 shapes from finishing the lower edge. This week on Monday, I pieced six shapes. Tuesday, I pieced the remaining eight blocks. Wednesday (this morning), I took a photo of my top.

My plan is to applique a border around the outer edge using the purple fabric.  Next step is to carefully remove the papers along one side and place it on the border. Rather than use pins to anchor the edge to the border fabric, I'll use small drops of glue. 

I'm feeling thankful that Gertie kept whispering words of encouragement!!!


Sunday, February 25, 2024

Farm Quilt Progress and Rainbow Scrap Squares--Post 4

Beginning to quilt the churn dash sections
Goal number one on my February list was to make progress on the Farm Quilt. I was thinking that perhaps another month would have lapsed with the quilt in the same condition as it was at the beginning of the month. 

When I don't make progress or when it looks like I'm not going to make progress on a project the second time I've listed it on my monthly goal list, I ask myself if the project needs to come off of my list. I ask myself what is stopping me from working on the project. In this case, I have been studying for a class. With work and studying, I haven't had much concentrated time in the studio.

Quilted lines 
I decided that I would spend two hours working on the project last Wednesday after work. Since so much time had passed since I last worked on it, I needed to reacquaint myself with what I was doing and what I was doing it with!

First quilted block
At the end of the time, I had finished the ditch quilting and had started quilting the blocks. Friday evening and after spending a day training in the pool, I attended our standing Zoom sew day session. 

The makings of some blocks
Every Friday, our Clark County Quilters guild provides a Zoom link so any member can sew with other members from 10 in the morning until 11 in the evening. People come and go and some come back through the day. It is good to catch up with people. I treat these days like a mini retreat. 

Last Friday after the training day, my brain was too tired to think about putting selvages together for a square. I decided  I could make more progress quilting the block I had started on the Farm quilt.

I was stitching line after line using a ruler. The repetition of the movement helped my brain unwind from the challenges of the day. I hadn't planned to quilt this project this densely nor had I planned to customize each block. Sometimes, the quilt talks and the maker needs to listen. In this case, the quilt talked.  I ignored the quilt. Gertie, my inner squirrel, chirped at me to listen to the quilt. Gertie had a point. I listened. Now, I'm stitching. There are 20 blocks in this quilt. I'll be at this stage of the quilting for some time!

It took me about three hours to quilt this block. Some of the time I was talking to other pitchers on the Zoom call.. Some of the time, I was auditioning a line and sometimes, I was removing a line. Perhaps if I'm not visiting, I will quilt the next block a little faster. 

Yesterday, I pulled out my selvages and began to putting together squares for three blocks. Today, I'll stitch and trim the blocks. Goal number four on my February list was to make selvage squares in the color of the Rainbow Scrap Challenge. This month, Angela chose red. Eventually, I will combine four squares into a block. This year, I'm concentrating on making the squares!

Linking to Angela at Scrap Happy and linking to Cynthia at Oh Scrap/Quilting Is More Fun Than Housework. After all, these selvages qualify as scrap!


Wednesday, February 21, 2024

Another Kitchen Towel

 Goal number 12 on my February list to make another decorative kitchen towel. I thought I'd use these two fabrics; but, I decided the red was too bold. 

Original plan
I actually stitched this project as a leader ender as I finished my Lime Sprinkle top! I went a different route with the fabric. I found a blue that could be a subtle transition from the tree fabric to the checked towel fabric.

The finished towel
For the next project, I'll try to center the tree print so that you can see the branches rather than the trunks. This would be a good gift for someone who likes blue. I have a lime green checked towel and a different tree print fabric for the next two towels. 

That is a project for next month! I'm planning to gift kitchen towels to colleagues next December. I started in January and my goal is  to make one or two a month. I was asked in a comment where I get the towel. It is a Dunroven product. I've paid four to six dollars for a towel which I cut in half. Using scraps, a little thread and time, it is an affordable project!

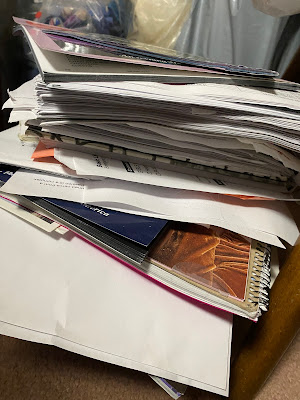
The eighteen inch pile of "stuff"
I also eliminated  the pile that has been on my studio floor for at least a year. This was goal number 11 on my February list. I had saved at least a dozen magazines over the years for inspiration. As I looked at the pages, I pulled patterns that I could make. In the end, I recycled all the magazines but two. Those two magazines contained projects that I "might" make!  There were six quilt books in the pile. I had pulled them off the shelf for possible patterns. There was the stack of medical bills from my September 2022 car accident. These I saved because there are still outstanding bills. While I'm not as good as I was before I was rear ended, I look forward to closing the case. 

There was an equal amount of papers regarding quilt projects, activities and trainings. I filed some and recycled the majority. The biggest find was a little project bag that I have been trying to find! I have a plan for that project! Finally, there was my art journal. There are still some blank pages. I placed ii with my other art supplies. Now there is open floor space which is great. 

It wasn't the awful experience I had anticipated. Although, I'd much rather be stitching than cleaning or organizing! Next month, I'll choose another "pile" to tackle. Little by little, I'll regain control of my sewing space!

Sunday, February 18, 2024

Lime Sprinkle Is A Top!--Post 2

Auditioning the upper left corner

Goal number 10 on my February list was to get the project I started in an Irene Rodrick workshop to a top. I have had so much fun piecing this top. I was stuck with what to do in the last corner. I originally planned to use solid black. . .then decided that approach would be too much black. I thought about Improv piecing log cabins--I wasn't feeling that shape. I wasn't making progress.

Pieced left corner
This week, I decided I'd determine what fabric color was going to be in that corner. I'd already determined it wasn't black. I auditioned a piece of gray, no. . .I had gray on the right side of the project already. That left red. I hadn't considered red because I have so much of that color in the quilt already.

When I stepped back after placing a chunk in that space, that color felt "right." Then it was what to insert in the red. I decided that I would piece in some wider strips using black. I'd end up with triangle shapes.

I did no measuring. I didn't use a ruler. I free hand sliced the red fabric and began piecing the black strips. I did use a ruler to trim the edges. Once I had sewn the section, I decided that the piece was stronger without the checkerboard strip.

From my previous post, I had the top right section together as well as the right lower section. I also had a partially sewn seam that linked the left to the right. 

I decided the project which I'm calling Lime Sprinkle, was ready to become a top. (I'm planning to share it with my modern small group as an answer to their lime twist challenge. The rules were 24 inches wide by 48-60 inches long. Lime fabric has to be visible on the front of the quilt. Kintsugi--the art of using gold to repair broken pottery should be present. Piecing should be Improv either curved or straight.)

I pieced chunks together, In the photo below, I shared my stitching path. In a short time, I had the top together. .  .well. . .sort of. . .There were a couple spots that waved! I altered those areas. I added a little more Improv piecing. 

Order in which I stitched the sections
Then I trimmed the top to resemble a rectangle. I liked it and proclaimed the top was finished. Then that checkerboard talked to me. Well, Gertie, my inner squirrel, was the one who was listening to the checkerboard chatter. The following morning, I auditioned the checkerboard at the bottom right of the top. It looked like it wanted to live there. I believe I have captured the theme of maximalism (more is more) in this project!

All the sections stitched together

I added a strip of black to the checkerboard to get the section to fit the bottom of the top. I stitched it. Now. . .it is a finished top, Bonus. . .I've even selected the back fabric and determined that the project will be faced. Now on to the layering and basting!

Finished top
I'm linking to Cynthia at Oh Scrap/Quilting Is More Fun Than Housework. There is always lots of inspiration of what others are doing with scraps and bits!


Wednesday, February 14, 2024

Free Hand Curves---Post 1

Fabric choices
Goal number six on my February list was to attend a Cindy Grisdela workshop. Last weekend, I attended her two day on line Free Hand Curves workshop. One might think that in six hours of class with sewing time after, a number of blocks would be created. Several people in class did create multiple blocks. I made parts and sort of finished one block.

The beginning of a curve
I did add to my bag of techniques and at some point, I will finish my start. The piece will be small. Perhaps, a little larger than four blocks.

Parts waiting to be added to a block
Building the parts, took more effort than I had thought. I didn't have many scraps to piece as leader and enders nor did I have chunks of scraps to build into bigger parts. Perhaps, these parts will find a home in the project or maybe not. 

Blocks at the end of class
I used a ruler to cut the initial square of fabric and to square the block. Otherwise, I free hand cut the fabric. I used burnt orange, lighter orange and a dark green, all colors not ones I often use, to help me broaden my palette. 

I didn't find the joy in this class like I did in Irene Roderick's class. Perhaps, using a palette instead of two colors as a start had something to do with it. Perhaps, the multitude of ums from the teacher clicked something in my brain to make me feel the effects of that car accident again. Who knows. . I did get a terrible headache and was nauseous at the class end each day. Such a weird set of symptoms as classes should be fun and headache free!


Sunday, February 11, 2024

Swimsuit Tutorial

Cut the fabric so the greater stretch goes
around the body or crosswise
This is a long post.

Several people have asked me to share how I sew a swimsuit. I've made swimsuits for myself, my kids and now my grandkids. I made my first swimsuit during my first pregnancy. I learned the tips of stitching suits from my mom who taught a number of adult education classes, Swimwear was one class she taught! She made my suits when I was in high school.

My patterns are 35 to 40 years old. Mostly they are Stretch N Sew; but, there are a few Kwik Sew and even a Butterick! In addition to choosing a pattern size that reflects your bust, hip and waist measurements, you also need to look at the overall measurement. If you've ever had a suit that made you feel shorter, or pulled on your shoulders, likely, the overall measurement was too small. 

Crotch front compared to crotch back
Your overall measurement is the distance from your crotch to over one shoulder. The tape goes around your whole body: front, back and breast. The measurement reflects the depth of your body. A suit with the correct overall measurement is comfortable to wear for hours and hours. I lengthen my suits a couple of inches because over the years, I've gotten much thicker through the middle!

Crotch seam pinned and ready to sew
Once you've selected your pattern, made the necessary adjustments and drawn the pattern on tissue paper or some other pattern type paper; it's time to cut out your suit. Swimwear fabric stretches in both directions. Often the lengthwise and crosswise stretch are the same. Sometimes, there is a difference. Pay attention to the stretch. You want the crosswise stretch going around your body. If you make
a suit with the stretch going vertically, it is uncomfortable and difficult to get on and off.
Stitching the crotch with a 5/8" seam

Some people say not to poke holes in swimwear fabric and to use weights to cut out the pattern pieces. I use sharp pins and don't have issues. I have used pattern weights too and both ways work. If you want to line a suit, cut out your lining now as well. The lining fabric has stretch too so treat it just like you did your swimwear fabric with the greatest stretch going around your body. If you are lining your suit, you won't need to cut a crotch lining piece.

The suit I'm making in this tutorial isn't lined. In this case, there is a crotch lining which is a small pattern piece. Sometimes people are concerned about the crotch seam because the back of the fabric piece is larger than the front of the pattern piece. This is normal. You will pin the sides and then ease the pieces to fit.

For this suit, I've pinned the front and back crotch seams right sides together. I've added the crotch lining, right side to the wrong side of the back crotch. Use a cotton or cotton/poly thread. I used the stretch thread and found it didn't hold up well to the chlorine.

With an 80/20 needle, I stitched with a 5/8" seam allowance stretching it as I stitched. If you find the needle causing little runs in the fabrics, you could try a ball point needle. I've used universal, sharp and ball point needles. All worked. I am a Schmetz needle fan.

Serging the seam

Stretching the seam allows the seam to take stress when you are putting the suit on and taking it off. If you hear popping noises, you are ripping stitches which means that suit isn't going to wear well! Don't panic if you hear those noises the first time you wear it, you do sew the seam a second time. I use a stitch length of 3.5.

Serged crotch seam
Then I serged the seam, leaving a quarter inch seam allowance. The serger is set up to in normal stitch mode. If you don't have a serger, stitch the seam a second time. I don't stretch the seams much when I serge and that works fine. I was asked about using the stretch stitch in my machine. I have used it years ago. When I purchased a serger, it was faster to straight stitch and then serge. That stretch stitch is not a stitch that you want to rip!

(If you are lining your suit, you will follow the same steps except you won't have the crotch lining piece in the mix. You will sew the front and the back of the suit together. You will repeat that step for the lining.) 

Crotch lining edges pinned in place
Then, I flipped the crotch lining piece to the front of the suit. The crotch seam is enclosed. From the right side, I pinned the edges together. Later the elastic will enclose these edges.

Stitch 1/4 inch away from crotch seam
I stitched a quarter of an inch away from the crotch seam. This holds the fabric in place. 

Crotch seam view from the wrong side of the suit
This is what the seam looks like from the wrong side of the fabric.

Stretching the fabric as I sew
Next, stitch the side seams and the shoulder seams using a 1/4 seam. Stretch the side seams in front and in back of the needle as you sew. The more you stretch, the more give the seam will have when putting the on and pulling it off.

1/4" seam. Don't sew over pins!
Sometimes people are concerned after stretching the seam that the stitch looks a bit wonky. That is okay. Next serge of stitch the seam a second time. (If you are lining your suit, repeat for the lining.)

View of the stitched and serged seam
If you are lining your suit, place the lining wrong sides next to the wrong sides of the suit. Pin around all openings: arm holes, neck and leg opening. With another color of thread, Baste the edges together using a long basting stitch. Stretch as you stitch. Trim the lining close to the basted stitching. 

Roll of 3/8" elastic
Now it is time for elastic insertion. The pattern instructions will give you guidance on how much elastic to cut and what size to use. I use 3/8 inch swimwear elastic. I bought a roll of it on line years ago. This elastic holds up better to the pool chemicals. Manufactures often use clear elastic as it is less bulky than the elastic in the photo. I haven't stitched with that so I can't comment on its use.

Setting used to sew elastic ends together
Most of the patterns will say to use a one to one stretch for the neck and armhole openings. I like the elastics to fit more snuggly to my body so I cut the pieces at least one and half inches less than the measurement of the opening.

Stitching in progress
When I sew the ends of the elastic together, I butt the edges together and I use a zigzag stitch. I snapped a photo of the setting that I used. I butt the edges together because it reduces bulk. I stitch back and forth several times to secure the join.

Edges joined together
This is what it looks like when the edges are joined together.

Divide the elastic into quarters
For the armhole and neck openings, I divide the elastic into quarters with pins. I then divide the suit opening (neck or armhole) into quarters. I change the position of my needle and lengthen my stitch length and narrow the zigzag width. For the first round of stitching, I move my needle all the way to the right. (The photo shows the needle position for the second round of stitching. I forgot to take a photo of the machine setting for the first round!)

Setting that I use 
I pin the elastic to the wrong side of the suit matching the quarter marks. When I begin stitching, I stretch the fabric in front and behind the needle as well as position the edge of the elastic about one eighth inch inside the edge of the fabric. My goal is to stitch on the outside edge of the elastic. Honestly, I feel like I did as a kid when I would pat my stomach and rub my head! 

Needle and elastic position on the fabric
The reason I want to stitch so close to the outer edge of the fabric is because the elastic will fit better against the body and the suit will be more comfortable to wear. If there is a little fabric to the outside of the elastic, the finish looks nicer.

Example of the first row of stitching
You can stitch with a straight stitch or you could apply the elastic with a cover stitch if you have access to serge that contains that stitch. I find the zigzag has less popping when I wear the garment. My serger doesn't have a cover stitch. For years, I've stitched with a wider zig zag because I felt more stitches equaled more stability. I like how the narrower zig zag looks and I haven't had an issue with thread popping.

Second row of stitching applying elastic
Once you finish the first application of the elastic, the second stitching is simple. You will turn the elastic to the inside of the suit and stitch again. This time, you stitch on the inside edge of the elastic.

One to one ratio (top of curve)
Applying the leg opening elastic is a little different. First, I make the elastic at least two inches less than the leg measurement. Second, I apply the elastic to the front of the leg opening at a ratio of one to one. As I approach the back of the leg opening, I stretch the elastic to the maximum possible. I stretch the swim fabric too. I stretch in front of the needle as well as behind the needle.

Stretching the elastic
This stretching the back of the leg opening is the key to eliminate the uncomfortable issue of the suit riding up your backside. Once you've finished the first application, then turn the elastic to the inside and stitch again. 

Note more gathering on the left side of the 
photo. This is the back of the leg.
If you lined your suit, all the openings are now enclosed. You can remove the basting stitches. I use a different colored thread so that it is easy to see which thread to pull. 

Finished leg opening. Note more gathers 
in the fabric next to the table. This is the
back of the leg opening.
You've completed stitching your suit! Put it on. Notice how it feels. Make notes to improve the fit of the next one that you make.

Finished back
There is no more of this fabric left. I used it all. My stash use will stand at negative 6.75 yards because I made this suit out of the other half of the quarter yard that I made the new baby suit that I posted about last month. Finishing this suit was goal number 15 on my February list.

Finished front
I'm linking to Cynthia at Oh Scrap/Quilting Is More Fun Than Housekeeping. Go visit. There is so much inspiration there!


Wednesday, February 7, 2024

Quilt Entries


Zip tie loop option for hanging
Goal number two on my February list was to enter my quilts in the Clark County Quilters show/Quiltfest Northwest which will be held April 4-6, 2024. This year, the guild provided an online method to enter our quilts. While it has some issues for the entrant, I believe the online entry process will help organizers categorize the quilts and organize them much faster. 

Close up of Fly Home
I entered four quilts. My entries are: 42 Minis--display only as the past presidents of the guild are showing the quilts that they made with the blocks the members gave them at the end of their term. Nuggets--an entry representing our Thread Tales group and the book "Where the Forest Meets the Stars." Lone Star Modern Contemporary--entered in the pieced category. Lime Sprinkle--an entry representing the Lime Twist Challenge through the small group Mod Squad. I need to finish Lime Sprinkle. . .it isn't even a top. . .yet!!!!

In January, the Portland Modern Guild put out a call for entries to display quilts at the Vancouver Public Library. This is my second year as a member. I haven't made a project from a workshop or a challenge. . .but, using books as inspiration, I have created a few modern looking quilts. I thought what better place to display book inspired quilts than a library! 

Close up of Circling the Sun
I entered four quilts. Crossroads (The Time Traveler's Wife), Rue (The Hunger Games), Fly Home (The All Girl Filling Station's Last Reunion) and Circling the Sun (West with the Night.) A few days after I entered, I received notification that all FOUR of the quilts were accepted! I was excited!! I hope that I can see the quilts hanging at the library. I am humbled and honored to have been selected.

Close up of Crossroads
To hang the quilts, we are to provide a wooden slat or dowel with a hole drilled at each end that fits the sleeve of our quilt. We were to insert a zip tie into the hole and create a loop. The loop will fit the hook in the
library's hanging system. We could have also used a wooden slat or dowel that a contains screw with an eye. I went with the zip tie option.

I'm happy to share my work. Fifteen years ago, I wanted to stitch an award winning quilt. I thought I had stitched a winner. I showed it in a couple of smaller shows. I entered it in big shows; but, it was not selected to hang. The judge's comments were similar. There was one section of the quilt that drew criticism.

Close up of Rue
It was then that I had a decision to make. Stitch quilts that the judges will like or stitch quilts the way I like. I stopped entering national shows. I share quilts at the county fair and at the guild shows.

I  appreciate other artists and quilters when they share their work. Seeing my work hung creates a feeling of amazement within my soul. I've spent hours working closing on the project. When I view it hanging, I grin because the overall impact is what I haven't seen working so closely on it!

Putting my work in the public eye, also places me in a vulnerable position, Some attendees can be overheard saying the most unwelcome comments. I am choosing to be brave! The best quilt shows/displays are the ones that share quilts with a variety of techniques and made with various levels of difficulty. Goal number 14 on my February list was to write a post sharing the acceptance news.

In the header on my blog, I have tabs for completed quilts and books read. I have a tab labeled Thread Tales Quilts. This is where I've listed the books our group has read over the years. Corresponding to the book, I've noted a response. Often, there is a completed quilt listed with a link to read the story about the project.