Showing posts with label Leader/Ender. Show all posts

Sunday, July 19, 2026

Triple Treat Is A Top--post 4

Layout on the design wall
At an in person sew day with the Mavens, I sewed the remaining blocks that I needed for the top. I didn't take photos. At home, I added the blocks to the design wall. I did find one block that I hadn't sewn the neutral squares correctly. I also had two extra blocks which I used on the back.

The top
Stitching the blocks into rows and the rows together didn't take long. It measured 60 by 72 inches. I had planned to use a wide back for the backing. Instead, I decided to go into stash and choose fabrics to piece a back.

The fabrics
I started with a couple pieces of red; but, went instead with a brown, a tan and a red fabric. I've had these fabrics since 2005. Their time to leave my curated art collection, more commonly known as stash, had finally arrived! 

The back
I did cut a sleeve from the tan fabric. I used four and half yards of stash to make the back! Soon, I'll be taking the top and the back to the quilter! Making progress on this project was goal number one one my July list.

Linking to Oh Scrap and Sew & Tell.

Sunday, June 21, 2026

Triple Treat Blocks Becoming A Top--post 3

Blocks made as Leader/Enders
Goal number 11 on my June list was to figure out which Bonnie Hunter project I would work on when my Mavens group meets the first and third Monday of the month. I decided that I would begin putting together the blocks for Triple Treat. This was Bonnie's Leader/Ender project for 2022.

Every July, Bonnie releases a new Leader/Ender project each July. The idea behind Leader/Ender is to begin sewing on a short piece of fabric. This is the leader. When the end of the fabric approaches, begin piecing the unit of your pattern. Chain stitch 10 repetitions of that unit. End the chain with another strip of fabric. This is the ender. 

Twenty blocks kitted and ready to go
Starting and stopping in another fabric, helps fabric from being pulled into the hole in the throat plate. It helps me start and end with a better quarter inch seam. For big projects, it is an easy way to count how many units you've completed. 

Many people use a scrap of folded fabric as their Leader/Ender. Bonnie decided that since she was stitching anyway, why not make a second quilt and make a better use of thread and scraps!

One block laid out
I started Triple Treat in 2022 because this block was a good way to use the 2 1/2 inch colorful scraps that I couldn't categorized as one specific color. It also used some 1 1/2 squares which I had a lot. I cut enough parts to make 20 blocks. 

Four blocks ready to stitch into one unit
Many of these parts came from my friend Martha's scraps. I kitted these parts which I stored in a zip lock bag. When I sewed on my project, I had one block of the Leader/Ender next to the machine. As I reached the end of a section, I'd stitch a unit of the Leader/Ender. 

It didn't take long to cut the block pieces because I used the scraps that I had saved from other projects. Bonnie's Scrap Users System is a good way to process the bits at the end of a project. When a pattern calls for a specific size unit, I check my pre-cuts to see what I can use. Over time, I cut and organized many kits. I did cut strips from neutrals; but, otherwise, all the pieces in this project are project leftovers. 

Progress at the end of the sew day
I bundled 12 blocks together as an easy way to track how many blocks I had made. I had about 120 blocks made so I decided it was time to begin setting the blocks together to see what size quilt I could make! This is the point in the project when the Leader/Ender becomes its own project!

I started selecting four blocks that had enough variety to sew together. As I finished a unit, I put it up on the design wall. At the end of the day, I had pieced 22 units and used 88 blocks! Stepping back from the design wall, I was amazed at how great all these bits looked together! 

My friend Martha would be impressed with how many of her scraps went into this project She would also be shocked that I sewed such scrappy blocks! While I had 28 blocks remaining, I knew I wanted to make enough blocks so that quilt would be about 60 x 72 inches. This meant that I needed to cut 20 more blocks. I cut the parts and kitted them. 

I'll sew them at our next Mavens Sew day. Now, I have a new Leader/Ender at the ready. Four Patch Fun is the name Bonnie gave it when she released it last July. My Mavens group is calling it Pink Lemonade. We exchanged pink and yellow strips to make this project. 

Linking to Oh Scrap Sew & Tell and To Do Tuesday.

Wednesday, December 17, 2025

Pink Lemonade AKA Four Patch Fun--post 2

Strips to exchange

At our November Mystery Maven hybrid sew day, we exchanged pink and yellow strips. Goodness, we had a lot to share! It was fun to exchange. I don't know how many strips I took; but, I'm thankful for the variety! 

Fabrics sent in the mail
 Thanks to my friends Rosanne, Riza and Alvera sending me some of their pink scraps, I had 80 pink strips to exchange. Rosanne was glad to get rid of the scraps. When my husband saw what came in that mail package, he wanted to know why someone would send me something like that? The something were 25 different pink fabrics! I pre-washed the fabrics and trimmed them into strips for the exchange.

Prewashing background fabrics
The first part of goal number nine on my December list was to finish pre-washing the strips from our group strip exchange. It took me a few days; but, I did pre-wash all the strips from the exchange. I hand wash the strips so the process was fiddly; but, not difficult!

The second part of the goal was to pre-wash and cut background fabrics to make kits. I didn't specify the number of kits; but, over the weekend, I did cut enough background pieces to make 50 kits. I'm set to begin the actual sewing of this leader ender process. I have a few background fabrics ready to cut into strips when I sew all that I have prepared. I'm looking forward to making these blocks! 

50 kits ready for stitching
I still have a few kits of the Triple Treat leader ender left. I will sew those and then take an inventory of how many blocks I have completed. I did group the blocks as I finished them in stacks of twelve. It won't be hard to determine if I made enough of these blocks to make a lap quilt. 

Sunday, November 16, 2025

Four Patch Fun--"Pink Lemonade"--post 1

Pink fabrics
Our Mystery Mavens group is planning to share strips to make Bonnie Hunter's Four Patch Fun Leader/Ender challenge. We were going to share the strips in September but some us forgot! I was one of those who forgot! So we are exchanging strips in December. 

One of our members said the colors reminded her of pink lemonade and so that has become the name of the project. We are sharing strips so we will have fabric from other members of the group. Some of us have pink and yellow fabrics. Some of us have pink and little yellow. Some, like me, have yellow but almost no pink!

Yellow fabrics
We decided any pink from light, to bright to dusty and to dark would be accepted. We also made the same sort of allowances for yellow. We could look at our stash for yellow gold, bright yellow, mustard, dark yellow and light yellow. 

My oldest granddaughter was over for a visit. She helped me find the remaining pink fabrics. (I already had pulled pink for Bonnie's mystery that will begin in a few weeks so I had little left!) We also pulled the yellow fabrics. 

Again, a lot of the yellow fabrics came from Rita's Temperature quilt fabrics. Although, I had quite a few. The really bright yellow fabrics, I picked up from the free table a number of years ago. 

I thought that I would start cutting strips. Then, I decided
that at the least, I want to pre-wash the fabrics first. Some, I have pre-washed; but, there are a lot that haven't been pre-washed. I will likely pre-wash the strips I get because I don't want to be surprised with a fabric bleed when the project is finished!

In process sewing
Then, I decided that I wanted to make a block to see what it was like. I asked my granddaughter if she would like to cut the pieces and sew a sample block. She did!

Chain piecing the block
That quarter inch seam proved to be elusive in some places; but, as she stitched, she hit the mark most of the time. She was impressed she remembered how to lower the presser foot and provide an even speed with the foot pedal. I was impressed with how quickly she corrected her seam allowance.

Finished block
Once she had finished, we both liked the block. So over the next week, I pre-washed fabric, dried fabric, pressed fabric and cut strips. If there wasn't enough fabric to cut a strip; but, there was enough fabric to cut a block, I did. For two days, I spent the majority of the day cutting!
15 pink and 80 yellow strips to exchange
Next,  I raided my precut strips and was able to come up with a few more fabrics. I pre washed the pink leftovers that my friend, Rita had cut for her Temperature quilt. These were the leftovers that would work for this project. I dried, pressed and cut as many blocks as I had fabric. I cut steadily for a couple of days!

Pink leftovers
I'm ready for the exchange. I have a great amount of fabrics cut for the leader/ender. I do need to cut the background fabric. I'm saving that task for another day!

Yellow fabrics ready for stitching
All my yellow and pink fabrics are in a project box awaiting background fabrics. I'm thinking that I will cut 20 strips to start and replenish as I need. My project box is about full; but, I believe I can squeeze in some background strips! When I finish this project, I will have used a lot of scraps!

Pink fabrics ready for stitching
Goal number six on my November list was to gather and cut strips for this leader/ender. Linking to Oh Scrap and Sew & Tell.

Sunday, June 23, 2024

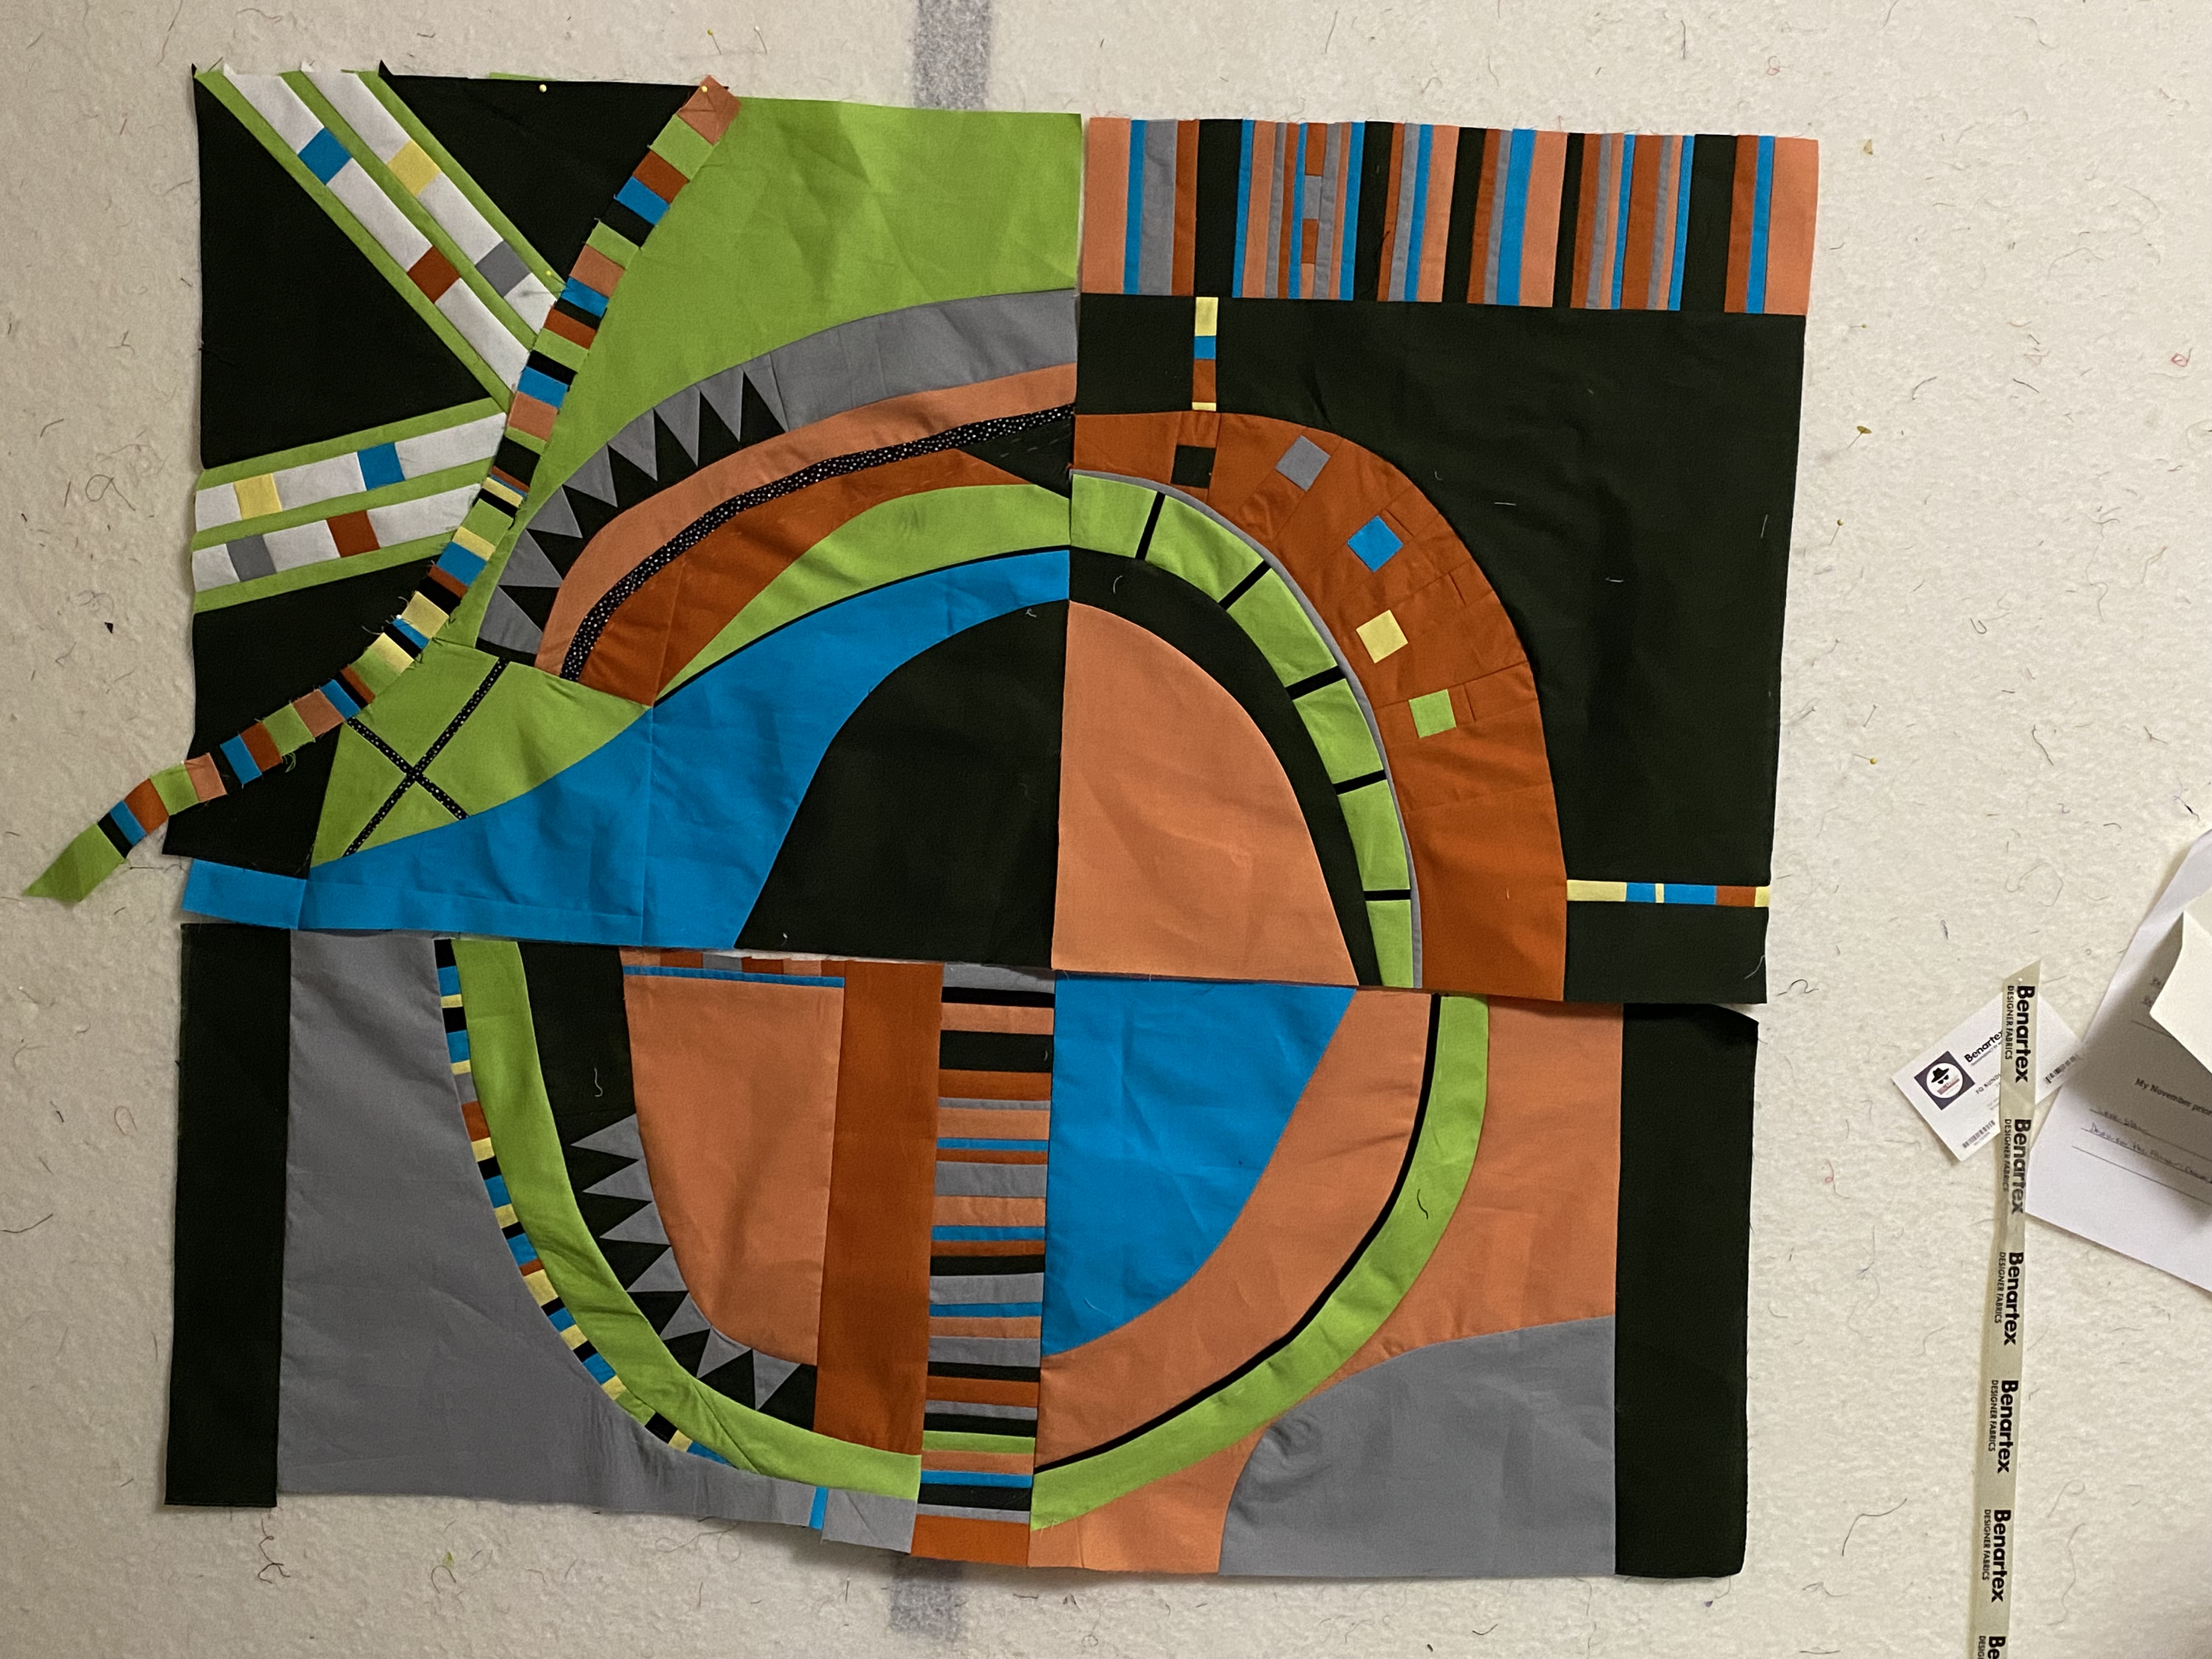
Play--An Improv Piece (Formerly Called Free Hand Curves)--post 2

Where I left off in February
Goal number eight on my June list was to make progress on the piece I began in the Cindy Gridsdela class I took last February. 

Auditioning a curve layout
I left the pieces on the design wall and have turned them in a number of directions looking for the layout that felt "right." I had an orientation that was a long gradual curve; but I didn't take a photo of it. In that layout, I was stuck with what to fill in the space around the curve. Instead, I have a photo of a shorter curve.
Auditioning some parts

I decided that I needed to decide whether I wanted to spend a lot more time on the project or did I want to finish it and move on to another project. Gertie, my inner squirrel, was all in for creating a circle and finishing sooner rather than later.

Piecing the bits as a leader/ender
I began with my pile of scraps. I began piecing more curves and adding length to an insert piece. I continued to audition a fabric and the orientation of the curve until I could live with the result. When I had the quadrants mostly pieced, I auditioned a sashing. A challenge one of my small groups currently has is to make a traditional block modern. There is a size rule and cream has to be used. This is a variation of a drunkard's path block. I wasn't feeling the sashing.

Quadrants mostly pieced

After a few days of adding a piece of fabric, rearranging, adding another fabric, rearranging, I managed to piece most of the quadrants. On purpose, I didn't piece a square nor did I square three of the blocks. I liked the wonkiness of the organic blocks. 

Lower right quadrant needs a bit of green
Next steps are to determine the frame. I was considering a dark frame around the piece; but that plan felt too traditional. The lower right quadrant needs a bit of green. Perhaps, a pieced strip would add some interest.
Green in lower right quadrant; pieced 
strip added to upper right quadrant
The upper right was too boring. I pieced a strip of scraps and liked the results. The upper left quadrant was now too boring. My small group that stitches on Friday, suggested I put some cream in that area. Rosanne even drew me a shape as an example. I love Friday Sit and Sews. The conversation is good and the advice shared is helpful. We chuckle that we are quilting by committee!
Rosanne's suggestion
I cut the shape. I'm becoming more comfortable cutting free hand organic curves! Then, I cut the shape into sections so I could piece a few confetti squares into the area.
Curved shape cut into segments
for confetti
Looking at the section spoke "too much white."  I subbed out the uncut segments for the dark green fabric and that action "felt" better to me.
Beginning to piece the curve
There was still too much white, so I added some green strips on each side of the white segments. The green was a good add. I liked the direction that corner was going. 
Left corner audition
The top half is wider than the bottom half so I pieced another strip of scraps together. I wanted a horizontal orientation for this section. Initially, I placed it on the lower left side of the piece; but, after a group discussion, Su suggested I put it in the center of the two bottom blocks. I liked the suggestion.

Center pieced strip added
The photo above is where I was at the end of Friday. The top still needs some work. I am rethinking the black strips on either side of the bottom half of the project. The lower right quadrant needs a little more interest. Saturday morning, I removed the dark strips from each side of the lower half of the project. I separated the lower quadrants. I plan to insert a fabric next to the green and do something in the gray. Let's see how far I get today! In spite of all the changes, I feel like it will be a finished top soon!

This is going to be a book club quilt for the book, "Prayers for Sale" written by Sandra Dalles. The main character in the book is a quilter. She fell in love with a blue fabric and bought the bolt. Fast forward years, the reader learns that each project has a bit of this fabric in it and that her quilting circle of friends' projects also has some of the treasured blue fabric. Using some blue fabric was my inspiration to create this piece.

Linking to Alycia at Finished or Not Friday; Frédérique at Patchwork and Quilting and Cynthia at Oh Scrap.

Sunday, January 22, 2023

An Outing and Chilhowie--Post 2

Shrimp and grits
Last Monday, my friend, Theresa took me on a mystery outing. I pulled out my jeans which I haven't had on since COVID locked us down in March 2020. I was surprised that the jeans fit! This outing was my first long outing since I came down with the flu December 11! We were gone about five hours.

Theresa shared one of her Christmas presents with me. First, we went to The Hive Social restaurant in Oregon City. It is a farm to table restaurant. We ordered from the brunch menu. She had shrimp and grits. I had poached eggs, roasted vegetables and brisket. She enjoyed her dish almost as much as I enjoyed my order! We both took half of our entree home with us. Next, she took me on drive to another secret location. Imagine my surprise when she pulled up to Cup of Tea in Clackamas. 

Beef brisket, poached eggs
and roasted vegetables
I hadn't been there to enjoy a cup of tea since the lockdown. The previous Friday, I was thinking about making a stop there as my tea supply is beginning to thin. I used to drink tea more than coffee. During the pandemic, I drank more coffee than tea. After recovering from the flu, I'm finding that I enjoy one cup of coffee in the morning and tea the remainder of the day.

Oops, I missed a piecing error
We had a flight of tea which meant we sampled five teas. She purchased two teas to add to her collection. I will purchase a tea once I finish the leaves in my storage tin! We both enjoyed how quiet and laid back the tea shop was during the time we were there. It was an enjoyable outing; but, the company was what made it extra special. 

I thought that I had held up rather well. Then, I rested in my chair after returning home and didn't do much else the remainder of the day! The following day, I was still recovering! It is so interesting how long it takes a body to recover from an illness!

I also worked two days this week helping staff earn their CPR certificates. I was so exhausted after the work day! I continue to be shocked at how little stamina I have!

Chilhowie Update from last week: I thought that I had caught my piecing error; but, thanks to the sharp eye of Ivani, she found an error I totally missed! Bless her heart, she even sent me a photo with the error circled. Thank you Ivani for taking the time to point out the mistake to me! I don't think I would have spotted that second error on my own! I have corrected that error too.

Center together

Our quilting community is amazing. I am so fortunate to have had Ivani's support! She has been making crumb blocks from small bits of scraps that many quilters would have tossed. She is going to have a fun project to
share. She can say that using the bits kept them out of the landfill! Click the link above to read her blog post.

Pieces cut for the inner border

Leader ender block kit
I was berating myself for not catching either error sooner. Then I took a breath and counted the number of pieces in the block. There are 111 pieces in the quilt block. One hundred eleven translates to me that there are tons of opportunities to go awry so two isn't many at all!

The last clue of this mystery was Clue #7. Some years, there are more than seven clues. Not knowing how many clues there will be or when the reveal will be are fun parts of the mystery! The reveal is always an exciting post to read. As I viewed Bonnie's finished quilt, I enjoyed seeing her vision for the project. My eyes look for where she placed the units made during the mystery. Rarely has Bonnie used the units like I imagined. 

The last clue involved sashing the blocks together and adding a couple pieced borders. It seems like the steps won't take long; but, the process always takes longer than I think it will!

Block almost ready for sewing
This year, we cut some fabric for the sashing and then pieced it together. There are two pieced borders. For the inner border, we were to cut some fabric and position the appropriate triangle next to its corresponding block. For the outer border, we were to piece together the units from Clue #2. We also made and added some four patch units. 

For a few days,  I worked on the sashing. Ensuring that the seam lines with the triangle piece lined up to its mate in the adjoining block took some time. I like that Bonnie constructed the design so it finishes in the sashing. I also like the secondary pattern the piecing created. By the end of putting the quilt together, I was better at matching those intersections.

I cut the pieces for the first border and next week, I'll be working to piece that together to attach to the top. There is one more border to make before the top is finished. I'm getting closer to a finish every day!

As I'm working on this project, I'm making Bonnie's current leader and ender project, Triple Treat. A leader and ender means you start (leader) sewing with a couple pieces of fabric to ensure that you've a quarter inch seam. Then you sew the pieces for your current project. When you've sewn the your project units, you finish (ender) with another couple of pieces of fabric. Many people use a scrap of fabric; but, using parts to make a block, you actually can sew an additional quilt top at the same time. Using this method also saves on thread.

A few completed Triple Treat leader and ender blocks
I spent some time last week cutting fabrics for 20 blocks. Then I made kits. I lay out one block and stitch parts of it in between my Chilhowie project. I have about 11 blocks stitched. For now, I'm just making blocks and using up the many inch and a half squares that I have in my precuts! I'm also using the two and a half inch strips that have been in my precuts for a long time. These are the strips that may have a lot of pattern or colors in them.

If stitching blocks with scraps or you have a use it up philosophy, another quilter where I find inspiration is Cynthia at Oh Scrap/Quilting Is More Fun Than Housework


Wednesday, December 9, 2020

Grassy Creek Clues 1 & 2--post 2

Pressed and cooling pieces
For clue number one of Grassy Creek, we stitched a lot of gold and gray half square triangles (HSTs) together. I cut a pair of strips from the gold and gray fabrics. From there, I cut enough pieces to sew a set of HSTs. After I pieced the set, I pressed them. For this mystery, I'm pressing the pieces differently. I'm using Sally Collins' tip of weighting the pieces until they cool. (Check the video at about the 35 minute mark for a demo of her pressing technique.)

Sally says that the seams will stay flat through the whole sewing process. I've started pressing that way on a project, but, abandoned it later. This time, I'm attempting to stay true to the process to see how well I like it. I covered the pressed pieces with a large square ruler. I weighted it with my spray bottle. 

Next, I trimmed the HSTs. I sew with a scant quarter inch seam so that I can trim to perfection. I'm not a perfect piecer; so trimming helps me look like I am perfect piecer! 

Cooled HSTs
For the first time, I used the Folding Corners ruler to trim the pieces after they had cooled. This is my new go to trimming tool. I liked how easy it was to orient the block accurately under the ruler. Those lines are helpful to ensure I've centered the block correctly!

In my younger days, I would have completed the steps as if it were a production line. I would have cut and kitted all of the pieces. Then, I would have sewn, pressed and trimmed all of the pieces. These days, my body needs more breaks. Sewing a few pieces and moving to another task helps me to not become so sore. This "mature" process also gives time for the pressed pieces to cool. I like working in smaller batches. I don't feel as overwhelmed with the scope of the project when I work on a few pieces at a time.

Finished HSTs
I finished clue one in plenty of time to start clue two! Clue two was to make a lot of hour class blocks with the neutral, gold and green fabrics. I had two Zoom sewing sessions this week. The concentrated sewing time helped me complete most of hour  glass blocks in-between checking out other people's projects. I even located a few strips in my "pre cuts" that I was able to incorporate into the blocks. 

Monday was our Mystery Mavens sew day. We have 24 members in our group. Twenty people spent a part of their day with us. Some people had to work or had other assignments. It was a great turnout and what I appreciate about the members is their helpfulness to others. 

Lining up my bonus HSTs for trimming
If someone is having trouble, there is a lot of support and trouble shooting to solve the issue. I have noticed that we are improving our descriptive techniques so we can explain options. I've also noticed that we are improving our listening skills too. Even though in person stitching is preferable to "demonstrate" what you are saying, Zoom is working for us!

I also appreciate that members post photos of their progress in our private FaceBook group. I love seeing all the different fabrics and different color ways people have chosen! It is a nice way to stay connected! We meet once a month. Although, we may choose to meet in a couple weeks if we find a clue is difficult to understand or if we are getting behind in the process. Before the pandemic, we met in a community room in a member's neighborhood.

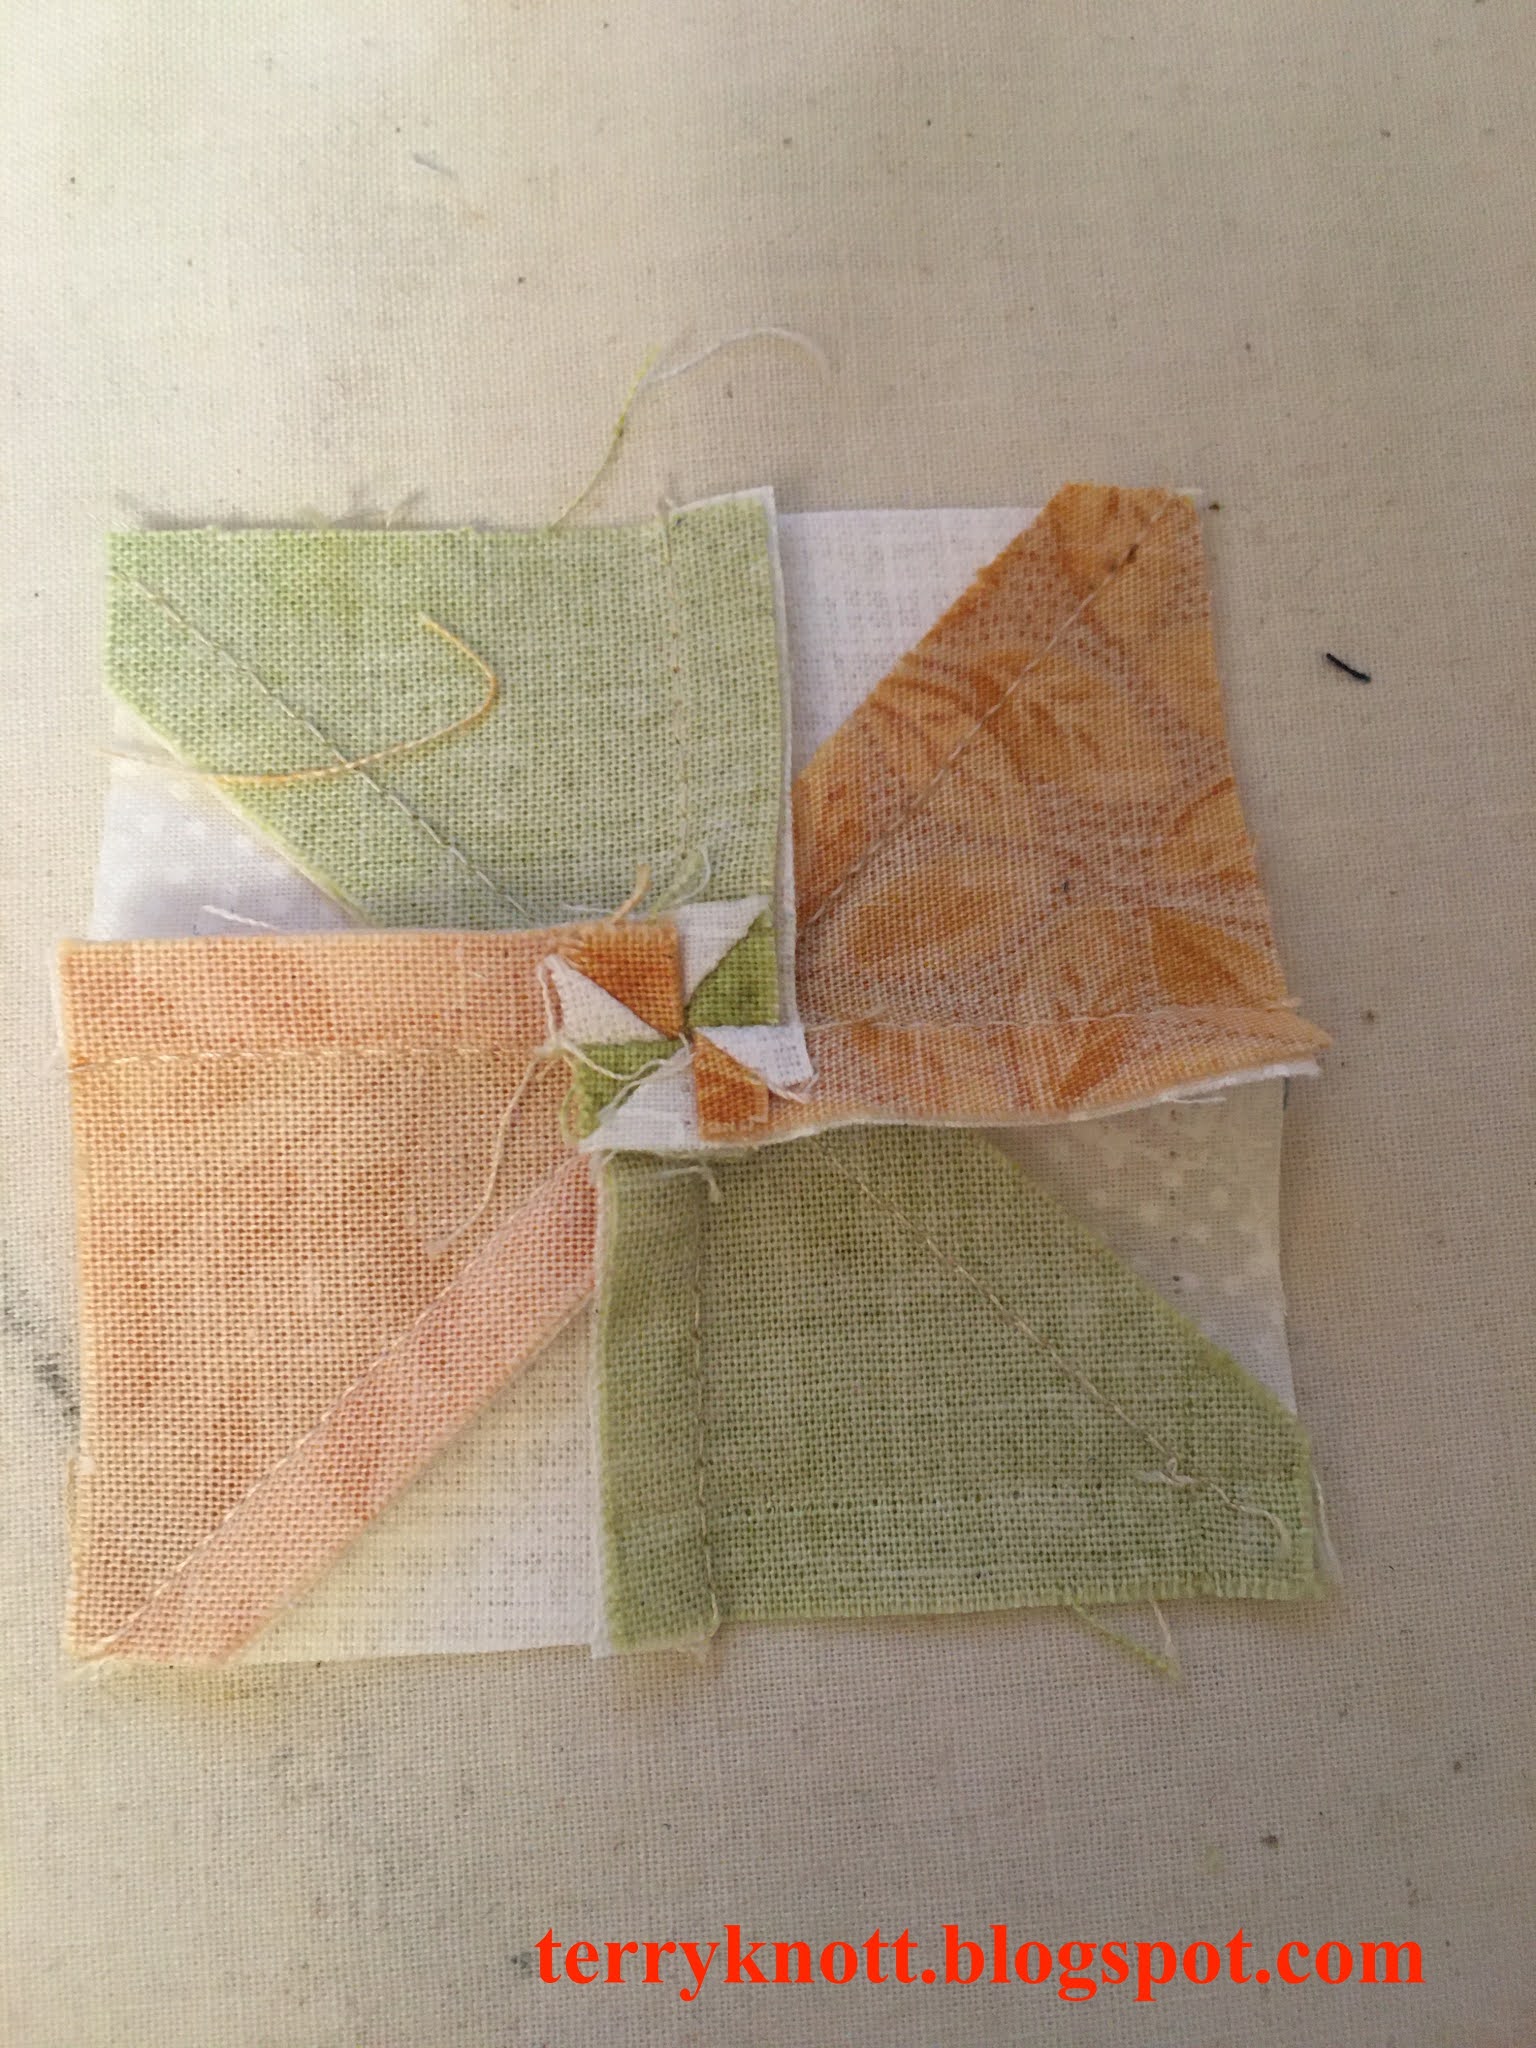
One of the gals in our group pieces small scraps together and makes the most wonderful charity quilts. I had a bunch of small leftover scraps that I cut into HSTs. I sewed the HSTs into pinwheels as leaders and enders. The pinwheels are small. I did spin the seams. How cute is that little HST in the seam allowance? These blocks will finish to two inches. 

Completed Step 2--HSTs
Sewing the leftover bits is a goal of mine. I don't want a bunch of scraps leftover at the end of a project. When I reach the end of strip, I cut it into what ever useable sized piece in my scrap saving system that I can. I know that I'm more likely to use from my scrap saving system than I am to pull out those scraps and cut useable pieces later.

I don't know if these pinwheels will end up
in the quilt or if they will become "parts" to be used in another project. They are cute!

Pressed pinwheel from the back
Friday, Bonnie releases clue number three! I'm ready! In the meantime, I've put in a few stitches on the Unity binding. I've made a couple more Folic blocks with the leftover parts as my starting base. I'm finding cutting the pieces to fill in the leftovers tedious. Looking through the scraps to find a little more of the block fabrics and cutting a specific number of pieces takes time! I also needed to use a completed block as a guide so I could remember how I pressed the block! Truthfully, I'm happy to be using a few more scraps so in the end, more blocks will mean more stash reduction! 

Bonus pinwheels
Even though I've sewn mainly from my stash during this pandemic, I haven't seen much change in the stash stacks. I'm thankful I've stash to keep me plenty busy in a variety of projects.  

Last night, our Mt. Hood Quilters guild had a live meeting. There were about 65 members who attended the virtual meeting. It was fun to see people dressed up in their holiday tops, necklaces, earrings and hats! One of the members gave a demonstration of a Swedish weaving which we made out of a piece of felt. We had breakout rooms and I got to meet new to me members. 

I appreciated how members helped other members who were new to the zooming process. It was a fun meeting!


Sunday, July 28, 2019

From The Cutting Room Floor--A Start!

Contents of the bag after a rough sort
My friend Martha loved to sew scraps.  When I learned she had died, I thought I would like to have her scrap basket. She put her scraps in a wire basket that was about 20" x 12". In our daily e-mail conversations, she would tell me how messy her sewing space was. I, however, only saw her space neat and organized. When I asked her where the mess was, she would report that when I came over, she put it in a bag; put it behind a door; put it in a closest; dumped it on her bed. Then, she just giggled. When I stepped into her sewing room that first time after her death, I discovered her mess. I chuckled.

She was true to her word. There were scraps, parts and projects everywhere! As I cleared fabrics, I'd encounter more scraps. The more scraps I found, the more I giggled! The couple grocery bags that I thought I would have turned into much more than that! For this post, I'm sharing what I did with one plastic grocery bag of her scraps.
Packaged after cutting

From that scrap bag, I removed the neutral strips and chunks as well as any fabric that fit for the Bonnie Hunter mystery last fall. I gave my friend, Gail, some bits of blues and purples for her to add to a background she wanted to make for a special project. Miss K pulled fabrics from the bag for her mermaid project. After all that removal, the contents of the bag continued to spill out on the floor. I'd pick it up only for the spillage to occur another time.

It was time to divide and conquer the contents of that bag using Bonnie Hunter's scrap saving system! I dumped the contents on the cutting table and began putting like pieces together. I had a pile of strings that were about 1-1 3/4 inches wide. I bagged these for a string project. There was a group of 2 1/2 "ish" inch strips that I also bagged.  Finally, there were some larger strips and chunks that were in the 4-5 inch range. I also put those in a bag. It was time to sort and start cutting the remaining bits into useable pieces. I wish the photo showed how high these scrap piles were! The photo makes it look like there wasn't much in the bag!
(Left) Ready for the project bag and (Right) ready for storage

The first day, I cut for a couple of hours. I had a pile of: 3 1/2 inch squares, 2 inch squares and 1 1/2 inch squares. I also had a few 2 1/2 inch squares. There were a lot of 4 1/2 inch chunks. I decided that if I had a plan, the more likely the pieces would become a finished project. I have so many in process projects and projects that I want to start that I didn't want to go that route. Instead, I decided that I would do a leader/ender project.

Since this bag of scraps contained some large print florals, I decided I'd prepare Jewel Box Stars as the project. (Martha had a lot of floral fabrics in her stash.) This pattern uses half square triangles that finish to three inches. It is a free pattern on Bonnie's website. I spent a few more days cutting. Total cutting time was 10 hours. If I could have cut two or three layers at a time, I would have spent less time cutting. Most of the pieces were odd sized so cutting them one at time was the best way to get the most out of the fabric pieces.

When I finished, I had a bag of triangles of various sizes. These probably were waste triangles from other projects. Some day I'm going to make a tiny paper pieced flying geese block project. I'll need many triangles to stitch it. I also had a few three inch squares. I didn't cut these down. I might use them in a particular project soon. We will see! As I cut, I ended up with a large amount of 1 inch by 3-4 inch strips. I saved these because I think I will make a paper pieced string border to sash this quilt.
First block finished

My inventory after sorting/cutting and in addition to the string bag and two strips bags was:
--a small bag of pieced bits which could be starters for crazy pieced blocks. I also added parts for a few nine patch blocks.
--a small bag that contained fabric that was backed with fusible. Martha liked fusible backed fabrics for applique. I may cut some shapes with the fabrics during some future play time.
--a small bag that contained all the squares but the two inch squares.
--a small bag that contained all the two inch squares plus I raided my neutral two inch squares.
--a small bag that contained all the HSTs. I also added enough neutral HSTs so that I will have enough to cover all the HSTs that I cut!

A lot of these scraps were the leftovers she had after piecing her project. After I finish a project and generally before I work on the next project, I take some time to cut the scraps into usable pieces using Bonnie's system.  In a few minutes, I have the pieces cut and sorted.

In this manner, I have accumulated bags of squares and strips. I stopped cutting the bricks because if I want those, I can cut them out of strips and I have less parts in my scrap inventory! I do not have bags of scraps. I do have bags of color coded "precuts" instead!

Second block ready for stitching
It is great to go to the scrap bags when I need materials for a project. Having "precuts" at my finger tips is nice! I cut what I could out of the bits. I didn't count how many parts I cut. I did cut backgrounds from my stash of neutrals. Now, my plan is sew and see how many blocks I have. When I need more chunks, I'll break into that bag of 4-5 "ish" inch strips to cut more. Martha wanted variety so she cut her strips at at different widths. When she miscut a strip, she slipped it in her scrap bag! So those are the reasons behind the width variety!

I laid out a block and took a photo of it. Those HSTs remind me of butterflies! I have no idea how close I will come to stitching it nor do I have any idea how long it will take me to make the blocks because, I plan to stitch these parts while I piece other projects. The parts will be the leaders and enders instead of scrap fabric. I'm going to make two quilts at one time! Perhaps, once a quarter I will update my progress. I think this would make a great "I Spy" quilt because of all the variety. Believe me, there is a lot of variety!!! In each block, there are 32 two inch squares and 16 three and a half inch half square triangles.

The projects I make from Martha's scraps will be called "From The Cutting Room Floor." I'm curious as to how many quilts I will stitch from her little bits! Stay tuned! For now, I'll report that storing a closed two gallon plastic zip lock bag that is less than three quarters full is a huge improvement!  It is so much easier to use parts from it too!  I'm no longer tripping over spillage from that plastic grocery bag!!!