Wednesday, November 28, 2018

New Beginnings--A Karen Kay Buckley project post 1

Fabrics for the project.
Last May, I took a two day machine applique class from Karen Kay Buckley. When I registered for the class almost a year in advance, I had no idea what the project would be. I will admit that I was disappointed when the scheduled class ended up being a machine appliqué class. I really wanted to take a hand applique class from her. She  produces amazing appliquéd quilts, so ultimately, I was just happy to take a class from her!!!

The first layer 
About six weeks before the class, I started looking through my stash for possible fabric combinations. I came up with several options; but, eventually eliminated each one because there wasn't enough of a value change or because the fabric I wanted in a particular area wasn't enough! Finding 18 fabrics that would work into the project was a daunting task.

Three weeks before class, I asked my neighbor, Pat, to give me some feedback. She has amazing color sense. She agreed.  It helped to talk through my choices and hear her feedback. I made a few changes. I felt better about my choices.  Thanks for your help, Pat!

I cut the fabrics into the size pieces listed on the class list.  I labeled each piece. I also made a cheat sheet of the fabrics so I could refer back to "what was I thinking" at a glance. I packed my supplies according to the class list. I was ready!

The second layer- appliquéd
I like packing early for class. Spring is a hectic time of year and I didn't want to get to class without an item on the supply list. I also wanted to just learn the process and if I was kicking myself for fabric choices, I wasn't going to be as mindful of her teaching in class.

I LOVED class. I was so inspired to play with Karen's techniques in a number of my other projects! My friend, JoJo, also went to class. This was extra great because not only were we able to keep each other moving forward as we learned the new techniques; but, we also rode together to class. Sharing a ride when class is a minimum of 45 minutes away was nice because we were able to visit as we drove!
Making a sample of the zig zag

I couldn't believe how quickly the first layer was ready for stitching. Karen employs a technique of using painting spray starch on the fabric shape, then pressing the fabric shape over a heat resistant template material. After she removes the template, the shape is ready to appliqué into place.

Circles and inner ring appliquéd
Karen had us work with our blind hem stitch on our machines until we were able to stitch a sample she approved with monofilament thread. She likes the Madeira mono poly best. I used Superior Thread's monopoly because I have a lot of it. She doesn't use it because she feels it has too much sheen.

At the end of the first day, we had made points and learned some how to stitch around the applique. I LOVED how the stitches don't show. We had homework. I went home and prepared a lot of circles and some shapes for stitching the following day.
Progress at the end of the second day

It was great seeing all the different color combinations and fabric choices. Although these circles are good, I know how now to make even better circles. Turns out, I needed to use a heavier thread and leave a little larger seam allowance for better results!

At the end of the second day, I had the gold frame placed on the project and was ready to cut the
focus fabric to be placed on the outside. I was shocked that I was able to keep up in class. Usually, I'm half a day or more behind everyone else!

I also purchased more products from Karen than I have from any other teacher. I spent some birthday dollars purchasing a pair of scissors, some template materials and some other "necessary" supplies.

One of the products I especially liked was the glue pen. It is easy to use and it a little bit will hold the fabric in place. It dries clear and doesn't affect the hand of the fabric.

I look forward to getting back to this project.


Sunday, November 25, 2018

A Lot of That and a Little of This--Mostly A Journal Update

Monthly and daily goals example
I started strong using a bullet journal in August. I refined a few pages and was making great strides again in September. Mid way through September, I came down with a nasty cold. For about four weeks, which meant into October, I didn't do much!

Habit tracker page, 2019 planner and 2018 planner
My current bullet journal is one that I had on hand. It doesn't have enough lines on a page for a month so making a habit tracker and the monthly calendar took a bit of a redesign of the space. I printed a habit tracker from my laptop thinking that it would be useful. I found I didn't use it!  In November, I went back to writing by hand my tracker activities. I do know that using color helps me work in the journal and I need to integrate more art and color into the pages.
Pages that I didn't use in my planner

In November, I purchased my new calendar/planner. This time, I purchased one that will fit in my purse and it will last for two years! I spent $11 instead of $18. Seven dollars for two years isn't a lot of savings. When I purchase my next journal, I'll probably spend my savings; but, not having to shop for the next planner in twelve months will be nice! Being able to put my notes in the journal is helpful for me. I found when using the planners, there were many pages that I didn't use or the occasional times when I needed more space! With the bullet journal, it is easy to use another page if I need more room. The index lets me find the page later when I want to review the information.

As far as my journal progress, I'm still refining what I want to track and how I want to track it. I thought I would be tracking project time in a particular way. Then realized I didn't track one bit of a project after I had finished and was writing the label! Now, each evening I'm entering the time I worked on a project.

I have found that my daily lists are short. Before the journal, my daily lists were long! I don't generally list cleaning activities; but I might list cooking or baking an item. (My dear husband is a great cook so I might cook a couple times a week.) A short list means most of the time I complete the list at the end of the day. I have found writing a monthly goal list to be helpful. When I didn't come close to finishing my October goals, I reviewed the goals in November and determined that I had worked on all of the projects in October so I did make progress. Had I not reviewed the goals, I wouldn't have realized the progress I did make!
Spoils from being a FAL winner
I thought that I would use the future list pages of my journal more; but, perhaps that will come in time. I did add a couple envelopes inside the inside cover of my journal. Sometimes, there are items like a receipt or a note that I like to keep. Now I have space to keep it! I'm considering adding tabs to the pages I like to frequent as that would make it faster to access the page I want.

When I make my quarterly goals, I purposely put more on the list than I can possibly finish. One reason I do this is because I need variety. Working on only one project would kill my creativity because when I got stuck progress would be halted. Having options allows me to work on something else while I ponder my approach about getting unstuck. Options also allow me to work on other projects when my body can't sit and pull for quilting. I do try to be more realistic with my monthly goals. Time management and I, however, are passing acquaintances. We need to become better friends!

Posting my quarterly goals with the Finish-A-Long program and posting my monthly goals have also helped with making better progress on projects. I'm more focused and less apt to jump to the next cool project. Although, I'm still attracted to those cool projects!!!

Once I've posted my monthly and quarterly goals, I review them each day. I pat myself on the back for the projects I've finished and for the progress I've made on other projects. I think about the progress I'll be making on future projects.
Two inch squares for the Star Patch Sew Along
I was a second quarter winner in the Finish-A-Long (FAL) program. Posting about finishing my guild name badge holder, posting about it and linking that post to the FAL quarter finishes won me a $25 gift certificate from Mad About Patchwork. It took me months to decide what to purchase as there were too many cool and fun choices!!! In the end, I picked a ruler and then I bought a companion ruler. I like hexagons and thought. . .why not??? I've held off playing with it because I wanted to make a bigger dent in my projects waiting to be finished!

I won a copy of "Modern Patchwork Home" from Teri Lucas whose blog is TerifiCreations. The book has many striking projects in it made by a variety of quilters.  She also included a copy of "Generation Q" where she was a contributing staff member. Unfortunately, this publication ceased printing some time ago.
Bonnie Hunter mystery fabrics
I'm not sure what project I'll stitch from the book. . .that cover quilt is dynamic. For now, I'm drooling over the pages.

Teri and I share the love of machine quilting. I met her through The Quilt Show and physically met up with her when she was in Portland to teach a class through MQX a number of years ago. I enjoy following her blog posts. Thanks again, Teri for the book and magazine!

I started two quilts. One is a "Star Patch Sew Along" with Amber over at Gigi's Thimble. It started October 29 and runs through December 22. So far, I'm keeping up! The other is the annual Bonnie Hunter mystery. For at least the last five years, I've thought about joining in; but, didn't leap. I generally got stuck at the fabric selection stage. This year, I leapt which is a crazy move for me!

My goals for December will be to continue quilting the BOM mystery quilt and to stitch as many gift items on my 4th quarter Finish A-Long list as possible!

Thursday, November 22, 2018

Sandals--Fourth Finish 4th Quarter Finish-A-Long 2018

Goal #18--stitch four pair of sandals
My friend Martha, had a shoebox full of parts for infant sandals. Goal number 18 on my 4th Quarter list was to stitch four pairs. The box contained: gripper material for the sole; cute cotton fabrics for the sole and upper part of the sandal;  binding fabrics for the finish; batting cut to size for the sole; a package of buttons; some circles she planned to use to embellish the sandals; some uppers stitched together; some parts cut out/pinned together; some sandals needing hand stitching and one finished pair! She also had made a pincushion out of a single sandal which was cute.

Last month, I looked through the box and decided for the first few pairs that I make, I should cut some out and use some of her partially sewn pairs as a storyboard of the process. I rummaged through my scrap batting box and found a small piece of polyester batting which is what she used for "cushion" in this project and cut out all the soles and uppers that I could squeeze out of the batting scrap.
The supplies and steps for the project

I also had a scrap from a skirt that I thought would make a
cute sandal so I cut two pair of soles out of the scrap. The scrap wasn't big enough to cut an upper. I found fabric to use as the upper and the lining and cut those out as well. In the end, I "readied" supplies for six pairs of sandals.

Step 1: All the parts are cut out and ready to be stitched. The finished sandal is about six inches long and about three inches wide. There is an outer and lining fabric and batting for the upper. There is outer fabric, batting, lining and gripper fabric for the sole. There are 12 fabric parts for this project!

Step 2: Stitching the batting to the gripper fabric and stitching the upper together.

Step 3: Stitching the outer fabric to the sole. It is also clipping, trimming, turning and top stitching the upper.

Step 4: Pinning the upper to the sole and machine stitching the binding to the gripper side of the sole. I learned it is important to sew slowly to avoid tucks. The pattern called for either binding cut 1 3/4 inches wide or to purchase extra wide double fold bias tape. From my grandmother's stash, I had some double fold bias tape in several colors. A couple packages were extra wide; but, the majority of the packages were narrower. I decided to see what the narrower tape would look like. In the end, I decided that I liked the look of the narrower bias tape so I planned to use that in future sandals as much as possible! Any time that I can use my grandmother's buttons or other notions from her stash, I do. She was a giving person and a way that I can share her spirit with others.

Step 5: Hand stitching the binding hand so the sandal is ready for embellishment.

Finished slippers--too stinking cute!
Step 6: Martha's finished sample. The embellishment that she made came from a circle that she cut with pinking shears, folded to resemble a flower and held in place with a button. What a cute finish for a girl sandal! Boy sandals don't need embellishment. I used buttons from my grandmothers button box to hold the flower embellishments in place.

In the six pair that I stitched, two were "girlish", two were "boyish" and two were neutral. I barely made a dent in the supplies in the shoe box! Another month, I will make more pairs. For now, I've dabbled enough with this project. The plan for these is to donate them to the Mt. Hood Guild's bazaar which will be held at their 2019 fall quilt show. If they don't sell, I have another location for them in mind. Both places, Martha would have approved.

The pair that I used as my sample were priced at $10. Martha sewed fast so perhaps, she could turn out a pair of sandals in under an hour. I figure it took me about three and a half hours to stitch a sandal. I don't think that she was able to make back her investment in her supplies or be paid for her time. Although, like me, she probably thought that they were cute and made some to give away. She may have decided to make a few more to sell just to use up the supplies that she had accumulated for the project. Hm m m m. . . . I wonder how long it will take me to get to the bottom of her box and how many pair of sandals are really in there! Time will tell!

This is my fourth finish for the 4th Quarter Finish-A-Long and the second goal for the month of November! As far as fabric goes. . .I used about an eighth of a yard of fabric from the stash. When I count the 1/8 yard of stash that I used for the Christmas stocking ornaments, I've used a quarter yard of fabric. I've now used 38 1/2 yards of fabric from my stash. I've 11 1/2 yards of fabric to go to meet my goal of using 50 yards from my stash this year.

Sunday, November 18, 2018

Quilt Delivery

Susan holding the finished quilts
When my friend, Martha, died last July, one of her many in process projects were quilts for the kids--ages 1 1/2, 3 and 5--who lived next door to her. Last August, Susan Ainsworth Smith took the parts and finished the quilts. Susan gave me the quilts last week. Seeing the sparkles and the purples in many of the fabrics as well as the cross X design of the quilts sure reminded me of Martha. I appreciate the time that Susan spent getting these projects to the finish line!

I made labels for each quilt and hand stitched the labels to the back of the quilt. I tried to make the labels as Martha would have made them. I wrote each label by hand. Martha would have stitched each one using the embroidery font in her machine!

Labels inked and ready to stitch to the quilts
I coordinated a time with the kids' mom, Karri, to make the delivery. Karri, greeted me at the door. She told me that when their youngest was born, Martha came over and watched the older kids. She talked about how Martha would watch over their house and send a text when Rob, the dad, arrived home after working all night.

While Karri was speaking, it was like Martha was right in the room telling me the story again! Martha loved her newest neighbors! Karri shared that she had a photo of Martha proudly snuggling the youngest family member when she arrived home from the hospital. Karri also said that their oldest asked about Martha and missed her.

Playing " I Spy"
That conversation was the perfect segue to distributing the quilts. I started with the oldest recipient.  He recognized the letters on the label being his name. He didn't quite know what to make of a "blanket" or why it was his. I brought the quilts folded with the back showing so each kid could have their own reveal. He was a little unsure about why it needed to be unfolded so I helped!  He was a good sport looking over the blocks while I was telling him that he could find all sorts of items in the fabrics. I thought he would located the Coke bottle fabric; but, he was drawn to an apple fabric first. Then he had his dad clear off the coffee table where he carefully placed it "just so." Next he pulled out a puzzle and started building his puzzle on top of the quilt!
Using the quilt as a base for a puzzle
Martha made a lot of kid quilts using this cross pattern and another that was made of strips stitched on a muslin. She was adamant that kid quilts contained a variety of fabrics from bright to dull so that kids could find all sorts of items while practicing learning their shapes, colors and even counting!
Susan did an awesome job of making more blocks and putting the existing blocks together.  The two oldest kids ran their fingers along the quilting lines. They really liked the swirl pattern that Susan had quilted into each of the quilts.

I showed the middle child the block of her quilt that was a print of metallic butterflies. Martha would have approved of the purple border that Susan added to the blocks on this quilt. Purple was one Martha's favorite colors.
Testing the warmth factor

It wasn't long before this recipient was trying out the warming qualities of her blanket. Martha would have smiled and giggled seeing her blanket put to "use" less than five minutes after the initial reveal!

For the youngest, she sat on her blanket. She was "shy," but, I happened to catch her checking out her blocks while her brother was putting together his puzzle.

The youngest sitting on her quilt.
Martha loved her neighbors. She loved being their honorary grandma. She loved having a place close to her dream house where she could visit. She would have loved gifting these quilts.

Speaking of Martha's dream house, her house sold a day after it was on the market. The new owner will be moving in soon. Relatives of the new owner were painting, carpeting and replacing other flooring the day I delivered the quilts. I hope it will become the next owner's dream house too!

My heartfelt thanks go to Susan Ainsworth Smith and the ladies of Mt. Hood Quilt Guild who helped with this project.


Wednesday, November 14, 2018

Pot Holder--Third Finish 4th Quarter Finish-A-Long 2018

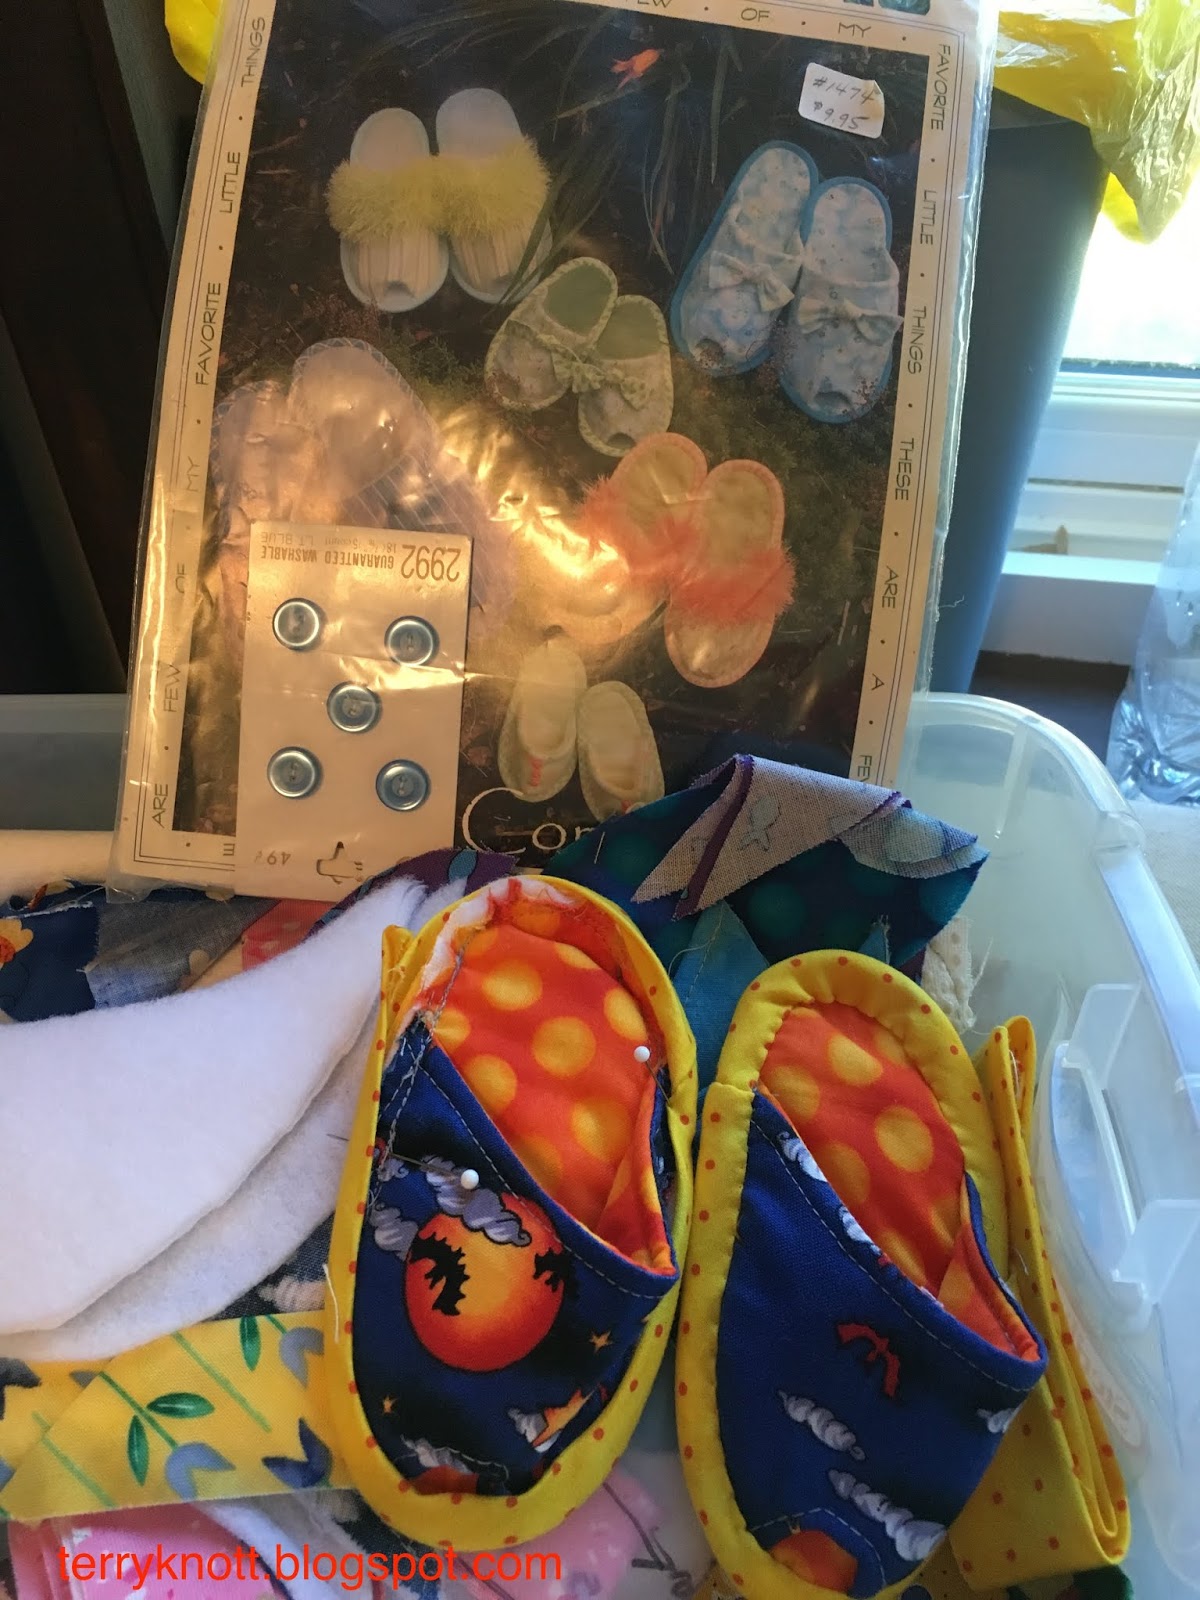
Model for drawing a moccasin 
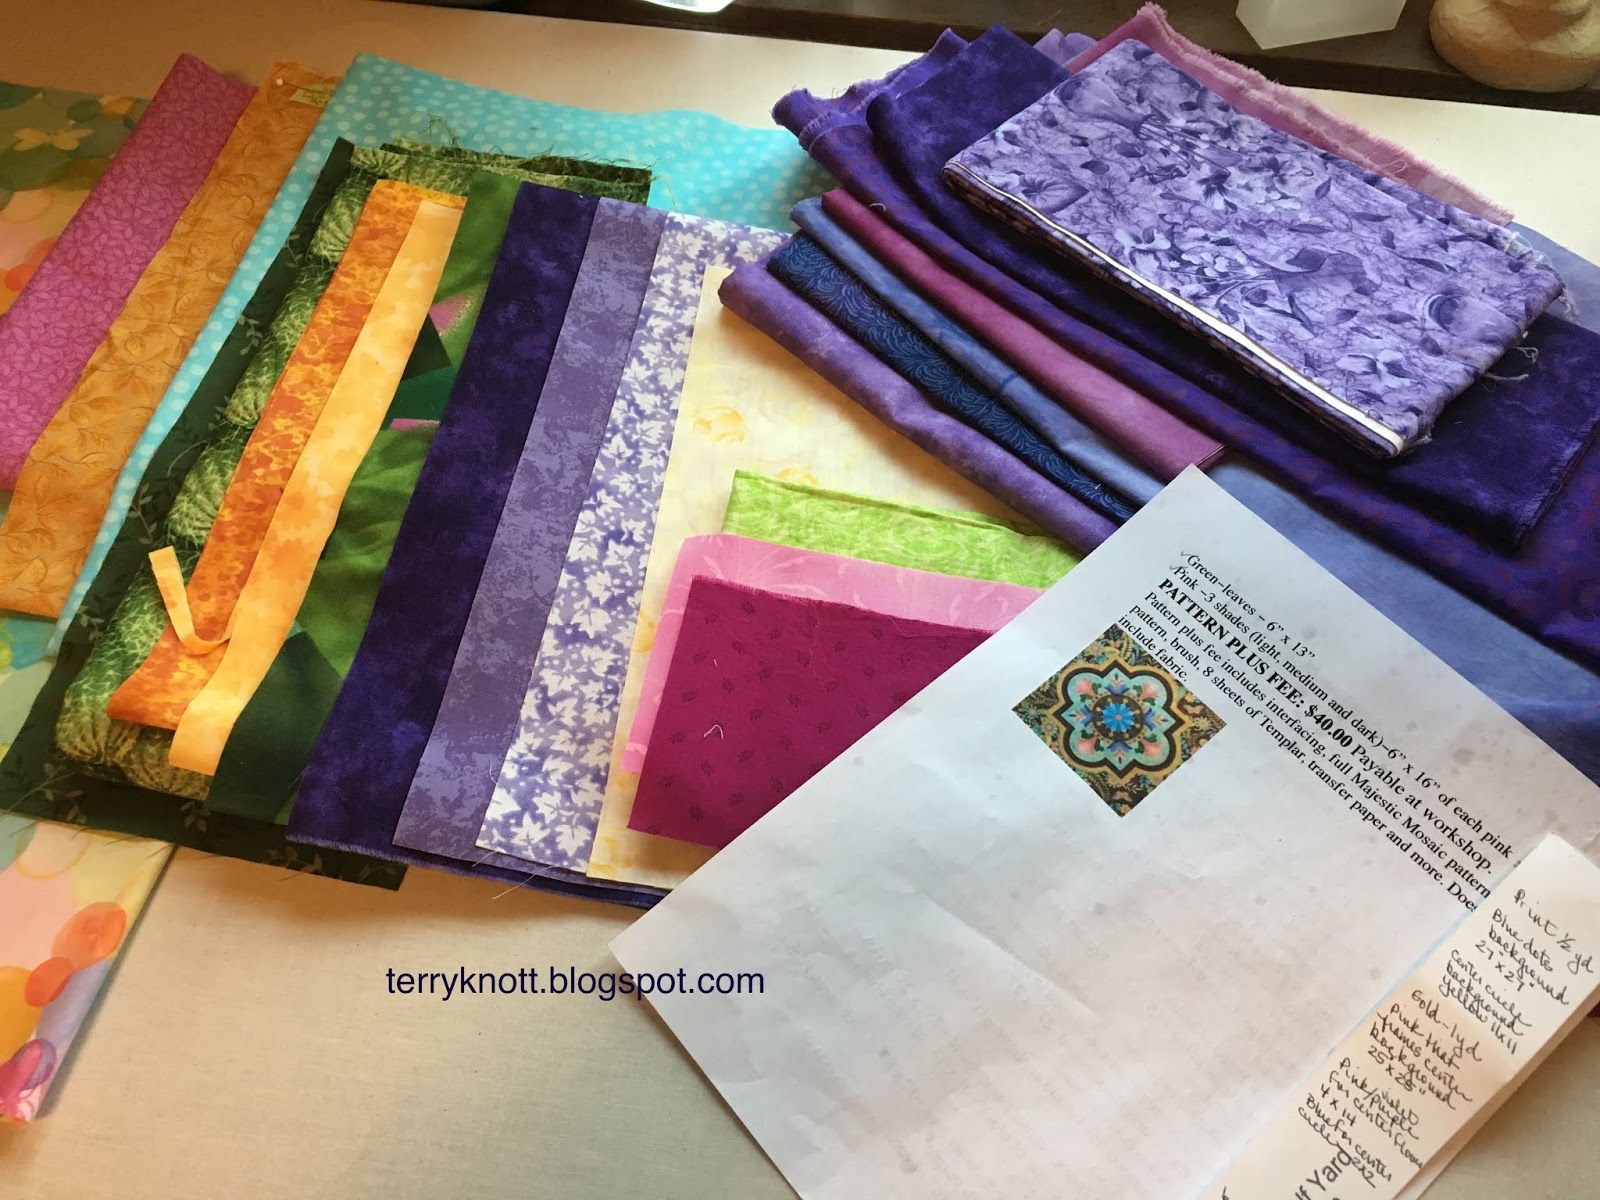
Our Thread Tales fourth quarter book was "The Snow Child" by Eowyn Ivy. It was about a husband and wife who moved to Alaska some years after losing their infant during childbirth. I enjoyed the author's description of the landscape. The author's development of the characters and the story lines sometimes lost me; but, all in all, I enjoyed the read.

I sketched a figure. I thought about the night sky, snow, snow flakes, red mittens, a fox, a dog. I sketched more on the figure and thought more about the story. I couldn't figure out how to draw a shoe from the front view. I took a photo of a slipper and tried drawing it. Miss J was so helpful about how to make my drawing more realistic. I worked more with my shape.
Drawing of a figure for a possible quilt

I thought about the previous book club project I had started. I had drawn some figures on a piece of fabric. (A post about that project is ahead!) I had a frank discussion with myself about starting another art type quilt when I haven't finished the other art type quilts because I got stuck somewhere along the way. I also haven't had a finished quilt at a reveal in so long that I can't remember when it was that I did! I decided to go small and to stitch a hot pad with the Aurora Borealis on it.
Selection of green bits

Selection of bits in monochromatic photo
JoJo over at Through My Hands, posted a pot holder project that she named, "Aurora Borealis." This project has been on my Finish-A-Long list since January 2017. I started with the fabrics that I had bundled for this project.


Shaded and basted hexagons ready for stitching


Background was too small


As I reviewed my fabric choices, I decided that I wanted to make the Aurora Borealis as green as possible so I removed all but the background, backing and binding fabrics. As I looked through my scraps for greens, I decided to use a different green in each hexagon.

I also wanted to practice shading the Aurora Borealis from light to dark. I pulled some pieces and then tried to shade with my eye. Then I took a photo in monochromatic on my phone. After viewing the photo, I pulled some pieces and chose others. I cut out the hexagons using the template that I had purchased last month. These hexagons finish to 5/8 inch so they are small!

It has been a while since I English Paper Pieced. It took me a few hexagons before I figured out how I had basted them in the past. I figured it out and was happy that I had purchased a bag of foundation papers that were just the right size as it make the task easier. I also remembered how much I enjoyed this method.
Audition of prairie points

I also had to do some searching on You Tube for information on how to do a Knicker Knot as my first attempts weren't as I had remembered! It didn't take all that long to sit and stitch the hexagons together. Using the pattern provided, I cut out a background hexagon. Right away, I noticed that I had a challenge. My background was too small for the hexagons! Probably what happened with my pattern was my printer was set to "fit" so that was why the pattern printed too small.

I could have taken some hexagons off; but, I decided that I would recut the background and this time, I would work with a squarish piece of fabric and that I would cut the lines of the hexagon after I had quilted the piece.

I like the background. It looks like the Aurora Borealis is going on behind the hexagons. The background fabric is a scrap from a quilt that I made my freezing daughter many years ago. Nancy Crow designed it. I like that the darkest hexagons fade into the background. I  used a little bit of glue to baste the hexagons in place. Glue basting made it easier to applique them.
Label

At the April Clark County Quilters quilt show two years ago, I purchased a spool of bright blue thread heavier weight Aurifil thread to hand stitch in the background of this project. I put a layer of insulbright and two layers of cotton batting behind the top and stitched some hand stitches around the hexagons. Then I layered it and added the tiny prairie points. I liked them; but decided to add them when I add the binding so that I don't cover too much of them up.

Quilting wise, I wanted it to be simple. I chose to stitch a few gentle curves to represent water and a few peaks and valleys to represent mountains in Alaska. I stitched next to the hexagons and about a 1/4 inch away from the hand quilting. The definition the stitching gave was enough for this small project and probably took me about half an hour.
Finished back

I made the prairie points using Susan Cleveland's tool. These are small. I used a 1.5 inch strip of fabric! I did stitch a decorative thread on the strip to add a little interest to the prairie point. I basted the prairie points to the potholder before I quilted it. Then I decided it would be easier to tuck the prairie points under the binding so I removed the basting stitches and worked on the binding.

Stitching the binding was a challenge. I used my number 72 foot and after I had stitched it, I realized that I had neglected to move my needle over to the left. It made sense now why the seam allowance seemed so small!!! In my defense, I often set up the next step of a project before I leave the studio for the day. Then, when I have 10-15 minutes, it is easy step into the project and make some headway. This was the first time that I was able to consistent square corners with the binding.
Finished front

In the past when I have had a corner different that 45 degree angle, the end result was different for each corner. It really helped that in JoJo's instructions, she shared using the marks on her sewing table to use as a guide for when she turned the corner with the binding. I still need practice; but, I am pleased with how much better these corners look! I am working on bettering my technique of applying the binding totally by machine. I'm making progress but, need more practice!

I used about a quarter of a yard of fabric for this project. Truly, my only costs were the papers, template, thread and needle as the fabrics were all small bits of leftovers. I did put insulbright and two layers of cotton batting in the project so it could be a working potholder. I've had the insulbright on the shelf for years! I'm glad to have used a chunk of it too!

I have now used 38 1/4 yards of fabric from my stash. I am edging closer to my goal of using 50 yards from my stash this year. I have 11 3/4 yards more to use before December 31. If I can finish quilting that mystery BOM quilt, I will surpass my goal. As for my initial drawing, it may become a later project! I'm pleased that goal number five and goal number 23 on my 4th Quarter Finish A-Long list are finished. I'm excited that I've also completed one of my November that was in my previous post!


Sunday, November 11, 2018

Goals for November


Quilt the square in a square border
This month, my goal is to make more progress on the list that I gave myself in October. It was helpful to be concentrating on a smaller monthly plan rather than look at my lengthy quarter list.  This month, I'm going to set myself weekly quilting goals. Where I seem to bog down in the finish process is estimating the time it will take me to complete a step in the process. In the past, I would start a new project while I waited for that light bulb moment to happen with the stalled project. The problem with that approach is that I often would get stalled on the next project too!!!! Hence, I created so many Works In Progress (WIPs) that ended up becoming Projects In Grocery bags (PIGs) or UnFinished Objects (UFOs). With the death of my friend, Martha, I've taken on a few of her projects too. So how many projects are there? I don't know and I really don't want to know!
Marci Girl Designs
Stumbling across Finish-A-Long has been such a positive in that I've finished projects that have been laying about for years. I am thankful for the moderators that keep it going and for all the sponsors that provide rewards at the end of each quarter. I've won a reward a couple of times which has been really cool. I've won fabric and I've won a ruler template. I've shared about the fabric and I will share about the ruler template. Most of all, I enjoy reading about others' finishes and seeing their quarter goal lists. It is inspiring to see what others create. There is camaraderie knowing there are others out there with big lists and repeating items too!

One of my monthly goals is to quilt the square in a square border in the mystery BOM quilt and to quilt the sashing on each side of the border. I am waiting for inspiration to strike. I might have a plan for the sashing; but, at the time of this post, I haven't a solid idea for the square in a square border. I hope ideas pop into my head soon. I also hope that I don't spend another 24 days on that section like I did on the center section last month!
Sandal project ready for hand stitching

In the meantime, I plan to stitch the sandals that my friend, Martha, had a box of parts and fabrics selected for this project. Last month, I cut out at six pairs; but, didn't get to the stitching.  I had a small piece of polyester batting in the leftover box that I used to layer with the lining and outer pieces of the shoe.

For future pairs, I will need to invest in more polyester batting. I will also look through the bias tape packages that were in my grandmother's stash for any colors that will work for this project. I do like to use her bias tape stash in my projects especially when the finished project will be a gift. She was a giving person and was always sending a note, taking a casserole or dropping off a meaningful item to someone she deemed "in need."

If I don't have the right color of bias tape, I'll cut some fabric. The little edge of the shoe is where the binding is stitched and it is applied like a binding so there will be some handwork involved.
Hot pad project
When I was waiting for inspiration to strike about what to quilt in the center section of the mystery quilt, I looked through the hot pad project. I decided that rather than trace off the hexagon size--these are 5/8 inch--I would order the papers and an acrylic template from Paper Pieces. My order arrived so I have started the project!

I'll keep working on the alphabet/words project. This month, I'll print another 80 pages of reference guide. I'll stitch another set of words that I have refined a bit. It is helpful to "dabble" more frequently with the embroidery.

I slacked off a bit with the bullet journal last month; but, I've reassessed my issue and revamped the process a bit so it will be easier to use it. I have found value with the bullet journal.  I've taken the jump to down size my planner to a much smaller one that will easily fit in my purse! More to come on the journaling process.
Working on the embroidered words

I'll also work on the Karen Kay Buckley top that I started in a class with her last May. Last month, I reacquainted myself with the project. . .in other words, I figured out what my next step should be!

I started two new projects. I cut out the pieces for one project at the beginning of the month. I read a blog about a sew a long on Gigi's Thimble. The pattern looked simple and I realized I had the supplies on hand. I had a bunch of two inch squares in a tray that I have petted, spilled, petted some more; but, haven't used. Martha had a piece of yellow/gold fabric that would make the center design. Over time, I have "collected" bits of cream background fabrics.  It isn't the size that my freezing daughter in London needs; but, making it will free up some space to access the fabric that I have had squirreled away for her.
Make progress on this top

I also pulled some fabrics to play along with the Bonnie Hunter mystery.  For about the last five years, I've thought about playing along; but, always got hung up on choosing the fabrics.  Bonnie is great about using scraps. I've collected a lot of scraps so the time has come to use the bits and chunks.

Bonnie provides a photo of some paint chips of fabrics that she used in her project as well as listing the page of the color on the Ultimate Color tool. I don't have the yardage needed for the project; but, I hope that I have some "precuts" that will work into the project when she releases the cutting instruction. If not, it won't be the end of the world if I purchase some fabric.

I might not get to other projects on my quarter list; but, rest assured I'm going to have fun stitching! Stay tuned!

Wednesday, November 7, 2018

Quilting Mystery BOM--Second Step--The Center

Quilting in the center block
Quilting the center of the mystery BOM quilt was a challenge for me. I drew filler stitches; I practiced other filler stitches. I drew designs using various rulers. Not one of my trials excited me enough to begin. I was stuck. To get unstuck, I thought about Cindy Needham's advice to divide the space. Aha! I was no longer stuck!

I used my Bohin chalk pencil to mark lines to divide the block in half vertically, horizontally as well as diagonally. I placed my template on top of the square. I stitched, I rotated the template and stitched again until I completed the circle. I did use a pin to anchor the template. The design stitched well for being in the center of the quilt!  Later, I added some shadow to the block. Photos are toward the end of the post!
Quilting design in corners of the center

I had planned to quilt the larger arms of the star next; but, because I had the pinkish thread in the needle, I decided to quilt the other four squares that were also in the center of the quilt. This time, I used a different shaped ruler template. I also held the template as I stitched it. I quilted these shapes as part of my Skittles and Sherbet quilt. It was fun to practice quilting them again!
Curved cross hatching
When I had pieced the center part of the quilt, I knew I wanted to quilt the center to emphasize the star pattern rather than the square in a square design. Of course, the challenge was how to accomplish that decision!
The lines that didn't work & the lines in the star legs
Tear drop filler stitch

I looked through my rulers and my thread. I decided to use a variegated thread with orange, purple and green to quilt a curved cross hatch design in the arms. I was dubious about having orange in the quilt with the pink thread used in the center as I thought that the orange might stand out too much.

A few pebbles and a border added to the quilt center
After I had stitched the lines, I liked the thread choice. This was a Valdini thread that I have had in my stash for many years. I was glad to use it in a project. I quilted some straight lines in the legs of the with inner star with the same thread. I quilted half a design of the inner center star in the green triangles. I used a cream King Tut variegated thread for that work. I liked the look.

The fabric colors were too strong to achieve the star leg look. Perhaps, if I quilted the cream background to emphasize the star legs, could get closer to achieving that goal. I decided the best way to accomplish that decision was to quilt straight lines that looked like they were behind the star. I first used a 50 weight cream thread; but, it wasn't heavy enough to accomplish the look.

Another challenge was continuing the line and keeping the line straight when I stitched in the section with the pink square. I decided I didn't have enough strength to hold the ruler and manipulate the fabric to make the line design work the way that I had envisioned. Instead, I stitched a tear drop filler stitch in the background.
Pebbles and stippling added to center block

The plan was to stitch a larger version of this filler in the outer star points. As I stitched a quarter inch around the outer star legs, my eye rested on the green triangles. The more that I looked at the triangle opposite the green triangle in the background, the more I thought about repeating the design. So I did. It would have been much easier to have continued that design in the beginning; but, all in all I was happy with how close I was able to match the design.

Evidence that there was just enough thread
Again, I looked at the blank background and contemplated stitching that tear drop filler stitch. Would that stitch be enough to help define the legs of the outer star? Could I make that tear drop filler larger? Should I keep drawing and testing other options?  Should I add more shadow to the center star while I waited for the quilt to tell me which direction to take?

Green triangle squares completed
The quilt "talked" to me. I stuck with quilting the tear drop filler stitches in the background in the outer part of the center block. I did add pebbles and stippling to the pink blocks. I liked how much the additional quilting added to the overall look. I liked the silk thread better than the cotton thread in the pink squares. I had just enough thread left in the bobbin to complete this step!

When it was time to quilt the pink squares surrounded by the background, the quilt said to stitch some straight lines in the background that were similar to the ones in the star legs of the center block. I thought that the addition of the straight lines worked well and it broke up the amount of tear drops.
Finished center

The light green squares needed to have a few lines quilted in the background of the flower design, the center star needed pebbles and a filler stitch in the center block along with a few pebbles in the star legs.

What I thought would take me ten to fifteen days to quilt actually took me 24 days. Rather than bemoan the extra time, or bemoan my slowness, or bemoan my indecisiveness, I am celebrating the progress I've made. I'm excited to have this much of the project quilted. I like how the quilting is more modern. I like that I practiced my ruler skills too. This portion of the quilt is about 30 inches by 30 inches. The quilt is about 86 inches by 86 inches. I'm not at the half-way point yet!

Next to quilt is the square in a square border and at least the brown borders that frame it. I'm waiting for the quilt to tell me what it feels it needs in those areas!


Sunday, November 4, 2018

Green Tomato Salsa

Step one: tomato preparation 
Step two: chop onions and peppers
Pat had gifted us a jar of her green tomato salsa some time ago and was it ever delicious. She said that she would make salsa with anyone who wanted to do it. . .but, the tomatoes had to be green! This is the end of the growing season and yes. . .there were green tomatoes so the time to make it was now!
Step three: adding the ingredients together 
and Step four: cooking it
Step five: filling the jars and lidding them;
putting them in the water bath canner

Step six: emptying the water bath canner
The sayings--"The more hands, the merrier" and "Many hands make light work," came into play two weeks ago when JoJo asked a local farmer if he had any green tomatoes because she was interested in making salsa. He did have green tomatoes. In true farmer fashion, he led the way to his field in his tractor. As he passed the "field," he stuck his arm out the window and pointed! I wish I had been there to capture the photos because his actions reminded me of my dad. Perhaps certain farmer traits are just inherent!
Mid-way view of the process

This farmer farms organically so these tomatoes were not sprayed with any chemicals. He also grew hot peppers and told her where to find those too. They were beautiful hard green tomatoes. The peppers were beautiful red jalapeños.

JoJo invited me and our friend, Pat to a salsa making day. Pat has made a lot of green tomato salsa. We refer to her as the "Queen of Salsa." She brought her Cuisinart food processor. We started a little after 10am and finished about 3:30pm. It was so much FUN to work together.  The time flew as we filled more jars! Thanks again Pat and JoJo for a great day!
Playing with Bowdee--a really fun part of the day

The first step was to cut the tomatoes into chunks. Pat commented about how the hard green tomatoes felt cold and the the ones that had started to ripen felt warm. I was surprised to find this to be true!

The second step was to chop onion and jalapeño peppers. The third step was to measure the tomatoes into a pan, add the chopped onion mixture along with vinegar, sugar and salt. The fourth step was to bring it to a boil for 10 minutes and then to simmer until it mounded on the spoon. The fifth step was to jar it and water bath it for 10 minutes. Step six was removing each jar to cool on the counter.

We visited, we worked and JoJo prepared an awesome lunch. We worked some more and I got to play with her almost 12 week old puppy Bowdee.  In the end, we made more than 40 jars of salsa. . .mostly pints. I took some green tomatoes home to make fried green tomatoes. Over the years, I've heard about fried green tomatoes; but had not eaten any. There were still a few green tomatoes left. I'd not made fried green tomatoes; but, JoJo gave me a recipe so I tried it.
Fried green tomatoes with Wow sauce.

Miss J and I cooked them for breakfast. She decided the sauce we made was too spicy and that the tomatoes were okay; but, she wouldn't go out of her way to eat them! I thought they were best eaten hot and the Wow sauce added a lot.

JoJo made green tomato cake and gave us a sample. It was delicious! I thought it was a lot like fresh apple cake. Before our salsa day, I had eaten green tomato jam; but that was it. I didn't realize that green tomatoes were so versatile! As for the salsa, I'd say that there are a lot of corn tortilla chips ahead of the three of us. Hm m m . . .I wonder if the Juanita's brand of chip will be on sale this week?