Sunday, November 28, 2021

Machine Embroidered Months of the Year--One Monthly Goal Met!

Printing the letters to check for uniformity
If it weren't for Elm Street Quilts One Monthly Goal - November Finish Link-up, completing the machine embroidery of the months of the year for the blocks in my Temperature Quilt would still be an item on my list. I can't thank Patty enough for having this link up. 

While I've put in a lot of hours to complete this goal, I thought that I would miss meeting this goal as the days flew and I wasn't near the actual embroidery stage of the project! 

My Friday Sit and Sew group and Gertie, my inner squirrel, provided the support to complete this goal. I thank all of them for their help!

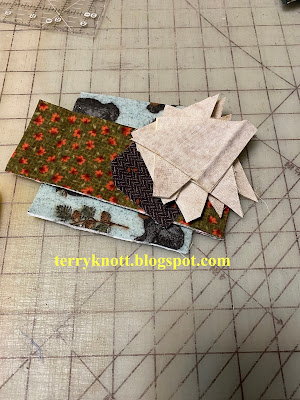
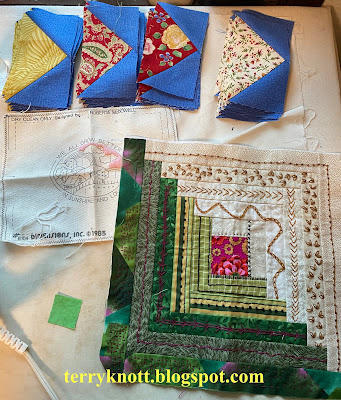
First sample stitching
Last February, Gertie had the idea of laying  the blocks into a calendar format. I liked it. I put the embroidery on my mental to do list. I worked on other projects. Until this month, the project hadn't moved from my mental list!

Why did I wait so long to get this finished? The reasons are many! I'll list two. First, I lacked the confidence to start. Second, I can't remember the last time, I used my embroidery software. 

Auditioning the sample with the block
While I want to learn how to use this software, I haven't bonded with it. I did join a monthly club at the shop where I purchased my software. The member interaction and lessons were interesting; however, I continued to have a disconnect between completing a lesson and applying it! 

Each time I get out the software, I get to reacquaint myself with it. UGH!!! I simply MUST figure out how to get the most out of this product because I do like what it can do. 

At the beginning of the month, I spent several days testing the various fonts in the software. I settled on one and began the process of creating the  letters in each of the months of the year. 

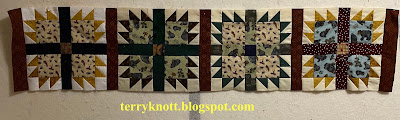
Auditioning the finished strip with the block
One would think that you could set the parameters of the letters, type in the letters for the month and embroider the letters. Ah. . .if it actually WERE that simple. SIGH. . .it is NOT! My first aha moment came when I realized the size of the letters in the word January were different from the letters in the word July.

I understand now that this issue comes when there are ascending and descending letters in the word. My work around was to make a file of the letters needed to stitch all of the months in the year. I copied and pasted letters from that file into a new file as I needed them. I made a file for each month.

Then there was the spacing issue. Sometimes the letters were too far apart. I edited the spacing until my eye liked it. There was the centering issue. I'm using a two and a half inch strip. I wanted the embroidery to be in the center of the strip.
Underlay example
All the months embroidered

As I finished each month, I printed a paper copy of the letters. I found this helpful for auditioning the size to the block as well as checking that the common letters, such as an "a" or a "J" were the same size. I checked that the "a" in January was the same size as the "a" in May. I checked that the "J" was the same size in June as it was in July.

Then I did a test of the embroidery. I tried different combinations of stabilizers. The combination that had the least amount of puckering after I had completed the embroidery was to use a fusible interfacing on the strip where I was embroidering the letters. I used a cutaway stabilizer in the hoop which I backed with a medium weight tear away stabilizer. I found the step underlay worked well and I played a bit with the pull compensation. I watched hours of virtual stitch outs until I was satisfied the process was going to end well.

Slowly, I worked my way through the embroidering the months. I used the medium sized hoop and embroidered one month at a time. I had few issues. I learned the order in which I brought the letters into the design was the order in which the design stitched. Another time, I would stitch the letters in the order of how they are written. I do know how to make those changes. With several months, however, I   found selecting all the parts of a letter was challenging. 

In the end, I was successful. I spent much of one day on the embroidery and several hours trimming away the stabilizer. I do like how much the embroidery adds to the blocks. I did practice the steps many times. I plan not to wait so long before getting the embroidery software out for another project!

Later today, I'll finish adding the embroidered strips to the blocks. Perhaps, Gertie will help me determine the plan for setting the blocks together as well as determining the legend. If you have any suggestions, she would love to hear them!
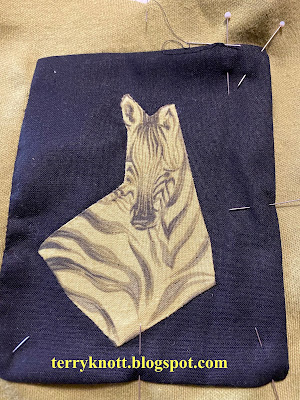
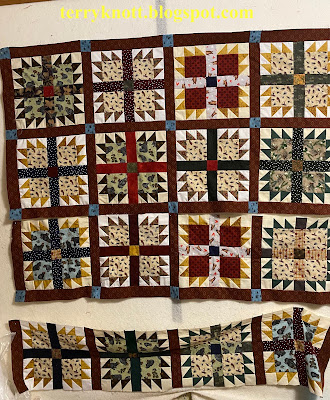
Finished block
This was my One Monthly Goal for November. It was goal number five on the November list. I am ELATED to have completed this goal.

I'm also linking to Cynthia at Oh Scrap/Quilting Is More Fun Than Housework as I'm using some old scraps in this project!

Regarding COVID:

Worldwide: 262M cases; 5.2 M deaths

United States: 48.1M cases; 777K deaths

Oregon: 387K cases; 5,116 deaths

There is a new and according to the media yet another variant of concern of the virus out of South Africa. The UK closed the airport to ten flights from South Africa last week because of safety concerns.

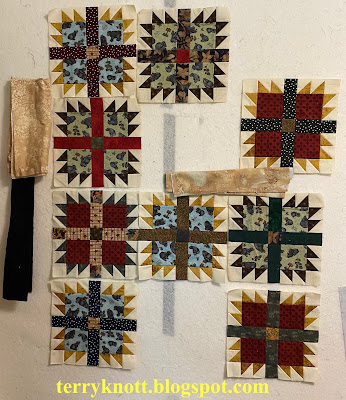
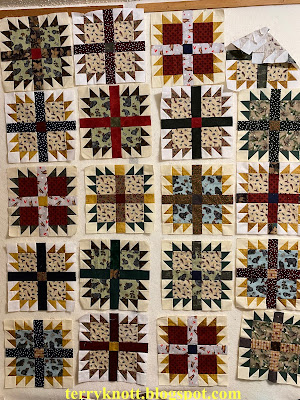
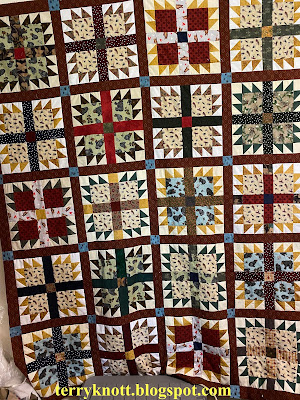
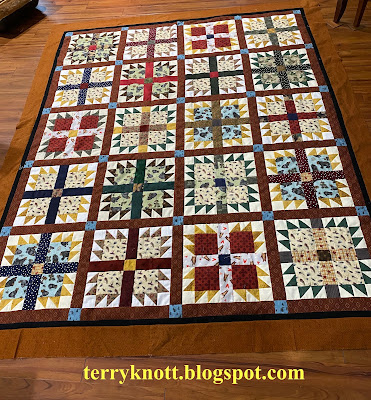
Five of the twelve blocks
The vaccination rate in Oregon continues to edge slightly higher each week. Currently, 70 percent of the population has received one dose of the vaccine and 63 percent is fully vaccinated. Five to 11 year olds are getting vaccinated. 

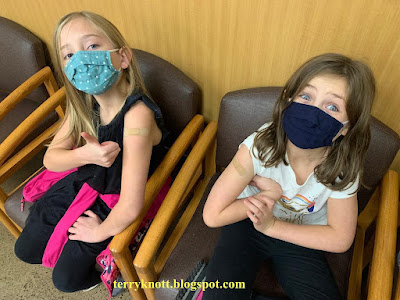
Yesterday, my chiropractor called to let me know that her ten year old son was exposed and contracted COVID at school. She said his first day of symptoms included high fever, headache and loss of appetite. So far, no one else in the household has tested positive. She said her son was feeling better. She felt that the vaccine (he had his first vaccination two weeks ago) had provided him some immunity. I sure hope that he recovers soon. He will have a story to tell when he has children!


Wednesday, November 24, 2021

Granddaughter's Dress--A Finish!

Adding the applique to the bodice
This project has been in my thoughts for a long time. Today is Miss J's eighth birthday. I made this pattern for J's sister for her birthday a couple years ago. I still had plenty of the knit fabric left so I looked through my stash for a coordinating cotton fabric. I found it in this zebra print. Not only was the color compatible; but the print was a score since J loves animals.

When the two granddaughters were over for a visit last week, we completed a quick measuring session. I do this a couple times a year. It is amazing how fast they grow! When I make them a wearable, I also make it a little bigger for growing room. Once I had the updated measurements, I drew off a pattern and cut out the pieces. I still have enough of the knit fabric for another project! Sometimes sewing up a chunk of fabric takes a number of tries!

Completed applique
I changed the thread on the serger to colors that were neutral to the knit fabric. In addition to using my fabric stash, I am also motivated to use my thread stash.

I decided the bodice needed a bit of a "pizazz" so I fused steam a seam two to the back of a zebra in the cotton fabric. Initially, I planned to fuse the zebra to the front of top. When I laid the zebra in place, however, it didn't show up because the value in the top fabric was so close to the value in the print fabric. 

To solve the value issue, I pulled a piece of black fabric and appliquéd the zebra to the black fabric. Then I appliquéd the black fabric to the front of the top. This took some time! To ensure that the motif would stay in place through wearing and washing, I machine topstitched the patch in place. I then stitched vertical lines behind the zebra in about eighth inch increments. That embellishment is there to stay!

Finished dress
It did take some time to finish this project. It always takes me more time to finish than I think it will! I used 1 1/2 yards of fabric which brings my total used this year to 20 3/4 yards. I hope my granddaughter will love this dress. I packaged it with a long sleeved shirt and tights so she can wear it now! This was goal number three on my November list

Tomorrow is Thanksgiving. How many of you are cooking a turkey?  Are you serving your guests another main dish? Turkey doesn't agree with me. We're having brisket. This year I'm thankful that we get to host our immediate family.
We're excited. 

How many of you are baking pies and bread? I'll be putting together a couple of pies later today. One family requested pumpkin and the other family requested pecan. I'm always grateful to receive requests!

Have a wonderful holiday. If you're a Bonnie Hunter follower, you'll be poised for the release of the first clue of the mystery on Friday. If you aren't a follower, I hope that you will find some time to create!

Sunday, November 21, 2021

Fourth Flannel Quilt--Progress!

A "kit" to make a block
It's been more than a year since I posted about progress on this project. It's been that long since I worked on this project too! Other than making bear paw blocks, I didn't have a plan of how many I needed. When you have a pattern, the road map is there for you to follow. You can choose to vary the route; but, there is a plan! It was helpful to have a recipient in mind for the finished quilt to come up with plan.

My friend, Martha originated these scraps. She liked giving quilts to graduates, newborns, newlyweds, people living through a loss or an illness. . .in short, she liked giving. A young man, now a college freshman, will receive this quilt. In thinking about him and his family, I began to plan this top. I made blocks until I had no background fabric or strips to sash the four paws into one block. 

Considering a border or sashing fabric
I started the project with four fat quarters and some scraps. A bunch of the scraps are strings. Gertie, my inner squirrel, let me know that even though I have a good selection of strings left from the project, there aren't enough to sash the blocks together or enough to become a border.She thinks those strings would be better utilized in their own project. I tend to agree.

I cut and kitted as many blocks as I could with the scraps. When I was out of background fabric or I didn't have a strip large enough to bisect the blocks, I set that block aside. 

At the point that I had stitched all the kitted blocks, I decided I would make a 4 x 5 layout or 20 blocks. Each completed block finishes to 14 inches. I was six blocks short. I needed a background fabric, another print for the "paw" part of the blocks and some more strips to bisect the block.

Auditioning border and sashing possibilities.
First, I pulled the larger chunks of flannel fabric that I had on hand. The neutrals didn't excite me as a background fabric. It might work into the pieced back or perhaps, it will be in another project.

The print fabric that I had on hand didn't move me as a border fabric. I liked the print. It worked well with the theme of the top. I made one bear paw block. I liked it so I made more.  

As I finished a block and added it to the design wall,  I liked the how a constant alternate block added to the overall interest of the bear paw blocks. so I made a total of ten blocks with the tie fabric.

A layout of the blocks
Incorporating a constant block made the other prints shine. I'll likely use the remainder of the tie print in the pieced back. I did purchase fabric at an area quilt shop to make more blocks. I also purchased sashing and border fabric. My goal is to use UP the flannels that were in my friend's stash. After making the purchases, I think that there will be another project coming from the leftovers! 

Adding the sashing between the blocks
I did take the red blocks apart and incorporate the bisecting strips in the constant blocks. It was late when I had finished the layout and I let the design sit over night. Gertie, my inner squirrel, often finds my mistakes after she has had a little shut eye. 

Sewing the rows together
Do you see what she saw? Check the block in the bottom right hand corner. Do you see it? I was kicking myself, because I ripped apart a constant block to make that extra block. She and I had a good laugh at ourselves because we were more than halfway through sashing the rows before we noticed the lack of a constant block.

Gertie let me know I wouldn't be happy if I didn't rip out the print fabric and restitch the constant block. I did rip it and resew it. I am much happier with the overall appearance of the top after making that change.

Finished Center
I had purchased a fat quarter to use as bisecting fabric; but, I decided a better use of it was to sew cornerstones with it. It features a blue background printed with green pine trees.

Once I had the rows sewn together, I added a small black border. I liked the addition and moved on to constructing the border. Both the sashing fabric and the orange fabric for the border were directional so I put some thought in cutting those pieces.

Finished top
I eased the top to the border. Some of the flannel fabrics wanted to stretch more than others. I was able to sew the whole top together without too much angst. It measured 72 inches wide by 91 inches long which is a good size for a six foot guy!

The young man will get a kick out of the fabrics. Last fall, he achieved the rank of Eagle Scout so he knows a bit about camping. When I was shopping for the borders, Gertie saw a great camping flannel which I will use on the back.

This was goal number six on my November list. I'm linking to Cynthia and Oh Scrap/Quilting Is More Fun Than Housework. 

Granddaughters after dose one of the COVID vaccine
Regarding COVID:

Worldwide: 257M cases; 5.14M deaths

United States: 47.7M cases; 770K deaths

Oregon: 384K cases; 4,914 deaths

Our granddaughters received their first dose of the vaccine at the beginning of the week. Other than having a sore arm, they had no other side effects. 

At the hospital where I work, last week there were 13 people hospitalized for COVID. Seven were on ventilators. Even though the number of cases continue on a downward trend, there are still many people affected. The media is reporting some areas of the United States seeing an increase in cases.

In Oregon, 70.5 percent of the population has received one dose of the vaccine. The percent of the population that is fully vaccinated is 63.7 percent. 


Wednesday, November 17, 2021

Butterfly Is Glued

My last post regarding this project was late November 2020. Gluing the edges of the fabric bits had been on my to do list for a year. It wasn't a project that Gertie, my inner squirrel, or I was excited about doing. Gertie reminded me that if I wanted to move the project forward, I had to spend time working on it.

Last month, I listed it as one of my goals. I spent one 20 minute session gluing. Obviously, I wasn't motivated to work on it. Gertie told me at that rate, I would be gluing for months! We had a brainstorming session about what was holding me back and how to get this job completed. 

Frankly, gluing is boring. I'd rather be quilting or piecing. I decided that I'd glue 20 minutes every day I was in the studio. Four days passed. I had managed to busy myself with other projects. Gertie suggested at the next Zoom sew day I had that this project would be my focus. The day came, I managed to work on a couple other projects for the majority of the day. At the last hour, I cleared the sewing space, spread the top on the table and glued. 

Glued butterfly
A few days later, I spent most of the Zoom sew session, gluing. The following week at another Zoom sew session, I finished gluing the butterfly. Gertie was right. The Zoom sessions were the best vehicle to conquer the gluing step in the project. I was able to visit while I worked through this step of the project.

Brilliant! I had planned to layer, baste and quilt it when I finished gluing it. Now, I'm rethinking my options. Perhaps, I want to try using some tulle in the project. I plan to play a bit before I layer it. This was goal number 13 on my November list. It was goal number one on my fourth quarter list

Many of the scraps in this project came from my friend Martha. She would be pleased to see how I used her scraps! For now, I plan to ponder my options and confer with Gertie. 

Sunday, November 14, 2021

Tea Quilt Is Finished--

Leaf filler stitch
Last month, I finished the top to this quilt. I began the quilting process with stitching in the ditch of all of the seams. I also stitched around the applique shapes. 

Next, I stitched about a quarter of an inch away from the applique. I added some other straight lines in the blue background so that I could quilt other motifs. At the time that I stitched the lines, I didn't have a vision of what I was going to stitching in those areas.

This project is a book club quilt. I read the book, "For All the Tea in China: How England Stole the World's Favorite Drink and Changed History" by Sarah Rose with my Thread Tales book club. The applique in the center is the Chinese character for tea. I quilted leaves in the background around the applique. I used a blue 100 weight YLI silk thread for all the filler quilting in the blue background.

Free motion sailing ship
Next I moved on to quilting the lower section of the blue background. I wanted to represent the ship that carried the tea plants and seeds to India. I looked at photos of Chinese sailing ships from that era. 

I drew my own version of the ship with three sails. I drew the shape on a piece of notebook paper. I traced it with my finger several times. Then I used a Bohin fine line marker to free hand draw the design. It is mostly a continues line design that I stitched about four times with a gold Floriani 40 weight polyester thread.  

Detail of quilting filler stitches
After I had completed the ship, I quilted a  filler stitch representing water around the ship. At the top of the piece, I quilted mountains using a ruler foot and ruler. Tea plants grow in mountainous terrain in China. I was stuck with how to quilt the sides until Gertie, my inner squirrel, reminded me that the tea plants were shipped in their own glass terrarium type container. She suggested circles with a couple filler stitches. 

I've wanted to learn how to stitch that type of circle. It took me a few minutes of drawing with paper and pencil before I determined a quilting path that I could do without having to apply my full attention to the process! I like the organic nature of the free motion stitching around the circles.

Label

The bold applique will catch a viewer's eye and encourage the viewer to step closer to the work. The reward for the viewer will be the texture of the background quilting. There will be a lot to see!

View of the pieced back
I added a facing, a label and sleeve. This was goal number one on my November list. It was goal number two on my fourth quarter list. It is my second finish for the second quarter of Devoted Quilter's 100 day challenge. It is my thirteenth finish for the year!

I used 2 3/4 yards of fabrics from my stash which brings the total of stash I have used this year to minus 19 1/4 yards.

Most of the thread used
I'm linking to Cynthia and Oh Scrap/Quilting Is More Fun Than Housework. Please visit the link. There is always a lot of inspiration at the link up!

Regarding COVID:

Worldwide: 253M cases; 5.1M deaths

Finished quilt
United States: 47M cases; 762K deaths

Oregon: 376K cases; 4,730 deaths

This week, the United States opened the borders for people outside of the United States for visit and for travel. 

My granddaughters, whose ages are almost eight and nine, will be getting their first COVID vaccination on Monday. I hope that they have no issues.  My husband received his Pfizer booster last week. Other than feeling extra tired for a day, he had no other symptoms. 

I plan to get my booster at the end of December. I've work scheduled until the winter holiday. I'd rather wait when I have a number of days off in a row to recuperate should I
need it!

The pool where I worked prior to COVID, is located on a community college campus. The pool remains closed to the public for lap swimming and lessons. I understand that swim teams are holding practice sessions. I have heard that the college has targeted January as a possible time to reopen to the public. I sure have missed swimming. I do plan to apply to be able to work there again after the pool opens.


Wednesday, November 10, 2021

Rhododendron Trail Mystery Fabrics--post 1

Gertie, my inner squirrel, loved Bonnie Hunter's colors for the upcoming Quiltville Mystery which is called Rhododendron Trail. Are you going to play along?

My Grassy Creek, the 2020 mystery, is still at the stage it was when Bonnie revealed the last clue. I'll likely work on it after at Christmas. My Frolic, the 2019 mystery, is at the quilter's. My Good Fortune, the 2018 mystery, needs a couple more borders because I want it to fit on a bed. I'm owning it that I haven't finished a mystery; however, I'm closing in on a finish with Frolic.

Color chips
In spite of my track record with the previous mysteries, I'm all in for Bonnie's 2021 mystery. At some point, I'll get the other mysteries finished. I like playing along. Bonnie stretches me with her color palette. This year, I decided to go rogue with my palette even though, I like the colors Bonnie chose. 

Why? I have a tiny amount of aqua, an even smaller amount of pink, a small amount of yellow and no garnet. I needed a buying trip. Gertie stopped in her tracks when she heard the word shopping. I explained that I wanted to go rogue. . .at first, she didn't move and then she started doing backflips for joy. 

My plan is: orange/gold instead of aqua; red instead of pink; navy instead of neutral for the background; blue instead of garnet and white instead of yellow. Let's see if what I sew turns into something I like! It is good to take risks. I didn't have enough of these fabrics either. I have been working on using my stash. I needed to replace these colors. While I might get a strip or two from my stash, only the white for now is coming straight from my stash! 

My palette
Gertie and I did a good job of supporting the local quilt shops. we purchased 32 and a half yards of fabric which is more than the amount of fabric that I have used from my stash this year. I purchased for this project, for the flannel project and an inner border for the churn dash project. I do plan to have a few more finishes before the end of 2021. I hope that I will have a net loss of fabric by the time the year ends! Currently, I have a net loss of 19 yards. It is no wonder that I'm not reducing my fabric when I keep purchasing!

I have prewashed all of the fabrics. Interestingly, a Basic Grey grunge red that I had had in my stash before hardly bled this time; but there was a Marcus and Benertex each of the reds that I had to treat three times before it stopped running. I had treated the previous grunge three times so this was an unexpected surprise. I had three solid navy fabrics that I also had to treat three times. Unfortunately, the selvage doesn't tell me who made it.

The fabrics are starched, pressed and the selvages removed. I'm ready for clue number one when Bonnie releases it on Black Friday! This was goal number nine on my November list.

Sunday, November 7, 2021

Lone Star with borders. . .It's a Top (post 3)

The first group of geese ready for stitching
Gertie, my inner squirrel, and I brainstormed a bit about designs for a border that would be on the top and bottom of the lone star. I wanted the top to fit on a bed. Hence, the need to add borders for length. 

Gertie, liked my idea of adding flying geese that floated above the star. I started cutting the pieces for the flying geese. Once I had a group cut, I stitched the units together. I used the philosophy of cut a little and sew a little!

I used Bonnie Hunter's method for this step. I cut strips. Next, I used her essential triangle tool to cut triangles out of the strips. I dislike methods that include drawing a line and cutting the waste triangle away. (I did cut a HST at the beginning of the strip and sometimes at the end of the strip so I have some pinwheels in the making. I, however, digress.) After I had sewn a few more geese, I did a little math to ensure I cut enough for variety but not enough for another project!

Auditioning the stripe fabric
Once I had pieced the geese fabrics, I auditioned them next to the lone star. Gertie said the geese needed striped sashing. When I auditioned the geese with the striped fabric, I agreed with her. Gertie responded with much tail flicking and chattering. I used the design wall to layout the geese in a sort of random organized pattern. 

Once I liked the pattern on the design wall, I stitched the blocks together into two long rows. I added the striped fabric to each side of the block. I also added a background strip of fabric to each side of the striped fabric.

After each step, I did lay the in progress border next to the quilt top to see if I liked what I was creating. I, however, failed to take photos past the point of the final
Beginning the row layout of the geese
 geese arrangement on the design wall!

After I had stitched the border to the top, I added another strip of background fabric to each side of the top. I had a finished top! Gertie likes the simplicity and interest that border added to the top. She claims the striped sashing is the key to the success of the border. I like floating the
Finished top
star and the border. I also like the size as it is about 78 inches wide by 98 inches long which is a good size to lay on top of a bed.

Next, I'll piece a back using the leftover red and green fabrics. I hope that there is enough! I plan to bind the quilt in the background fabric. Yesterday, I purchased more of it so that I can! This was goal number two on my October list.

I'm linking to Cynthia and Oh Scrap/Quilting Is More Fun Than House Work

Also, Gertie wanted me to mention the winners of the hanging towels from her post. The random generator selected Debbie, Pat, Kathleen and Nicole as winners. I hand delivered packages to Debbie and Pat. I mailed a package to Kathleen. While I was curious how much it would cost to mail a package overseas, Nicole has planned a trip to the states in a few weeks, so I'll catch up with her when she is in town.

Regarding COVID:

Worldwide: 250M cases; 5.04M deaths
United States: 46.4M cases; 754 deaths
Oregon: 372K cases; 4,562 deaths

In the United States, the Pfizer vaccine is being shipped to all parts of the country so that kids in the five to 11 year old range can be vaccinated. My granddaughters are planning to be vaccinated.


Wednesday, November 3, 2021

October Recap and November Goal Setting

Flying geese for lone star border; small handwork 
project; temperature quilt square and log cabin
block with embellishment projects
While I don't where October went, I made good progress on my October goal list. To recap, the list was: 

✔1. Turn two kitchen towels into four gifts. 

✔2. Finish the charity baby quilt.

✔3. Work on another small hand project.

✔4. Piece the back for Frolic and get it to the long armer.

✔5. Piece more string blocks.

✔6. Finish the Santa tree skirt.

✔7. Piece the top for the "Tea" quilt.

✔8. Continue glue basting the butterfly.--I spent about 20 minutes gluing.

✔9. Keep up with the Rainbow Scrap Challenge and the Temperature quilt.

10. Begin a new baby quilt.
Pieced string blocks

✔11. Work on the fourth flannel quilt.

✔12. Begin collecting fabrics for the next Bonnie Hunter mystery quilt.

✔13. Determine the borders for the lone star top.

✔14. Help Gertie with her special post. The squirrel party was fun. The packages are on their way to the recipients. 

I made terrific progress on this list. I attended a virtual retreat which began last Thursday and ended Sunday at one PM. I "engaged" myself in a project between the hours of 8AM and 10:30PM Thursday, Friday and Saturday. Sunday, I stitched from 8AM to 1PM. I did take a long break on Saturday to attend my granddaughter's last soccer match of the season. I made up the hours by starting my day earlier in the studio. 

Machine quilting sample on Tea quilt
Dedicated and productive sewing time was key to moving projects forward. Having the quarterly and monthly goal list to refer to as I'm working on a project was helpful. Finally, participating in Leanne's (Devoted Quilter) 100 day WIPS Be-Gone 2021 challenge has helped. I've been curious as to what I could finish in 100 days. So far, I've finished four projects and am close to finishing a fifth.

I also helped 56 people earn their American Heart Basic Life Support CPR certificates this month. I quilted the last charity quilt on Thomas the longarm. A member submitted a bid for him to the board which the board accepted. In four months, I quilted nine quilts for the charity group. 

For November, I plan to:

1. Finish the "Tea" quilt.--I have the handwork on the facing, label and sleeve to complete.

Block of Temperature quilt. . .OMG embroider the months
2. Piece the borders for the lone star top.--I have made the flying geese blocks.

3. Make a special gift for a granddaughter's birthday.--I purchased a couple of patterns and in the next week, I'll narrow my options.

4. Figure out the layout of the Rainbow Scrap Challenge blocks.--The oldest granddaughter has taken an interest in putting these blocks into a top. 

Flannel quilt block parts and potential scrap fabric
5. Machine Embroider the months for my Temperature quilt. Once the embroidery is complete, I'll add the section to the appropriate block. This is going to be my one monthly goal. I also plan to keep up piecing the blocks.--This project is the one I've thought about since last March; but, I haven't moved past the thinking stage. I am linking to Elm Street Quilts One Monthly Goal November Link-up  Click the link to see what other people are planning to complete. Thank you, Patty, for hosting this event.

String block layout possibilities 
6. Work on the fourth flannel top.--I started four different flannel tops from Martha's scrap in March 2020. I've finished three of them. Two went to the passage quilt program and one will be a birthday present in January. 

This fourth one, when finished, will go to a graduate who finished high school last June. I was working on other projects and wanted a break from stitching on flannel. He'll be home for the holidays so it would be a good time to get going on this project!

7. Work on the hand stitching project.--Last month, I started it.

8. Finish Frolic.--I dropped it off at the quilter's on October 19. It is likely that by the end of the month, she will let me know that she is finished with quilting it.

9. Keep up with the Bonnie Hunter mystery.--She released her colors last I Saturday. How many of your are planning to join the Rhododendron Trail mystery? If I stick with her colors, I'll be buying most of the fabric. If I choose to go with my own color way. . .I'll still be buying fabrics. . .ARGH. . .the fabric selection is my least favorite of the process!! Gertie is ready for a shopping trip!

10. Finish the log cabin embroidery project.--I am stuck with the edge treatment and a back. . .or, do I want to send the block to be the center of the CCQ's next charity quilt that tickets are sold on to benefit a charity. . .decisions, decisions!!

Continue glue basting this project
11. Piece the string blocks into a top.---At the retreat, I put together a layout and started the webbing process. For now, I'm calling it Strings--Another Line.

12. Work on a new baby quilt.--More to come on this project.

13. Actually spend some time each day that I'm in the studio glue basting on the butterfly. I began this project in 2018. . . it has been a WIP way too long!

14. Continue the piecing process on the churn dash block project.---The youngest granddaughter is sewing the rows together. 

Again, it is a big list. My goal is to list eight items each month. . .but, Gertie slips in a few more projects. She is such a cheerleader! Perhaps, next year we will do a better job of streamlining our list. Gertie tells me that I can always dream!!!