Showing posts with label ENGLISH PAPER PIECING. Show all posts

Sunday, June 16, 2024

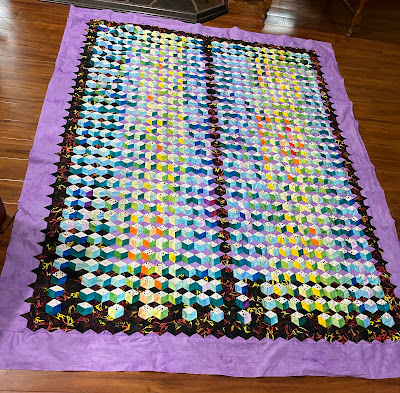
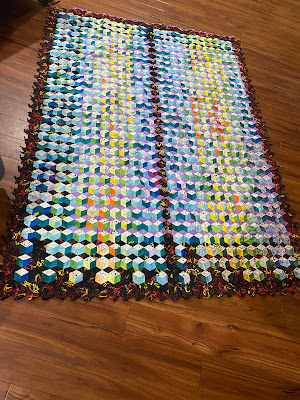
Temperature Quilt 2022-2023--It's A Top!

Goal number one on my June list was to cut the borders and begin stitching one to my 2022-2023 Temperature quilt. One afternoon, I cut the two remaining borders and marked the quarter inch sewing line. I noted the half and quarter marks on the length of each border.

Border cut and marked
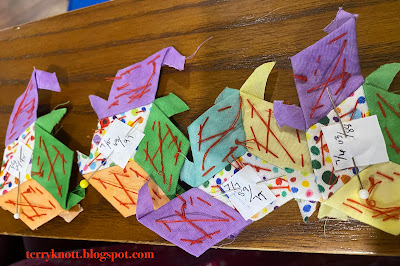
Next, I needed to remove papers. This was a job I did while watching television with my husband! I spent several evenings creating a pile of thread and used papers!

Paper removal debris pile
As I positioned the border in place, I removed the papers along the outer edge. It didn't take as long to prep the border as I had led myself to believe. I marked the quarter sections on the quilt top and began to pin the border in place. I found I needed to ease the top to the border. I thought that stitching with the papers would have eliminated wonkiness. . .not so! 

Appliquéing a straight edge is much faster than going around all the points on the lengthwise borders! I thought that I'd applique one border this month and one border next month. . .nope. I finished both THIS month. It is now a finished top! 
Detail view of appliquéd edge
I do need to press the back carefully to tame all the seam allowances and I need to construct the back. Pressing and constructing the back may happen next month. Considering the quilting, I am thinking simple. The top is heavy with all those seams!

I'm linking to: Cynthia at Oh Scrap; Alycia at Finished or Not Friday and to Frédérique at Patchwork and Quilting.
Finished top

Wednesday, May 29, 2024

Second Border in Place on Temperature Quilt

2022-2023 Temperature quilt progress
 I took a photo after I had appliquéd the other side of the border to my 2022-2023 temperature quilt. On this side, I pinned the triangles in place rather than using glue to tack them in place. 

Pinning made it easier to stitch the points. Taking them into place was great because I had no pins for my threads to catch. In the end, I'd report either way was a good method.

Next month, my plan is to cut, mark and place at least one border in place. Since there are no points involved, I may stitch that side faster than I stitched the other two borders. Two more borders and I will have a finished top!

This was goal number one on my May list. I'm linking up to To-Do Tuesday with Gail who blogs at Quilt Schmilt and Alycia Finished or Not Friday.

Sunday, April 28, 2024

Update on the 2022-2023 Temperature Quilt

Close up view of the border
Goal number one on my April list was to make progress on my 2022-2023 Temperature quilt. I sure thought that I not only would have finished appliquéing one border to the top; but, that I would well be on my way to appliquéing the second side on the top. I sure didn't realize how much I would be challenged with the knee joint replacement recovery!

Last night, I finished appliquéing one side in place. Next month, I'll work on getting the other side prepped and begin stitching it.

One border on 
Goal number four on my April list was to begin planning a modern mystery quilt along. I have begun the process. In June, I'm planning a get together on Zoom to share photos of the quilts/tops/blocks people made during the mystery this year. (We participated in Bonnie Hunter's Indigo Way mystery quilt.) At that wrap up meeting, I wanted to get feedback about sone of my thoughts for the next mystery. 

Because it is a mystery, I may write about it; but, I'll be keeping the design under wraps! I'm linking to Cynthia at Oh Scrap/Quilting Is More Fun Than Housework.


Wednesday, February 28, 2024

Temperature Quilt -- English Paper Piecing Complete

All half diamond shapes in place
Goal number five on my February list was to finish English paper piecing the half diamonds on the other edge of my temperature quilt. 

To meet the goal, I needed to insert one half diamond piece 25 out of the 29 days of the month. I wasn't worried. I started out the month making good progress; but, after the first week, I fell behind. By the fourth week of February, I had pieced a little over fifty percent of the half diamond pieces. It wasn't looking like I'd meet that goal.

Gerite, my inner squirrel, kept whispering to me that I could do it. She told me all I needed to do was piece four shapes each day. 

Close up of lower edge
I couldn't get motivated. Days passed without me stitching even a partial diamond into the top. Daily, I review my monthly list of goals. I look at the calendar. I have talks with myself about which project I could move forward a bit as I approach the end of the month. I also determine what projects will likely languish. I ask myself what is holding me up to work on those projects.

While I had these conversations, Gertie told me that I had
done so well keeping up with this project for the last two years. She said it would be sad if I lost momentum now. The last two weeks, she has been especially vigilant. After all, I was 14 shapes from finishing the lower edge. This week on Monday, I pieced six shapes. Tuesday, I pieced the remaining eight blocks. Wednesday (this morning), I took a photo of my top.

My plan is to applique a border around the outer edge using the purple fabric.  Next step is to carefully remove the papers along one side and place it on the border. Rather than use pins to anchor the edge to the border fabric, I'll use small drops of glue. 

I'm feeling thankful that Gertie kept whispering words of encouragement!!!


Wednesday, January 24, 2024

Filler Blocks for the 2023 Temperature Quilt--post

December 31, 2023 block
I pieced and inserted the last block for my 2022 and 2023 Temperature quilt. I'm calling the project Deux Ans which means two years in French. The block below was December 31 2023.

I took a break one evening and didn't work on the project. After spending time on this project daily for the last two years, I missed not piecing! I was surprised! I suppose almost daily English Paper Piecing a block provided me a routine. Now, I'm missing that routine!!

Close up of upper border
I have begun adding the filler blocks to the top edge of the project. I will also add the same filler blocks to the bottom edge of the project. For now, I'm inserting a few blocks into the top most evenings. I'm not putting a deadline on completing the filler blocks. It is a fiddly process to insert the half blocks. I'm taking my time. I'm finding not having to insert a particular number is freeing!

The finished blocks
A couple Sundays ago, I was sharing the project with my friend, Theresa. That is when I saw that I had added a design feature. Gertie, my inner squirrel has been on hiatus. Had she been her usual cheery and busy self, she would have alerted me that I was altering the design.

The left side of the quilt contains blocks from the temperatures in 2022. The right side of the quilt contains blocks blocks from the temperatures in 2023. I'll likely not share a progress post until I have inserted all the blocks in the bottom edge. Goal number nine on my January list was to make progress on the half diamond shapes in the project. I have made progress and it wasn't as difficult to add that half block as I had envisioned.

Next month, I'll begin adding those half diamond shapes to the bottom of the quilt. I had planned to applique a plain purple border around the edge of the quilt; but, Gertie has been whispering to add filler blocks around all the sides ad bind it with  the purple. Hm m m m. . . .Leave me a comment with your opinion! 

While I have recorded the daily temperatures this month, I have yet to stitch a block for the temperature quilt of 2024!


Wednesday, December 13, 2023

Another Hexagon Ornament

Getting supplies ready for another ornament

Goal number three on my December list was to stitch another hexagon ornament. It takes me a little more than three hours to cut out, baste and stitch one of these ornaments. I now have three of them. When we mailed our cards on Monday, I forgot to add them to the card!

Three total ornaments made

I may wait until next year to deliver them. . .I do plan to make more. . .although, I will wait until after the holiday!

Wednesday, November 15, 2023

Hexagon Ornament

The hexagons ready for piecing
Goal number five on my November list was to stitch a hexagon ornament. I cut several little kits out of the pictured fabrics last winter to make ornaments. I was teaching an EPP class, I needed some examples of projects that wouldn't take years to complete in order to learn the technique. The hexagons finish at 5/8 of an inch.

Glue basted and ready for stitching
While I've been steadily quilting my Lone Star quilt, the progress I'm making has been slow. I can envision the finish to the quilting; but, it is farther away than I would like it to be! At any rate, I didn't think that between the hand work I've been doing on my temperature quilt and the Lone Star, I'd have time to fit in this EPP ornament project.

Stitching underway
I have several of these kits and my plan was to gift them to friends in Christmas cards. I decided that I would make time on a Friday and stitch it. Fussing cutting the snowman print wasn't difficult. Glue basting the fabric so that the snowman motif lines up relatively the same on each paper foundation was "fiddly." I did manage the glue basting. As I finished basting each hexagon, I checked the placement with its neighbor. 

Front and back hexagons are stitched
When I had glue basted all the snowman fabric hexagons, I glue basted the hexagons with the green striped fabric. I began stitching. I chose a Friday because that is the day I Zoom with a group. I call it my in house retreat day. There is conversation, laughter and progress made on all kinds of projects. 

Finished back
Once I had finished stitching the front and back of the ornament, I glued a piece of ribbon to the inside of the top edge of one side of the ornament. I leave the paper templates in to provide stability. Next I placed a few drops of Elmer's school glue to the edges of the hexagon. After placing the glue dots, I place the other side next to the glued side. I waited a few minutes and then stitched the two sides together. The glue helps the edges stay aligned while I'm stitching.

Finished front
It wasn't long until I had a finished ornament! Next month, I'll stitch another. The finished ornament is about three inches square which will be a nice size on a tree. Now, it is back to more stitching on my temperature quilt and Lone Star quilt. . . little by little. . .I'm making progress!

Wednesday, October 25, 2023

Temperature Quilt

I last shared my progress on this project in August. I was adding the filler blocks for the border. Goal number four on my October list was to continue making temperature blocks and inserting them into the top. I'm up to date on this process. 

At the beginning of October I had pieced all of those blocks into the project. Rita, one of our Mystery Mavens, took a photo of me and my top on October 2. It is now wide enough to cover my body!

Progress on October 2
I've managed to continue piecing the daily block and inserting it into the top. I thought that I would have pieced more of the dark filler blocks for the outer edged than I have. Honestly, I'm finding it difficult to be motivated each day to stitch the block. 

My goal for November is to have pieced all the dark filler blocks needed for the outer edge. In December, I will insert the filler block along with the block of the day. I still haven't figured out how to attach the border. I'm thinking that I will need to add at least another half triangle so that the edge will be straight. 

I'm planning to add a purple border that finishes at four and half inches. I had planned to applique it because I didn't want to lose all the points on the English paper pieced blocks. I have been unable to figure out a method of adding the top and bottom border without having a seam show. 

One solution is to piece a purple filler block along the edge. I don't know if I'm up for piecing close to another 170 half diamonds. Time to contemplate.

Sunday, July 9, 2023

Home

Mending the t-shir
Late Thursday night we arrived home after a thirteen day trip to Greece. We explored Athens and the island Naxos. We sampled lots of food dishes. As our son in law put it, we saw a lot of old rocks on hot and humid days! The temperatures were in the 90 with the humidity ranging from 45-86 percent! 

Wednesday posts will be about our trip. My favorite part of the trip was spending time with the family and swimming in the pool with the grandchildren. My least favorite part of the trip was the travel. Coming home was a 20 hour process from the first take off to the final landing
which doesn't include the hour taxi ride to the first airport and the forty minute ride from the last airport to home.

We unpacked once we arrived home. One of the t-shirts that my husband wore on the trip had a loose thread at the hem of one of the sleeves. He pulled it and most of coverstitched hem came with out with the thread. Mending is not high on my list of priorities. This shirt, however, is a favorite of his. After the wash and after I had picked up Joie, my Bernina from the spa, I mended it. 

July blocks ready to be inset to the top
The trip was the perfect opportunity for Joie to receive a tune up. She seems to be stitching most days that I'm in the studio. To be without her is like being away from a dear friend! 

Regarding my temperature quilt: While I have made a block for each day on my temperature quilt, I need to insert the blocks into the top. My goal is to stitch at least two each day until I am caught up. My goal is to be caught up by the end of July.

Yesterday, I finished quilting the border of my five inch batik squares top. Today, I get to quilt the printed pinwheels that I made from the squares that Preeti gifted me. 

Thumb nail sketches

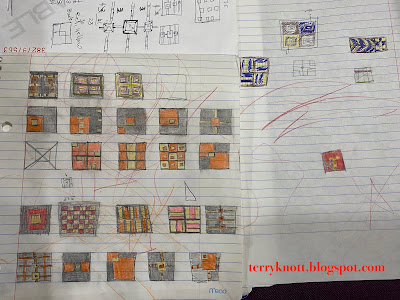
I'm still drawing thumbnails for the square in a square challenge that the small modern group I'm in issued. The perimeter of the finished piece is to measure 150 inches. Rectangle shapes are okay. Setting triangles are okay. Corners need to be square. The background is to be black. Yellow has to be used and one color of your choosing. Fabrics should appear as a solid. The reveal of the challenge has already been held; but, there is still time to play as the show we will share our creations is in April 2024.

All of the granddaughters shared their ideas too. The red line shapes on the back of the page are Miss A's, our youngest granddaughter. Miss J kept her sketches; but, Miss K's are on the other lined notebook paper. I still don't feel like one of these is the one though. I'd be interested if one design is of interest to you. Please leave your thoughts in the comments.

The jet lag is with me and I felt like I caught a cold so I'm staying close to home for another couple of days. I do wake up for several hours each night but am managing a four to five hour nap each night! 

I'm linking to Cynthia and Oh Scrap/Quilting Is More Fun Than Housework. I'm looking forward to reading what other people are creating!

Sunday, May 21, 2023

English Paper Piecing Wlorkshop--Zoom and in Person

Some of the EPP samples
Saturday, May 6 via Zoom, I taught a three hour English Paper Piecing (EPP) workshop. To prepare for the class, I watched a number of You Tube videos which shared a variety of basting and stitching techniques. I brushed up on my knowledge of needles. I practiced the techniques that I watched on the You Tube videos. My friend, Rosanne, lent me a number of her finished EPP projects and books. Of course, I drooled over her finishes and thumbed through the books!

Mary Ellen working on her rosette
As I pieced blocks for my Temperature quilt, I practiced stitching and talking about the process. Talking while stitching is not easy for me to do! I practiced the techniques while I talked. About a week before the class, I used my cell phone to practice being on camera while I demonstrated. 

I found that my cell phone version wasn't new enough to enable the macro setting in the Zoom application. Not being to access the macro setting meant you couldn't see what I was doing. The stitches were too small to show up on camera. 

Sandy trying out the painter's tape tip
I thought about using You Tube videos to demonstrate a technique. No video, however; demonstrated the exact process I had planned to share. 

Claudia creating her own design
In the end, I photographed each step of the process and made a slide show. The slide show worked well. I did get some feedback that the photos seemed to be backwards. I'm left handed. My whole life, I generally flip whatever I'm seeing when I'm watching a teacher. I didn't even think about flipping the photos so that the right handed people didn't have to turn the visual around in their heads. Actually, it didn't occur to me that there would be an issue. 
Paula creating a sweet floral rosette

In the end, the flow went well and there were some great looking rosettes in the making from the twelve students who attended the workshop. They had fun and I hoped that some of them would become an EPP addict. Teaching an EPP class on Zoom was goal number six on my May list.

Thursday, May 17, I taught an in person EPP class in Stevenson, Washington. This was the first time that I've taught a class outside of my guild or small group. The Columbia River Gorge Quilters held a Quiltaplooza event. This three day event was held at the Skamania Fairgrounds. There were at least eight classes, a banquet, a huge trunk show and general lecture, vendors as well as mini lectures during lunch. It was a hot day; but, our room was air conditioned which was nice!

Classes began at 9:30am. We broke for lunch at noon. There was a lunch lecture from 12:15 to 12:50pm. The lecture on Thursday, was about paring down one's UFOs. (UnFinished Objects) It was a terrific lecture. I plan to employ some of the tips the speaker shared to pare down the UFOs that I have! Class ended at 4pm.

The six participants who attended the class had some experience with some sort of hand work like knitting, crochet, embroidery, cross stitch and appliqué. At least four of the participants were new to quilting. About half of the group were interested in the technique because they had future trips planned. They wanted a project that would travel. One person brought an in process EPP project to class.

Joan and her fussy cut shapes
The participants picked up the techniques of the process quickly. They also asked the best questions. What I love about an in person classes is the camaraderie that builds among the participants. There was sharing of materials, supplies and knowledge. There was plenty of wows and congratulations as people became adapt at the knicker
knot, the whip stitch and the flat back stitch.

There were conversations about how to attach the rosettes or the hexagon shapes to a background. The samples I shared provided examples of different methods. One participant planned a contemporary design of the hexagons. I sure hope that she will share her progress as I was intrigued with her idea.

Julia arranging
her rosette in alternating fabrics
We had conversations about how to stitch with other shapes. One person brought a project that incorporated diamond shapes and she wanted to know how to line up the points. I shared the technique of how to ease the sides together so that there can be a perfect point. Learning how to accomplish points was one of my highlights when I began EPP.

We talked about using striped fabrics. We touched on the subject of piecing fabrics to make our own striped fabric. We briefly talked about how turning the shape slightly could create a myriad of design possibilities.

In the end, it was as great a day as the Zoom day! Teaching an in person EPP class was goal number seven on my May list.

Because we all used scraps, I'm linking to Cynthia at Oh Scrap/Quilting Is More Fun Than Housework.


Sunday, March 12, 2023

Hexagon Round Pincushion--post 3

Fabrics and templates ready to glue baste


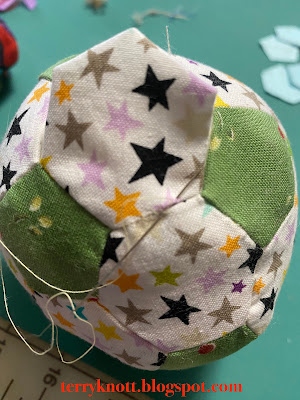
After making the hexagon pincushion, I happened upon a hexagon ball photo on Pinterest. When I clicked the link to investigate further, I found a tutorial AND a link to a template pattern! I had to try it! 

View of the half stitched ball
This time, I printed the shapes on cardstock and  cut out the shapes. I made an effort to cut carefully on the lines. As with hand work, there was less accuracy than with using the laser cut papers I purchased from Paper Pieces

Ready to stuff
I had considered choosing a fabric that I could fussy cut. Since I couldn't see through the paper templates, I decided to use two fabrics. I cut 2 1/4 inch squares for the hexagons and 2 1/8 inch squares for the pentagons.  Cutting squares was faster than drawing around the templates. When I was ready to begin the basting process, I centered the cardstock on the fabric and trimmed about 3/8 inch away from the edge of the shape. 
Sewing the last hexagon in place

As I glue basted the shapes to the cardstock, I was mindful to glue a bit away from the outer edge of the paper. Gluing away from the edge of the paper made sliding the needle under the fabric easier. The fabric stayed in place during the whole sewing process. It wasn't too challenging to remove the card stock.

For stitching, I used a lingerie thread made by Coats and Clark in a neutral shade. It buried well into the fabrics. 

Finished ball
The whip stitch that I used to stitch the pieces together is hardly visible on some of the shapes. I was able to angle the whip stitches and ease a longer edge next to a shorter edge as I do when I use the ladder stitch to stitch pieces together. I didn't like how that seam looked so I turned the ball inside out and stitched the remaining shapes to the ball with right sides together.

The last four sides of the shape is stitched after the papers are removed and after the ball is stuffed. I chose to stuff the
ball partially. I used leftover bits of batting for stuffing. I had leftover wool and 80/20 batting. I removed the papers at the last moment to try to avoid stretching the edges.

The stitches are going to show so I chose to join all the pieces in this project with the whip stitch. I wanted to make it challenging to determine which were the last three shapes I stitched together!

I thought stitching the shapes would be more challenging than it was. I found stuffing the ball firmly allowed me to press into the center as I stitched the edges of the last shape to close the ball. It was a firm surface and it wasn't long until I had a finish!

Aside from the prep work, the fiddly business of stuffing it, trying not to stretch the ball and stitching the last four sides to finish the ball, it wasn't a difficult project. It did take time! It is about four inches in diameter. Perhaps, I will use it as a pincushion.

This was goal number three on my March list.  Since I stitched with small scraps, I'm linking to Oh Scrap/Quilting Is More Fun Than Housework.

On the health front, I had a re-evaluation on my head, neck, back, shoulder last week. I'm making progress. I have more range of motion, fewer tremors in my hand, less numbness and a little more tolerance of PT exercises for my neck. I'm making progress although it is slow!

A few weeks ago while walking across a parking lot, I felt a twinge in my knee. Oh the sharp pain I felt at that moment! Unfortunately, I still have pain and walking has become difficult. Tomorrow, I have an appointment for an MRI. 

I have had meniscus tears in the past. It feels like I have done it again and while doing the same activity. . .walking!

Sunday, January 8, 2023

2022 Temperature Quilt--Post 5

Progress at the end of 2022
First, thank you for your comments on my last post about my return to blogging. I appreciated your words of encouragement and thoughts of work arounds. I heard from Linda H; Pat S and Theresa K via e-mail. I have so missed the interaction of friends, fabric and quilters! 

I thought writing the last post was a challenge. . .well, writing this post was even more of a challenge. Partly, I couldn't choose a topic. Then, I was unable to get my brain focused on the topic. I notice when I'm tired or feeling bad energy, my brain skips around. It doesn't skip like it does when Gertie, my inner squirrel, is sharing ideas, it is more of a leap into emptiness. It is a weird feeling. I find if I acknowledge the skip happened, I can become grounded and I can move forward again. 

Year spacer blocks--far right row
Previous to my accident, I multi-tasked and had a laser focus. I have so much less capacity for multi-tasking and focus now. I hope improvement will happen. Time will tell. I must work on applying patience as well as celebrating small wins. Thanks again for the comments, I was moved that I was missed!

When I began the current temperature quilt last year, I knew I wanted a project that could travel since I planned to spend three months in London with my daughter getting to
know my youngest granddaughter. Once I had picked the pattern, I started making the blocks. I didn't map out size or plan beyond making a block every day.

Auditioning background blocks 
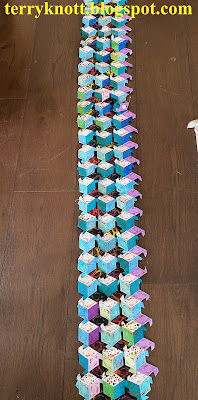
The problem came in September when I realized that this project was going to be long and narrow. (It would measure about 25 inches wide by 72 inches long.) 

Auditioning border fabric
My goal was that it would be a lap quilt. It was headed to be more of a bed runner! I contemplated my options. My London daughter said finish it as it was and move on. I considered that option. The project didn't want to be finished at that size. I decided that I would continue the project for a second year. My London daughter said I was CRAZY!

Early December, I met up with my friend, Gail. I picked her brain for ideas about the border. I showed her options I was considering. I do want to finish this project. I don't want any more challenges!!

Gail provided terrific feedback. For example, I was considering building the black background blocks into a design in the border. Then, I planned to applique the edges to the purple fabric that I had used as the secondary background. She commented that the additional block design would take away from the central blocks. She was right. 

In the end, I decided that I would add dark background blocks around the perimeter. This additional block will balance the dark background blocks that I used to separate the year 2022 from the year 2023. Let's see what I think as time progresses and I finish more of the blocks. I will have a lot of those dark background blocks to make!

Scale of the blocks
I also auditioned a strip of the purple that I used as a secondary background as a border. I like the color. I will think what width of
border that would compliment the project. When I began the project, I thought that I would add more of the dark background as the border. Later, I decided that I liked the points on all those blocks. I didn't want to cut off the edges so add the border. 

My London daughter tells me it is crazy to add more work to this project. She wanted to know if this project was going to become a chicken project! To save all those points, my plan is to applique the border to the top. Yes. . .that is crazy and it will take a lot of time. . .I hope it will look terrific. I do agree with my daughter that I'm likely certifiable when it comes to her definition of crazy!

I'm linking up with Cynthia at Oh Scrap/Quilting Is More Fun Than Housework as I started this project with the scraps from the piecing of the temperature quilt I pieced for 2021.

Sunday, May 8, 2022

2022 Temperature Quilt--Post 3

February and March

I believe that Gertie was correct in wanting me to add more background fabrics. As my inner squirrel, she sure makes me think multiple times about fabrics, techniques and projects!

While I'm still not sold on a different background every month, I am warming to the idea of adding one or two more fabrics to the purple than I'm currently using. Gertie is still working on me to reconsider!

I took a photo of February and March rows together. The original background I planned to use would have been fine. The three boxes on the left are the spacer blocks that I use when a month has less than 31 days.

February-March view

Adding the purple, however, contributes to the overall eye impact of the project. When I return home, I'll determine if I add one more fabric, two more fabrics or none!

As I create more rows, I am enjoying al the English Paper Pieced blocks! My plan for stitching the rows together for now, although Gertie may convince me to take another tact, is to wait until the end of next month before stitching the rows together. I'm concerned with how heavy and bulky the piece will become. I think adding rows to each side will make it easier for my body to handle the added bulk and weight. 

Let's see!

Closer view of February-March
Since I'm using scraps from last year's temperature quilt, I'm linking to Cynthia and Oh Scrap/Quilting Is More Fun Than Housework.

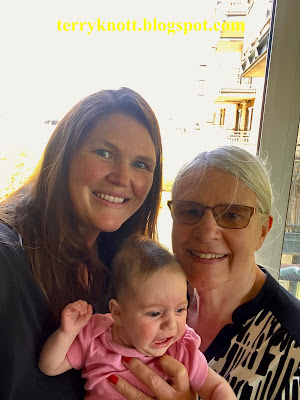
Happy Mother's Day to all you moms! I arrived in London on Mother's Day in the UK (March 27). My daughter and I both agree that two Mother's Days are definitely an improvement over one celebration. Yesterday my daughter treated me to a manicure/pedicure. I haven't had a manicure since March 2020 before the pandemic. I haven't had a pedicure since April 2021! It was heaven. 

She received a manicure and pedicure too. Miss A went along with us to the West Lane Salon. One of us started with the pedicure while the other of us started with the manicure. With that arrangement, one of us would always be available to jiggle and hold Miss A. Miss A, now eight weeks old slept most of the time we were there. Honestly, holding a sleeping baby is wonderful!

Three generations on Mother's Day
The business owner, Melissa, brews a wonderful cup of Vietnamese coffee and she is a baby whisperer. Miss A was asleep after about five minutes in Melissa's arms. Melissa smiled proudly then exclaimed. . ."it's really the white noise from the hair dryers that does it." White noise or not, Melissa knows exactly what her customers' needs are---no matter their ages !


Sunday, April 17, 2022

2022 Temperature Quilt---post 2

Getting ready to baste
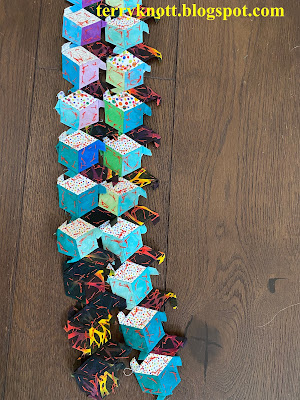
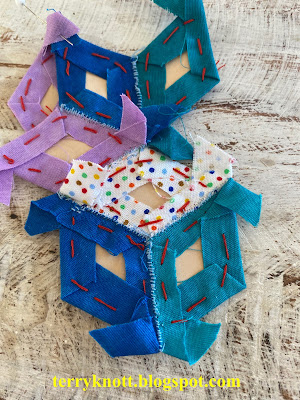
In reviewing my post from last Sunday, I realized that I hadn't shown the steps in putting the block together. I'll share my process in this post.  There are a variety of methods of basting and sewing the blocks together. While I haven't done a lot of English Paper Piecing (EPP) and only a tiny bit of hand piecing, I find the process meditative. I like having a handwork project going. My friend, JoJo, introduced me to EPP. I'm glad that she did! 

My die cut paper supplies and template came Paper Pieces. I have no affiliation with the company. I have always had great customer service and my orders have arrived sooner than I had expected.

I start with cutting the shape using a template that is about 3/8 inch larger than the card stock paper. I center the paper on the fabric. Using my nail, I fold the fabric over the edge of the paper. I take a basting stitch in the center of one side. I use a double strand of a strong thread. I leave the knot on the right side of the diamond so that it will be easier to remove when it is time to do so. 

Beginning the basting
I work my way around the edges of the paper so that the entire section is prepared. Then I begin to stitch the edges together. I use a single thread of 50 wt cotton. I don't match the color because rarely does the thread show. I slide the needle into the edges and let the thread say 'hello' to each side twice. Next, I stitch a knicker knot at each corner to begin. These knots are surprisingly strong and are not easy to remove. (I know because from time to time, I attach parts in a new pattern!)

I lay the two edges together in a flat orientation. I slide the needle back and forth in a sort of ladder stitch. When I reach the end, I stitch another knicker knot. If I have a lot of thread, I may walk the thread by stitching under the fabric to the next edge. Or, I may slide the thread under the fabric a short distance and tie it off.

Stitch the edges in a flat orientation
I continue adding parts until I have constructed the block along with a piece of the background. Then I attach it to the month string. It takes me about an hour and 15 minutes to cut and stitch a section to the chain. 

After I had stitched all of January, I put it up on the design wall. What looked great close up, didn't look so great from far away. The value of my background fabric was too close to the value of a number of my temperature fabrics. Now what to do? I wasn't going to rip off all of those background pieces.

Gertie immediate began reiterating that I should've gone with the rainbow background. Again, the variety of fabrics was too chaotic for me. As I pictured the piece on a wall, my eye would look at the background fabrics and not the blocks. 
Back view of the blocks

As gently as I could manage, I told Gertie that while she had a point, all the fabrics was over the top. Perhaps, though, one fabric would work. That comment caused her stop chirping and start auditioning! She wanted to use the red fabric, it is our favorite color after all. In her words, "One can't go wrong with red." I agree with her there; but, in the end we went with purple. 

Gertie asked, "Why purple?" First, the background fabric has no purple in it, it has red, green, yellow and blue. Second, there will be few days that any purple will be used in the project. For sure, there will always be a contrast using it. 

This fabric was leftover from last year's temperature quilt project. There isn't enough; but because it is a hand dye fabric from Vicki Welsh, I can confidently order more which I will do. I've had great customer service from Vicki.

Front view of the blocks
My plan is to have the previous background become a border which floats into the rows. For the top three and bottom three blocks in each row, I'll use the border fabric as the background. I'll also use the border fabric for the first
three rows and the last three rows. The reason that I chose three is that months less than 31 days will have a spacer block which will be made from the border fabric. 

This week, we had a snow day. I can't remember a time when measurable snow fell mid-April. The kids had a snow day off from school and people built many a snowman! My husband said there were six inches at our home. A neighbor about four miles to the east of us had eight inches of snow! The snow was wet and heavy so there was a lot of tree limb damage. 

I write this bit about the weather because I chose to not pack any snow fabric for my temperature quilt! I'll "get" to add that diamond and connect the row when I return home.

Chocolate Easter egg
This month, I decided that I would sew a block or two to the March row; but, that I would also make a  block a day for April. My one monthly goal is to piece all the blocks for February. I've done that but will save that for post number three about this project.

In the meantime, I'm linking to Cynthia at Oh Scrap/Quilting Is More Fun Than Housework

On Wednesday, I posted about my Ouch quilt. I'm continuing to use Wednesdays as a way to document past Thread Tales or book club quilts.

Finally, happy Easter/happy Passover. May you be enjoying your own traditions today. My daughter introduced me to the tradition of chocolate Easter eggs in the UK for the kids. She has shown me photos of children with boxes of eggs. In the U.S., it is more chocolate bunnies and small brightly foiled covered chocolate eggs.

In the photo, I'm holding a vegan chocolate egg. It is hollow and I'm told that part of the fun is "smashing" it to eat it. I have marveled at the size of the chocolate eggs in the stores as well as the sheer number of available chocolates. I'm fortunate that chocolate isn't a favorite. . .otherwise, I'd be eating way too much of it!!