Tuesday, December 31, 2019

December recap


Desserts at high tea
Happy New Year! I wish you all good fortune in the coming year. I've been thinking about what I want to accomplish in 2020. First, I need to recap what happened last month.

I listed seven goals for myself in December. Of those goals, I decided not to do one. I amended one goal. Instead of having a sew day with Miss K, we had a sew afternoon. Making the amendment instead waiting for a whole day meant we made progress on her project which was the end goal. I completed two goals and made progress on two other goals. Anytime I make progress, I deem the month a success!

Teaching wise, I taught 26 participants in health care provider CPR.  I helped train eight Water Safety Instructors and completed a lifeguard instructor review for seven people. Three of those participants also renewed their lifeguard cards so I trained a total of 44 people this month.

The breakdown for teaching in 2019 was:
Bloodborne pathogen training 18, Lay Rescuer CPR 68, Lifeguards 17, Lifeguard Instructors 48, Water Safety Instructors 8, Swimming lessons 147, Babysitters Training 34, Healthcare Provider CPR 334 and Inservice Training 22  for a total of 696 people for the year. 

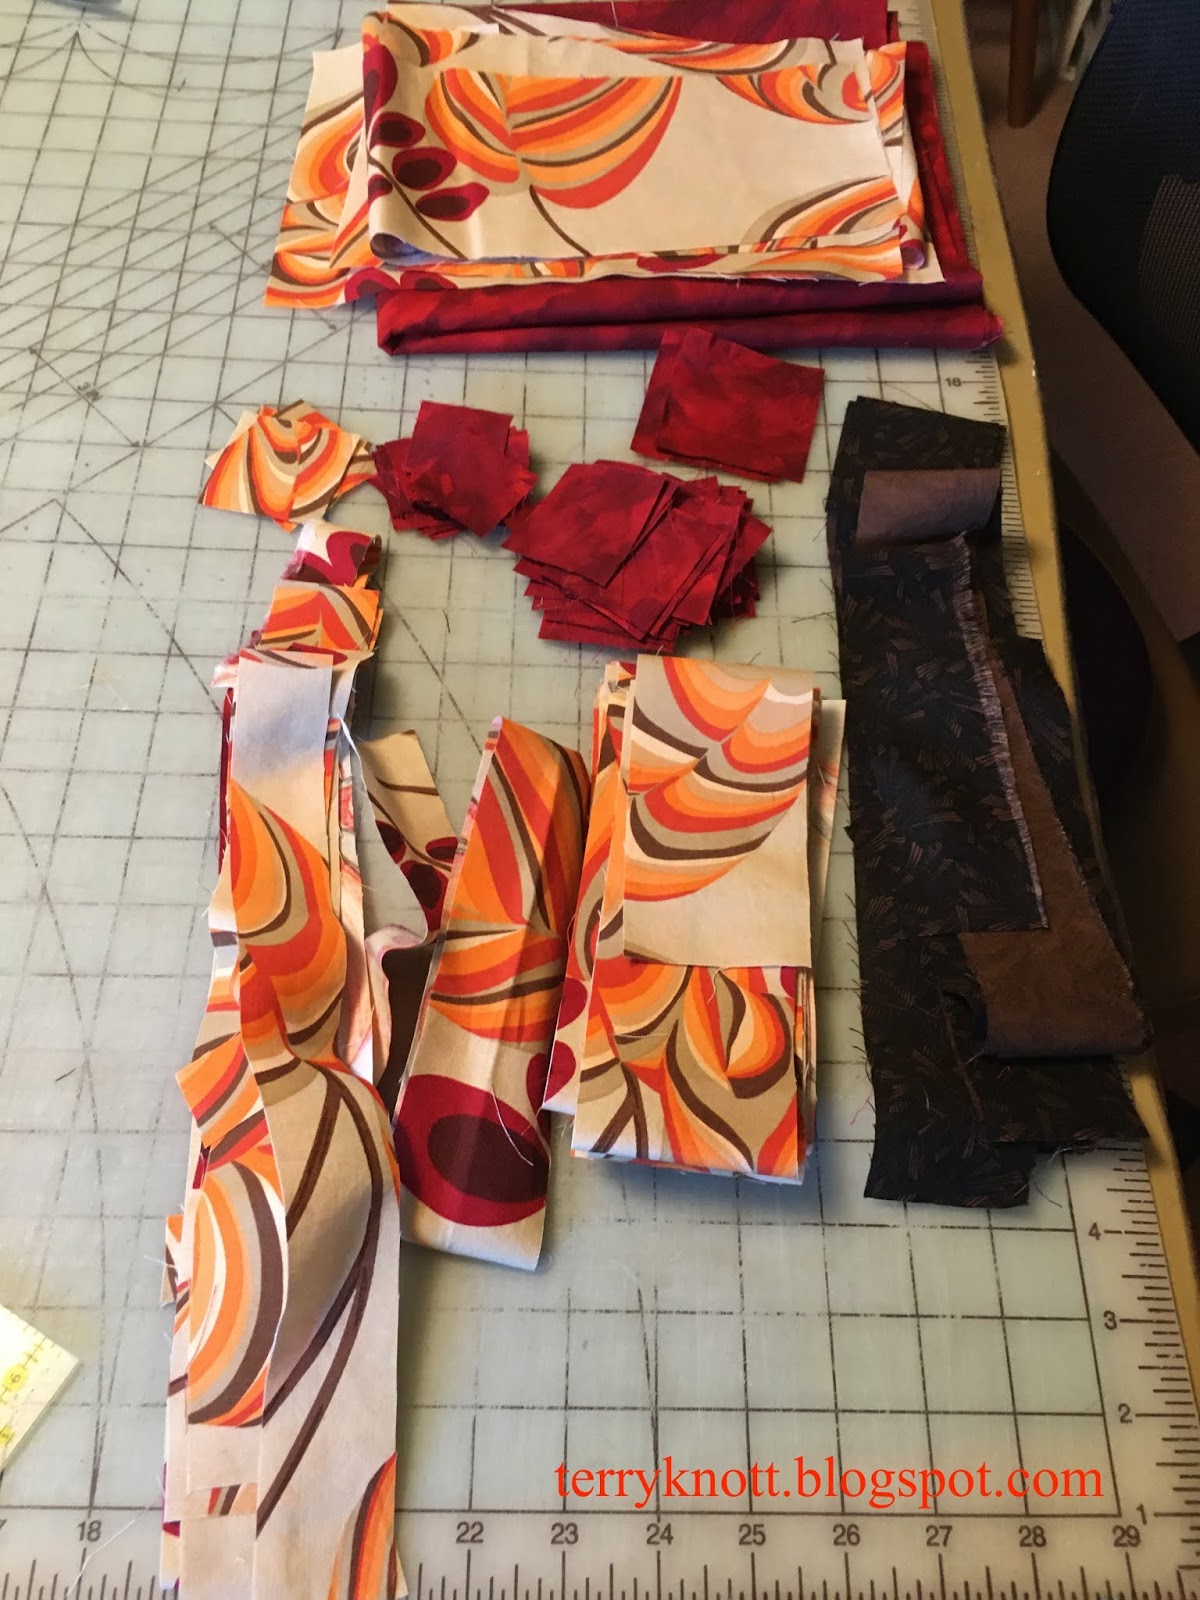
For the quarter, I had two finishes for the Finish-A-Long program. I'm okay with two finishes. I finished two book club quilts-- A-B-C quilt and Trio of Sisters. This month, I'll get back to the projects and again begin making a dent in my project list. The Finish A-Long program has helped me accomplish more finishes so I plan to continue participating.
A container of Chex mix and fun sock gifts

What made December fun was partying, lunching and sewing with friends. My friend, Pat, who lives down the hill from me, hosts an annual Christmas party. I caught up with three friends I hadn't seen since the last party which was great! The potluck dishes were delicious and the dice game we play for the wrapped ornament present was hilarious.

Mid month, I went with a special friend to lunch at the Mountain View Golf Course near where I live. I've never been there. Service was great, the tomato soup was delicious. I will have to go another day!

I took a drive to The Dalles with a friend who had business to conduct. We chatted the whole trip planning what classes we will be teaching together in 2020. We also got together to watch the last basketball game of Miss K! (I sent my friend the wrong time so she arrived after the game; but, we still snuck in a short visit!)

Leaf quilting detail
At the end of the month,  I met up with two coworkers at Cafe Yumm which offers a variety of vegetarian and vegan menu items. This restaurant is also located close to where I live that I've not tried. I had a Yumm bowl which was good. We try to get together every couple of months to catch up. I do miss working with both of them!

Also, mid month, I attended a tea with two other friends. Not only did I get to catch up with them; but, the retreat center where the tea was held featured a quilter. We looked at about 120 quilts of her work. Tea, quilts and friends are a great combination!

I participated in two sew days with the Mystery Mavens. This is the group that I formed to play along with the Bonnie Hunter mystery which is "Frolic" this year. It is so much more fun to be sewing along with a group!!!

I am so fortunate to have such a wealth of friends!

Before the haircut
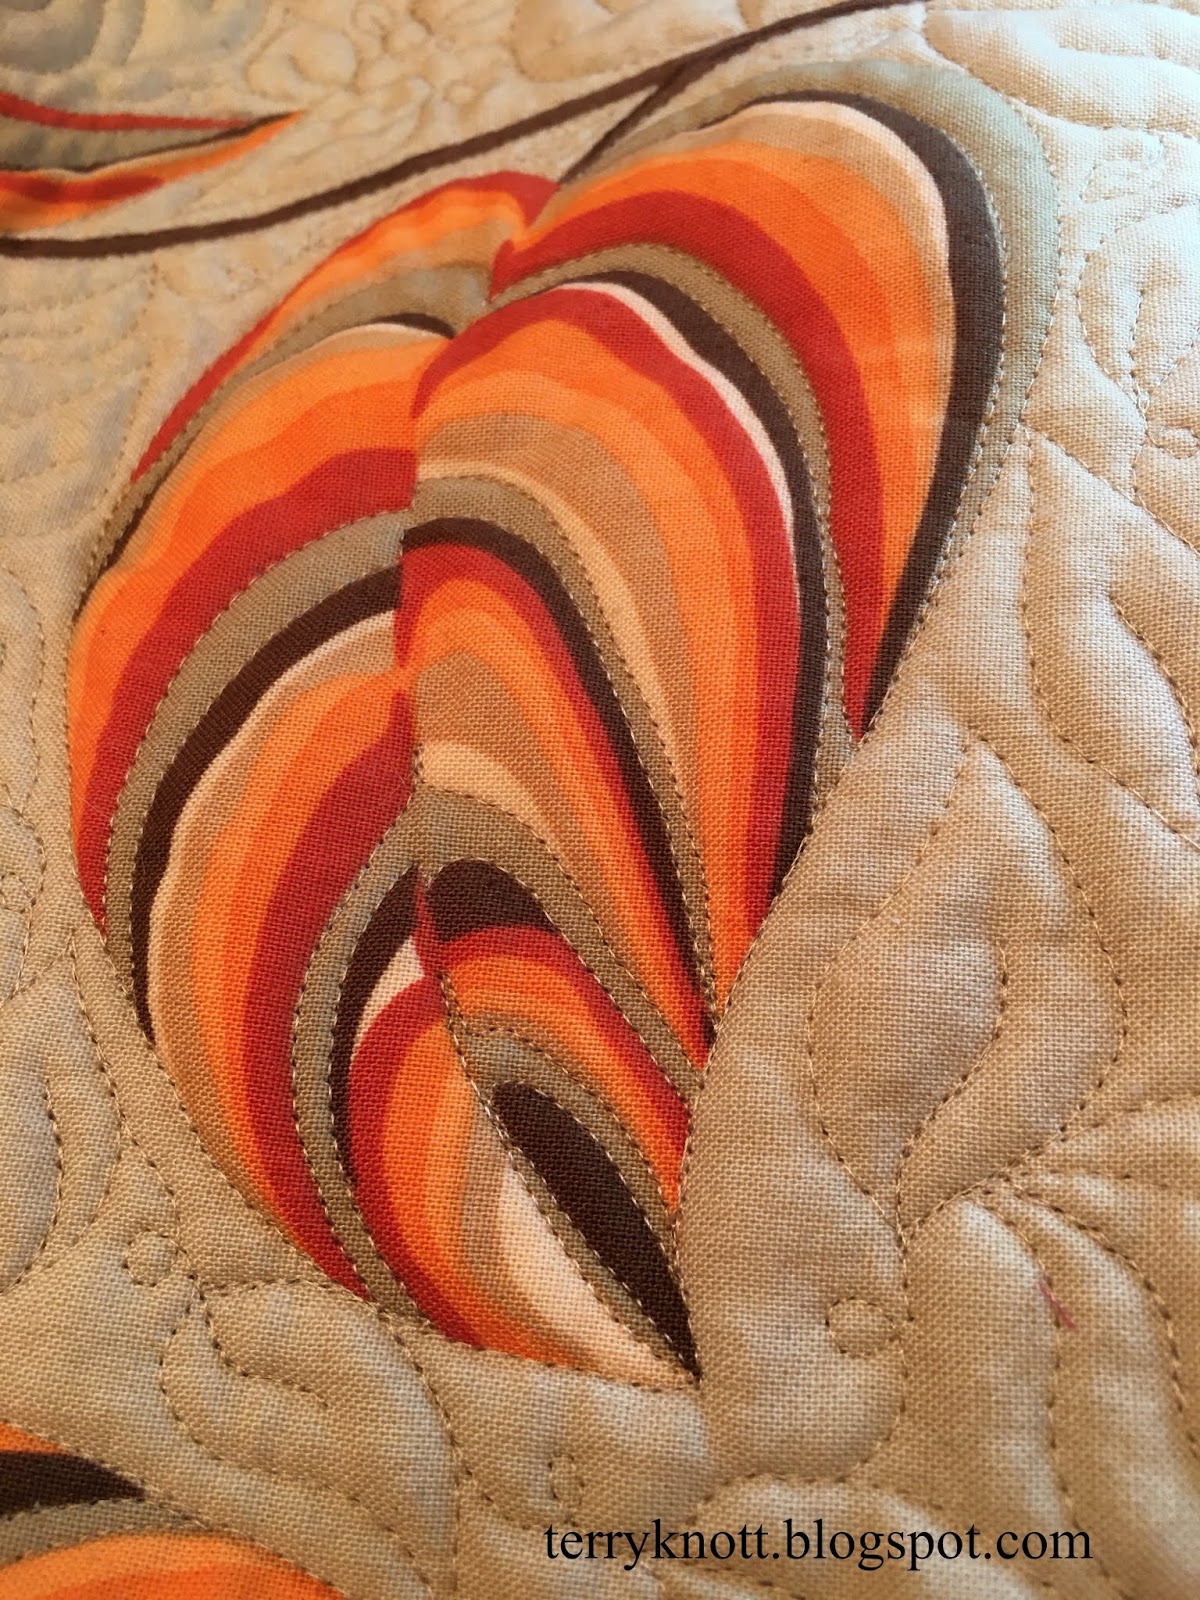
Progress on the leaves quilt is coming along. I have quilted backgrounds on nine of the 24 blocks which represents about 31 hours of quilting. While I was sad that I was unable to finish this quilt in time for my daughter's birthday, I am excited that it will be finished in time for her birthday next year! I have found that I can quilt for about three hours in a day. I cut the hour into 15 minute segments. I stretch at the end of each segment and then I do a different activity for about an hour. The stretches and activity changes sure help my body endure the quilting.

I am enjoying the quilting process and there is something to say for quilting the same filler in the background. Not having to think about what comes next has allowed my mind to think about other projects as well as planning the next section of quilting that beast!

After the haircut
The actual name for the quilt is "Leaves" but, I affectionately call it "The Beast" because it is 100 inches by 108 inches which is a huge project to quilt on my domestic sewing machine!

On a personal note, a hairdresser cut about six inches off of my hair. I hadn't had a haircut in almost two years! I had considered growing it to donate it; but, didn't do more than consider when the other gals in the "donation" group decided not to donate. They cut their hair at the end of summer.

Shorter means that it takes less effort to wash and to dry. My hair is still long enough that I can pull it all into a hair tie. Having it this length makes it easier to keep my hair under control when I teach swim lessons. About 40 years ago my hair reached my waist. This time it reached the middle of my back. I don't miss the length!

Saturday, December 28, 2019

Tea Room Quilt--post 1

Sign--letters made from ultra suede scraps
"Major Pettigrew's Last Stand" written by Helen Simonson is the inspiration behind this quilt project. The first time that I read the book, I picked the fabrics and the pattern. The pattern is from JoJo's "All Things Through My Hands" blog post. You too can make your own variation!

It stayed on my FAL list for years. Last August, I volunteered to be the leader for the next book for our book club. I decided to re-read this book. Rereading gave me the opportunity to savor the details that Helen included in the story.

Cup ready for application
In the leader role, I contacted Helen and she consented to FaceTime the group during one meeting. We thoroughly enjoyed the insight she provided to the story as well as her humor.

In terms of the project for the book, I tackled the sign board first. I cut out the letters using ultra suede scraps from Martha's stash. Martha would have approved of me using her ultra suede scraps as letters for the sign board! My plan is to secure the letters during the quilting phase. I haven't used ultra suede before
so this is one of the "firsts" in this project!

Next, I stitched together the elements for the cup and then for the tea pot. In the story, the major is quite particular about his tea. I chose a cup that might have been one of his favorites. I had chosen a lighter brown fabric because I wanted the illusion of milk in his tea. Unfortunately, there wasn't enough contrast and my eye couldn't see the contents of the cup unless I was almost nose close to it! The tea is a richer blend now that it is a dark brown!

Tea pot beginnings
After constructing the cup, I selected fabrics for the tea pot. The design on the tea pot contained a bird. I was challenged to add elements to the tea pot so that it looked like it was part of a set. It was also challenging to select fabrics that had enough contrast for the background of the tea pot and the main background.
Auditioning the various elements

I decided repeating a couple fabrics in the tea pot would be a good way to make the pot and cup look like a set. I also cut a motif from the cup fabric to become the decorative top to the pot.

Next I pieced in a hanging post, auditioned placements of the elements and thought about border fabrics. The post needed to be positioned with some background fabric around at least three sides.

I cut off a section of the background and applied it to the top of the post. I liked the positioning better. Needle turning some of the elements, raw edge appliqué preparation for other elements and choosing the fabrics took about 10 hours.


Wednesday, December 25, 2019

Merry Christmas

Cross stitch on linen 
Merry Christmas! I hope you are enjoying family and friends today. This year, the time between Thanksgiving and Christmas evaporated!

My friend, JoJo, will be moving to Alabama by the end of next month. I am so going to miss being able to run by her house to pick her brain for ideas to challenges. I will miss the awesome lunches she prepared, the laughter we shared and all the Bowdee adoration! (Bowdee is her dog who took a special shine to me!)

JoJo stitched the ornament which I will cherish as a keepsake. I can't imagine cross stitching on linen. She included red which is my favorite color and yellow which is her favorite color. She stitched the words in French because I love France. She included a special button from her collection. She included sewing motifs because we both enjoy quilting and stitching.

Earlier this month, I pulled out my "Christmas" clothing. I used to add an item each year; but, in the last ten years, I've reduced my inventory to three favorites. I have a couple sweaters and a sweatshirt that I look forward to wearing during the season. Because they are "seasonal," these items have been around for a long time.

Thirty one years ago when the kids were in elementary school, we took a trip to Disneyland.  My dad's mom lived in Morro Bay, California. We spent a couple nights visiting with her. She enjoyed shopping and sharing what made the area paradise to her. She loved the variety and uniqueness of the shops in and around Morro Bay.

One evening, we went to dinner and in a store window near the restaurant, I saw a sweater that I loved. The store was closed so having a closer look wasn't an option. Her agenda didn't have a trip back to this location. The following day, she altered her agenda. She drove us back to the store, where I bought the sweater. It wasn't on sale. Rarely, do I purchase clothing that isn't on sale. (I figure any savings means more fabric and thread buying ability!) I remember that the sweater cost $30.

The sweater is a deep pink with pearls embellishing a white leafy design at the neckline. I was attracted to the neckline because it reminded me of  the edges of a snowflake. I was also attracted to the pearl embellishment! Over time, I lost some pearls. Now that I have done a little beadwork, I understand the importance of knotting the thread so that if it were to break, one wouldn't lose a bunch of beads.

In my husband's grandmother's bead stash were some pearls that were about the right size and color for the sweater. I added them and restitched each pearl to the neckline. These will be in place for years to come!

The free standing lace embroidered snowflake was the ornament that I won at Pat's Christmas party earlier in the month. My friend, Martha, loved snowflakes so getting it at the party was extra special.

Now, I'm off to make some more memories with family. Life is good!

Sunday, December 22, 2019

October Embroidery Lesson

Some of the practice motifs


The October embroidery lesson was fun to work through. Again, the lesson focused on manipulating letters. I thought that I had followed the directions in the software. I did a trial run of the stitch out in the software and then. . . I was surprised to find my stitch out had issues!!!

Splat motif
Rather than try to fix the issue in the file, I opted to redo the lesson. The second time around, the lesson went faster and when I stitched out the various letters, each resembled the diagram in the printed handout. Success is nice!

Initial with fill stitch in appliqué


I have opted not to complete the November lesson. I've reviewed the lesson and the emphasis is on different file formats which is good information to have; but, not information to use in a design. I practiced many different lettering techniques this year. Some, I would like to add to future quilt projects. Let's see how that goes!


Wednesday, December 18, 2019

"Frolick"ing with the Mystery Mavens--post 2

Ann reviewing the directions
Denise selecting fabrics; Heidi stitching


Pat cutting strips


Our Mystery Mavens met on Monday. It was our second "formal" meeting. Truly, the only formality about our group is the date, time and place that we meet! Once again, we giggled and we even accomplished some stitching!


Laura stitching the first clue


There was cutting, stitching and pressing. Some finished their clue. Some dropped by to say hi. Some stitched on another project. Some helped others move forward on their clues.
Jane used a different method of making HSTs

The group is such a treasure!!!! I enjoy the camaraderie. I love that people tried the second method of making HSTs that Bonnie shared in clue #3.

Sometime, I am going to try that method. My chunks were not ten inches square. I loved that people made HSTs other ways too.

Ruth pressed my HSTs and a lot of Heidi's too
We talked about the pros and cons of the various methods. The consensus seemed to be that it depends on the number of HSTs you need, what you are working with (scraps or yardage) to make the HSTs, what methods that you are comfortable making to determine which one works best for you or for your project!

Julie working on another project
Some people are caught up. Some are catching up. Some are enjoying the journey while some are eyeing the journey! Some share their progress on our private FaceBook page. It all works.

I feel so fortunate to be part of such a supportive and giving group. I hope that we will be together a good long time.

With Ruth's help, I've completed clue number three. Bonnie releases clue number four on Friday. I see more fun and fellowship ahead. Oh. . .yes, there will be stitching too! Are you "Frolic"ing too??


Sunday, December 15, 2019

Gone Crabbing

Close up of the wording
I was looking at my pile of quilts and had a thought. I haven't featured my earlier quilts in my blog. I need to document them. Next year, I'll make the documentation more of a priority! The post today is about one of those early quilts.

Every quilt has a story. The story behind this quilt involves memories at the beach. My husband's aunt, Mar, owned a cabin at the beach in Florence, Oregon. When our girls were small, we went there several times a year. Often, my father-in-law, Bill,  joined us. More realistically, we joined them! Sometimes, Mar's sister Mary came too.

I have many fond memories of the coast house. The girls learned to play pinochle there. We had some long games. We'd start with four people playing and as someone tired, another person took the retiring person's place. A pinochle game could last from after breakfast to before dinner with a break for lunch! The game would resume after dinner and last until people went to bed. The following day, we would start a new game!

Many Labor Day weekends were spent at the coast house. We had a number of Thanksgiving dinner's there too. One of my father-in-law's fun activities to do was to go crabbing. We would set pots, motor about, then come back and pull the pots. A pot full of crab is heavy! Once we had our catch, we brought it back to the coast house and cooked the crabs on the back porch.
An early quilt gifted to my father-in-law

We would spread newspaper on the picnic table and crack crab. Later we would have crab omelettes, crab salads, crab cakes. . .well, you the picture! Some crab we each took home; some crab we gifted to the neighbors. Many hands always made light work.

The cabin was about a five minute walk from the beach so it was easy to take the girls to build sand castles, walk the dogs, look for shells and watch people fly kites. My favorite time to walk on the beach was in the morning when the wind was less likely to blow one over!

There was a radio at the coast house; but, no tv. It was a good place to visit, read a book and do some handwork. In 1999, my local quilt shop had a class to make a sampler wall hanging. The class fee included the fabrics for the project and dinner!

The sample wall hanging sign read, "Gone Fishing." I knew, I wanted it to say "Gone Crabbing." One of the part time employees hand lettered the the words for free if you finished your top. That was good incentive for me to finish the top!

It was the second class that I took of many from that shop. When I finished it, I gifted it to my father-in-law. It hung above his guest bed for many years. He appreciated the memories of the coast house and the crabbing excursions that the wall hanging represented. This one doesn't have a label. I wrote my name on the front and dated it. . .December 1999!

He's been gone for 13 years this past Thanksgiving. I still miss him.  I usually hang this quilt in September to honor all those Labor Days we spent together.

Wednesday, December 11, 2019

Two Weeks To Go--Leaves post 4

Beginning the leaf filler stitches
I did finish ditch quilting the leaves yesterday. It took me about 12 hours to complete the ditch quilting. This time, the back is tuck free!

Detail of the leaf quilting
Today, I started quilting the 24 printed blocks. My plan is quilt around the print and to fill the background with smaller leaves.

I have no idea how long this part of the process will take. It took me about two hours to quilt one background on a large block. I do like the leaf filler quilting as it fits well with the printed leaf motif on the fabric.

I do plan to add some dimension to the flowers and the leaves. I'm thinking pebbles would be right for the center of the sections of the flowers. I quilted one block of the leaves outlining the greenish stripe in the leaves.

First background quilted 
In a couple weeks, my husband and I will be taking a trip to visit our youngest daughter in London, England. This project is supposed to be her birthday present. I've two weeks. After quilting today, I doubt that I can finish this quilt in that time frame; but, I do plan to quilt as many hours as I physically can to see how far I get.

Had I not lost those days to repinning the quilt, I would be closer to the finish. I'm happy that I stopped, reassessed and rebooted the project. At the very least, I will get it finished before her birthday in 2020. My husband has been doing the meal preparation and planning to allow me more hours in the studio. Thanks, Bob! The best quilting journeys include lots of support. Who supports you in your journey?

Sunday, December 8, 2019

Leaves--a reboot post 3

All hands on deck to help with pin basting
I started quilting in the ditch. The quilting was going okay. Although pushing and pulling the mass of fabric through the harp of the machine irritated my ongoing neck and back issues. I had completed about three quarters of the ditch quilting. I took a good look at the back. . .I hadn't realized how I neglected to keep the back smooth during the pin basting process. I now had tucks in the quilt back.

Finished pin basting
I spent Thanksgiving weekend and the week after ripping out all the stitches. I then separated the layers; I re pin basted. My dear husband, Bob, as he does every day, asked what he could do to help me. I replied, please help me pin baste. The look on his face said he would rather clean toilets than work on the quilt; but, his lips said "Really?" Followed by, "Are you serious?" I assured him that I was serious.

He was a trooper and closed pins for me. In a few hours, we had finished basting that monster for the second time. This time, I laid the quilt on the floor and checked the back to see that I hadn't pinned in any tucks in the back!!! I hadn't.

Although I again started the quilting in the ditch, I used a monofilament thread and a walking foot. The reason for the change was the walking foot would feed the fabric and my body wouldn't get as sore pushing and pulling the fabric. Using the monofilament thread meant I wouldn't have to change thread until I was ready to begin the free motion quilting.

Below is the photo of what 108 inches of quilt looks like going through the harp of the machine. It sure isn't pretty! Moving that mass, however, is doable with lots of breaks!

I doubt that I will finish this project in time for my daughter's birthday which is in 12 days. I have no doubt that I will finish this project before her birthday next year. Perhaps, she will make a visit to Oregon and take it back with her!
The mass ready to be moved through the machine at the start of the day

The time I spent ripping gave me plenty of time to consider quilting designs in the blocks and sashing areas. Once I get start quilting the sashing areas, I will progress quickly. If I had a longarm, I imagine I would have had it quilted by now!

Wednesday, December 4, 2019

Frolic--Clue #1


Bonnie Hunter's Mystery Mavens group
Fabrics for Frolic from my stash
How many of you are participating in Bonnie Hunter's "Frolic" mystery this year? I am. Bonnie released the fabric requirements at the end of October. I combed through my stash and found much of the fabrics. I did purchase some. . .I needed the aquas and a couple of lighter blues. I purchased two and a half yards.

At a Mt. Hood Quilters guild meeting, I put the word out that I was planning to participate. I asked people to let me know if they wanted to play too. I hoped we could form a group. Eighteen of ladies joined our private Facebook page. Fourteen of us met on Monday to work on the clue that was released last Friday.

I chose to include the word mavens because it sounded like it fit. Wendy asked about the choice because it is a Yiddish word. She wanted to know if the person who chose it was Jewish. (I'm not Jewish.) She said it was a great word. . .which sent me to find out what she meant.
Laura's fabrics

Google's explanation was:
Whether it's in fashion, or food, or forensic science, someone who really knows his stuff about a topic is a maven, or a person particularly skilled in the field. The word maven comes from the Yiddish meyvn, meaning "one who understands." You don't become a maven overnight. Maven is a great term for all of us!

Ruth had already completed the clue. She came to cheer us on, to explain how to spin the seams, press, rip. . .well, how can life get better than to have a sewing buddy to help you make progress!!!
Ann cutting strips

There was cutting, stripping and pressing with lots of discussion and giggles as we progressed. Bonnie's hints and tips are helpful for consistently capturing that quarter inch seam. We are all spinners now meaning we can spin the seams in our four patch block to reduce bulk! One person, who came just to see what was going on, decided it would be fun to participate.

Jane sewing strips

It was fun to see all the different fabric choices. Lots of attendees shared fabrics. Carol brought a bag of beautiful fabrics that matched the fabric chips with the caveat, "cut what you need!" I am loving this group for their generosity and giving spirits!

Some people came with their strips sewn. Other people came and sewed strips. Some people came to press their strips. Others came to stitch their segments. The point is that no matter what stage we were, we all applauded each other for what we had done so far.

I snapped a photo of Jane stitching her strip because her nails coordinated so beautifully with her fabric choices!

Carol pressing strips
At the end of the day, some had completed stitching their four patches, some had even spun and pressed the seams. It was a nice day. We are planning other get together dates. Our long range plan after all the clues are released is to continue to get together monthly to sew so that we will finish our projects!

Denise sewing segments
I teach swimming lessons on the days that we picked to meet so I got to leave early. I've been sewing a little every day. I've made progress on my four patches. Like a number of ladies in the group, I've a project that has a "deadline." It is the "Leaves" project. I'm at the quilting stage. I've been working on that project most of my quilting time.

I have made a bunch of the four patches. I am well into the clue. Bonnie suggests to make some of each clue so that when you come back to the project, you will have a sample of what you were doing.

Ruth sharing how to spin the seams
A number of the group by this posting finished the first clue and are waiting clue number two! Kudos to them!  Bonnie cautions us that this is a journey and not a race which I love. Stuff happens.  Sometimes, we get to go on an alternate journey which is okay. Sometimes, those alternate journeys become places we want to explore more.

Sunday, December 1, 2019

November Recap

Framed thank you notes
At the beginning of November, my friend, Gail, sent me a photo of the thank you notes the grandkids, J and K, had written to her husband, Dick. Dick had invited us to see his trains run. He has made an amazing display of trains, track, countryside and cities. The girls were awed with all the details of the layout. They wrote their thank you notes after their visit and I mailed them. Dick and Gail purchased a frame and mounted the thank you in a frame which they hung for their open house guests to see.
Barb and a project that she stitched on my machine

In this day and age, a written thank you note is a rarity. Miss J was concerned about "writing" her note since she just turned six. She said she is in school but, she hadn't learned how to "write" yet! She came up with a plan and she completed her thank you. Miss K completed her thank you entirely on her own. I was impressed with her vocabulary and sentiment! Kudos to their momma, A, who has supervised their thank you notes from the time each could make marks on paper!

One day while I was out walking the dog, I had a conversation with my neighbor, Barb, across the street. Her Bernina was in the shop because the thread cutter needed repair. She was waiting her second week for the part. She was in the middle of a special project that had to be finished by November 22.
Barn block
Barb and I purchased our machines from the same dealer at about the same time. I asked her if she wanted to borrow my machine. At first she said no. Then she said she would think about it. A day later, she said yes! I was happy to share Joie, which is my 790 Bernina, for about a week. Barb shared with me one of the embroidery projects she made during the week!

While Joie was away, I used Inky, my 1947 featherweight to do some piecing. I also used Bernie, my first Bernina to do some applique and to begin the quilting on my book club quilt. I made a quilt block for an outgoing guild president. The outgoing president has had several barn quilt painting sessions so the block choice fit! I "painted" my quilt block with micron pens and needle turned appliquéd the lame windows. I liked it finished.

I also combed my stash for the "Frolic" fabrics which is the Bonnie Hunter mystery that kicked off on Black Friday. My neutral bag isn't in the photo. I did purchase a few fabrics because I had no aqua and I wasn't sure about the light blue. I formed a Facebook group made up of Mt. Hood guild members to stitch this mystery. It took me a long time to piece the mystery quilt from last year. My thought was working in a group would help us all move toward the finish line. We meet tomorrow to support one another. I'll be posting progress from time to time!
Frolic fabrics

Last week, I shared my finished Karen Kay Buckley project with Karen. When I take a class with a teacher, I try to drop them an e-mail after the class thanking them for the class. Once I finish the project, even if it takes years, I e-mail a photo and thank them again. Karen not only wrote back with some nice comments, she asked if she could share my project on her social media! Of course, I said yes! A day later, she posted it on her instagram account. I met someone who lives sort of in my neck of the woods who might join one of the guilds I am member. I felt like "Queen for the Day" with the recognition from Karen.

With my book club, I led them through three drawing exercises. I was impressed with everyone's efforts! We had a few laughs and people said it was a fun day. . .WHEW!!! I was hoping for that kind of a review! In January, we will have the reveal for this book at a tea shop. That will be my last activity. Later in the month, we will discuss our next book! This is the third book that I've led the discussions.

This month, I taught 23 kids in swimming lessons, 30 participants in Red Cross lay rescuer CPR and 15 participants in American Heart Healthcare Provider CPR for a total of 68 people.

In terms of my November goals, I completed six of my 10 goals. I made progress on two other goals. I did not do the November embroidery lessons. I did stitch the October embroidery lesson. I haven't documented the lesson yet! I'm not too far behind!  I have had one finish to report this quarter. I am quilting a beast. . .the leaves quilt that I shared with you in the last two posts. I am making progress and having fun which is what counts in the end!

We had a nice laid back Thanksgiving. My mom who recently began splitting her time between Woodland, WA and Bend, OR, had planned to have dinner with us. In Bend, she woke up to eight inches of snow one morning and four the next morning so she decided to skip driving over the mountain pass. Her decision was a smart move as the previous day there had been an accident that closed the highway for a number of hours. She had dinner with my brother instead.

Shading exercise I shared with my book club
My husband cooked dinner which we shared with a couple friends. They brought dessert and appetizers. . .it was great pairings all the way around!  Later that evening daughter A and I did some pre Black Friday shopping. It was a little crazy; but I was home by 10pm. I did over sleep the following morning; but, daughter A and I did a lot of shopping. I still made it to the first store by 5am! We went to a lot of stores and because few door buster deals were on our lists, we avoided most of the crowds. I have missed two Black Friday shopping days--both times I was on a trip in the last 27 years we've been going. This year, we went out for breakfast to celebrate our finish! We might need to make breakfast part of our tradition!

Our neighbors for the last five years are in the process of moving to more acreage for all their livestock. Our new neighbors moved in enough supplies to have Thanksgiving in their new house. Yesterday, they were moving in beds and other furniture. Sylvia, the previous neighbors' milk cow, came for a visit. The new neighbors were trying to catch her which she was having no part of that game! I was able to catch her and walk her back to her digs. It is nice to know our new neighbors are kind and helpful. Life is always good!


Wednesday, November 27, 2019

Leaves--post 2

Auditioning the leftovers for a back arrangement
Removing four blocks from the top was a good start to the back! I laid the length of the orange print fabric next to the pieced blocks. On the other side of the pieced blocks, I placed the remaining leaf print fabric. I also pieced a checkerboard chunk out of the leftover dark brown and red fabrics. This layout showed I needed to make the back longer and narrower. I cut the orange print fabric and then I cut it again to be the top and bottom. It was wide enough with the addition of a print chunk!

Finished back
It took me about six hours to piece the back. I like how the back looks. It could be a front. I like it when the back turns out that way!

When I first started piecing backs, it could take me as long as it took me to piece the front! The more I piece a back, the easier it become for me. Practice does help! I like making interesting backs. Often, the backs could be a front. I also like using the leftover bits from the front. It sure seems like a win all the way around!

I did cut the fabric for the hanging sleeve and I saved some fabric to make a pillow case. When I give a quilt as a gift, I like to make a pillow case for the project. I use that as the "wrapping." The pillow case protects the quilt too! Usually, I wait until the quilt is at the binding stage before I start cutting the remaining leftover fabrics into usable "parts."

This time, I decided to clean up early. I spent about 20 minutes and at the end, I had a few more bits to add to my "pre cuts." For 22 yards of fabric, there wasn't much remaining!
Bits ready to add to the pre-cut section

Piecing the batting with Bernie
There will be some backing that I'll trim into usable bits after I trim the quilt for the binding. This is a huge quilt. The top is 100 inches by 108 inches!

The roll of 80/20 cotton/poly batting that I had on hand was almost large enough. I did need to piece it.  I do save the leftover bits of batting. I generally put a lot quilting stitches into a project so pieced battings work fine for me. I also use the pieced battings for placemats, bags and other smaller projects. Any smaller bits that can't be pieced, I cut smaller. . .like shreds and use as stuffing. I also use some smaller pieces to dust surfaces and to clean my cutting mat. Rarely, do I throw away batting scraps. The next step was to layer and pin baste it.

To pin baste, I use a modified version of Cindy Needham's technique that I learned through a Craftsy (now Bluprint) class. I have used various brands of temporary spray adhesives to baste quilts. That process worked. I didn't like the smell and I didn't like having to be careful about over spray. (I managed to spray my floor which wasn't as easy to wash off as I had envisioned!) I decided that the cost wasn't worth the convenience. I did wonder if removing the spray from the finished product was as challenging as getting it off of my floor was. Although, I haven't noticed any issues with the quilts that I did spray baste. It has been years since I spray basted. In the end, I decided pin basting was my best option.
Pinned and ready to quilt!

My knees no longer can hold up to long periods of time on the floor so I baste my projects on the kitchen table. It took me about three hours to pin baste this quilt. I used all my pins which was not a surprise!

I worked in sections which equated to about a third of the quilt was on the table at any one time. Had my husband been at home, I would have used his help to pull the table apart and put in the leaves so I could have pinned a larger section at a time. Repositioning the backing and smoothing all the layers takes some effort. The less times this needs to be done the better!

I have about 40 hours in to this project. It will be a week before I can start quilting because my 790 Bernina Joie is working in my neighbor's studio. We purchased our machines at about the same time. Her thread cutter had to be repaired with a part from Bernina which was taking weeks to be shipped. She was worried that the craft items she agreed to embroider would not be ready for a craft fair she committed to vend. I offered to lend her my machine. After she thought about if, she took me up on the offer.

I worked on another project while I waited. Bernie, my twenty year old 1630 worked great to piece the batting and to compete the zig zag stitching I needed to do.

To all of my American readers, Happy Thanksgiving. We will be cooking dinner here for a couple friends and my mom. Yes, I do plan to do some Black Friday shopping as that is a tradition I have done for lots of years!


Sunday, November 24, 2019

Leaves--post 1

The fabrics and pattern
A couple months ago, I started washing and prepping fabric that I had purchased about a decade ago. The purpose of the purchase was to make a bed quilt for my daughter, N.

It is a Valori Wells fabric design that I loved because of the large scale; but, I had no idea of what sort of pattern to use. I purchased some additional fabrics because the colors or textures went with the print. In all, I purchased 22 yards. Looking back, I was crazy to purchase so many yards of fabrics with no idea of how to stitch them together! The fabrics are bright, bold, fun and beautiful which are all adjectives I would use describe my daughter!

Testing the block sizes
Over the years, I looked at Pinterest, quilt shows and websites for ideas. Yet, nothing excited me. Meanwhile, daughter N let me now how cold she was. You may remember her "thoughts" in comments to a variety of posts I had written!

A couple years ago when I visited her in London, I brought her a wall hanging. She appreciated the "art;" but explained the piece wasn't large enough to even serve as a shoulder warmer!  Earlier this year, she moved into a flat that she purchased. She let me know that she had several beds and a couch that needed a quilt. She took a twin size quilt back with her after a visit last spring.

I had seen a quilt a friend had made hanging in the local guild show that used a large scale print. She shared that it was a BQ pattern that she had enlarged. I asked her more about her process and she freely shared answers to all of my questions.
Top left block isn't correct

A few months later, she gifted me the pattern! Fast forward another year, I decided that I would get started on the project. I started with prewashing all of the fabrics. It takes a while to prewash and test all that yardage!!!
Correct orientation for these blocks

Once I had finished prewashing, I pieced a couple blocks to try out the pattern. I decided the small block was just right;
but, the print fabric in the large block scale was too large. I scaled down the size and restitched the block. I liked it. I made more.

Of course, I made errors at every step of the process! For a simple set of blocks, it sure took me a long time! I decided that I wanted the red flowers in the print to orient in the same direction. I ripped a few panels because the red flowers were in the wrong direction.
Add caption

When I started, I liked the profile orientation of the blocks. When I had stitched several panels, I viewed them on the bed. The day that I chose to do the viewing, the wind was blowing hard enough that the leaves were blowing across the lawn. I happened to lay the blocks on the bed in the landscape orientation.

I liked it better! I made a few extra panels thinking it might be nice if the quilt was large enough that it could be tucked under the mattress. I ran out of the dark brown. I pieced
the leftovers together much like our quilting ancestors would have. I was excited to have the
top finished. I put it on the bed. It was way too BIG! So, I ripped off two of the panels. Those panels will find a home on the quilt back! The top measurers about 108 inches long by 100 inches wide. This size will fit well on N's bed which is more like a queen size.

So far, I have about 30 hours of work in this quilt! The next step is to construct the back for the quilt.