Showing posts with label IMPROV. Show all posts

Wednesday, July 22, 2026

Garden Flowers--post one

Fat quarter, parts and scraps
Goal number nine on my July list was to determine what to do for our book club quilt project. We are discussing "By Her Own Design" by Piper Huguley. It is the story of Ann Lowe, a black woman dress designer, who created Jacqueline Kennedy's wedding gown. Lowe was truly an artist when it came to dress design. From the time she was a young girl, she liked to make fabric flowers and attach them to the dresses.

Fussy cutting the flower motifs
In the stash, I had a fat quarter that was printed with large flowers. I decided to use it as well as some green strings, pink half square triangles (HST), a few leftover parts from a previous project and pink strips. I fussy cut the whole printed flowers. I was able to cut out six flowers.

Possible layout
After fussy cutting, I started to work on a layout. Because the flowers were different sizes, I used a variety of pink strips to frame the flowers. Then I trimmed the blocks to one consistent size. I continued to arrange the blocks as if they were photos on a wall.

Flowers framed
After seeing all the pink, the project needed green! I thought the green bits I had were crumbs; but, it turns out they were strings. I started piecing two and a half inch strings strips of fabric to use as sashing. I also pulled the leftover pieces from a previous project to audition into the mix.

Leftover parts to possibly add to the project
I added a few HST to the layout as well as a yellow background fabric. I made an X from four of the leftover parts. I changed the layout so the flowers circled the X.

Adding a background fabric and changing the layout
I decided that I needed one 4 1/2 inch string strip to be placed at the bottom of the project. I pieced that strip. Maybe half of this strip will be on one side of the triangle leftover with the other half on the other side of the pieced part. 

Center block on point, adding HSTs
Looking at that center block, I decided it needed strings. I pieced more strings. These strings are two and half inches wide. After contemplating the layout yet again, I turned the center block on point and auditioned the pink HSTs as a border around the center block. 

Additional flower block added
I needed another flower block. I was able to piece one from the scraps of the fat quarter. In the photo below, you have to zoom in to see the piecing line! The design needed the additional flower block.

Pieced flower
I've created a math challenge for myself. I want to piece the flower blocks around the center. How to make the design work will be a challenge for another day! I hope to be able to inset the flower blocks around the center block with straight forward piecing.

Sunday, June 22, 2025

Stitch By Stitch Is A Flimsy--post 2

Pieced words
In April, I posted about my SHIB (Squirrels Hiding In Bags) project. I put some of the pieces together and played around with some layouts. In May, words were calling to me so I pieced some. 

Fewer words
The words took over the project. I decided to use fewer words on the front. I planned to piece the word "she." The words, She transcended, may go to the back because I don't want to make a big project. This is the project for the book, "The Dressmaker of Khair Khana" by Gayle Tzemach Lemmon. I also want to hang this project in my home so that was the reason to nix the transcended line. Gertie, my inner squirrel, protested mightily.

HSTs from leftover background triangles
As the piece marinated, I decided that my string pieced strips didn't show well. The purple that I liked wasn't doing much to add to the overall design. I pulled both from the design wall. I decided to sew HSTs from the leftover background triangles from the original SHIB with leftover triangles from another bag. (Can you tell that I have a problem er challenge with bags?)

Layout of words as per Gertie
Gertie continued to talk to me about the "words." I removed all of the pieces from the design wall. I added the words. I played with different configurations until one felt "right." I placed a few of the scraps around the words. I auditioned two orange scrap fabrics that were about half a yard each. These were leftover from a previous project. I liked it better than the purple.

Progress at the end of session one
I liked the darker orange; but, because I didn't have enough, I decided to augment it with the lighter orange. I also realized that I could use the strings, if I sashed them with the background. With the limited background fabric, I knew getting this project to a flimsy would be like solving a 1500 piece puzzle!

Progress at the end of session two
At the end of session two, I had incorporated some background fabric and the lighter orange fabric as well as the darker orange. I liked the direction of the progress. Gertie, while supportive, wanted to change "Transcended" so that it began the second line. I agreed to consider her request. 

It doesn't look like I did much from session one to session two. Placing a section, stepping away, replacing it in another orientation takes time. Irene Roderick calls this process "Dancing with the Wall." She wrote a book about improv piecing with that title.

Progress at the end of session three
At the beginning of session three, I did change the order of the second line. I liked the change because the words have more impact. Where it was possible, I added strings to fill in the spaces. For such a simple project, I ripped a ton. I let my mind wander and learned every way possible to stitch the rows together incorrectly!

The leftover strings
I had some strings leftover. These will go into another project. The extra pinwheel will become my label. I  used all but two pieces of the background. I had little of the other fabrics remaining as well. This project measurers 56 1/2 inches wide by 40 inches high.

Other leftovers
Goal number four on my June list was to make progress on this project. I'm planning to make a pieced back to use some "parts" (sample blocks) I stitched long ago just because I was curious as to how they would look in different sizes. I'm linking to Cynthia at Oh Scrap and Melva at Sew &Tell.

Sunday, May 11, 2025

As Noted--Unveiled!

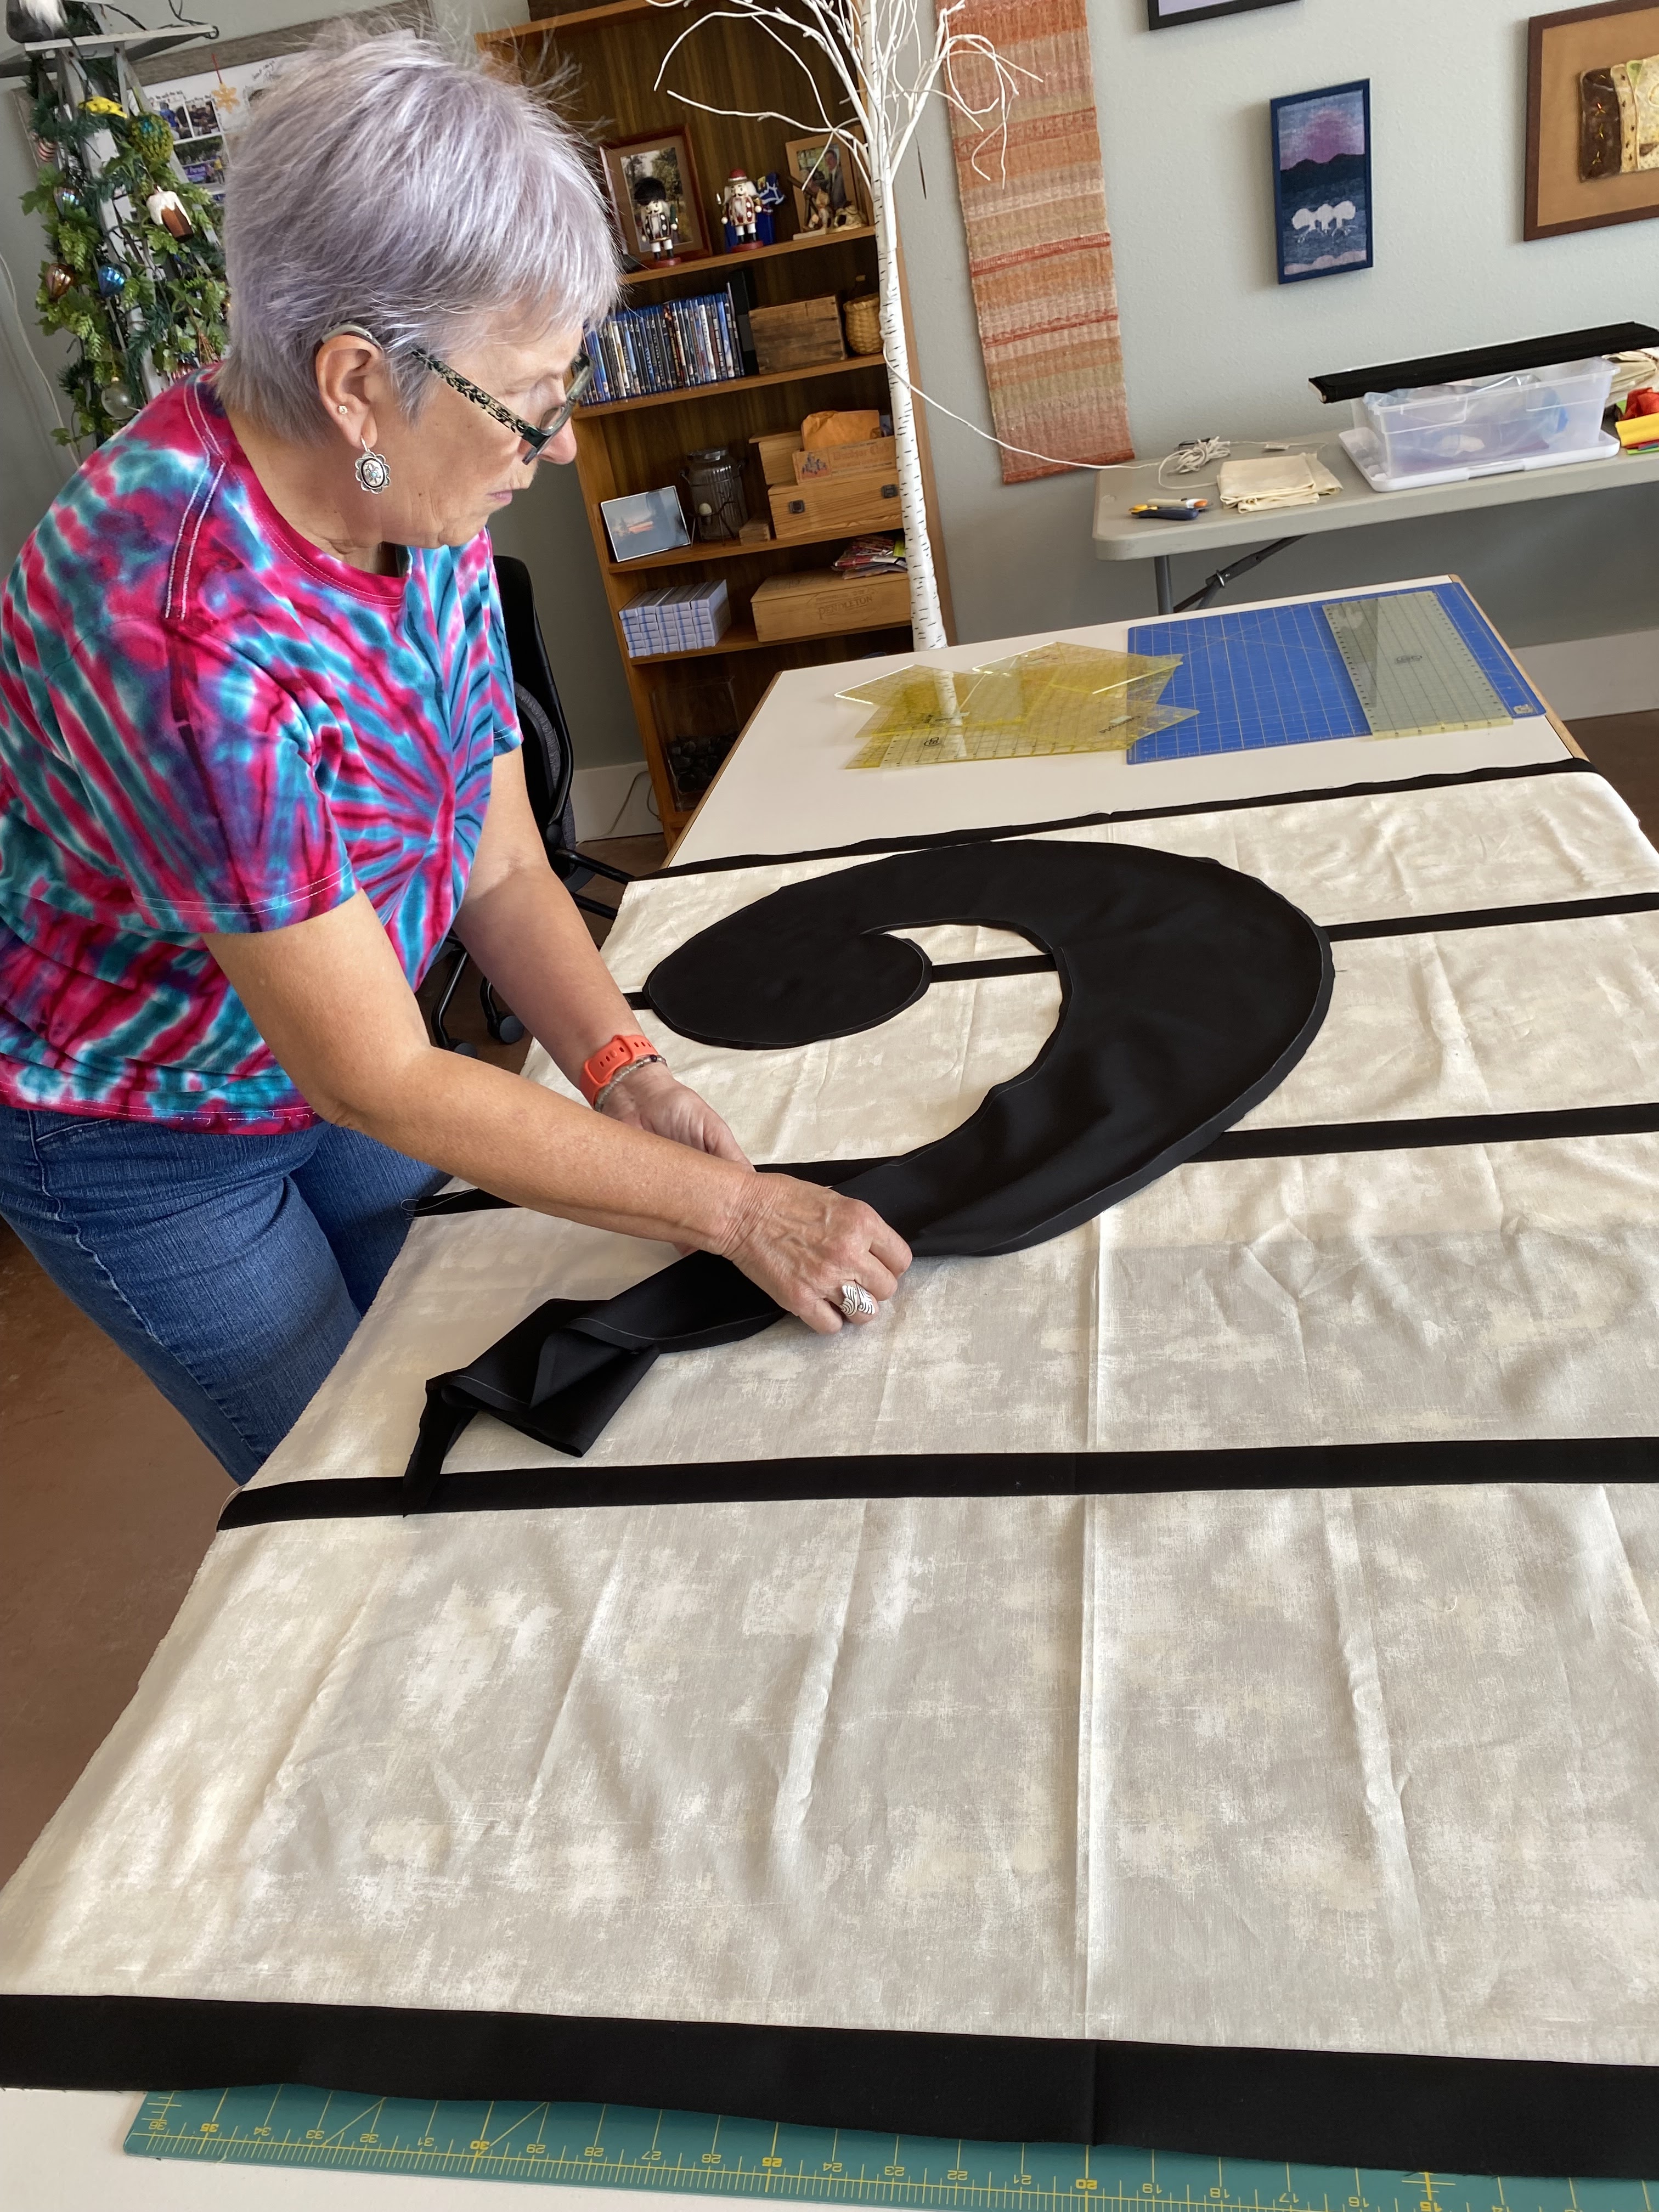
Linda H. placing the bass clef
Last summer, I shared the blocks that our members made for the guild block challenge, "As Noted." The rules for the challenge was to make a block with a musical theme. If you used notes or words, these should be in black. The background should be cream, off white. We received 56 blocks which were made by 31 people. These blocks became the opportunity quilt for 2026. (Members choose a 501(3)c charitable organization to support. The ticket sales go to that organization.

Su S. placing the dots
In that post, I also shared how we were sashing the blocks. We pieced various widths of strips of solid fabrics which we cross cut into various widths that we sewed to the blocks. At the beginning of one sew session, we drew the bass clef on freezer paper. Once we had the shape and size we wanted, we cut it out of freezer paper. We then adhered it to our black fabric.

Placing the blocks around the staff
We used round household items to audition the size of the dots we needed. Su S. stitched the dots into perfect circles. Linda H. hand appliquéd the bass clef and the dots. Linda P.  figured out the math needed for the staff.After we had this section of the top together, we began placing the blocks around the bass clef.
Getting closer to a top
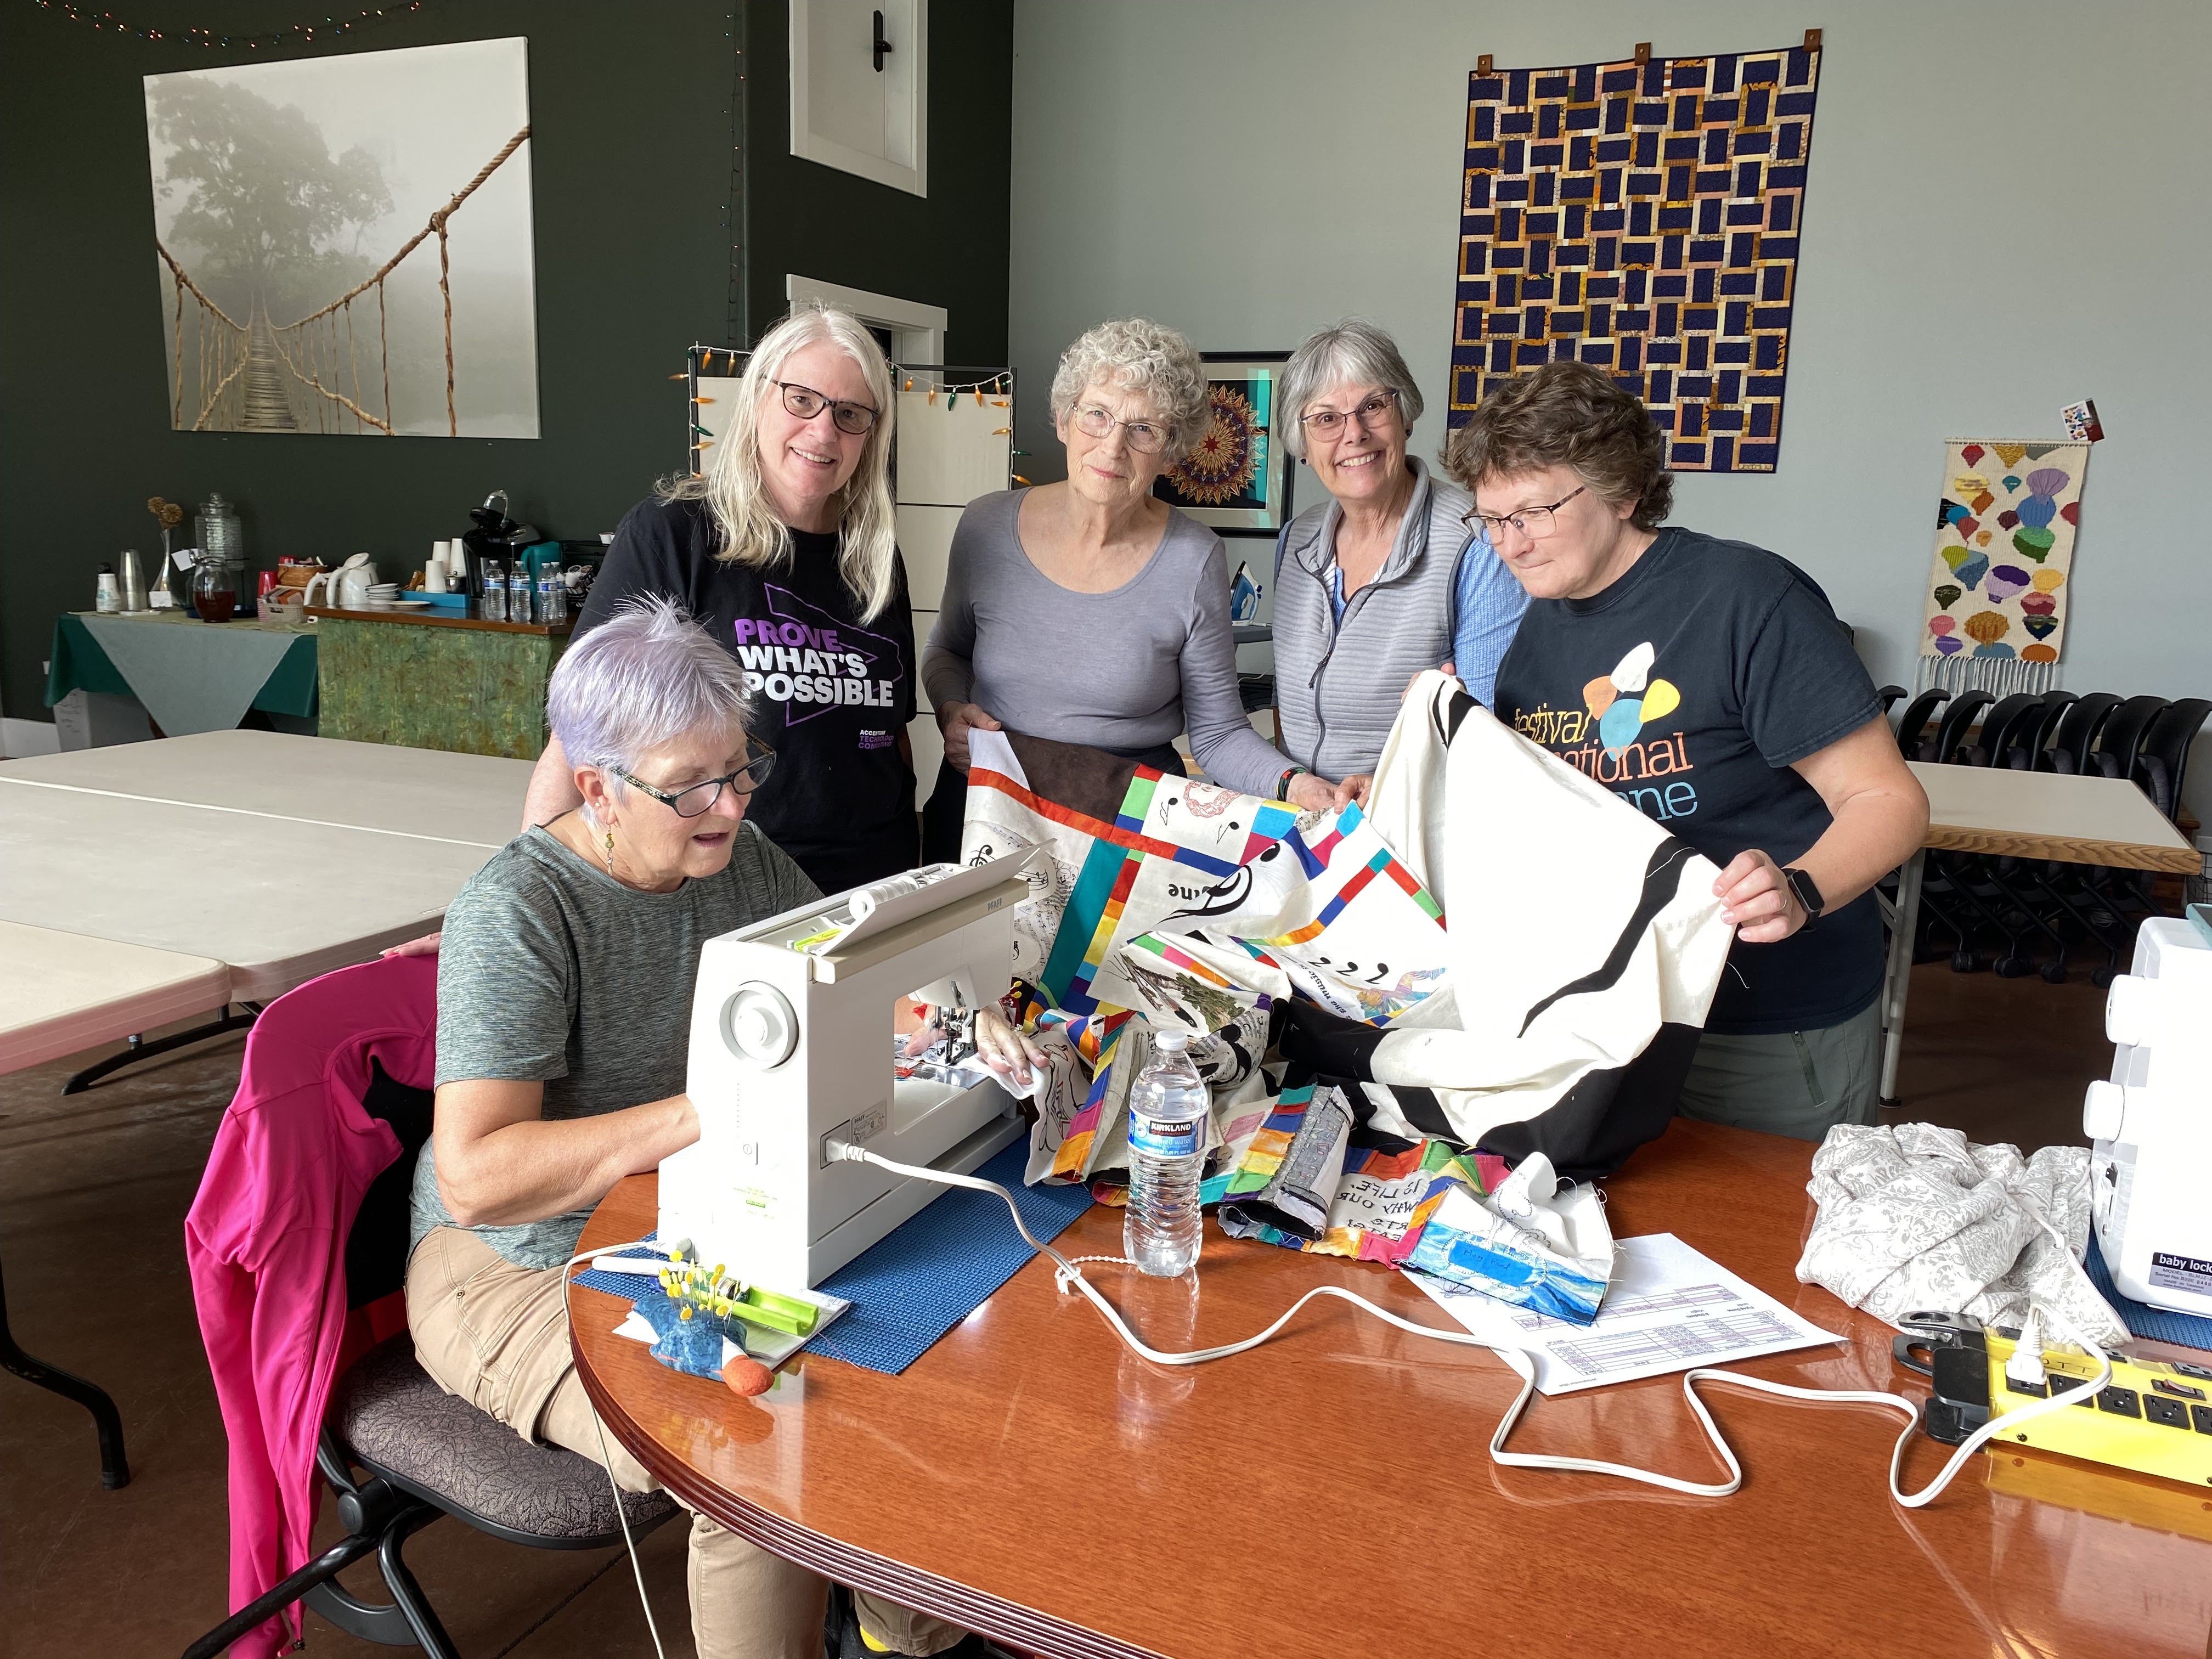
We did need to take a few of our four patch blocks apart because our top was approaching 110 inches in length. We then had to add more of the solid fabric sashing. Determining where that sashing was placed to get the blocks to fit together was quite the puzzle! We moved some blocks to another position. We used some solid black, some solid colors and even a musical print to fill in some of the spaces. We high fived one another when we had a "section" together. We totally improv pieced this top!

Sharron B. pressing a section
From the beginning, we planned to machine appliqué two blocks to the staff. Linda P. hadn't done this before; but was game to give it a go. Linda H. stitched the last seam.

Linda H. stitching the last seam
We were gifted a bunch of musical fabrics. From those donations, I pieced a back. You can read the post here. You can also view the label that Su S. wrote.

Finished top: Su S., Linda P., me, Sharron B. and Linda H.
We asked another Linda P. to quilt it on her long arm. We encouraged her to let the blocks inspire her to quilt the top. 

Quilting sample
She did an awesome job. 


There is so much to see on the project. 


Each block is quilted a little bit differently. 

A few of the blocks are included in this post.
Note the musical instruments quilted to the left of the block
She said she went on the internet to capture free clip art of musical instruments which she quilted in the staff.

The detail of the quilting is evident from the back too.

Detail of the quilting from the quilt back

Once the quilting was finished, Su machine stitched the binding to the front. Then Su, Linda H., Linda P. and Sharron B. hand stitched the binding to the back. Sharron B. added the sleeve and made a pillowcase to house the quilt when it isn't being shown at various locales where tickets will be sold. 
Binding
Finished quilt.
Ticket proceeds will go to the West Columbia Humane Society located in Washougal, Washington.

I so enjoyed working with these women. When any thought was on the table, the response was positive with comments about how to fine tune or improve the idea. That they chose one of my ideas as our initial start, was especially touching to me. I hope we will sell all the tickets.

We unveiled our finished quilt at the April guild meeting. We had so many positive responses. Ticket sales will begin late Fall or early Winter.

Sharing this project was goal number four on my May list.

Linking to Frédérique at Patchwork and Quilts and Cynthia at Oh Scrap! Happy Mother's Day to all you moms of two legged and four legged kids!


Sunday, April 13, 2025

Strings From A Scrap Bag--post 1

Bag of scraps
Goal number six on my April list was to sort a bag of scraps. Chantal, At the Corner of Scraps and Quilts, often posts about scrap bags that have shown up on her doorstep. Cynthia, Quilting Is More Fun Than Housework, is the queen of turning scraps into amazing quilts. They inspire me with every post. My challenge is that I ALWAYS have way too many projects in process to stop and play. I tell my little inner squirrel, Gertie, to wait until I FINISH a project.

When I wrote the goal, I had envisioned tackling one of my large bags that came from my friend Martha. I thought I could get started on sorting the bits into what were strings, strips and bits as well as by color. This is not what happened.

Laying out the chances
Instead, I came across a bag that was left from a string project that I finished in 2022. The pros to the the bag was that it was a small and came from a project. A small bag wouldn't overwhelm my efforts to empty it. Because it was project leftovers, the pieces would go together.

I opened it. Of course, there were a few pieces that didn't belong so those were put where they can be used in another
project. There were also some string strips of various widths. I thought that these might work as a border and as blocks. There were a lot of HSTs of varying sizes so I started piecing those together.  

Auditioning background fabrics
Once I had a few pieces together, I started laying out the project. I kept going until the only remaining scraps were small triangles from the neutral fabric. My goal is to make a piece about 40 inches by 60 inches. Right away, I realized I needed a filler fabric or fabrics.

I went to my stash of solid fabrics and chose a purple. I liked it; but, knew that the yard of fabric wouldn't be enough. So I selected a blue fabric which is okay; but the value is a little too dark. I did have a little leftover piece of orange that I decided would work great as an accent. I decided that this might be my book project for "The Dressmaker of Khair Khana" by Gayle Tzemach Lemmon instead of the panel that I had identified last month.

In the book, Kamila is about to complete her studies to become a teacher. Unfortunately. she has to abandon that career option because the Taliban take over and women lose their freedom. Kamila ends up helping many other women and families in the process. The strings represent all the people she touched. The various patterns the leftovers became represent the girls she trained. It is interesting how projects present themselves and the journey they take!

It's been quite the week. I took Old Town to the quilter on Tuesday. Friday, I received word it was finished and I picked it up. I have it to bind as well as my 2021 Temperature quilt so I will be working on being able to report on a couple finishes soon! 

Tuesday, I wanted to sew the ruffle to the Santa Tree skirt. My Bernina 790plus acted like it was possessed. I had it on straight stitch; yet it was trying to vary the width of the stitch. The stitch length and width dials stopped working. It is back at the repair shop. I hope it will be repairable and that the repair is affordable.

Linking to Frédérique at Patchwork and Quilts and Cynthia at Oh Scrap.

Sunday, February 23, 2025

Love Makes a Family--post 2

The two red fabrics
Goal number four on my February list was to get this project into a top. In my first post about this project, I had pieced the words for the project and had placed some scraps on the design wall. I needed a few days to noodle options. The red hunk that I wanted to use, while a generous sized scrap, wasn't as large as I had hoped! I did pull another solid red fabric from my stash that is similar in value. While I considered purchasing fabric, I decided to use what I had on hand.

Frame in place, words and some scraps
auditioned
First, I removed all the pieces from the design wall. Next I made a frame that was 40 inches by 40 inches for the size of the project. I used selvages to mark the space. I allowed myself to narrow the width to save on the amount of background fabric! I placed the words where they felt "right" to me. I added some scraps. I walked away. I wasn't happy with the large area of background.

Auditioning skinny yellow strips
I decided to build the quilt from the bottom up to conserve as much background fabric as possible. I added a few skinny yellow strips because it brightened the project. Also, Riel, the character in the book, "Before We Were Yours" by Lisa Wingate, showed a lot of courage and initiative to keep her wits about her. The pieced horizontal strips represent the happiness she felt living on the river boat with her loving family. The vertical pieced skinny strips represent the chaos she and her siblings experienced. If she hadn't had the foundation of a happy family, she couldn't have survived the crap that happened at the Tennessee Children's home. The red represents the high alert under which she lived.

Progress at the end of the sew session
Once I added the yellow strips, I felt like the piece was coming together. My goal was to keep the length about 40 inches. Making the piece narrow would conserve the background fabric.I auditioned a narrower project. The words still looked balanced.
Progress at the end of another sew session
I continued filling in the spaces with the vertical bits. As I constructed, I laid background fabric in the open areas. This was a good way of ensuring that I was getting the most possible coverage out of the background fabric. As I completed each section completed, I was inspired to keep making progress.

Leftover background
In the end, I had enough background fabric to complete the top. I even had a few pieces leftover! I placed these in my solid scrap bag. Maria Shell is going to have a Zoom workshop in July about using scraps. This bag will be likely be used then. . .unless, they are "needed" for another project before then. My inner squirrel, Gertie, is always telling me about possibilities and she loves playing with scraps!

Finished top
The finished top measures 33 by 39 inches. I did look in my stash for a backing fabric. I found a red batik that I had purchased a long time ago. I actually had purchased three different red batiks. I made a shirt out of one of the fabrics. I can't remember how I used the second fabric. At any rate, rolled up in the backing fabric were the scraps. I made the shirt well before I had a scrap saving system.
Backing fabric
After processing the scraps, I found that I had enough two and half inch strips to make a quilted facing. I haven't made a quilted facing in a long time. I looked back in my blog. . .it was 2018!! Let's see if I remember how to make one! 

Ready to be basted
In March, I will layer the top, batting and backing to pin baste it. This won't take long because it is a smaller project. Next, I will quilt it. I'm thinking a lot of straight lines in the background. I might heavily quilt the background on the words; but, that is just a thought for now. Once the piece gets under my needle, then the conversations begin!

Linking to Frédérique at Patchwork and Quilts and Cynthia at Oh Scrap.

Wednesday, January 8, 2025

Love Makes A Family -- post 1

Multicolored scrap bits
Our book club is reading, "Before We Were Yours" by Lisa Wingate. I knew I wanted to include the word, Love, in my project. I also knew that I wanted to incorporate the leftover multicolored scrap bits from the opportunity quilt that I will share in April or May.

In the book, Rill, a young girl, tries to hold her family together; but, they are all taken to the Tennessee Children's Home Society to be adopted. Georgia Tann operated the home. She single handed corrupted the adoption system. My heart wrenched at the crap the kids endured.

A couple other books that are related to the subject matter follow "The Baby Thief" by Barbara Bisantz Raymond is the untold story of Georgia Tann. "Before and After" by Judy Christie and Lisa Wingate provides real life stories of children who lived in the Children's Home.

The scrap bits represent the chaos Rill encountered. I knew I wanted at least the word "Love" in the project. Saturday, I listened to Bill Kerr and Weeks Ringle share their knowledge in My Word a mini quilt along. 

One of the words
Bill is a college professor who is a graphic design specialist. He teaches a class in typography. He also calls himself a nerd when it comes to typography. 

He developed a unicase alphabet meaning some letters are upper case while others resemble lower case; but, the letters fit well together. The lecture that you can listen to in the link was so interesting. There is a part two as well; but, I've only linked to the first part of the quilt along. In part two, Bill and Weeks answer questions.

The quilt along was free. All Bill and Weeks asked was for those who participated to purchase the pattern and to use the alphabet according to the pattern. I had a blast making the letters. Then, my little squirrel, Gertie, decided I needed to make a phrase. 

Auditioning background fabrics
Once I had constructed the phrase, I decided I needed to pick a background color. I tried a variety of fabrics before settling on a red fabric leftover from Indigo Way. A yellow was a close second. I may incorporate a few yellow strips to signify the courage and bravery that Rill exhibited.

The background or field fabric of the words is a light purple and the works are eggplant purple. I don't want to use those colors anywhere else in the project. I also don't want to use white or black because Tann was a master at treading in the gray areas of the law.

In the end, I pieced the phrase, "Love Makes A Family." Rill experienced love from her mom and dad as weak as from her adoptive family. Of course, she loved her sisters and brother.

Progress after piecing the phrase
I played around with different configurations of the words before settling on three lines. My next step will be to decide the size of the project. At that point, I will remove all the extra bits leaving the words. 

I will employ Irene Rodrick's technique of dancing with the wall which means placing a piece on the wall before stepping back to see if it "fits." Once it "fits," I leave it and work on another area. I'll be working in an "improv" format.

While I had planned to work on this project again this week, I might not get back to it until next month. Goal number three on my January list was to participate in the quilt along. Goal number six was to work on the project for the book, "Before We Were Yours," by Lisa Wingate. I have a good start!

Linking to Alycia at Finished or Not Friday.