Wednesday, December 30, 2020

Santa 2021


Package delivery
When our daughters were little, my father-in-law would drive two hours to our house to wake the kids up wearing a Santa costume that my mother-in-law had made. He would ring the bells and the girls would fly out of their beds to try to "catch" Santa in the act of leaving presents. One daughter would always check outside for reindeer hoof prints! He would gift each girl with some special presents on his way out to make other deliveries. 

Then he'd make the return two hour trip. He would call the girls to find out if they had been good enough for Santa to fill their stockings! He played Santa for other families too once the girls become wise and then too old for Santa.

The "awe" of  Santa in the house
My husband has been filling the Santa role since the granddaughters have had Christmases. The beard and wig while the best accessories for the costume are also what makes the costume extra hot. The pillow worn at the midriff also traps the heat! 

This year, we didn't think that their parents were going to allow Santa inside their home in spite of Dr. Fauci's claim that Santa was immune to COVID 19. 

With less than a day notice, Santa received visiting privileges if he wore a mask. The granddaughters at age 7 and 8 1/2 were up at 3AM. Their parents encouraged them to go back to bed; but, they were too excited to sleep. I'm told the bell ringing at 5:30AM brought them out of their rooms!

Santa commented that the youngest seemed to figure out his identity although she didn't ask. The way she is "snuggled" in for the photo gave us all a clue that she is in the know! With the deliveries complete, Santa returned to the North
Pole for a well deserved nap and vacation.

Snuggling with Santa
The first opportunity after the holiday that my husband had to spend with granddaughters was a walk yesterday. The youngest granddaughter said, "Papa, you look a lot like Santa. AND Santa is almost as handsome as you!" Is that not a thoughtful comment for a kid to make? To let you know; but, yet, still be able to walk the line so that Santa will come again next year? What a memory they made together!

As a family, we met via Zoom. A year ago, we were visiting our youngest daughter at her flat in London. We traveled Christmas Day. What a difference a year makes! 

The daughters cooked lamb for dinner. We cooked a ham. We look forward to physically being together in 2021.

This is my last post for the month and the last post for the year. I helped 22 people earn their 
American Heart Health Care Provider CPR certificates. I had two finishes for the quarter. I finished Unity and I finished Steps. I plan to roll most of my fourth quarter list forward into 2021. I also have lots of new projects planned for 2021 which I'll be posting about in the coming weeks.

Thank you dear readers for reading my posts and for your kind and uplifting comments. New Year's Eve, I'll be sitting and sewing with my Friday Clark County Quilters group. I hope the new year brings you joy. Stay safe. May the vaccine come to each one us sooner rather than later!


Sunday, December 27, 2020

The Nightingale Book Club Project--A Finish!

Grayscale of the fabrics
This quarter our Thread Tales book club read "The Nightingale" by Kristin Hannah. I had read this book a couple of years ago; but, I reread it. Rarely, do I read a book a second time! After I finished the book the second time, I had my inspiration. . .footsteps. One of the characters rescued 19 Jewish children, while having a German officer billeted in her French home.

She raised her best friend's boy Ari as her own after the Germans physically removed her friend from the community. Since I had the inspiration, I thought that the project would materialize quickly. Was I ever mistaken! The first month flew by. Mid way through the second month, I had a conversation with a friend about what I wanted to do. The brainstorming session helped; but, I still didn't have either a sketch and/or plan for the project.

Pieced background
I sketched a heart with footprints walking through the heart. I sketched a teddy bear. I sketched 19 pairs of footprints. I really wanted to use the foot/shoe print I had taken when our youngest granddaughter was about a year old. I liked the tread of the shoe. The tread was a narrow zig zag. I  thought about hand embroidery stitches for the tread. I thought about painting the shoe prints on a piece of fabric. I thought about brown, tan and cream backgrounds. I thought about using a fabric printed with French words as the shoe print. I made no actual progress because no thought "jelled."

This is the month we reveal our projects. Tuesday is our virtual reveal. I have struggled with having a project to share. Two weeks ago, I looked again at that fabric printed with the French words. Although I've been using an application on my phone to learn French, I can't translate what it says. The fabric is printed with parts of a letter because I can read the months of March and July! I can also read parts of an address. I decided the words would represent the tread of the shoe. 

French print fabric
I made a copy of the outline of the shoe print. I placed the copy on the fabric and cut out a right and a left shoe print. I used a pencil to trace around the shape. I added a seam allowance.

Next, I decided the shoe prints could be moving across a gray background. I used some of the gray fabric scraps from the Bonnie Hunter Grassy Creek mystery. To ensure that I had the fabrics arranged dark to light, I took a grayscale or mono print photo. 

Auditioning the shoe prints
I cut strips in a descending width. Next, I cut gentle curves in the fabric before piecing the sections together. I used Jean Wells' piecing technique. I liked what I saw so I placed the shoe prints on the background to see if I liked the orientation. I did.

This time, I planned to add the shoe prints after I had quilted the background. My plan was to use the walking foot and quilt curvey lines with gray thread. I located a back for the quilt which is a print with a bird.

A few years ago, I won a gift certificate. I purchased the half yard of fabric with a bird and other information printed on it. The print represents the book. It wasn't quite wide enough so I pieced it with a batik scrap. I planned to face the project. I envisioned that the facing and sleeve will cover most of the batik fabric.

After I pieced the back, I layered and basted the layers. I was pleased with my progress. Two hours later, I began quilting this piece. I'm tickled to be able to use my granddaughter's shoe print in this project. I'm happy that I was able to edit my earlier thoughts to simplify the project. I believe my fellow group members will be able to see the relationship between my project and the book.
The pieced back

Before I began quilting the background, I pulled all of my gray threads and auditioned the thread on the background. Pooling the thread across he backgrounds lets me see which thread is going to give me the look that I want. I used the polyester Floriani threads in the needle and a tan cotton thread in the bobbin. I placed the walking foot on the machine and began stitching gentle curves in each section. I stitched until it felt like I had "enough" density and texture. Quilting took about an hour and half.

Once it was quilted, I rinsed the starch out of the project and blocked the piece. Once it was dry, I marked the edges and applied the facing. A scrap of brownish fabric became the facing. I wanted to ensure that the handling I did to apply the footsteps didn't stretch the edge of my project.

I also decided I wanted to add a little depth to the shoe prints so I slipped a piece of wool batting under the each print before I needle turned appliquéd the pieces in place. It was a little tricky to needle turn the fabric without catching the batting; but, I managed!
The label

The sleeve is the remaining scrap of the back and the label contains the inspiration for the shoe print. Using the fabric print as inspiration, I wrote the pertinent information on the label like the tread of the shoe. I positioned the label so that it represents the evidence that a kid stepped on the back!

I named this piece "Steps." This is a small piece. It measures18 inches wide by 17 inches high. I am pleased that it didn't take me months to complete it. I spent about 10 hours to make the project and I used about $37 worth of materials in the process. I'm pleased with the simplicity of the design. I used about one and a quarter yard of fabric which brings my total fabric use of the year to 70 1/2 yards. This is my second finish for the quarter. It was not on my list nor was it in my head until a few weeks ago!

I'll be linking this post with Oh Scrap which is from "Quilting is More Fun Than Housework."

Regarding COVID:
Worldwide: 80.4M cases; 1.76M deaths
United States: 19M cases; 332K deaths
Oregon: 108,326 cases; 1,415 deaths

The back
A more contagious strain of the virus noted last week in the UK is now spreading across Europe. France, Canada and Japan are reporting infections from this latest strain. The representatives of manufacturers of the vaccines have stated that the vaccine is affective against this strain of the virus. Worldwide, vaccines are being administered. For poorer parts of the world, other country leaders have stepped forward to say that they will send some vaccines to those parts of the world.

In the United States, the media reported that a person is dying every ten minutes from the virus. In some areas of the country, hospitals are past capacity and have mobile units set up to receive the next wave of patients. Traveling nurses are being recruited to staff these mobile units. With people traveling and gathering over the Christmas holiday, officials anticipate a spike in COVID cases.
The front

In Oregon, while it has been heartening to learn that income levels have bounced back to about 1% less than before the pandemic, not all areas of the economy are so fortunate. Gyms, restaurants and hotels remain severely restricted. Low wage workers have not fared as well as high wage workers. The high income earners have been able to work from home. I miss swimming at the pool and my husband misses his gym workouts. 

Christmas Eve day, we took a social distance walk with the grandkids and their parents. It was icy so we walked a flatter and shorter route than we may have taken had the conditions been different. I hadn't seen the grandkids in a month. My have they grown!

The two of us spent Christmas zooming with the daughters. We cooked a ham. I zoomed with the Friday Sit and Sews. I am thankful that the Clark County Quilters held the zoom session on Christmas. Of the 18 people who were stitching, at least nine of them are socially isolated. I was glad to be able to visit with everyone. It was a different way to spend the holiday. Last year, we were celebrating with our daughter who lives in London. I hope next year, it will be safer to travel. I also hope that masks will not be mandatory! 


Wednesday, December 23, 2020

Grassy Creek Clues 3 and 4--Post 3

Variety of fabrics in finished clue #3

We got to play with our red and orange fabrics for clue three of Bonnie Hunter's Grassy Creek mystery! I even was able to use a few strips from my precuts and a couple chunks from the orange drawer. Using from my scraps is always a bonus! It is fun to speculate how these units will be incorporated into the quilt. I hope that my units will fit the space when it comes time to fill it!!

Because I used a variety of fabrics, I spent more time cutting. Bonnie wanted us to have a specific number of like units. Some of my precuts weren't long enough to yield that number and some were just right. If I cut from yardage, I didn't have to think about units! Although cutting from yardage gave me an idea of how long a strip I needed.

Added gray and neutral wings in clue #4
After reading laments about the amount of time it takes to cut scraps from people participating in the mystery, I can understand why many people work with yardage. I don't mind the extra time. With COVID restrictions, I have time to spend cutting. As I looked over my chunks, I thought about the people who tell me that they generally toss any scraps less than a quarter of a yard. While I would have more space in my studio, if I followed that mantra, I wouldn't have nearly the variety in my blocks! The variety is what makes the quilt sparkle. I plan to continue with my scrap saving system!

Parts and finished clues organized 
Last Friday, Bonnie released clue number four. We added parts to clue number three! I cut at least one strip from each gray and neutral fabric to have as much variety in the blocks as possible. I like how the clue stitched together. The majority of the points are sharp!

Cutting all those fabrics left me with a lot of leftover cut strips. I try to keep those cut strips and leftovers together in a plastic zip lock bag. As Bonnie releases clues, I will use from the cut bag saving the yardage. Once I've finished the top, I will cut the remaining pieces into the units that I save for my scraps. 

As I finish the clues, I bag the clues in zip lock gallon bags. It sure helps to have the parts organized in this manner! If I haven't finished a clue, I bag the parts and the directions together because I've learned that action saves me a bunch of time later when I'm trying to figure out what I was doing! Bonnie will release clue number five the day after Christmas. I'm ready!


Sunday, December 20, 2020

Unity Finished--Post 17; First Finish 4th Quarter

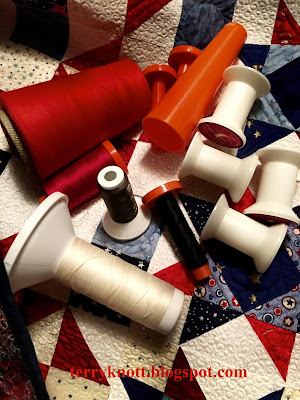
Thread used during the project
After 10 months of stitching on this project nearly every day, I've finished Unity! Actually, I put the final stitch in the project before I wrote this post! This project was a mystery sew a long with Bonnie Hunter. She started it to provide a positive activity during the beginning of COVID. 
All of the fabrics, including the back, came from stash. It is my first finish of the quarter and goal number five on my Finish-A-Long fourth quarter list. Since my last post, I wrote the information on a label from my stash. I've been hand stitching the label, binding and sleeve. I chose to hand stitch the binding to save more of the star points. I was mostly successful. Hand stitching irritated my sore thumb. I stitched one or two lengths of thread per day so I didn't cause more pain to my thumb! My thumb continues to improve. Improvement is slow! It took a long time to hand stitch the binding, label and sleeve!!!!!

This will be a present for our youngest daughter and her husband to be when they marry. I plan to write their names and wedding date in red once they have determined their date. I imagine once the COVID vaccine distribution has occurred, they will be able to set their wedding date.

Label

There is a lot of thread in this quilt. I like to take a photo of the thread I used in the quilt. This time, I have a lot of empty spools to show too! You can't see the blue thread that I used because I used all that I had.

Aside from all the time that I spent quilting this project on my 790 Bernina, I enjoyed the process. I LOVED using strips and squares from "my precuts." My precuts" are scraps that I've cut into useable segments using Bonnie Hunter's scrap saving system.

Over the past 10 months, I wrote 17 posts regarding this project! The other 16 links are listed below:

Piecing: Post 1; Post 2; Post 3; Post 4; Post 5; Post 6; Piecing the back: Post 7; Quilting: Post 8; Post 9; Post 10; Post 11; Post 12; Post 13; Post 14; Post 15; Post 16

I have enjoyed piecing this project. I loved the way the red white and blue fabrics complimented each other as well as coordinated with the neutral background. I love stars in a quilt and there were plenty of stars in this pattern!

Back
You can get an idea of how dense the quilting is when viewing the pieced back. 

I used 19 1/2 yards of fabric which brings the total fabric used from my stash this year to 69 1/4 yards. I have replenished my stash with 33 yards of fabric in the last couple months so in the end I have made a tiny bit of
progress in using my stash! I'm happy with having a net loss of 33 1/4 yards from my stash though! I have a friend who says that when you use something up or clear something out, often something new takes the space. I will agree to that!

It is still my goal to create using from my stash. The year isn't over so perhaps, I'll finish a couple more projects from my list. Perhaps, I'll have more finishes next year!

I'm linking to Oh Scrap the Sunday link up with Quilting Is More Fun Than Housework.

Regarding COVID:

Worldwide: 76.5M cases; 1.69M deaths

Front

United States: 17.8M cases; 317K deaths

Oregon: 100,308 cases; 1,304 deaths

Midnight Friday in the UK, London became a tier 4 meaning that people can meet with one other person not living in their household outside, essential shopping for groceries/picking up take out can continue and people will work from home. This protocol will remain in place and reevaluated after two weeks. There were people who packed quickly to take the last train out of the city to spend the holiday with loved ones in a lesser tier area. Some people got stuck outside of the city because after midnight, flights, train travel, etc. ceased. I hope the measures help reduce the number of COVID cases. Vaccinations continue throughout the country.

In California, the hospital ICUs are full and makeshift hospital ICUs (tents) are being set up because officials predict the rising hospitalization need has yet to peak. Funeral homes are also maxed to capacity. In Oregon, we live in a county that continues to be in the extreme risk category. We continue to wear a mask, stay home if possible and we are planning to have Christmas with the two of us. I image we will have a Zoom session with the family.

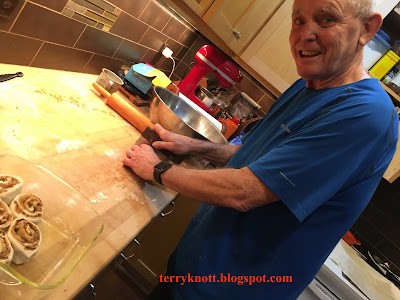
Making cinnamon rolls
Today, is our youngest daughter's birthday. We reminisced about her actual "birth" day. It was snowy and the trip to the hospital that should have taken us five to seven minutes, took 30 minutes because of traffic accidents and slick driving conditions. She was born about 45 minutes after I had walked into the hospital. The weather today was 50 degrees with heavy rain.

Today, I made the dough and my husband made the cinnamon rolls. We each felt we had gotten the best end of the deal! We often have cinnamon rolls for breakfast on Christmas morning. This recipe makes a big batch so we shared with our neighbors. The house smelled so good!

Wednesday, December 16, 2020

String-A-Long--post 2

Using the newsprint to trim the string fabric
After piecing the strips, I trimmed the strings. The newsprint foundation made it easy to determine the parameters of the pieced fabric. I trimmed the string fabric with the newsprint side up. Generally, when I paper piece strings, I don't leave much fabric along the waste edge. Some people will leave an inch to an inch and half. Then they will piece those scraps into projects. I rarely join that camp. Although, I have used trimmed strips that way!

Once I've trimmed the pieced fabric, I removed the paper. The needle perforated the paper when I stitched the fabrics together. The perforations make the paper easy to remove. I gently pulled the paper away from the stitch line with one hand. With a finger or two on the other hand, I placed a little pressure on the adjoining seam. As I pulled the paper away from the piecing, I found that the the pressure helped the seams from becoming pulled too.

Strips untrimmed and trimmed
Paper removing is a great evening activity. My granddaughters liked removing paper although the activity reached boredom quickly when they were four and six year olds! 

Once I've removed the paper, the string fabric is ready to be made into blocks. Every time I trim a chunk, I'm impressed with how interesting all those combined bits make the chunks!

I paper pieced long strings until I had stitched the majority into 11 inch squares. I could cut three 3 1/2 inch strips out of one 11 inch square. I paper pieced a few eight inch squares because I had strings in that length. I also thought the 3 1/2 inch unfinished squares from the eight inch squares might make a good border. I pieced 3 1/2 inch strips with the short strings. Occasionally, I'd slip in a few crumbs to add a little more interest. 

Cclose up of a few crumbs added as a string
It does take time to prepare the string fabric. The piecing is easy to do. The result is worth the effort. The question is, at what point is that string no longer viable for piecing? The answers depends on the piecer! Some people would toss the pieces that were too short for the 3 1/2 strips. Others would add a piece to the strip to make it work. Some people might stitch those bits into pieces to make strings!

Once I've trimmed the strips and removed the paper, I piece strips together until the strip is the length of the background fabric strips. Sometimes, I stitched the strips together before I removed the paper. Either way works!

Cutting triangles

When the string strip is about the same size of the background strip, I placed them right sides together and stitched both long sides of the strip. Next, I used the essential triangle tool to cut triangles. I lined the 3 1/2 inch line slightly above the edge of the fabric. I flipped the ruler and continued cutting triangles. I could cut between nine and ten triangles from a strip.

The apex of the triangle has three to five stitches that need to be removed; but, that takes no time.Next, I pressed the seam toward the background fabric. I also weighted the pieces and let them cool before I squared the blocks. Letting the pieces cool helps the seam allowance stay put. I was able to make 4 1/2 inch squares from this process. 

Remove stitches at the triangle apex
At this point, I'm ready to play with designs although the number of blocks I currently have wouldn't make more than a table runner. The design phase is truly the magic part of the process. I'll share a few designs in my next post on this subject. 

In the meantime, I guess I'd better get back to making more string fabric. Although, I'd better finish clue three of the Grassy Creek mystery first.
Pressed HST cooling

Sunday, December 13, 2020

String-A-Long--Post 1

Overflowing gallon bag of scraps
Last week, the Saturday Workshop chair decided to go ahead with organizing virtual workshops. Saturday Workshops is one of the Clark County Quilters guild activities that I anticipate every year. Members teach other members. It is a fun learning environment. I get to meet new friends and catch up with dear friends.

I wanted to help and offered to guide a string piecing session. I chose strings as my subject matter because strings are readily available. Some people save scraps that include strings. Strings could be cut from existing yardage. String piecing is a task I like to do because it allows my mind to think of other solutions to challenges in other projects!

Anyone could participate. For people at the point of piecing their strings into blocks, they will want background fabric. Participants might have a piece or pieces in their stash! Bonnie Hunter has several free patterns on her website using strings. 

Position of first strip
I have been adding to a gallon string bag that came from my friend Martha's sewing room. It was overflowing. It was time to use it. I also e-mailed Bonnie Hunter to ask her permission to use her free pattern for the guild workshop. Bless her heart, she not only said yes and to have fun; but, she responded a few hours after I had e-mailed her! Bonnie has in past blogs given her permission to use her free patterns on her blog to groups and guilds. I wanted to personally ask as a matter of respect to her and her work. I have credited Bonnie with the pattern and provided links to her string books and essential ruler.

Two strips sewn and seam pressed
For foundation, I'm using newsprint from the daily newspaper. To utilize the newspaper without the ink transferring to the fabric, I ironed the newspaper. I can remember my great grandmother talking about ironing the newspaper so my great grandfather didn't get ink on his white shirts! The heat sets the ink so it doesn't rub off or transfer to the fabrics during the piecing process.

I sorted the scraps. There were some pieces that were too wide for string piecing and some neutral scraps that worked better in my current Bonnie Hunter mystery project than becoming strings in my sewing session. I placed long strings in one pile and short strings in another pile. I like piecing with strings that vary between three quarter inches to two inches in width. While sorting, there were some string panels that my friend, Martha, had pieced. I don't know what her plans for the strings were. I also don't know if I'll use the panels in this project of if I'll save them for another project.

I cut a couple eight inch squares, a couple 10 inch squares and a couple 3 1/2 inch strips of the newsprint. I began the piecing process. Newsprint is great to use because it available at our house. It is easy to tear away after the strip is pieced. The words on the newsprint help me orient the strips in a more vertical position. Generally, I like to work with strips that contain a consistent width. Occasionally, I like to add a few strips that aren't because those strips add interest to the overall design.

Sometimes, people ask if it is necessary to use newsprint. The short answer is no. You can use other papers that are available to you. It is important to us paper that will easily tear for removal. Vellum and copy paper are often used in paper piecing. You can also use a fabric like muslin. In this case, the foundation remains in the piece. 
Adding more strings

Finally, if you can piece the strings together without buckling or bubbling or stretching happening, then you don't need to use a foundation. If I can piece scraps together without using a foundation, I will. Removing the newsprint takes time away from stitching!

When sewing strips to the newsprint, use a short stitch length. I use a 1.70 setting on my Bernina and 18 stitches to the inch on my featherweight. The shorter stitches make it easier to remove the paper without compromising the quarter inch seam allowances. Shorter stitches mean that the ends of the seam allowances are less likely to unsew. I prefer to press seams after stitching each one because the strips are flatter and easier to work into blocks, sashings and borders. I also like to chain piece the newspaper strips. During my sewing session, I had eight newspaper foundations going at once!

Chain piecing 
Beginning in the middle of the newsprint will allow you to piece on both sides of the foundation. I like stitching on both sides of the newsprint because I fill the paper faster. I also can press two seams instead of one.

If the string is longer than the paper, I cut it off with a pair of scissors. I do let the strings extend a bit beyond of the newsprint. For this project, I chose to use all of the strings. I have string pieced borders and sashing using one main color and I liked that effect.

As the strings cover the paper, it might feel like the project is messy; but, hang in there. Once the newsprint is squared up and the units cut, the strings begin to sparkle. I don't spend much time selecting a color to work with the previous string. I tend to pay more attention to
mixing up the width of the strips. If there is a string that is a little short, I'll piece a fabric to it so that it will fit. Sometimes, I'll include a strip of little leftovers that I've pieced together. I enjoy the process; but, I enjoy watching the pile of strips turn into a block most of all!

String "fabric" at the end of the session
My plan is to cut half square triangles(HSTs) out of the strings. I have a two yard piece of yardage to use as background HSTs. Before I cut the HSTs, I plan to piece more strings on the newsprint. HSTs can be used in a plethora of designs. Warning: HSTs can be as addictive as string piecing can!

At the end of my first stitching session, I took a photo of the strings ready to be squared. I've a good start! I'm linking to Oh Scrap the linky party at Quilting Is More Fun Than Housework.

Regarding COVID: 

Worldwide: 71.8M cases; 1.61M deaths

United States: 16.2M cases; 298K deaths 

Oregon: 91,420 cases; 1,138 deaths

COVID cases continue to rise worldwide. In Oregon on Monday, we had the highest reported numbers of new cases on a single day yet--1,610. After ten months of living in the midst of a pandemic, people are struggling from being isolated. The stress of not personally interacting, the stress of job loss coupled with the fear of being infected with the virus continues to wreck havoc with people's lives.  I am thankful for quilting!

More areas are receiving the vaccine. Canadians are being inoculated. In the United States, it is thought that we will receive the okay to distribute the vaccines from the FDA on Tuesday. The Oregon governor said in a Friday news conference that the plan is to vaccinate 10,000 people daily over the next ten months. She thinks by then the virus will be controlled.


Wednesday, December 9, 2020

Grassy Creek Clues 1 & 2--post 2

Pressed and cooling pieces
For clue number one of Grassy Creek, we stitched a lot of gold and gray half square triangles (HSTs) together. I cut a pair of strips from the gold and gray fabrics. From there, I cut enough pieces to sew a set of HSTs. After I pieced the set, I pressed them. For this mystery, I'm pressing the pieces differently. I'm using Sally Collins' tip of weighting the pieces until they cool. (Check the video at about the 35 minute mark for a demo of her pressing technique.)

Sally says that the seams will stay flat through the whole sewing process. I've started pressing that way on a project, but, abandoned it later. This time, I'm attempting to stay true to the process to see how well I like it. I covered the pressed pieces with a large square ruler. I weighted it with my spray bottle. 

Next, I trimmed the HSTs. I sew with a scant quarter inch seam so that I can trim to perfection. I'm not a perfect piecer; so trimming helps me look like I am perfect piecer! 

Cooled HSTs
For the first time, I used the Folding Corners ruler to trim the pieces after they had cooled. This is my new go to trimming tool. I liked how easy it was to orient the block accurately under the ruler. Those lines are helpful to ensure I've centered the block correctly!

In my younger days, I would have completed the steps as if it were a production line. I would have cut and kitted all of the pieces. Then, I would have sewn, pressed and trimmed all of the pieces. These days, my body needs more breaks. Sewing a few pieces and moving to another task helps me to not become so sore. This "mature" process also gives time for the pressed pieces to cool. I like working in smaller batches. I don't feel as overwhelmed with the scope of the project when I work on a few pieces at a time.

Finished HSTs
I finished clue one in plenty of time to start clue two! Clue two was to make a lot of hour class blocks with the neutral, gold and green fabrics. I had two Zoom sewing sessions this week. The concentrated sewing time helped me complete most of hour  glass blocks in-between checking out other people's projects. I even located a few strips in my "pre cuts" that I was able to incorporate into the blocks. 

Monday was our Mystery Mavens sew day. We have 24 members in our group. Twenty people spent a part of their day with us. Some people had to work or had other assignments. It was a great turnout and what I appreciate about the members is their helpfulness to others. 

Lining up my bonus HSTs for trimming
If someone is having trouble, there is a lot of support and trouble shooting to solve the issue. I have noticed that we are improving our descriptive techniques so we can explain options. I've also noticed that we are improving our listening skills too. Even though in person stitching is preferable to "demonstrate" what you are saying, Zoom is working for us!

I also appreciate that members post photos of their progress in our private FaceBook group. I love seeing all the different fabrics and different color ways people have chosen! It is a nice way to stay connected! We meet once a month. Although, we may choose to meet in a couple weeks if we find a clue is difficult to understand or if we are getting behind in the process. Before the pandemic, we met in a community room in a member's neighborhood.

One of the gals in our group pieces small scraps together and makes the most wonderful charity quilts. I had a bunch of small leftover scraps that I cut into HSTs. I sewed the HSTs into pinwheels as leaders and enders. The pinwheels are small. I did spin the seams. How cute is that little HST in the seam allowance? These blocks will finish to two inches. 

Completed Step 2--HSTs
Sewing the leftover bits is a goal of mine. I don't want a bunch of scraps leftover at the end of a project. When I reach the end of strip, I cut it into what ever useable sized piece in my scrap saving system that I can. I know that I'm more likely to use from my scrap saving system than I am to pull out those scraps and cut useable pieces later.

I don't know if these pinwheels will end up
in the quilt or if they will become "parts" to be used in another project. They are cute!

Pressed pinwheel from the back
Friday, Bonnie releases clue number three! I'm ready! In the meantime, I've put in a few stitches on the Unity binding. I've made a couple more Folic blocks with the leftover parts as my starting base. I'm finding cutting the pieces to fill in the leftovers tedious. Looking through the scraps to find a little more of the block fabrics and cutting a specific number of pieces takes time! I also needed to use a completed block as a guide so I could remember how I pressed the block! Truthfully, I'm happy to be using a few more scraps so in the end, more blocks will mean more stash reduction! 

Bonus pinwheels
Even though I've sewn mainly from my stash during this pandemic, I haven't seen much change in the stash stacks. I'm thankful I've stash to keep me plenty busy in a variety of projects.  

Last night, our Mt. Hood Quilters guild had a live meeting. There were about 65 members who attended the virtual meeting. It was fun to see people dressed up in their holiday tops, necklaces, earrings and hats! One of the members gave a demonstration of a Swedish weaving which we made out of a piece of felt. We had breakout rooms and I got to meet new to me members. 

I appreciated how members helped other members who were new to the zooming process. It was a fun meeting!


Sunday, December 6, 2020

Unity Border 10--post 16

Close up view of block elements
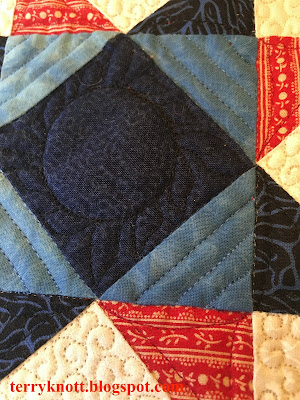
 To quilt the final border which is only at the top and bottom of the quilt, I again repeated elements. I used a template to quilt the circle. Next, I free motioned some shapes around the edge of the circle. (I quilted a lot of these in the center of squares and in the geese border!)

I used a ruler to quilt the straight lines in the triangles that surrounded the circle. I quilted a free hand continuous curve in the star legs. (I quilted these same elements in other parts of the border.) I repeated the background swirl design in this border. Repetition is good way to unify the quilting elements in a quilt. 

I have more than 18,000 yards of thread in this project. I have worked on it nearly every day since I started the Unity project with Bonnie Hunter in her COVID sew along last March. 

Finished block

It will be a wedding gift to my daughter and her husband to be when they marry. Her husband to be has followed along with the progress of this project. He made a point to tell me that he liked the colors, the stars and the quilting patterns. He also liked the back. He also said that my daughter is always using the quilts and he has none to keep him warm! He has asked that this one be for him. With that kind of want, I know that the quilt is going to a good home.

The reason I put in so many quilting stitches was to be sappy. I wanted the stitches to represent their love for each other and for each stitch to represent one day. In short, may the love they have for each other today only grow deeper with each day they are together.

Along the quilting journey, I did run into some snags. Sometimes, I didn't know what to quilt in a space. I found if I relaxed and didn't dwell on not knowing, I could hear what the quilted wanted. Although, I doubt that I will ever get over the fear of putting the needle into fabric and stitching relying on my subconscious plan!

Broken ruler foot
I did have an equipment malfunction. I broke the second #96 ruler foot. I was quilting straight lines and noticed the foot was at a slightly different angle. I thought that I needed to check to ensure the lever that holds the foot in place was fully engaged. When I checked, the foot fell off the shank. I was quilting at my usual slow and deliberate pace!  

I texted my dealer with a photo and the word "help!" She texted back to tell me she had another foot in stock and to bring in the broken one so she could exchange it. She reminded me that Bernina knew that there was a problem with this foot and had alerted dealers that this could happen.  I appreciated the fantastic customer service.

This week, I completed the quilting and am working on hand stitching the binding. Perhaps, I will finish this project before the big guy in the sleigh visits!

I'm linking to Oh Scrap and Quilting Is More Fun Than Housework

Don't forget to check out the Clark County Quilters quilt show. There are some amazing quilts, fun quilts and cute quilts in the virtual show.

View of the quilting on the back
Regarding COVID:
Worldwide: 66.7M confirmed cases; 1.53M deaths 
United States: 14.7M confirmed cases; 281K deaths
Oregon: 83,243 confirmed cases; 1,021deaths

The UK received vaccine doses first for front line workers. The media has reported that the vaccine will be available to frontline workers in the United States before the end of the year. California has been testing a drive through inoculation process to employ when the vaccine is available to the general population. Sources report this availability could be as early as next summer.

In Oregon, we continue to have record numbers of confirmed cases. This week, a news station reported that Providence Portland hospital has converted 100 beds in addition to the 82 beds already serving COVID patients. Plans are in the works to convert an additional 39 beds for COVID patients.. Staffing all those beds is an ongoing challenge. Other hospitals throughout the state are increasing beds available to COVID patients and are also facing staffing challenges.


Wednesday, December 2, 2020

Fabric Preparation and Why I Do It

Soaking in the sink
Since my Grassy Creek--Preparing For The Start post, I've fielded questions from one of my small groups about my fabric preparation. Some people purchase good quality cotton fabrics and sew the fabrics right from the bolt. Sometimes, I am that person; but, more often, I am not! There are generally at least two sides to an issue. In this case, one's answer is a matter of preference and not a matter of right or wrong.   

Why prewash? I tend to prewash my fabrics for two reasons. First: I want to know if that fabric is going to bleed when washed. If it is, I'm going to treat the fabric so that when the recipient washes the fabric, they don't get a surprise. Our city water has chlorine in it. I once pre washed a bunch of batik fabrics for a project. It took me several years to finish the project. When I washed the finished quilt, I was surprised that some of the batiks ran. The likely reason was that our water changed. When we first moved here, the water was untreated. Later, chlorine was added. The additional chlorine affected the colorfastness of the fabric. This made me think about water in other places where the gifted quilts would live. With quilts I give away, I tell the recipient washing instructions as well as include six Shout Color Catchers in the package. 

Second: I've learned over the years, some fabrics shrink more or less than others. For example, the gray fat eighths, that I purchased for Grassy Creek, shrank from one quarter to one half inch in width. Once I've washed the fabric, I dry it in a hot dryer. I do like the crinkly look of a quilt. I achieve that look using a batting that has some cotton in it. I like an 80 percent polyester and 20 percent cotton batting. The fabric doesn't shrink; the batting shrinks about three percent. For me, I'd rather not see some of the fabrics in the quilt more crinkly than others. Please note, some people preshrink their batting so the quilt won't have that crinkle look. Again, there is no right or wrong, rather preshrinking fabrics is a matter of preference!

Fabric liberally spritzed with starch
How do I prewash? I start the prewash in a white sink with hot tap water. I unfold the fabric and push it under the water. After 10 minutes, I check it. If there is color in the water, I drain the water, refill the hot water and add either Retayne or Synthrapol. Retayne fixes the dye to the fabric. I use that product on commercially printed fabric. Synthrapol is a special detergent that suspends the dye particles so they don't reattach to the fabric. I use Synthrapol on hand dyes and batiks. I follow the directions on the container. Once I've rinsed the fabrics, I refill the sink with hot water and let the fabric sit in the water for another 10 minutes. I continue to test and wash until the water is clear. If I still get bleeding after three "washings," I toss the fabric. Sometimes, the dye in the fabric isn't stable and I wouldn't want someone else having an unhappy experience! I dry the fabric in a hot dryer. This process removes the sizing from the fabric which makes the fabric soft or limp.

Why do I starch? Fabric from the bolt contains sizing. The manufacture adds the sizing to the fabric to aid in the weaving process. The coating helps the weft yarns withstand the tension of the weaving process and to reduce breakage of the yarns. That sizing or coating also gives the fabric body which makes it resist wrinkling as well as helps keep creases sharp when wearing a garment. Sizing is a resinous product made from polyester or vegetable sources or a combination of the two.

Starch is applied to collars and cuffs to stiffen them. Too much starch will result in the garment wrinkling during wear. Starch is made from a vegetable source. It is cheap and simple to use. I use starch to add back that "crispness" that was in the fabric originally. My cutting and stitching accuracy is better when I work with crisp fabrics.

Crisp uniform components
Why do I use liquid starch? It is cheap when compared to the spray sizing in the cans. I can easily adjust the amount of crispness I want in my fabric. It is easy to mix. I find a ratio of one part starch to two parts water provides the right amount of stiffening to the fabric. Sta-Flo is the brand that is most available to me. It is stocked at the local grocery store. 

I mix the starch in a spray bottle. I place the fabric in my shower and I spray the fabric until the starch has soaked all the fibers. I have found that a half yard of fabric fits perfectly in the shower. I will add layers of fabrics. Perhaps, I will process the red fabrics one day and orange fabrics the next. Once the fabrics are starched. I leave them for several hours or overnight to allow the fibers to soak up all the starch. Then, I hang the fabric to dry. Once dry, I iron the fabric. Now, the fabric is ready to be used in the project.

Does all of that effort help? Absolutely! I know when I wash the finished quilt, I have less chances of color bleeding in the quilt. I know that my quilt with crinkle equally as the batting shrinks. I have better cutting and sewing accuracy using the stiffened fabrics. My blocks tend to be right on the pattern size especially when a block has a lot of pieces in it.

Are there cons to this process other than time involved? This is the one question that I haven't received! Yes--because starch is a vegetable product, it is important to wash it out when the project is finished because bugs tend to be attracted to the starch. When bugs consume the starch, they will create holes in the fabric. I live in the northwest part of the United States. Bugs aren't such an issue here as they are in other parts of the U.S. or the world for that matter. 

In the end, do what works for you. If the process I've described here will zap the joy out of creating, don't do it. There are products and methods that do a pretty good job of removing the wayward dyes. Vicki Welsh has a wonderful post about what worked for her.