 |
| The back of the quilt |
When I began the QAYG project, I gave myself a couple "just for me" rules. These were to:
--Only use fabric from my stash.
--Use one thread to quilt the blocks.
--Make the project two sided.
--Use batiks on one side and cottons on the other side.
After I finished quilting the Quilt As You Go (QAYG) blocks, I was curious how they looked laid out together. I hadn't trimmed the blocks. The fabrics on the back have been parts of other projects or after buying it, I decided it wasn't the best option for the project that I was beginning. The colors say happy to me.
 |
| Add caption |
Cutting the fabrics was challenging in the beginning because the fabric on the front is directional. I needed to try to keep the lines going in the same direction.
One person with whom I shared the photos of the front and the back with said it reminded her of the candy, Skittles. It sure does! Actually, this is a great name for this project!
Notice that orange fabric in each of the photos? This is the fabric that I chose for my sashing. It is a little too close in value for the striped orange/pink fabric; but, it was the best that I had in my stash.
 |
| Front of the quilt with sashing |
On the back, I decided to hand stitch the edge of the sashing in place because I like handwork and I like the look of the sashing without stitching on it.
 |
| Back of the quilt with sashing |
 |
| 36"x36" nine patch unit |
Yes, it can be a little tricky to ensure that the sashing strips line up; but, it isn't impossible.
 |
| Finished quilted center |
 |
| Finished Front |
The designs that I chose compliment the motifs that I had already stitched. I really had to work to not switch to a different thread and to not fall back on my free motion fill stitches. I was impressed with how flat this little wonky section is at this point!
It was challenging and then I realized impossible to keep this block symmetrical. Probably I got off in the very beginning and just didn't realize it. I am calling it "in the neighborhood", "good enough" and "finished" so I moved on to attaching the remaining pieces.
 |
| Finished back |
 |
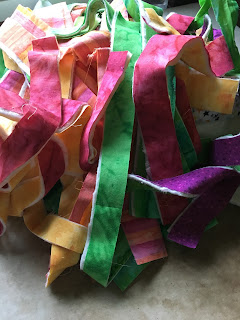
| Pile of scraps--the leftovers |
This is the pile of scraps that was left from trimming the pieces. I'll separate those into my scrap saving system.
What is left is on the QAYG project is to bind it, attach a sleeve and label. I may get to this in October.
Right now, I need to get back to the chicken project. I've been stitching French knots but still have a handful left before I quilt the flowers and border.
Next post, I'll be sharing about our trip to France.
6 comments:
This has turned out so lovely.
Your QAYG project turned out wonderful! I actually love how the color of the sashing works with the pink stripe fabrics. It kind of makes the sashing look like an extension of the pink blocks, in a very cool way!
Thanks, Luann!
Thanks, Nancy! Yes, that sashing fabric grew on me and I came to the same conclusion as you!
Beautiful. I love how different each side looks. The sashing color was a perfect choice.
Thanks, JoJo! The sashing did grow on me and not that I've finished, I'm glad that I decided to go with it!
Post a Comment