Sunday, June 23, 2019

Miss K's Mermaid post 2

Carrot peeling
After Miss K completed her cross stitch project, we made lunch. She peeled carrots for the relish tray and cooked the sausage for the pasta dish. She even toasted the bread and buttered it. She impresses me with her abilities as a seven year old!

Once she had eaten, she was ready to work on her mermaid project. Miss K has definite ideas about the fabric she wanted to use. You can read about how she created her design here.

I showed her how to use Susan Carlson's technique with fabric applique. It is a raw edge process. She liked using the glue and marveled at how easy it was to place the pieces.
Auditioning fabrics

Miss K LOVES working on the design wall. She auditioned her fabrics for the project and organized possible fabrics in groups. She was excited about using a particular scrap for her bucket. I asked if she could see it. . .she said yes. . .I looked at her project and I couldn't see it. . .until. . . .she pointed it out to me. Then, she understood what I meant about auditioning the fabrics.

We worked on her girl's face. She picked a skin type fabric and decided she wanted dark eyes with white spots. For the white spots, we might find a fabric that has the right size circle or she might paint the dots later.
Tail and shell bucket complete!

Our day was ending when she pulled out yellow fabric for hair. Originally, she had drawn a solid piece; but, after we talked about options she decided she wanted her mermaid to have Rapunzel hair. I cut a few strips for her and she arranged each one. She wants the hair to extend below her quilt. I like her idea. We will figure out how to make that happen!

Our next sew day came when she was home from school recovering from a fever that she had the previous day. While she was in slow mode, it didn't stop her from wanting to work on her mermaid! I was tickled that she wanted to work on her project!
Hawaiian mountains-A Miss K photo

She again veered from her original design because there was a particular piece of fabric that spoke "tail" to her. It wasn't enough to curve like in her drawing. I was planning to show her Susan's technique of cutting shapes to fit the space. Before I could demonstrate it, K had trimmed the fabrics and pinned them in place. There will be plenty of opportunities to share more of Susan's technique. K is confident with working on her project at her own pace. I LOVED that she was making templates and cutting fabrics on her own.

On our next sew day, she wanted to make the mountains. In some of Martha's scraps, there was a chunk of purple that had fusible on the back of it. Miss K liked the color. She was adamant that there be three mountains because if there weren't three mountains, it wouldn't be Hawaii!
Flower collage of tail progress

I suggested she consider adding a few little strips of waves to the background in a couple places to add more dimension to her work. She liked the idea and we cut a couple strips to apply later.

We spent the majority of the day working on her mermaid's tail. I showed her how she could create the curve in her mermaid's tail, if she wanted. Miss K didn't hesitate with her "YES" answer! She and her five year old sister chose fabrics with flowers that contrasted to the blue. They then cut out out the flowers and placed them in the shape of the tail. I was amazed at how well they were able to cut out the flowers. The Karen Kay Buckley scissors were the key to the cutting success.

It is FUN watching her project develop. She has decided on our next sew day, she will work on the sun and the mermaid's hair!

Wednesday, June 19, 2019

A Precious Thank You Note

Counting the wax pearls in accordance with the recipe
For Miss K's birthday, one of the gifts we gave her was a lip balm kit. Last week, she and I made the lip balms. When she arrived, she had read the directions and had set up the "laboratory."

Newly seven years old, she was able to read the directions and make each recipe. While I could have purchased a kit that made many more lip balm samples, the four samples she made also included an experiment which made the process more fun as well as educational.

Samples created at the end of the process
When she comes today, I'll have to ask her if she is using her lip balm and which type she likes best! I liked this product so much that I let Miss K know that I was born too early!!! She laughed!!

Every gift deserves a thank you. Now a days, the thank you is often given verbally when the gift is opened. Hand written thank you notes are rare. Even more rare are the ones that contain more than thank you for the _____! My mother impressed upon me to write a thank you note for the gift. In turn, I impressed upon my daughters to write a thank you note. We would spend part of Christmas Day and part of the day after a birthday writing thank you notes. Daughter Amanda also has taught her daughters to write thank you notes.

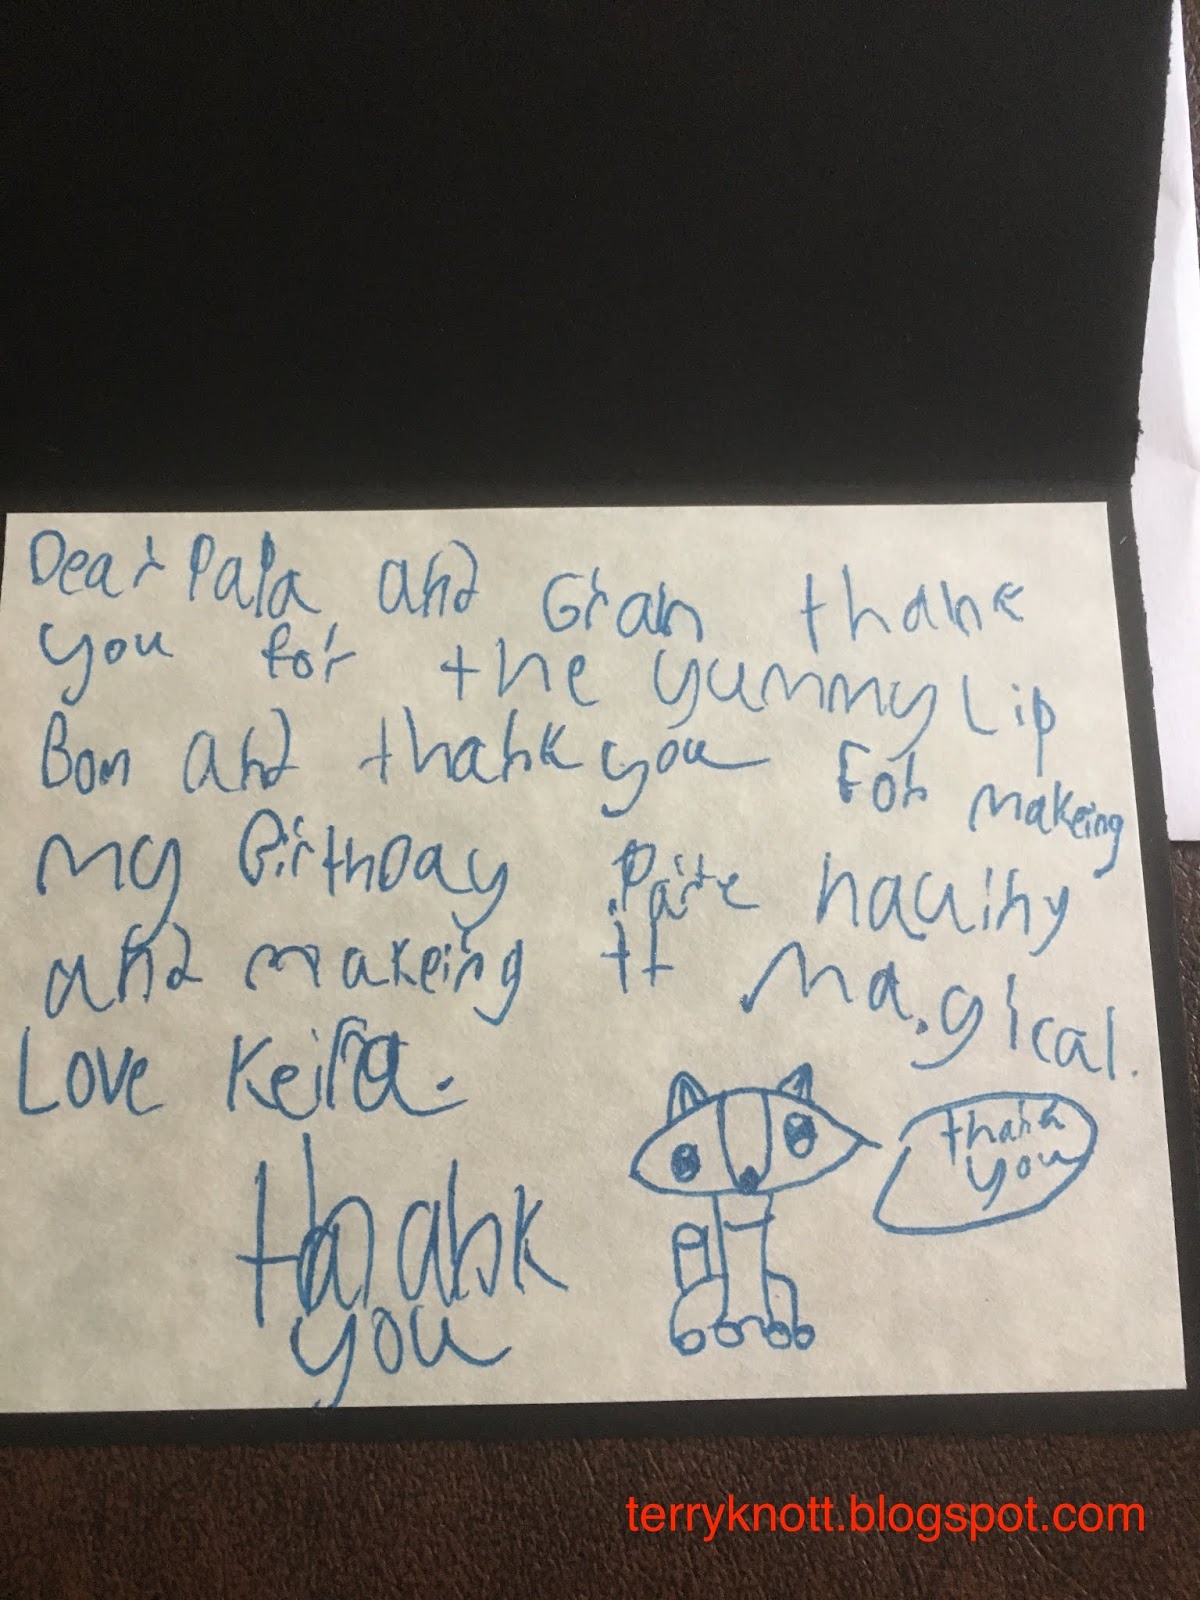
From the time that her girls were two, they were involved in the process. Perhaps, it was their artwork that made the card. Perhaps, they dictated to Amanda what they wanted written. Miss K created and wrote her first thank you note this year. It is priceless. There was one word that I couldn't decipher.
Front of the card

This was the text:
Dear Papa and Gran,
Thank you for the yummy lip balm and thank you for making my birthday party haunting and making it magical. Love Keira.

She drew a picture of a fox telling us thank you too. When she was over, I asked her to read it, which she proudly did. (This was the best way to figure out the word which was haunting!) I let her know just how special the card and the writing was and what a great job she did. (She liked all the feedback!!!)

She and her mama had made the cards. There was a golden snitch on the card front. She had a Harry Potter themed party. As the 14 kids arrived, they were sorted (with a phone application which was a questionnaire) into the various houses. Then they had "classes" like quidditch, potions and divination to attend. It really was a great party.

As for the thank you note, I'll be saving it. . .it is just too precious not to save it!!

Message in the card


Sunday, June 16, 2019

Happy Father's Day Dearest Bob

Adding wire to hang a quilt
In about a month, I will have been married to my best friend for 39 years. Friday was his birthday and today is his Father's Day.

Although he can sew, he doesn't quilt. In college, he would mark the hem of dresses and shorten the hems so the gals would look great when they went out with their boyfriends. He has always said the "bachelor" sewing class that his mom taught has served him well! For Christmas one year, he made his grandmother a blouse which she loved. We know she loved the blouse because she wore it often and not just on the days she knew he was coming to visit!

He does support my quilting journey. He has cut dowels and added wire so that my quilts could hang in an art hanging system at the library. When pushed for an opinion, he says what he thinks not what I would like to hear! His color sense and prospective is so much better than mine!

Shoveling the four cubic yards of compost one wheelbarrow at a time
Since 2009 when a car accident cut gardening out of my life, he took over maintaining the flower beds as well as continuing to maintain the two acres around our home.  When I snapped the photo of him shoveling compost this spring, his smile is telling me to leave him alone. . .he has a task to finish!!!! It took him three days to spread that compost. Had he not had a couple school runs for the grands, he would have finished in less than two days!

The last few years, we've gone to the local nursery on Mother's Day. I pick the plants; he plants and maintains them. It doesn't matter if it is a hanging basket type plant, a flower border plant or a vegetable plant. He keeps it going until the frost! (He even brings the potted geraniums in to the garage in the fall and over winters them!)

At the ballgame with daughter Amanda
He likes to cook and to try new recipes. His smoked ribs, brisket, chicken on the traegar are terrific every time. He bakes delicious cinnamon rolls and his chicken pot pie is out of this world. His Asian shrimp/pea pod stir fry is almost as good as his Kung Pao chicken. We line up for "Dad's burgers" and grilled steaks. Most every item he cooks is great. Mealtime is always an experience!

Demonstrating how the parts attach
He also shops for all the groceries. I didn't mind buying the groceries; but, after several decades the task had lost its luster! As a numbers guy, he calculates his savings and his expenditures before he gets to the cash register. He is great about getting the best bargain. Should I be the one purchasing the groceries, he has the list/ the app to get the discounts/the location of the item ready for me. He can remember some of the most trivial bits of information. I use to think my memory was good; but, his memory is better!

Fun for him is a workout at the gym almost every day of the week . . .unless he is planning to go on a bicycle ride or help a friend with a wood cutting project.  Sometimes, his friends come here to help with a wood cutting project. Sometimes, he goes fishing.  In the fall, you would find him attending an Oregon State
Tree removal project with his buddies
 University football game.

Family is important to him. When our daughters were in high school, he attended swim meets and water polo matches. He often timed events and he took an active interest in activities that interested his daughters.

Salmon for a dinner in Hawaii
For the last seven years, he has provided shuttle service to the grands. . .whether that was driving from our house to their mama's school at the end of the day or picking them up from their house at the beginning of the day. He even did the various routines: get breakfast, get kids dressed,  walk elementary school kid to school, pick up elementary kid after school and drive both kids to mama's school in the afternoon. In between, he read stories and played games. . .even if it meant he was playing a part in a make believe princess game or it was a chase game!!

Bob is a gamer. . .pinochle and cribbage are a couple games he enjoys playing with family members.

He's been retired for the last nine years. Yes, he retired early as a project manager in a road construction company.  During his working years, although we didn't do without, we also didn't live extravagantly either. The savings we built are serving us well now. In a couple of years, he will "mature" into social security eligibility.

Yes, Bob vacuums, washes windows, mops and does laundry.  He preserves pickles, jams, peaches, peppers. . .in short, he has a myriad of talents. His mom was a good teacher; but, his dad was a terrific role model. His dad also had all of those talents too!

Choosing oysters on the half shell at a market in London
Bob would prefer to not travel. Although, he did enjoy a trip to Normandy France a few years ago. Daughter Nicole, navigated as he  drove around Scotland. She captured a photo of him as we began our driving trip around a portion of Scotland. He indicated a couple weeks ago that he thinks Ireland would be a good place to visit. (I'll start planning a trip!!!)

He has a wicked sense of humor and is so quick with a comeback. The only way one can beat him at his game is when he decides to let you!

Driving in Scotland
So dear Bob. . .Happy Father's Day. You are truly one in a million. I am so thankful you are the biggest and best part of my life. I love you more than I did the day before!


Wednesday, June 12, 2019

Workout Top for a Grand--Fifth Finish for 2nd Quarter FAL 2019

Tracing the pattern pieces
I decided that I would take a break from all the pebbles that I was quilting on the star patch project and stitch a workout top for a grand. I sat down at the machine to begin; but, those darned pebbles called to me so I put this project aside until I completed the pebbles on the Star Patch project!

Originally, my plan was to cut out shorts from the shiny green fabric. Unfortunately, there wasn't enough fabric for a pair of shorts; however, there was enough fabric to cut out a workout top!
Top layout; ready for cutting 

First, I needed to trace the pieces. When there are small pattern pieces, I often use wax paper as my "pattern paper." It is cheap and usually available from the kitchen! Once I had traced the pieces and cut them out of the wax paper, I placed the pieces on the green fabric. I cut out the pieces and was ready to sew.
First finished top

Bernie, my first Bernina, and I stitched the top pieces together. I liked that the pattern directions include topstitching the seams. This was a great way to add a decorative touch as well as strengthen the initial seam.

 I needed to try the top on Miss J to see if the straps were the correct length. The strap length was fine.  It wasn't long until I had applied the elastic and it was finished. Of course, Miss J had to wear it. She loved it!!!!!!

There was enough fabric left to cut a second top so I did. I stitched it too! After all,  Miss K would like one too!
Second finished top

I used about a 1/4 of a yard of fabric which brings my total to 50 yards used out of my goal of using 57 1/2 yards from my stash this year. I've 7 1/2 yards left to stitch!! This is finish number five for the 2nd quarter of the FAL 2019. It was goal number 14 on my FAL list.

There were a few smaller pieces of the fabric left. I'm considering saving these in case those scraps can be used in a future collage project. . . I am crazy!!!!


Sunday, June 9, 2019

Thread Catcher--Fourth Finish 2nd Quarter FAL 2019

Contents of thread catcher kit
At least five years ago, I purchased this little thread catcher kit when I was having a day out with my friends, Martha and Linda. After lunch, we stopped at a cute quilt shop that was closing because the owners were retiring. In addition to the kit, I purchased a few yards of a lime green batik and a white background fabric. I haven't cut into those fabrics yet. (I doubt that I will run out of fabrics to start projects any time soon!)

I thought that these thread catchers would be a great gift item to make for quilt retreaters. Several months later, I went to retreat and one of the gifts given were these thread catchers! I was a little late getting this project off the ground!
Inside of thread catcher

I really don't know why it took me so long to actually make this thread catcher. I think I spent $6 on this kit. It didn't take long to stitch. It is ready for gifting now!

Outer view of thread catcher
This was goal number 18 on my 2nd Quarter FAL list. It is my fourth finish for the quarter.

I used a little more than a quarter of a yard.  I have stitched 49 3/4 yards of my goal of stitching 57 1/2 yards from my stash this year. I've seven and three quarters yards left to stitch to meet my goal!

Wednesday, June 5, 2019

Hemming Drapes -- A Project with N

Cutting off the excess
While daughter N was here for a short visit, she found some drapes at a discount chain store that she thought would be perfect in her London flat. She didn't know the length of drape she needed and of course, she needed more pairs than what was available at that location.

N thought for a bit and then decided to purchase ones that might be too long as well as purchasing the same drape in a darker shade of gray. She googled other locations of that store and over four days went to the closest ones looking for the style and shade of gray drapes that she liked best.
No going back now

 She texted her friend, who is staying at her flat while she looks for her own place, to measure the space for the drapes. Her friend used an application on her phone to measure the space and within minutes of the request, the "numbers" were available! Technology is wonderful!

N decided to return the darker gray drapes because she found enough of the lighter grey drapes. She even. . .now this shocked me, purchased a pair of drapes that have a floral design for something different! In the past, N was never one to choose a fabric with flowers in it.

 In the end, she had four pairs of drapes that were too long. N asked for help to shorten these drapes. Hemming drapes rates right up there with hemming jeans.  Both tasks are not ones I want to do.

Earlier that week, Joie went to the "spa" for her annual maintenance. Unfortunately, she required a part so who knows how long she will be away from the work room. Fortunately, Bernie was ready to stitch those hems! Bernie is my first Bernina.

N has sewn projects. She made a quilt when she was 11 years old. She has sewn a lot of swim suits; but, she hasn't worked on a project in the studio for a long time. . . .I don't actually remember the last time that she used an iron, rotary cutter and pins!!
This is taking too long

N said she supposed that I would be posting about the project. I replied, "Of course!!!" I couldn't resist documenting N working in the studio. She knows me too well!

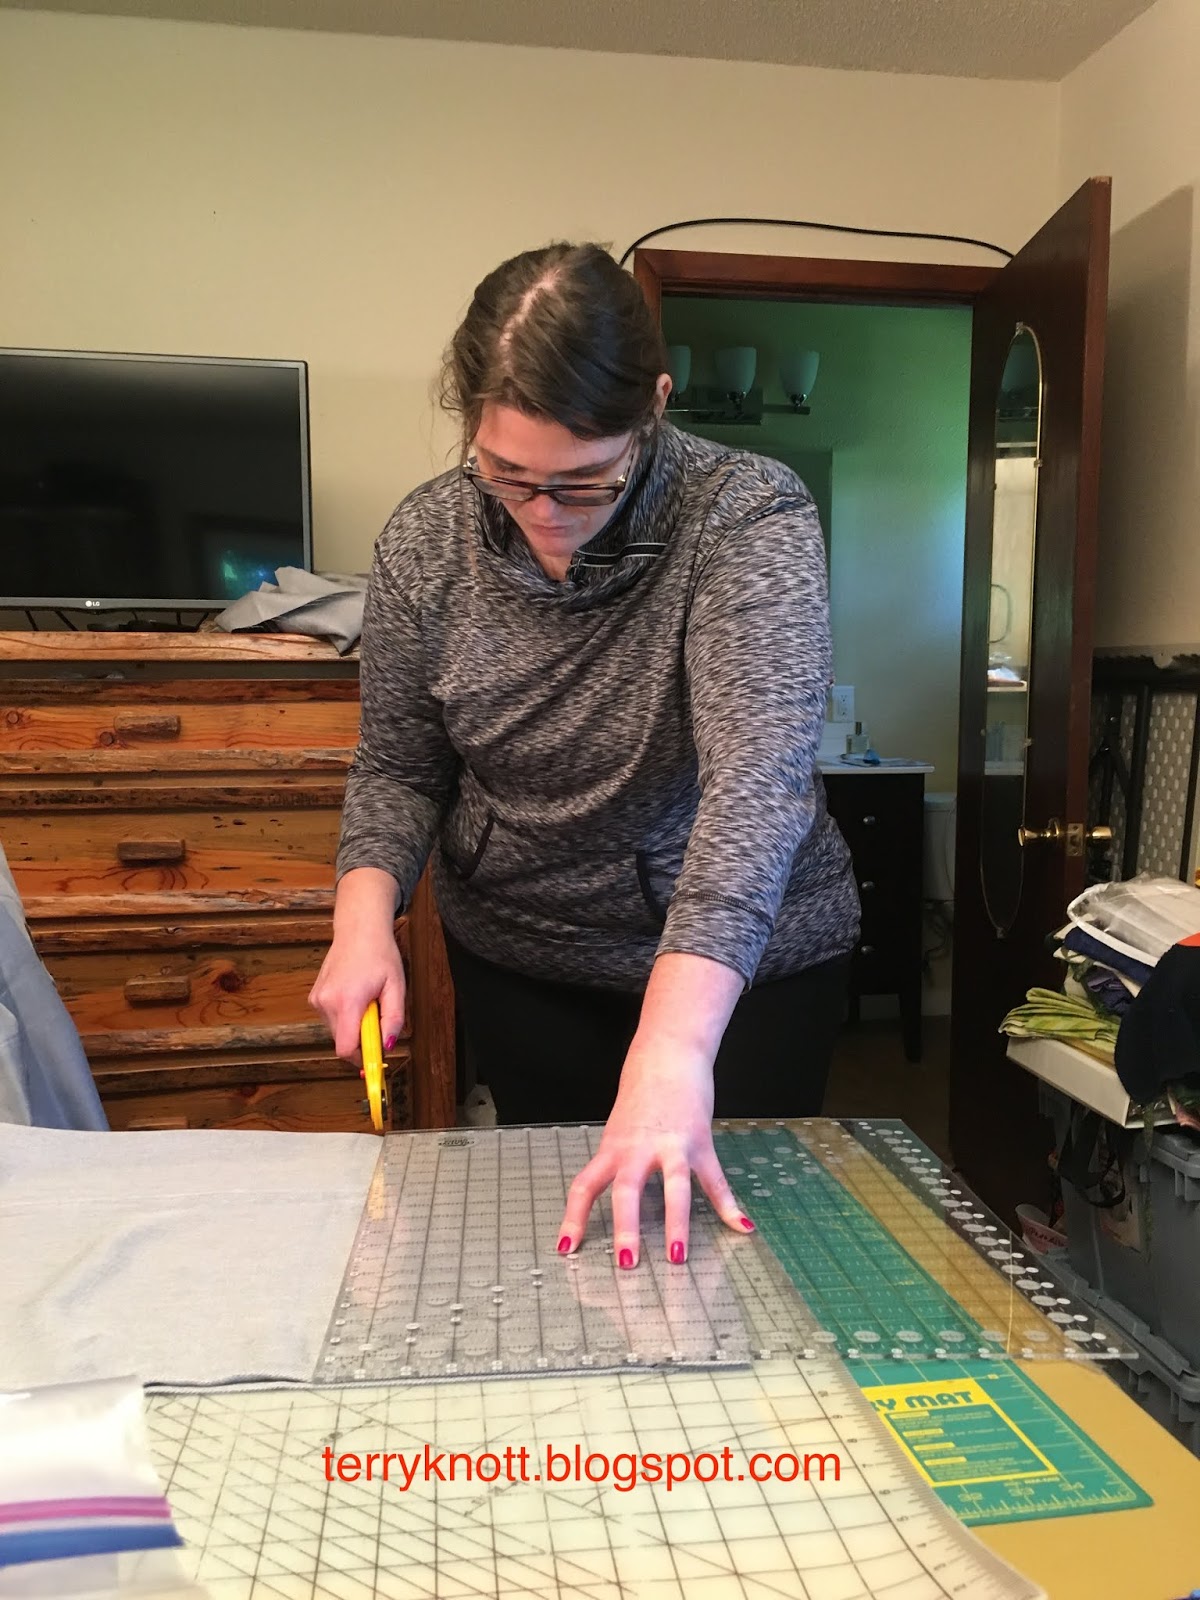
There was a little time spent figuring how much to cut off each drape. I was not involved in that process. Instead, I searched for a gray thread. I also needed to remember how to wind a bobbin on Bernie. It's been about a year since we've stitched together. Then, N cut the fabric. She made a comment that she hoped her math was correct because there was no going back now! (Her comment was so true. How often I have thought the same after I made that first cut!)
Finished drapes

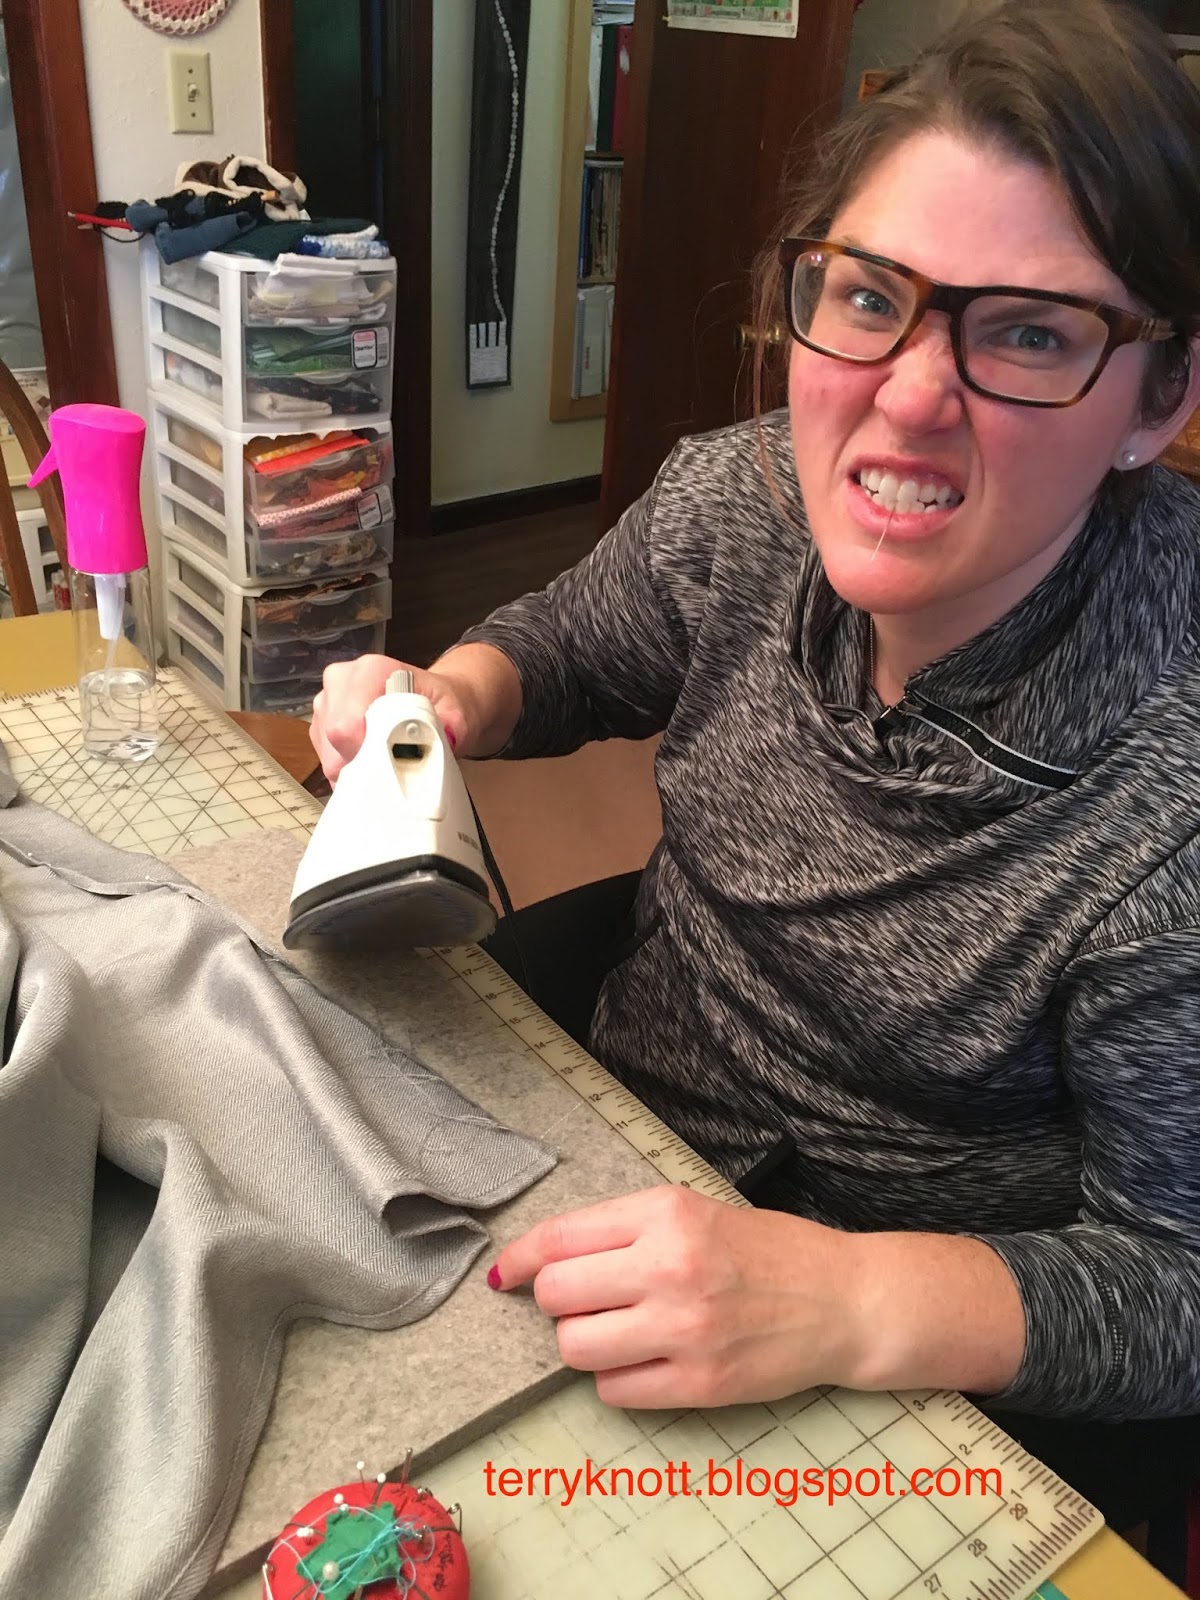
I then stitched a quarter inch from the edge. N pressed the quarter inch. She then pressed and pinned a two inch hem into the drape. She used a wool pressing mat which worked great. I pressed a few hems myself while she was on a work call. We spritzed the edge of the polyester drape with water. We used a dry iron on a polyester heat setting to set the edge. The wool mat held the heat as well as absorbed the excess water. It was a great pressing surface.

I stitched the hem. N razzed me about stitching so slow. . .I finished a hem and took a body stretch in about the time that she finished pressing and pinning the hem. I offered to change places with her; but she said she had a rhythm going that she didn't want to interrupt! (Had she sewn, it would have been pedal to the metal speed!)

Soon it was job done! She folded and packed the drapes. . .I hope that she will send a photo of how they look in her flat!

It was great to have her in Oregon for a few days.  of course, the time swept by all too fast. She managed to squeeze "Ripples" into her bag so two quilt projects ended up in her luggage. She said I could have visiting rights anytime! I made the half square triangles (HSTs) in "Ripples" from the leftover triangles in my "Dad's Stars" quilt. Although, I will miss "Ripples," I am honored that she wanted it and will enjoy it.
Ripples, London bound as well


Sunday, June 2, 2019

Quilting the Star Patch--post 2 Third Finish 2nd Quarter FAL

Quilting the alternate squares
As usual to begin the quilting process, I quilted in the ditch of all the seams. Cindy Needham calls this process "ESS" as in every stinking seam! I used silk threads from Superior and YLI that coordinated with the fabric. I found that a spool each of a cream, a green, a black and a brown thread worked well. Silk thread disappears into the background which is why I like to use it. I used a cotton 50 weight Superior thread to quilt the straight lines about an inch apart in the legs of the star.

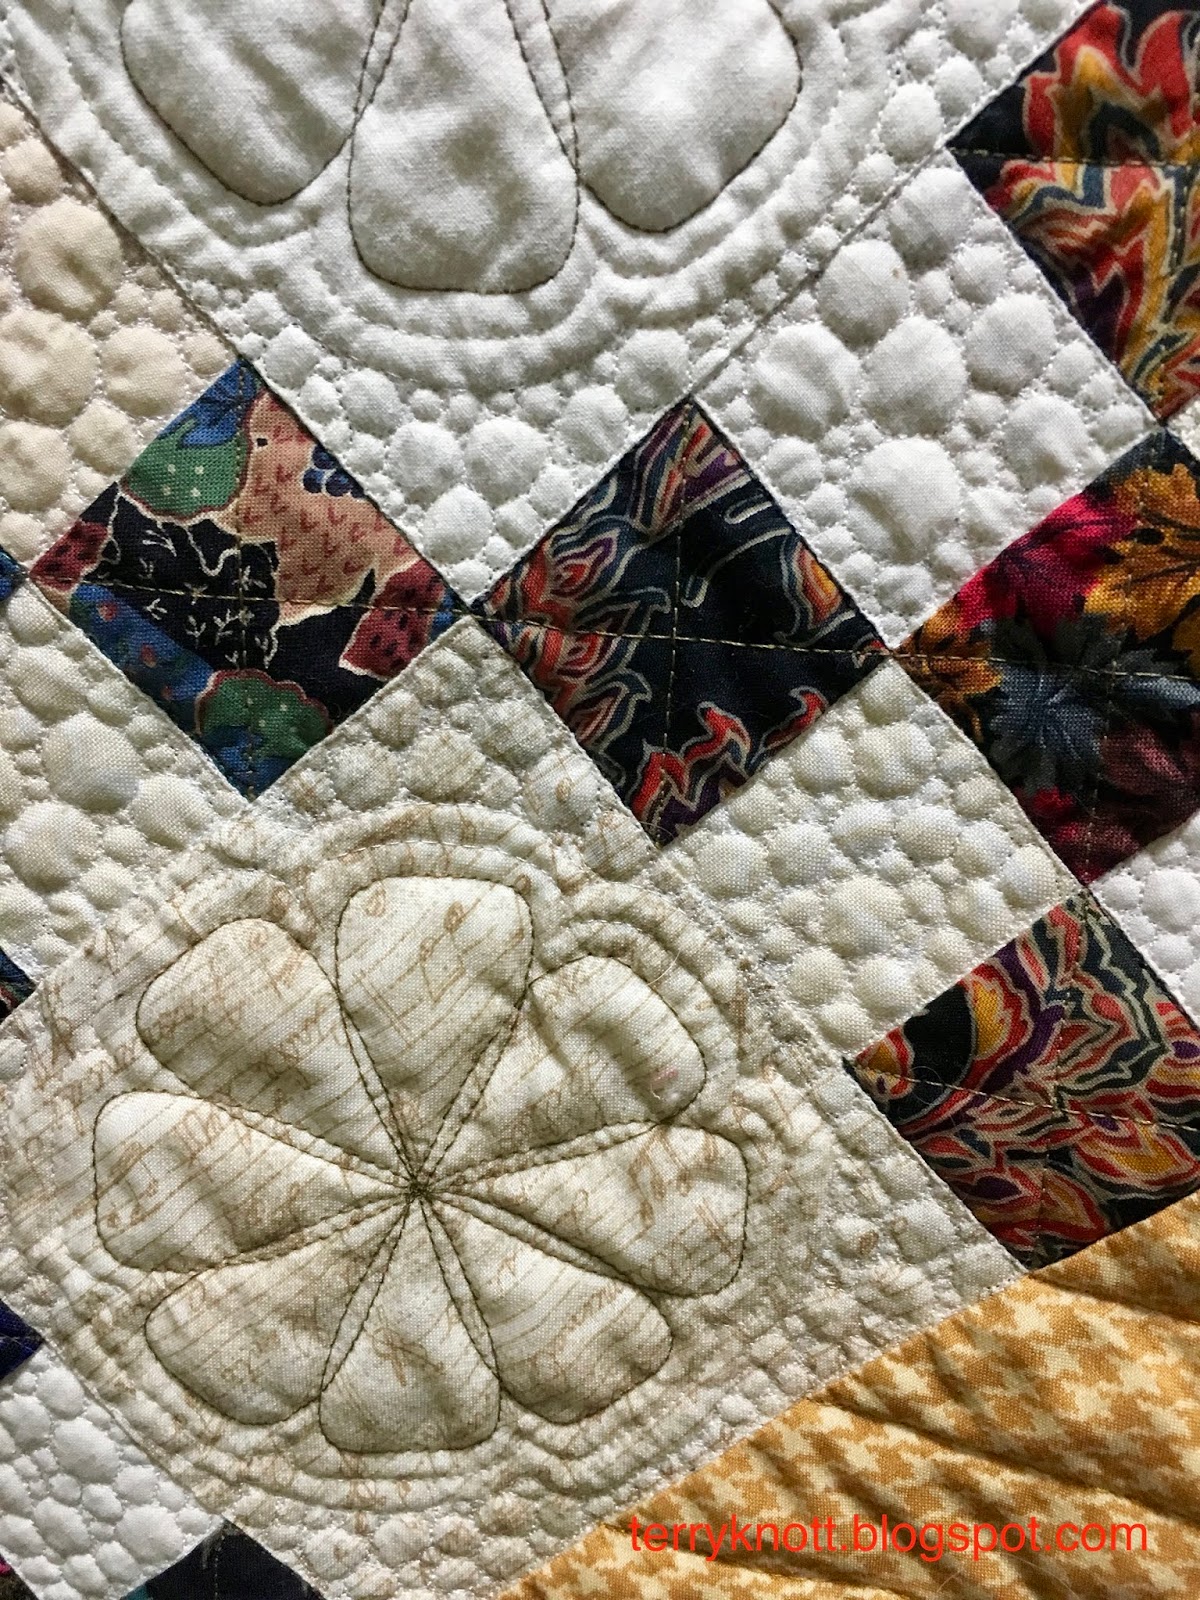
To quilt the alternate cream squares, I used one of my template rulers and made a circular design. I used a 50 weight Aurifl thread to quilt the design. It is a brown thread with green undertones. It took me about six minutes to mark and quilt a full square.

To quilt the printed squares in the center of the star, I quilted lines to repeat the lines that I quilted in the star legs. (It took me about two hours to quilt those lines.)
Ready for binding

I thought about all different sorts of ways to quilt the nine patches. I decided to keep the quilting simple. I quilted a straight line through the center of the "dark" squares. Then I kept looking at the light squares and started pebbling them. After echoing the circular motif, I pebbled the background of those squares as well.

Once I had determined the quilting elements for the various areas, all that was left was to put in the time to quilt! I thought that I would finish the quilting in a couple of weeks.

I had a set back when my arms started going to sleep while I quilted. My neck and my head ached from working in the "quilting" position. I do take breaks and stretch; but, some days, my body just isn't into quilting!
Close up view of the pebbles

I thought that I would have completed this project at the end of April or mid-May at the latest. All those pebbles take time! My body rebelled. Massage, chiropractic treatments helped. Next time, I
contemplate quilting pebbles. . .stop me!!!!!!

I left the corners to quilt after I had machine stitched the binding to the front of the quilt. Lately, I've been working on improving my machine binding technique. On this project, I decided to hand stitch the binding because I wanted to ensure that I kept all the points on the nine patches.

Quilting this project was a labor intensive project. I do like the motif that I stitched. It reminds me of sand dollars that we used to collect after a storm on the beach. The pebbles represent some beaches around the world. Personally, I like sand beaches; but, pebble beaches have a certain beauty too.
Finished back

Our book club read "The Tenth Island," by Diana Marcum. There was a passage in the book where she was enjoying the stars from the beach and she took a long path--seven years, before she returned to The Azores. The nine patches represent her travels and the straight quilted lines represent the few roads on the islands.

At our May book club meeting, our activity was to make a label. We met at Sharon B's home and in a hallway was a mirror that she framed with shells that she collected from the Marshall Islands. I was inspired to draw one of the shells from several angles and incorporate the drawing into the label. I actually used my sketchbook practice!

Label
This project will also be the "sample" to encourage members of the Clark County Quilters Guild to participate in the annual challenge. I'm in charge of the challenge which is to create a project from your stash using two inch squares. I'll save more details about the challenge for a later post. Next September, I'll be posting once a month to encourage participating in the challenge.

If you missed the first post on this project, you can read about it here. I used 10 yards of fabric from my stash in this project. Ten yards of fabric doesn't take up much room!! The gold fabric and many of the cream fabrics originated from my friend Martha's stash. She would have liked this pattern and she might have even made one of these herself!
I have stitched 49 1/2 yards of my goal o stitching 57 1/2 yards from my stash this year. I've eight yards left to stitch to meet my goal!

The cost of materials for this project was about $172. I spent about 72 hours completing this project. This is my third finish for the 2nd quarter. It was  goal number seven on my FAL list.

In May, I trained 29 people in Basic Life Support CPR. I don't have my May embroidery assignment completed yet. Although I finished creating it in the software, Joie, my 790 Bernina, wasn't able to stitch the designs I had created. She needed a spa day for her annual maintenance. Turns out, the gears in the drive that operate the raising and lowering of the pressure foot were stripped. The technician ordered the part. I hope the part arrives in a week. (Meanwhile, Bernie and I will be stitching. Bernie is my first Bernina.)

Wednesday, May 29, 2019

"Into The Depths" Is London Bound

Strip center possibility
Daughter, N, spent a little time with us over the Memorial Day holiday. For those of you who have followed this blog, you will note how "cold" she has been living in London. In other words, I haven't made her a quilt recently. I've fabric and I've a pattern; but, I've allowed other projects to get ahead of her project. During her visit, she perused my completed projects and selected a throw size quilt that she can curl up with on her couch on a cool day.

This was a project that originated from a 2 1/2 inch batik strip exchange. Some strips came from my small group; the majority of the strips came from participants from "The Quilt Show." I did add some strips just to be able to get the shading to work. It is an Elsie Campbell pattern from her book String Quilts published in 2009.

It was truly a great project to practice how value works. I spent hours creating strip sets and then cutting wedges which I then stitched together. It took a long time!!!

London bound
I named this quilt, "Into the Depths." It is a book club quilt inspired by "Shadow of the Wind," which
Carlos Ruiz wrote. It is made entirely of batiks.

Of all the throw sized projects I have finished, had I been the one to choose one for her, this was one of two I would have picked! Funny that we have the same likes!!!

It will brighten her space and bring a little of Oregon across the pond. All is good!!!!