Sunday, January 6, 2019

Miss K--Over for a Stitch Session

Miss K perfecting her texting skills
Miss K is six and a half years old. The last time she spent the night with us, she demonstrated how much her reading level has improved when she read the note in the mailbox to us. A few days ago, she sent me a text. It looked like this:

Wat  are doing  on Thursday
Josie is at school
I am getting shoos with Mom

And I  wot to xoss  stitch   With you


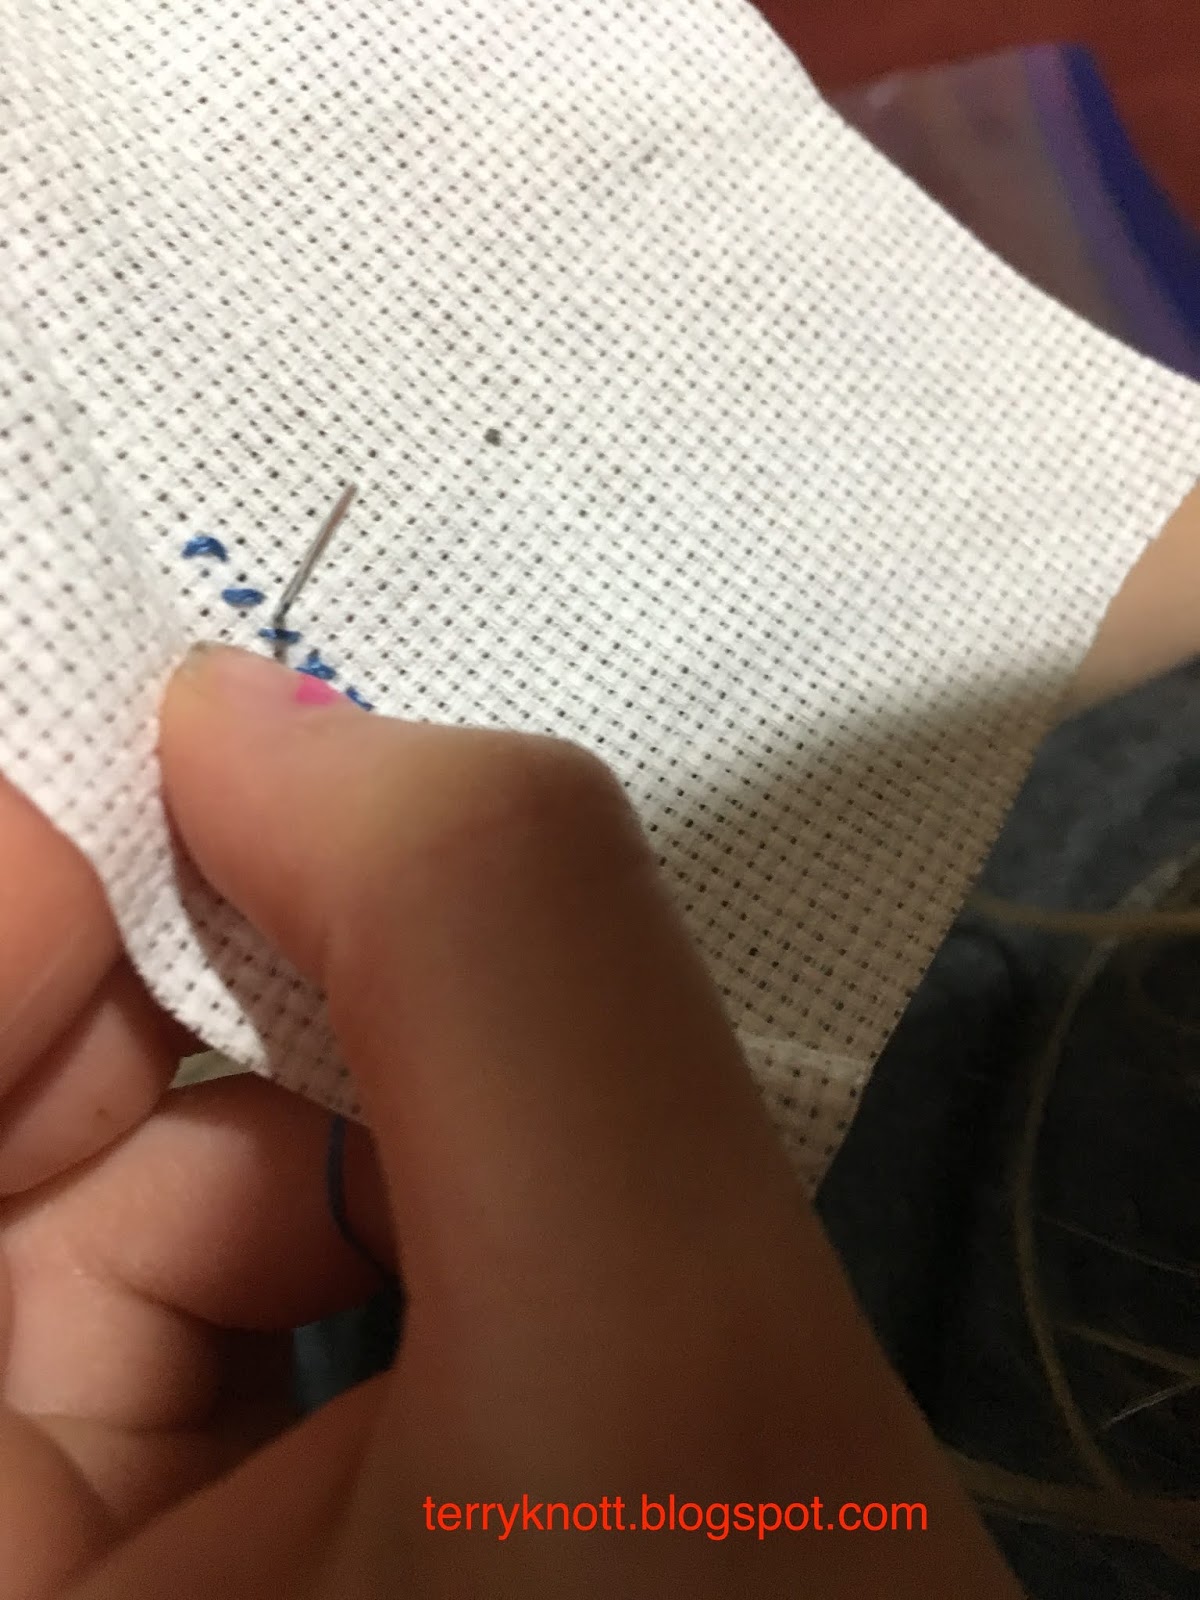
Stitching the letters
I was delighted to receive my first text from her. Of course, Thursday would work for for a cross stitch session. Miss K is focused on the cross stitch pattern. She can count the holes and enter the fabric with the needle and thread. Sometimes, she gets messed up with the stitch direction and has to unstitch.

Sometimes, she gets confused about where the 'hole in the fabric is. . .well, that part is confusing for me too!!

Progress at the end of Thursday stitching day
I really thought that both she and her mama would be coming on Thursday; but, she let her mama know that it was going to be a Keira and Gran day only. Mama was a good sport and found something else to do until it was time to go shoe shopping.

Miss K worked hard. While we stitched, she wanted to know how old I was when I started to sew, I was nine. She was excited that she was starting at six. She wanted to know how old I was until I could sew a dress. I told her 10; but, by 12 I could make one start to finish all by myself. She was quiet for a couple hours.

Just as she was finishing the lettering and the backstitching for the flowers and upper vine, she wanted to know if I thought she could learn to sew a dress when she was 12. I said as long as she keeps practicing sewing, she could! Her plan is to gift this to a friend for Valentine's Day.

Before she left, we made plans for her and her sister to come for a sleepover this evening. She plans to make progress on her piece. She thinks that she can finish the stitching in one more session. Time will tell.

I will remember this special day for a long, long, time.


Saturday, January 5, 2019

Miss K Is Stitching!--Post 1

Making a tracing of her original
Transferring the design to the background fabric
Miss K also wanted to have a hand project like her sister, Miss J. Miss K thought about her trip to Hawaii last summer and drew a picture to embroider. She traced her picture using the window as a light box. Tracing the major lines of her design would make it easier to transfer her design on fabric.

When it was time to choose her background fabric, she was adamant that her background fabric be "blue like the ocean."  She looked through the possibilities and found a piece that she liked.

Together, we fused a piece a stabilizer to the back of the fabric. She used a light box to transfer the design to the fabric.
Mini embroidery project
Stitching Xs
While I liked her fabric choice, it was a difficult fabric to choose embroidery thread that would be a good contrast on it. I suggested that she make appliqués for her shapes or paint the shapes or to choose a light fabric for the background. She hasn't made a decision on how she wants to proceed with that project; however, she really wanted to hand stitch. The next time she was over, I offered a little cross stitch kit to her. She loved that opportunity!
Rip repair

She chose a heart project to give to her friend for Valentines Day! She separated the floss and started stitching. She likes handwork. The other day, her mom shared a photo of Miss K's stitching a rip in a pair of pants. Her mom wrote, "I was folding laundry and saw that K tried to repair her pants. No knots. Just embroidery thread. Someone is rubbing off on her."

That "someone" could be Miss K's mom. She has been known to fix a problem without saying she had a problem! Then again, that "someone" could be me, which would make my heart sing!!!

We are going to need to schedule time together so she can stitch. She is coming tomorrow to work on her project. I look forward to seeing her design develop!


Wednesday, January 2, 2019

Star Patch post 1

Fabrics for the project
I was reading a post in Amber's blog last October. I liked the pattern she shared. Her post was about stitching the pattern during a quilt along that she was hosting. The project started October 29 and ended December 22. I decided to join in on the fun. I bought the pattern and registered for the quilt along.

While I waited for the pattern to arrive, I started perusing my overflowing fabric stash. For several years, I have fondled a tray of two inch squares that would work as the colorful squares in the nine patches. I spied a piece of yellow/gold check fabric, which came from Martha's stash, that would work for the center star. I had a bag of cream scraps to use as background. The gold fabric made me think of fall. I thought a fall quilt would be nice to have. Other participants may be making a Christmas quilt.

Miss J sorting the colors
The assignment for the first week was to cut the pieces for the project. Not having to cut 320 two inch colorful squares was awesome! (There is still at least that many squares left in the tray though!) My squares, for the most part are dark rather than bright. I hope that the dark will make a good sparkle behind the star!

Miss J helped me sort the best squares for the project. I watched her decide if a square was blue or black or pink and then followed her logic. She is good at making a decision. She is also good about keeping her decisions consistent!
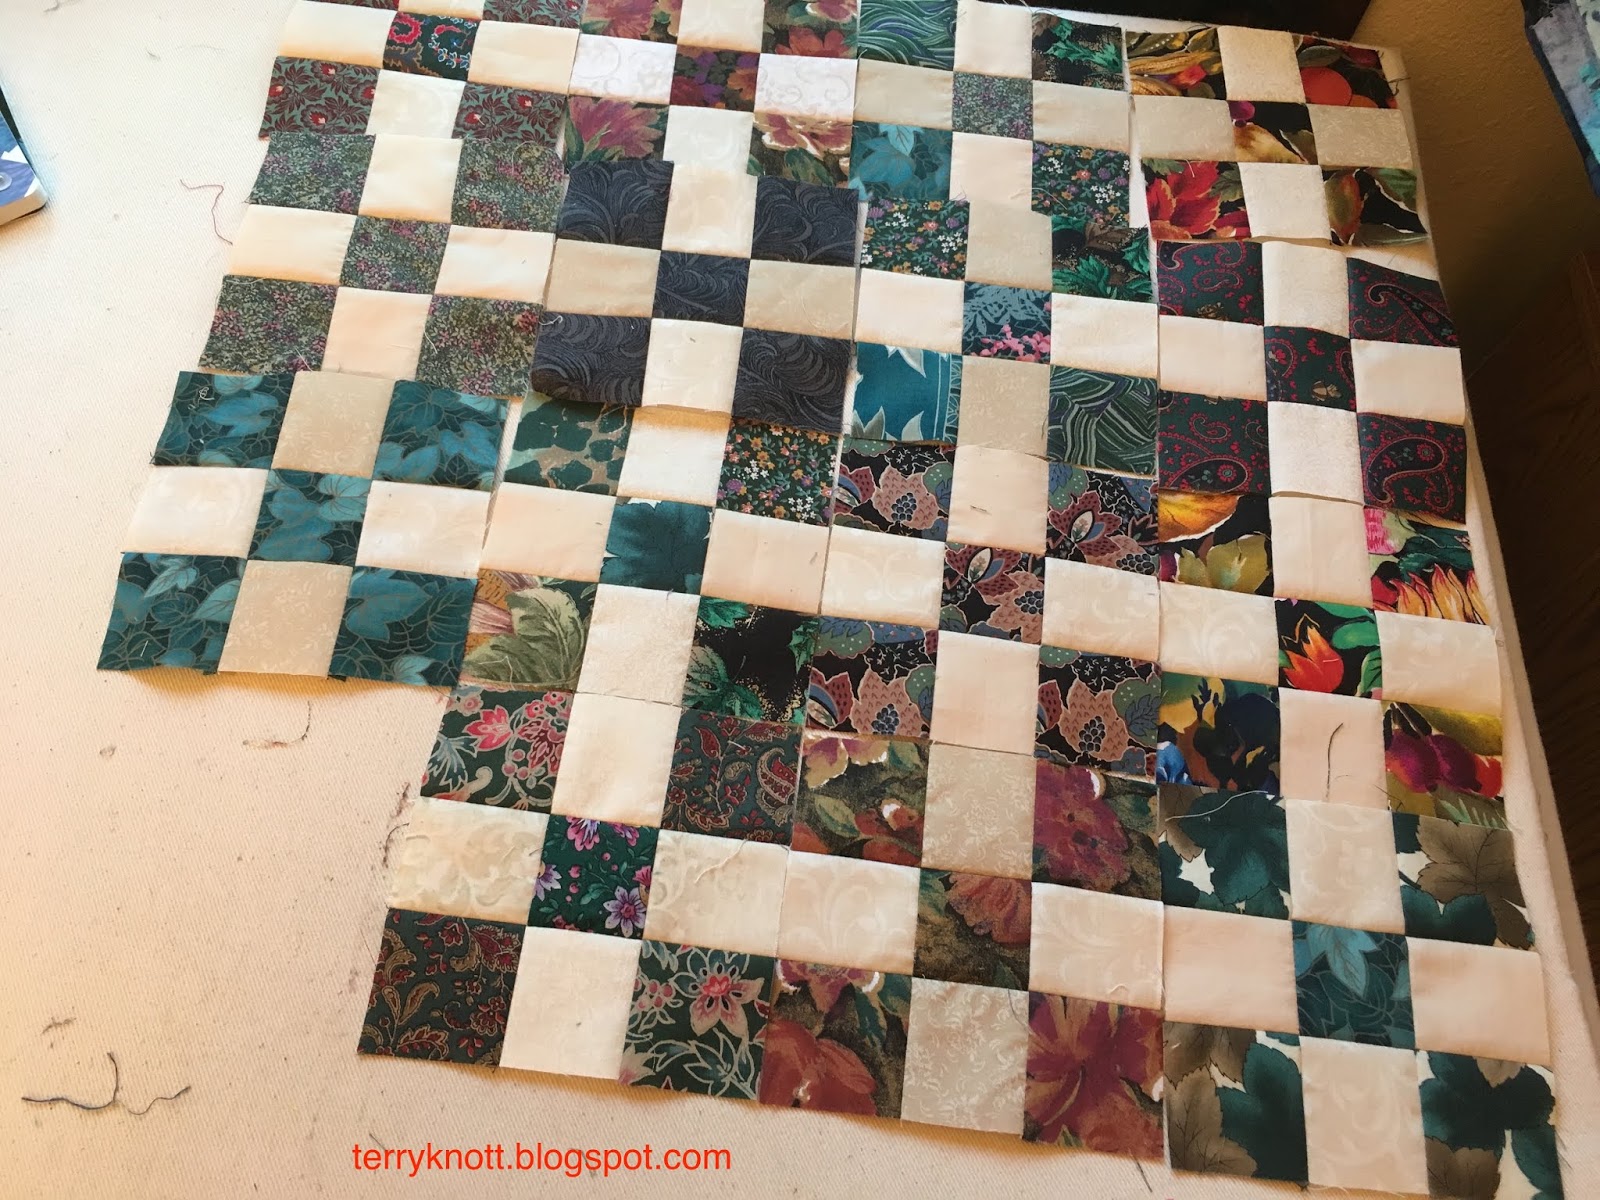
Project pieces cut and ready for stitching 

Cutting the 240 background two inch squares took some time; but, I used up a bunch of the cream scraps that were crammed in the drawer! I did sort through fat quarters to find one that I could cut a few five inch squares.  I also had to scrounge to find some other cream background fabrics to cut 80 five inch squares and some other parts to the quilt.

I like scrappy quilts; but, I'm not all that confident about my fabric choices. As we stitch through the project, I'll see how well my scrap choices work!
15 nine patches--goal for the second week

For this quilt along, we post to Instagram. I'm not much into social media. I rarely post more than a happy birthday on Facebook; I've tweeted once and I didn't have an Instagram account. I wanted to see the other people's progresses so I opened an Instagram account.  Let's see how that goes!

For the second week, we were tasked with stitching 15 nine patches. Stitching 15 nine patches of 60 was a doable assignment. I stitched slowly, pressed carefully and in not too long a time, the blocks were complete.
Flying geese ready to become star legs

The third, fourth and fifth weeks had the same stitching assignment. Since my project was
organized, I'd spend a few minutes stitching blocks each day until I'd stitched the assignment for that week.

Week six, we were tasked with making the checkerboard for the center of the star and the flying geese blocks that make the star legs. Amber's technique for the geese is to cut a square, draw a diagonal line corner to corner, stitch on the line and trim a quarter inch from the stitching line.

What is nice about this technique is that having four edges helps to keep the orientation of the sewing line truly on the diagonal. I found it helpful to baste the stitching line at the intersection of the nine patches to be sure that I didn't cut off any nine patch corners.
Finished Star Patch top

The downside to her technique is that there are two huge half square triangles remaining. I stitched it, sewed four together and made two large pinwheel blocks which I plan to use on the back of the quilt.

The other change I made was to use the technique of spinning the intersections on the nine patches so the seams alternate being pressed to the dark and to the light. The blocks are flat.

Arranging the leftover chunks
Week seven, I constructed the top. I did need to clip a few seams so I could press away from the nine patch blocks. It wasn't difficult to press. I didn't allow myself much "thought" time in arranging the nine patches or the darker cream plain blocks. I did get to "unsew" a couple of sections because I had stitched the section incorrectly. I will trim the edge after I stabilize it. I like how it turned out so much that I may make another! I rarely make a second of any quilt pattern.

Week eight I constructed the back. I like pieced backs. Piecing the back is a way to use some or most of the left over fabrics. Sometimes, I like the back better than the front!
Pieced back

Amber provided a tutorial for incorporating the extra nine patches that we pieced. I wanted to use the huge HSTs that remained after making the flying geese blocks in week six. She pieced her blocks in one long row; I pieced mine five in one row and four in another. If I had made more nine patches, I would have used them!

I needed to break into my stash for a chunk of fabric so that I could piece a 65" x 65". back. I used about a yard and a half and I also made the sleeve.

Now to layer it, baste it and quilt it! Perhaps, I will get a start on the quilting in this quarter!


Monday, December 31, 2018

Mesh Grocery Bag--Eighth Finish for 4th Quarter Finish A Long 2018

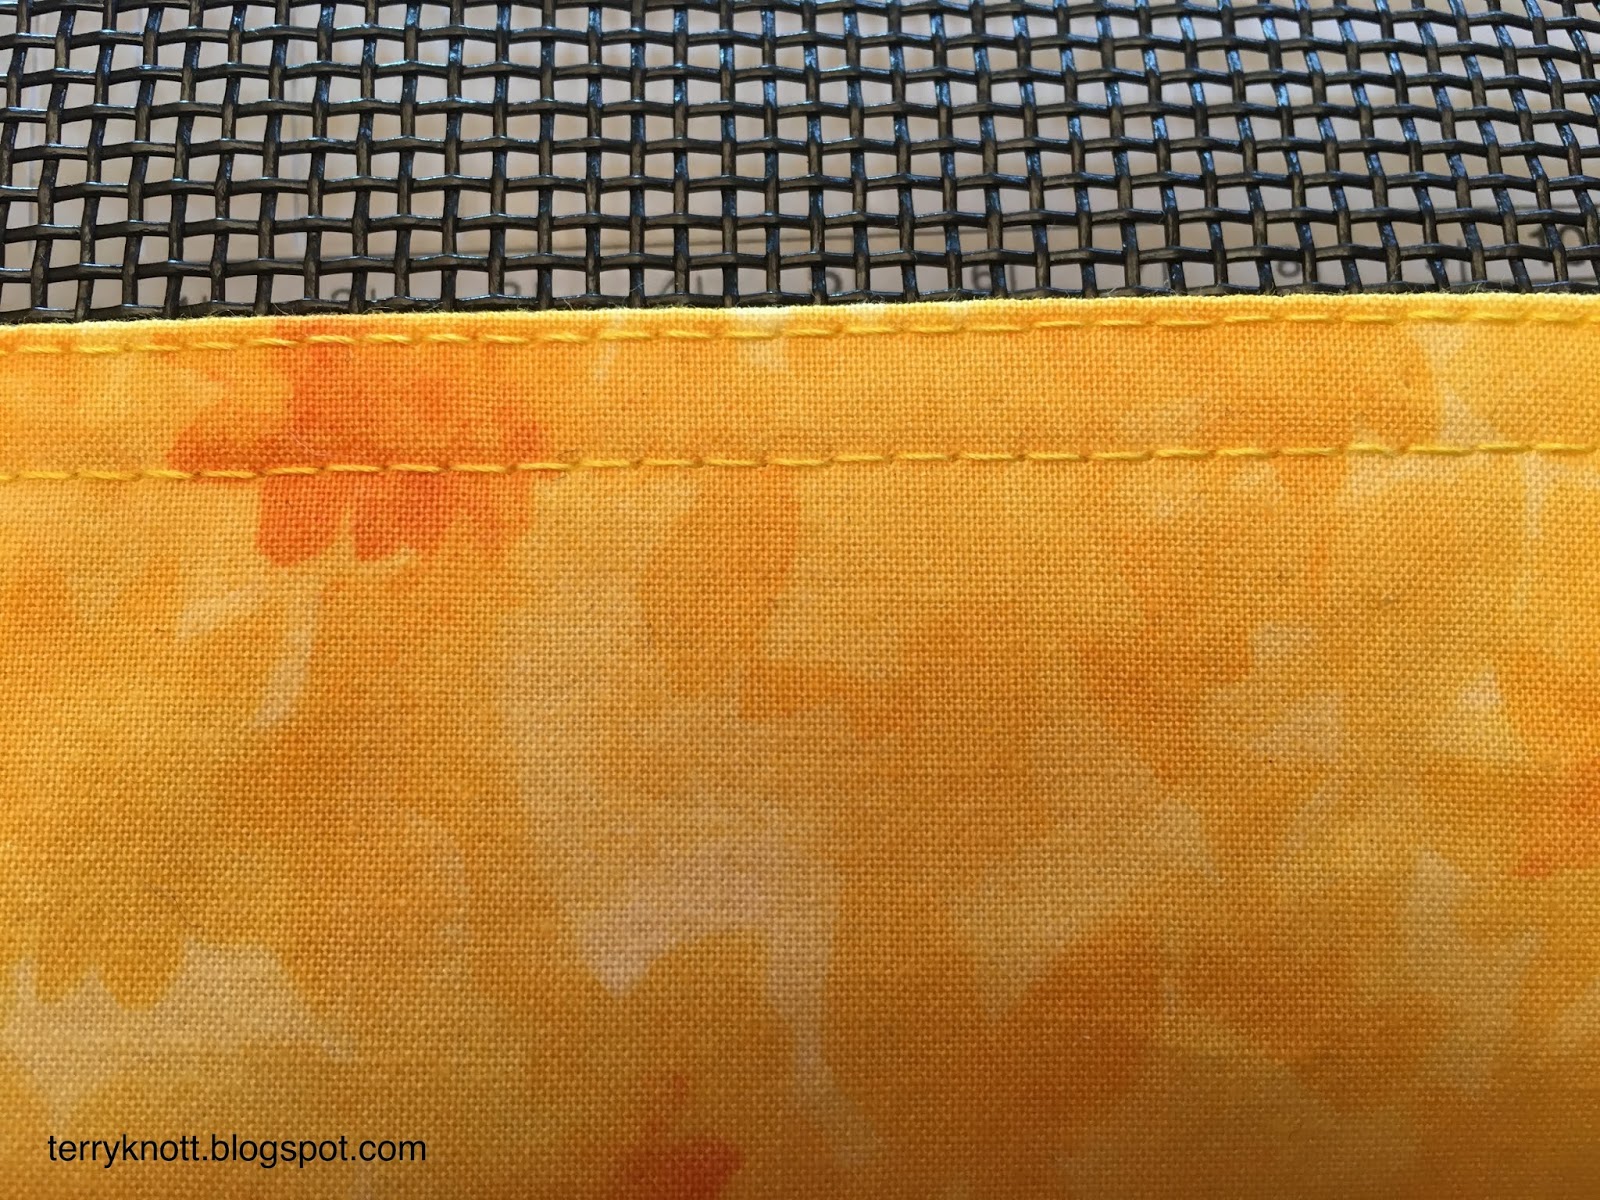
Pocket topstitching

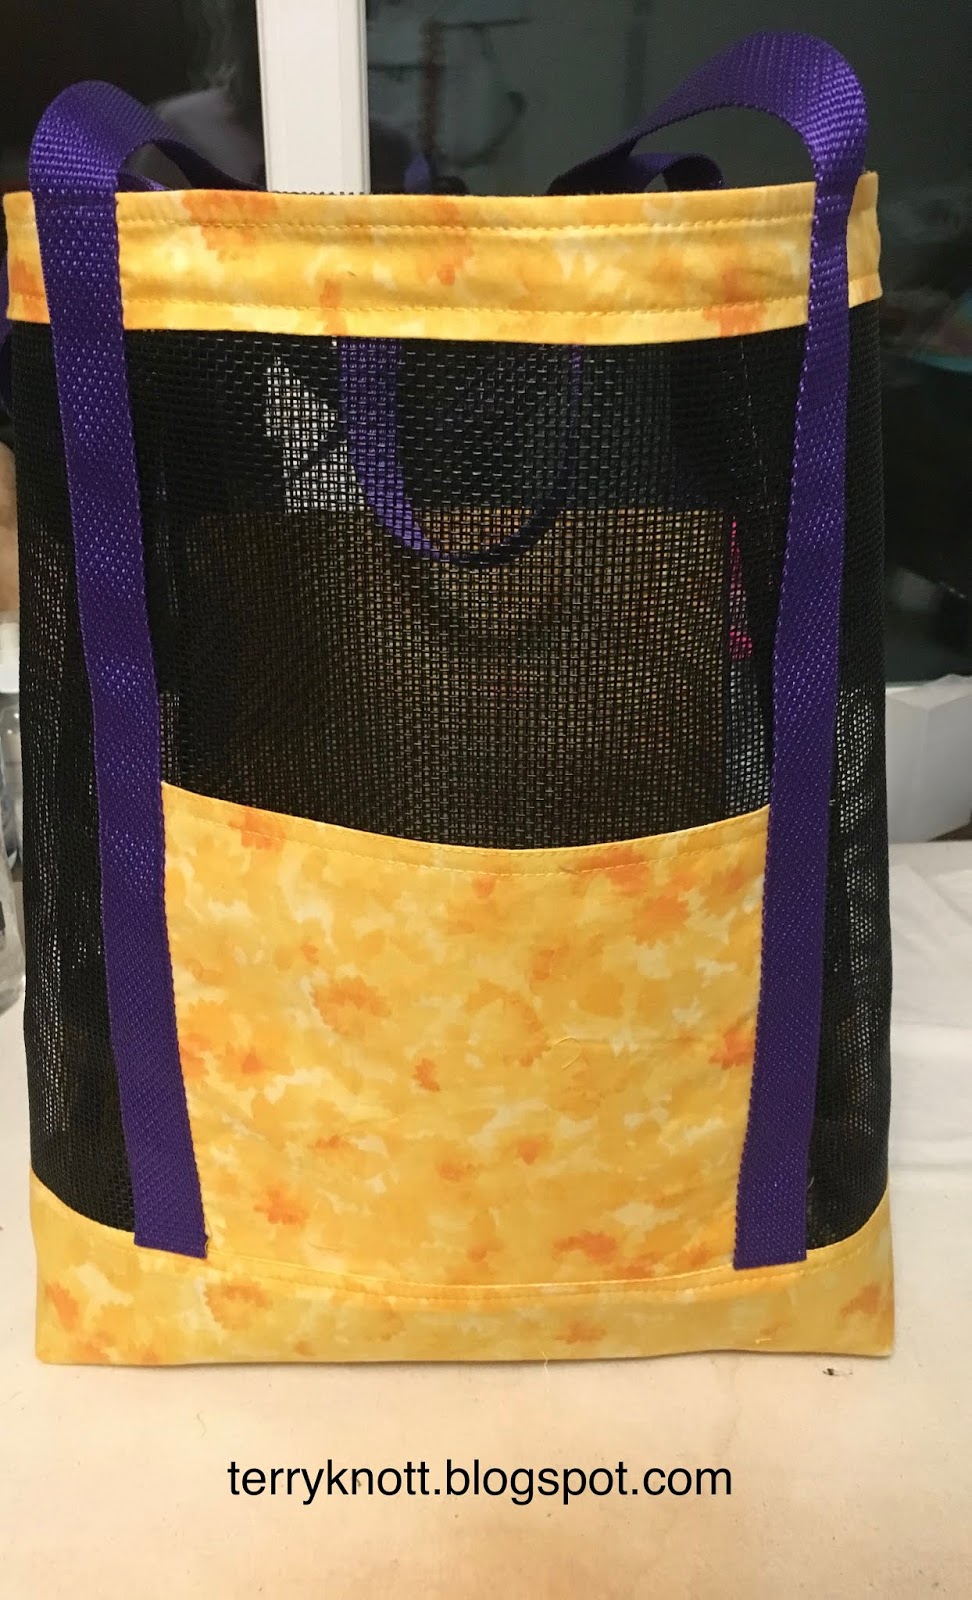
Today is the last day of 2018. Gosh the year flew!! I looked through my project list for this quarter and determined that I could make one more finish . . .a mesh grocery bag. I've had the supplies for more than a year. I used half a yard of cotton fabric, half a yard of mesh fabric and three yards of webbing. The 8 1/2 x 11 inch two sided photo copy of directions for the bag included a diagram for cutting, placement and stitching.

Stitching the webbing
I found it difficult to stitch the fabric on top of the mesh. The fabric would stretch. If I could stitch with the fabric next to the feed dogs, I had less stretch. I switched to a dual feed foot and had even better results. I also found it difficult to understand the directions; but, in the end, I did complete a bag! For example, press pocket in half. . .does that mean hot dog or hamburger style??? It meant hamburger style!

The edge stitch foot was great for applying the webbing. I had no slippage issues as I stitched. For extra security, I stitched several times across the top of the webbing. Then it was time to stitch a French seam on the bag sides. The mesh was a bit unruly and difficult to fold on itself. Next time, I would stitch the first seam at a bit less than a quarter of an inch and the second seam a bit more than a quarter of an inch. For this bag, I stitched 1/4 of an inch as the directions stated. Instead of stitching again  at 1/4 of an inch, I stitched a 3/8 of an inch seam allowance to ensure concealing the raw edges from the first stitching.
Boxed corner ready for the zig zag

To make the box corners, I cut a two inch square out of the corners. Next, I pinned the layers in a diagonal which I zig zagged. My 790 Bernina, Joyie, stitched through all those layers without a hiccup. I turned the bag right side out. The box corners pushed out beautifully. The bag stands up nicely.

It is ready for gifting next year. (I already have a recipient in mind!!!) I used a yard of fabric which brings the total yardage I have used from my stash to 42 1/2 yards. I am seven and half yards short of meeting my goal of using 50 yards of fabric from my stash. No worries, I plan to stitch another 50 yards from stash next year plus this amount from this year. That means my total goal will be stitching 57 and one half yards out of my stash! I can do this!!!!!


This was goal number 19 on my 4th Quarter Finish A Long list. It is my eighth finish for the quarter.

This evening, I'll be ringing in the new year with my best friend and husband. . .although, we may have the year rung in via Australia time! Wishing all of you a safe and happy new year. May your dreams and wishes become a reality in 2019!


Sunday, December 30, 2018

Chicken Placemats--Seventh Finish 4th Quarter Finish A Long 2018

Comb, beak and wattle basted into place
Last Christmas my friend, Martha, gifted me supplies to make four chicken placemats. I sure thought that during the year, I would stitch this project. Other projects went under the needle instead. I decided that I wanted to finish this project before the end of the year. I pulled it out of my "To Do" box and read the directions. I traced the pattern pieces on tissue paper and cut out the pieces.
Stipple quilting design

Stitching the wattles, beaks and combs took some time. After each was trimmed, turned right side out and pressed, I basted each on the placemat. The next day, I pinned the batting and the backing to each placemat. I stitched around the outer edge, leaving a hole to turn the placemat right side out. I trimmed away the extra batting, turned the placemat to the right side, pressed the edges and slip stitched the opening closed.

Using the main color of each placemat, I free motioned stitched a stipple design across each placemat. Last, I stitched a button to represent each chicken's eye. These will be a great gift.
Finished chicken placemats

This project was goal number ten on my 4th Quarter Finish A Long list. It is my seventh finish for the quarter.  I used two yards of fabric to make these placemats. I've now used 41 1/2 yards of fabric from my stash. I've 8 1/2  yards of fabric to go to meet my goal of using 50 yards from my stash this year. With one day in the year, left, I'll not meet my goal. No worries though, I'll just add the 8 1/2 yards to my goal for next year!

Tuesday, December 25, 2018

Christmas Card--Sixth Finish 4th Quarter Finish A Long 2018

Piecing and trimming complete
View from the front
Finished card
My friend, Martha, had a kit in a small plastic bag to make this card. It reminded me of her. I wondered if she planned to gift the kit, give the card and/or make a bunch of cards. I won't know the actual answer since she died last July. I've had it sitting on my sewing table since early September. It is paper piecing, a technique that she loved. I am not as adept at it as she was. Perhaps, that was one reason why I procrastinated with stitching the project. Before I started, I made a copy of the paper pieced pattern and I noted the dimensions of the fabrics in the kit in case that I decided to stitch more.

With six pieces to stitch, it didn't take long to stitch the piece together. I cut out the pieced block on the dotted line. Then I removed the paper. Using an Elmer glue stick, I liberally glued the opening of the card. I placed the pieced tree in the opening. I cut another piece of card stock and glued that in place. Covering the back of the piecing made for a more finished look to the card. To ensure the glue activated, I pressed the paper.

I like how it turned out. If I were to make more, I would need to purchase card stock that either had the center cut into a circle or an oval--there were patterns for both--or figure out how to cut the card stock myself. I doubt that I take on that project. . .but, then again, you never know!

It took me about an hour to make this card. It was goal number 15 on my 4th Quarter Finish A Long list. This is my sixth finish for the quarter. I stitched it Christmas morning.  I plan to gift it next year!

While I stitched the card, I thought about Christmases past. When I was a kid, my brothers and I would wake up early. Mom's and Dad's rule was that you had to stay in bed until it was light. Waiting for the sun to rise was hard! Once we were up, we could open our stockings. We used to bring our stockings into Mom's and Dad's room and open the stockings there. The guise was that Mom and Dad could rest a bit more! Of course, once we were there, Dad would kick us out of their room so they could get dressed. I think it was Dad's way of making the day last longer. Oh, the anticipation I had to see what Santa had left in my stocking!!!

When we picked up our stockings, there often was other evidence under the tree that Santa had been there. . .my brother received a lego toy train one year; I received a doll that was about as big as me complete with dresses that were just like mine; my youngest brother once received a hot wheels set complete with a track. My dad died two years ago on Christmas Eve. He was the one that put together the train and the hot wheels track. It must have taken him hours. He probably had just gone to bed when we were ready to open stockings! I still miss him.

No other packages were opened until my mom's parents arrived. They would arrive soon after the sun had risen. They were laden with packages, appetizers and side dishes for breakfast and for dinner. It was a big deal to me to share the morning festivities with them and then have them hang out with us until after Christmas dinner. It was a part of the holiday that I looked forward to each year. My grandmother would have knitted us mittens and caps and often there was another gift that she had stitched.

She and my grandpa said that they liked to see our faces as we opened gifts. It was always a fun day. So each Christmas, I think of those days. I hope that today brings you much joy and that many happy memories are made.

Merry Christmas!


Sunday, December 23, 2018

Kitchen Towels--Fifth Finish 4th Quarter FAL 2018

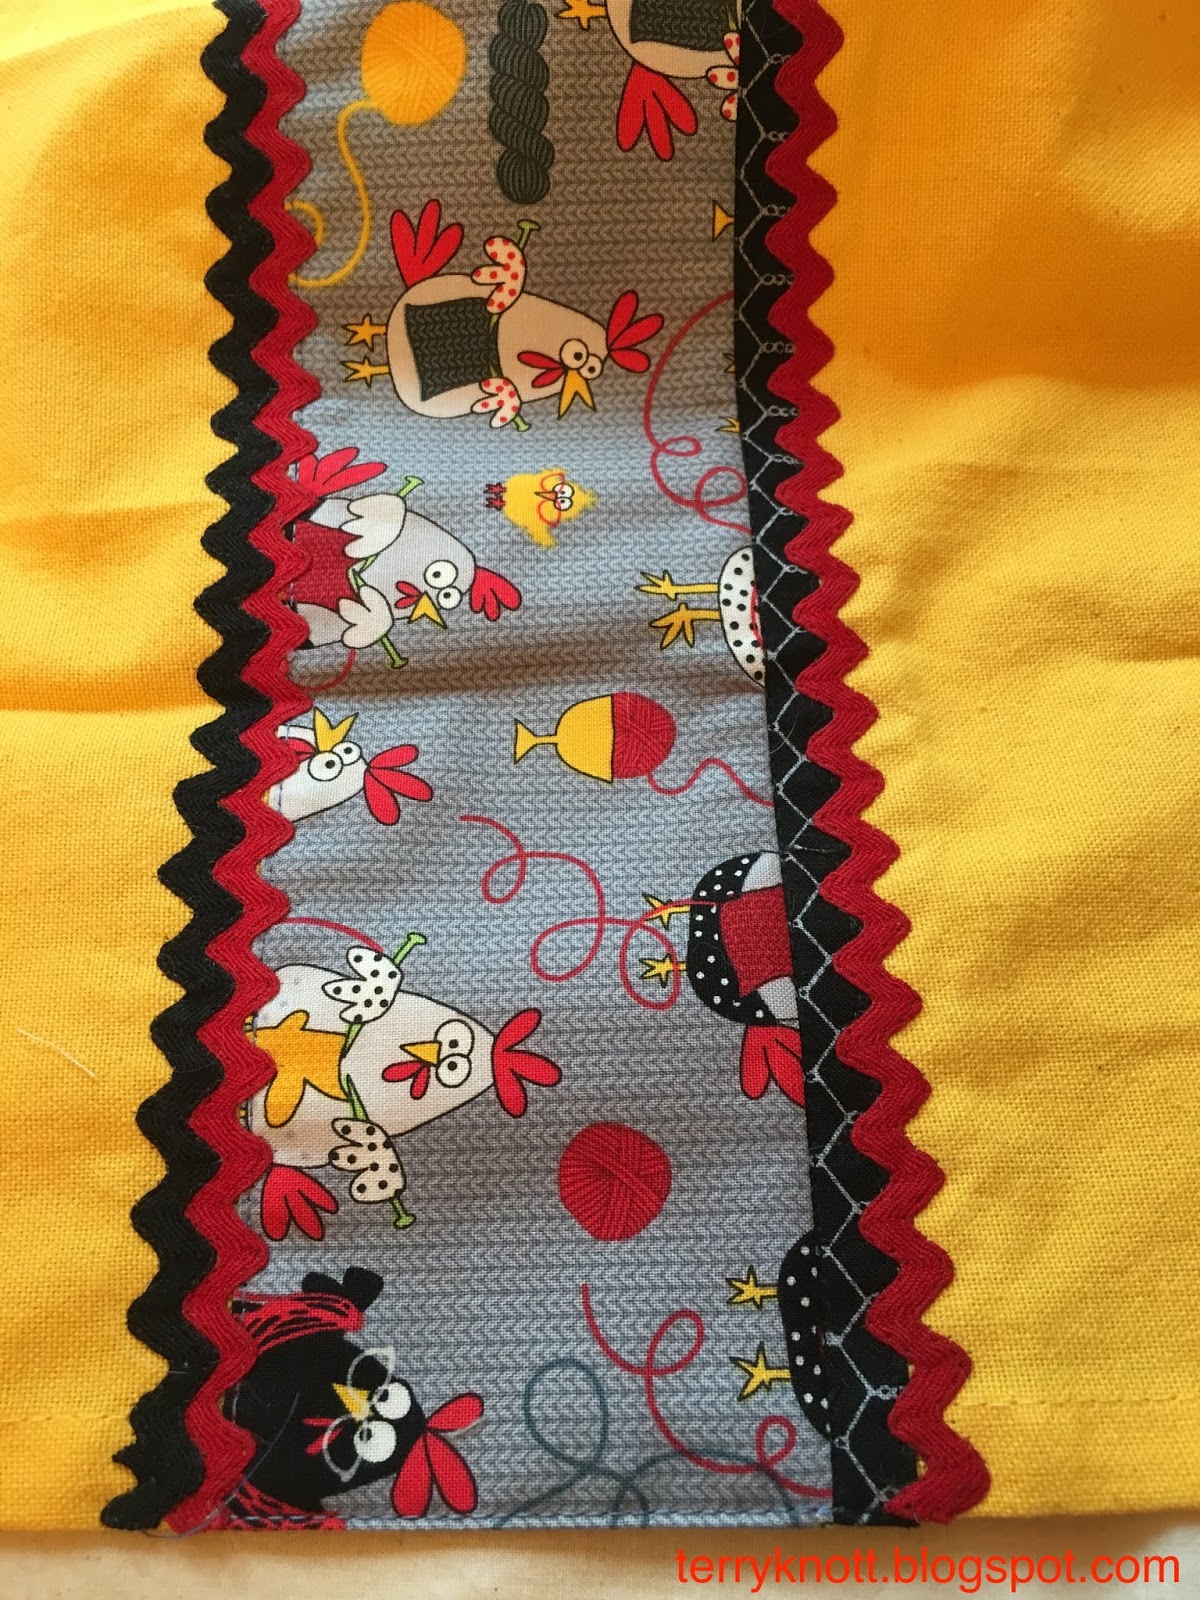
Decorative band for towel--too plain
Band with rick rack embellishment
I've taken on a couple new projects and was busy with an instructor course so I haven't finished the gifts that I thought I would finish this month. Yesterday, I completed the two kitchen towels that were goal number eight on my 4th quarter list. This is my fifth finish for the quarter.

I wanted to make these look a bit different from the four that I made previously. Click here if you would like to see them. I used the large rick rack on the previous four towels and I hadn't planned to use rick rack until I stitched the decorative band to the towel. That band looked too plain to my eye. I had sewn all the large rick rack that I had purchased.
Pleated kitchen towel ready for handwork

I dug out my grandmother's rick rack stash and chose a red and black to compliment the print. The price on the black package was 15 cents and the price on the red package was 60 cents. Those packages have been around for a long time! Seriously, I like to use my grandmother's stash in a project. The action makes me feel like she is hanging out in my studio!

 I used a monofilament thread and zig zagged the edges to the towel. This took some time because the rick rack was narrow. I chose that time consuming edge treatment because I didn't want the edges to flop down with washing or use. I especially liked how the red added punch to the project.

Then I stitched the handles. I could have edged stitched the handle to the body of the towel; but, I chose to stitch it by hand as I wanted to be sure that the layers didn't shift in the process of stitching.
Finished kitchen towels
I spent hours trying to figure out how to make the pleats. I looked at one that my friend, JoJo, had made. In the end, I divided the towel into fourths and made the pleats from the back of the towel. It worked. After I had hand stitched the handle, I edge stitched around the edge.

I had two red buttons left from when I previously stitched the towels. The buttons also came from my grandmother's stash. It didn't take long to machine stitch the button hole and stitch the button to the towel. Both are now ready for gifting and not a moment too soon either!

I used about 1/2 a yard of fabric. I may have enough fabric left for two decorative wide bands and perhaps, for one of those wide bands to be paired with a skinny band.

I've now used 39 1/2 yards of fabric from my stash. I've 11 yards of fabric to go to meet my goal of using 50 yards from my stash this year. Because I'm not close to finishing my mystery quilt, I'm likely not going to meet my goal. My plan is to roll over what I didn't stitch into my goal for next year.

Last week, I taught the last classes for the year. I taught 11 in Basic Life Support and six in the Red Cross Lifeguard Instructor course. Year to Date, my numbers were:
41 participants--Lay Responder CPR; 25 lifeguards; 22 lifeguard instructors; 3 water safety instructors, 81 swimmers; 22 babysitters; 291 basic life support CPR, 21 inservice training; 21 blood borne pathogen training and 6 for quilting. For the year, I taught a total of 533 people. Wow! I had no idea I would reach more than 500 people!!!!

Wednesday, December 19, 2018

The Mailbox

Found mailbox. . .now to find out what is inside
My friend Martha gave me a little mailbox several years ago. It needed a flag which my husband fashioned. When it is a grand day, I write a letter outlining the agenda for the day. I slip the letter and a small treat into the mailbox. I hide the mailbox for the grands to find.

Playing with the yoga cards
Sometimes they easily find the mailbox and sometimes it takes a while. If I forget to hide the mailbox, there are sad faces. In the letter, I include what we are cooking for breakfast and lunch. If it is a Monday, cleaning toilets and dusting is on the list. Sometimes, we organize a drawer or wrap a present. We often read a book, draw or play a game that their Auntie has sent them. We do a sewing related activity as often as I can work it into the day. We cook a recipe that is familiar and the next time, we cook a new recipe. I've found that recipes that require a lot of taste testing go over the best. We take walks and play outside when the weather permits. We also make a plan for the next time we are together.

Melting Marshmallows for Grinch cookies
With the youngest grand headed to kindergarten next fall, our Mondays and Wednesdays days will end at the end of June. I'm sad about that fact as I have had fun on our play days. If they have a no school day,  however, they might be inclined to spend it at Papa's and Gran's.

Next fall, I will plan for regular "sleep overs" so we can still have play time together. I hope that no matter what their age, they will still want to "find" the mailbox! This week, when I asked Miss J as her tummy was rumbling, what would she choose if there was only tuna fish sandwiches or pineapple to eat? (She doesn't like either of those options.) Without taking a moment to consider, she responded, "I'd go to the store and buy bacon and toast!" I LOVE how she thinks!

At any rate, I decided this was a good place to share anecdotes and some photos of times they have spent with us. We've made many happy memories together. This is a good spot to preserve those memories!