Wednesday, January 30, 2019

Bonnie Hunter Mystery (Good Fortune)--post 1(Clues 1-4)

Fabrics selected for the project
For at least the last five years, I've thought about joining in on the Bonnie Hunter mystery. This year, it is Good Fortune which was influenced after her trip to China. Each year, I got hung up on choosing the fabric. This year, I decided that I would change my thought process of "This picking fabric is so hard--it is impossible!" to "I will have all the fabrics I need in my stash and it will be fun!"

Bonnie releases the first clue on Black Friday and then each Friday until the holiday, there is a new clue. After Christmas, the clues come as they come as even the delivery of them and how many clues there will be are all part of the mystery!!!
Part way through clue #1

So her followers are ready for the first clue, around the end of October, she releases the fabric amounts and a list of colors. I like that she use paint chips as her color palette for all her followers to see and to access. Changing my thought process enabled me to choose fabrics that were close to her her paint chips and it was a fairly easy process. Actually, dare I share these next words--the choosing process was actually FUN!

I'll admit, I may not have enough yardage. I hope I'll have enough precuts in my scrap saving system that I follow of Bonnie's to fill in the gaps! If not, I could. . .gasp. . .purchase some fabric! The not pictured bag of neutrals are parts that I've picked up from the guild free table. I added one fat quarter to the mix.  Again, if I need more neutral fabrics, I can cut some yardage from the stash!
Bleeding before the treatment
When she released her first clue, I was busy with Black Friday shopping with my oldest daughter, Amanda. It is an annual event that I look forward to each year.  Bob, my husband, and I also attended a college football game--the Civil War for our state. (Our team lost by a landslide.) Sewing didn't happen until Sunday.
After the treatment

Bonnie suggests that you try to do at least half of the clue each week so you will know all of the steps. I'm going to try to do at least that much and if I can complete a clue in a week, I'll pat myself on the back!

I'm inserting a side note: This is a free mystery and anyone can join in at any time. Bonnie asks that unit numbers and sizes not be listed so I will do my best to honor her request. If you want to participate, know that the link isn't for always. She will take it down and gives advance notice of this happening.
Water and color catcher during the process

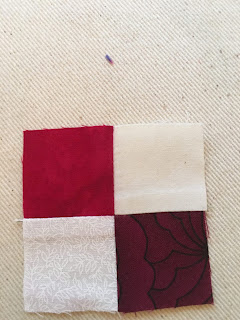
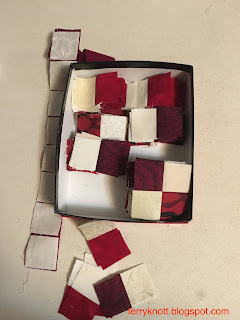
For the first clue, we were to make a bunch of four patches with the red and neutral fabrics. Luckily, I had about half of the neutral fabrics either cut into the correct size square or cut into the correct sized strips. I had about a quarter of the "paint chip" red fabrics in the right sizes in my scrape saving system.

So I started stitching. Stitching this step went fairly fast. I had stitched about a third of the four patches when I spilled some water on a four patch. The batik I was using bled. This batik fabric is in my Ruffled Roses top. I did prewash it so I was sick to see this. I reviewed my options:
--*I could remove that square which would mean I would need to purchase some fabric to take its place. Removing the many squares would take time.
--*I could try rewashing the square in Synthrapol. I decided I would try the synthrapol treatment. It worked. So I rinsed all the squares. I also rinsed the chunk again and any strips that I had cut. I used Shout Color Catchers.
HSTs finished for clue #2

It was shocking to see how much red was in the water.  The color catchers came out a beautiful hue of pink. Two red squares in a four patch had a bit of bleeding on them after treatment; but, not enough to be super obvious.

I don't know what I will do about that fabric in the skinny border of the Ruffled Roses project. At least, I have a heads up about that fabric.

After about 15 hours of stitching I finished the first clue. Had I cut my fabrics from strips, it would have been faster. I had the right sized squares in my scrap neutral and red scrap bags so I used those first. I like the extra variety that I had using the bits!
Clue #3--Chevrons and more HSTs

I finished the first clue the same day as Bonnie released the second clue. For this clue, we made a lot of blue half square triangles. (HST)

After the red fabric incident. I re-washed the blue fabrics. One fabric bled a bit; so I treated that one with Retayne because it was a print fabric and not a batik. I cut 2 1/2 inch strips from my scrap neutral bag. It is surprising how quickly I've depleted the contents of that bag!  I spent about 10 hours on this step. I used about five blue prints in this step, the value is about the same so it resembles one fabric.

For the third clue, we stitched chevrons using the green fabric. From the bonus triangles, we stitched more HSTs. The seam allowances are skinny; but, it is great to be able to use all of the fabric. Miss K helped me sew a few. She kept asking me questions like:
Clue #4--Orange strings
--How do I stitch the blocks together?
--What kind of design do they make?
--What was the quilt going to look like?
--What was the quilt story going to be?

She thinks I'm crazy to stitch when I don't know what it is going to look like. She sees no "fun" in this mystery!!!!

Miss K sorted the remaining neutral scraps. She wanted to know where the rest of the fabric from the bag went and was surprised how much fabric it took to make the backgrounds in all the previous blocks! She pulled out a piece of fabric that was a sewn sleeve and she asked how I was going to use it. I showed her how to rip out the stitches. She ironed the sleeve and then I rotary cut strips and squares out of it. She thought that the person who left the bag on the free table had really left a treasure. I told her that it is only a treasure if you USE it!
Segments ready for use!

For the fourth clue, we string pieced a bunch of orange units. I didn't have many orange fabrics. At the December guild meeting, someone left a bunch of neutral and orange scraps on the free table so I loaded up! It was a serendipitous moment!!!

Some chunks were close to a fat quarter size. There were about a dozen 2 1/2 inch strips that were about 12 inches long. The scraps were great to add to this quilt project. I did have a few strings in my string bag that I retrieved to add to the mix. After I had pieced the orange units, I spritzed a bit of Mary Ellen's Best Press on each before I cut the units to size. After I stripped off the paper, I decided the Best Press was a good choice.

Although, I had finished the third clue before receiving the fourth clue, I had stitched less than a third of the units needed before Bonnie released the fifth clue. It is all a process and as long as I'm making progress, I'm happy. I am pleased that I'm staying close to being caught up with this project!!


Sunday, January 27, 2019

Quilting the Mystery--Fifth Step Background Quilting of Log Cabin Borders

Lines that didn't work well with the curves
I struggled with what to quilt in the outer log cabin border. I thought that I could do another set of lines. I used the ruler and stitched one corner. . .nope. . .the quilt rebelled!!!! The lines weren't awful. The lines didn't relate well to the curves that I had stitched in the log cabin blocks.  I unstitched the sample and noted to myself that putting the quilt under the needle and going for it. . .sweaty palms or not. . .wasn't going to be the answer this time!
Leaves as a filler stitch
The question, What to do? loomed in front of me. I thought about the recipient who is my mom. She is a gardener. She starts plants from seeds that she has saved. What really tickles her is to transplant "volunteers" so that she has her old friends to enjoy through another gardening season.

Filler flower wasn't it
She likes to transplant those volunteers when they have their first true leaves and will do it early in the morning or late in the afternoon. She especially likes it when Mother Nature cooperates and waters the transplants in for her!

Now I had an idea. . .leaves! I could quilt lots and lots of leaves. I used a variegated King Tut  40 weight cotton thread on the top and a 50 weight cotton thread in the bobbin. My background was cream so I used a cream thread in the bobbin. If there was an issue with the tension visible on the front, the background would hide it.

Adding leaves to the inner log cabin border
The thread worked great. I did have some issues with the thread wanting to make a nest  which was a hassle until I changed the needle, rewound the bobbin and stitched slower.

The next section to quilt was the other smaller log cabin border. I tried quilting some meander fillers with a green silk thread. That filler was too blah and the quilting didn't balance the quilted leaves. The thread weights were the issue.

 I tried quilting a motif. It wasn't right either. I thought about the quilt as a whole. Originally, I had planned to quilt these two backgrounds with the same motif. I decided to go with my original thought and quilt more leaves. Whew! Quilting more leaves worked. It took 12 hours over a week to quilt this section.

I wanted to quilt the skinny pink border next. All along, I had planned to quilt intersecting circles. The quilt rebelled. Instead, I divided the quilt into inch segments and quilted two zig zag lines with silk thread. I chose silk thread to create a subtle texture. In other words, you would have to stick your nose close to the quilt to see it. The quilt liked my choice and it played well with the background leaf quilting.
Zig zag quilting pattern in skinny pink border
I've two more sides to quilt of the skinny pink border. I have an idea of what to stitch in the outer brown border. The quilt is telling me to repeat straight lines. Originally, I had planned to stitch feathers with a bold thread; but, I believe adding more lines is the best option.

Repeating a pattern helps to unify the quilting elements in a quilt. I still have the shadowing to complete in the square in a square border and in the smaller log cabin border. I'll make my decision about entering it in the quilt show in a few more days as there are still a lot of hours ahead of me to finish this project in time for the show which is at the end of March!!

Since my last post regarding this project, the quilt now has a name.  . .Gardener's Mystery! Isn't it interesting that often when you put out a request for some help, the answer comes? It is also miraculous! When you garden, you often don't know which plants are going to be the show stoppers for the season. It seems to vary from year to year. Mother Nature also spews hail storms, late and early frosts as well as stir up other challenges for the gardener. I think the quilt name will tickle my mom.


Wednesday, January 23, 2019

A Couple of Activities I'm Not Doing This Year

President's block
I've belonged to the Clark County Quilters guild since 1998. When I joined, I worked full time plus I had a couple of part time jobs so I rarely did more than attend the Spring retreat, the quilt show, Saturday Workshops and maybe a class or two.

Since about 2006, I've often participated in the block contest and the challenge contest. Last year, I won the block contest. I have spent a lot time sketching, trying new to me techniques and meeting the deadline for each of these contests. I enjoyed being part of the creative wave of the guild. Seeing what others created opened my eyes to new interpretations of the same set of rules/directions!

Last August, I was on board to participate in the challenge and the block contest as I had some designs for both noodling around in my head. I even had a thought for a quilt for the theme of the show. During the Christmas holiday, I had a serious talk with myself. I hadn't started any of the projects. This year, the show is at the end of March which is a week earlier than in the past.

The challenge included a size limitation and my idea was larger than the size. The project I had in mind for the quilt theme wasn't the "right" colors. I couldn't get excited about drafting a New York Beauty type block which is the block challenge.  I opted to take a pass this year. I will miss being a part of the fun; but, I can't do it all. It is okay that I can't do it all!
Cooking bacon. . .it's going to be a great day

I have projects that are calling me to finish and other projects that I want to begin. I've done little toward reorganizing my studio. I need time to actually complete the monthly embroidery software lessons. I decided, I would make more overall progress spending my studio time working on what I want instead of starting a couple of projects that have rules attached.

GASP. . . .I, who have been a rule follower and then a rule bender have gone ROGUE!

I did stitch an 8 1/2 inch block for the outgoing president in the Mt. Hood guild. In addition to the size, the only other requirement was that polka dot fabric be used. Sawtooth stars make fun quilt blocks so I looked through my bits and found some fabrics that had dots. I hope she likes the block. I enjoyed stitching it.

There will be cooking and stitching time with the grands too. Life is great!

Sunday, January 20, 2019

Quilting the Mystery Fourth Step--Stitching Sunshine!

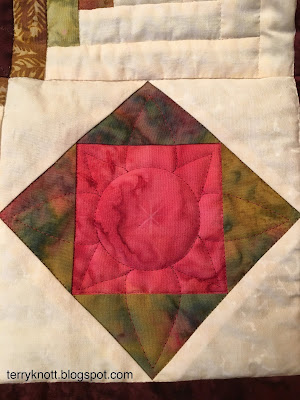
Flower like shape in square in a square block
Last month, I was ready to quilt the next three borders in the Mystery BOM. I didn't have a clue what I should quilt. I doodled. I looked at Pinterest for inspiration. I doodled some more; but, nothing came to me for the next section of the quilt.

One day in January, I threaded the machine and put the quilt under the needle. Honestly, I get sweaty palms when quilting without a plan! Before I began, I had a feeling that I should use a different thread. I rethreaded the machine with some pink thread and quilted the square in a square blocks just as I had quilted the ones in the inner border. I was quilting sunshine!

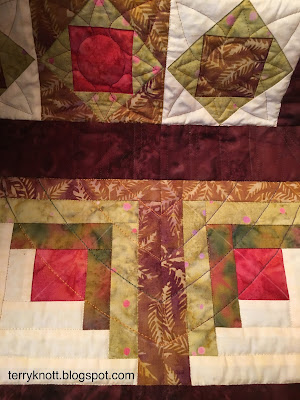
I have an idea for adding some shadow or detail to this block later. For now, I'm happy with the quilting. As I quilted, I was thinking about the variegated thread that I had used on the star points in the center of the quilt. I thought about quilting a slightly curved line in the dark section of the log cabin blocks.
Curved lines in dark section of log cabin

I didn't doodle this idea. I did chalk the lines to test my idea. I liked it enough to stitch it.  I did use a ruler; however, it was difficult to hold. I found using the chalk line as a guideline to be helpful. The reason the ruler was difficult to use is that it is large and parts of it would bump into the machine. The first few times when I couldn't move the ruler and the fabric, I thought I had a thread malfunction! It wasn't thread related it was the ruler bumping into the bed of the machine. I'm getting better at being aware of positioning the ruler so this impasse happens less often.

I have chuckled because I tried hard to finish this quilt last month. I've yards of fabric in this project. Unfortunately, the quilting vibe didn't come to me. As I quilted the log cabins, I thought about quilting leaves to fill the background of this section.
View of the quilting in the three borders

Pinwheel stars quilted
I quilted that skinny brown border and the pinwheels. In the brown border, I quilted straight lines similar to what I quilted with the other two skinny brown borders. To repeat the line theme, I quilted straight lines in the pinwheel. I also quilted a curved line in the inner pinwheels. I challenged myself to use a curved ruler so my lines would be more consistent.

I am so happy to be moving toward the finish line with this project! I've logged about 20 hours on this section of the quilting. I'm noticing that my breaks are as long or longer as my quilting sessions. Pushing and pulling the quilt along with holding the ruler is tough on my body. Taking many breaks is imperative to being able to continue later as opposed to taking days off in between sessions!

Regarding my quilting muse, perhaps, I was so focused on quilting that I forgot to listen to what the quilt was telling me. I hope our  communication continues to be on good terms throughout the rest of the quilting process!

I also feel it is time to name this quilt.  It will be gifted to my mother for her 80th birthday which was January of 2018. Giving it to her in 2019 will be just fine!

In the meantime, if you have a suggestion for a name, please leave it in the comments! Thanks!


Wednesday, January 16, 2019

Mesh Grocery Bag--First Finish 1st Quarter 2019 FAL

Bag ready for top stitching
A few days ago, I stitched my first mesh grocery bag. I decided that before too many more days passed, I would stitch another so I could apply what I learned from my first experience to my second! This time, I cut the top bands at 3 1/2 inches. I cut four pockets--two at 9x15 inches and one at 9x12 inches.  I had a little piece of fabric left so I cut another pocket at 9x10 inches. The pattern directions were to cut one at 9x15 inches and the other pocket at 9x12 inches.

Finished bag
This time I applied fusible stabilizer to all the fabric pieces. The stitching result was better. It was easier to stitch the top band to the bag. For the next bag, I will cut the band at the recommended three inches. After I topstitched the top edge of the pockets, I layered two together and basted a quarter inch around the edges. Next time, I would baste the bottom at 1/2 inch so it would be easier to place under the lower edge of the bottom fabric piece. I also stitched a center line to divide the outer smaller pocket on one pair of pockets into two sections.
Gail and Connie with their mesh tote bags

I still had some stretching with the top bands. There really is no way to be able to stitch those with the fabric side down. The bottom fabric also stretched a bit; but so much less than without the stabilizer. It worked to stitch the side seams at 1/8 inch and then again at 1/4 inch. It was also wise to use a shorter stitch so that when I cut out the squares at the bag bottom to make the box corners, the seam didn't unstitch as much.

I have enough mesh to make at least seven more bags. I wish I could remember why I thought mesh bags were such a good deal! Actually, I thought that this was the soft type of mesh that is used in accessory bags. Perhaps, I will make a few to see if they will sell at the guild bazaar.

I used 3/4 yard of fabric. I have 56 1/4 yards to meet my goal of using 57 1/2 yards from my stash this year. This was goal number 16 on my First Quarter FAL list and my first finish for the quarter.

This project and the previous grocery tote I gifted yesterday. I had a stitching day with Gail and Connie. It is good to have stitching days with friends. I am fortunate to have some special stitching friends. Gail and I worked together years ago. One day at work I discovered that she was a fellow quilter! I liked her even more after I learned that fact! I met Connie through Gail. She finished 25 projects last year and started 40 new ones! She is so resourceful. I always learn cool tips from her. We had a fun day sharing what we have completed, what we are working on and what we are planning to work on! Life is GREAT!!!


Sunday, January 13, 2019

Miss J is Stitching!--Post 1

Miss J's work on top; our work on the bottom
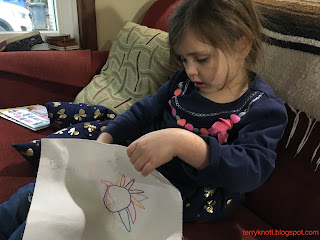
Miss J and I had some fun drawing pictures. We drew some together too! On September 5, 2018, when we had drawn a picture that Miss J liked, we darkened the drawing with a Sharpie pen. Then, she selected a piece of fabric. She liked the natural muslin best. She traced some parts of her drawing with a pencil on the fabric. She wanted me to draw the points though!

I cut a piece of stabilizer for the back and she fused it to her fabric. She looked through the embroidery thread box and chose a purple thread. I looked through my needle selection and found one that has a large eye and a fairly long shaft as I thought that style of needle would be easier for her little hands to use. We started to outline stitch her drawing. I liked her purple thread choice.
Progress at the end of the first day!

This will be an ongoing project; but, I think that she will enjoy putting in a few stitches each day that she spends playing with us! It might be a small wall hanging, or it could be a pillow, or it could be framed like art. She will figure out what she wants when the time comes.  She has stated that her work needs some pony beads so we will work out how to make that happen!

Perhaps, she will enjoy having her first handwork to share when she is older.  I kept and used a pincushion that I had made when I was ten. Three years ago, the dog chewed it up. I still have the memories of making it with my grandma.  I hope that she will remember this experience with her grandma at least as fondly as I remember my sewing experience with my grandma!
Slowly stitching the hair
In the meantime, our goal is to stitch together a bit each day she is here. Most days we are able to meet this goal; but, sometimes we have other "more important items" on her agenda that need doing! The time we spend might be about 15 minutes. It is hard for her fingers to coordinate the needle to pierce the line especially coming from the underside of her work. The needle easily unthreads itself; but, we manage.

She made the executive decision that her figure needed to have different colored hair so she chose another color of thread as she reached each spike of hair.
Finishing stitching the last blade of hair
Miss J decided that it takes a long time to stitch, because it is a challenge to enter and exit the fabric where she wants. Additionally, the needle is sharp! At the end of November, she had stitched the outline of the head and five of the nine blades of the hair.  She had completed almost half of her figure.

She thinks the blades of her girl's hair need to be "filled in." We will have to talk about what "filled in" means to her. Does she want to do more hand stitching?  Does she want to use crayons to create the color? Does she want to fill in the space with free motion quilting? Or is there yet another option? Miss J has definite opinions about her work!
A smoothie with a blueberry muffin is so tasty
I am intrigued with how quickly she makes her color choice! Her colors all play nicely with each other. In January, she finished stitching all her girl's hair. She told me that the next part she wants to stitch is the girl's eyes.

After we finished stitching the hair, we baked blueberry muffins and banana bread. Then while the bread was baking, she decided we needed to make a blueberry/strawberry smoothie too! So. . .we did!

Wednesday, January 9, 2019

1st Quarter Goals--Finish-A-Long 2019

#1. Add the fun quilting to this mystery BOM

I started two new projects last quarter which meant I didn't complete many finishes. I also fell 7 1/2 yards short of my goal of using 50 yards of fabric from my stash. This year, I plan to use 57 1/2 yards of fabric from my stash. With this goal, I'll keep pace with the 50 yard annual goal. (I have no idea how many years it would be before I. . . .gasp. . .used even the big chunks in my stash!) I am determined to sew fabrics that I have petted for years into useable items!
#2. Complete trio of sisters

Working with my bullet journal has helped me document my progress as well as identify some of my shortfalls. I will continue to intersperse big projects with smaller ones. I will continue to make weekly or monthly goals on projects that have been in the queue for a long time. I had success doing that last year.
#3. Quilt this top

This year is the year of the butterfly. I have three or four partially finished quilts with a butterfly theme. It is time to move those projects from the unfinished state to the finished state!
#4. Stitch a skirt with this fabric

I plan to continue my journey of finishing projects that I began; but, didn't finish. I even have a few of Martha's projects to finish. I vow to start new projects and to have fun along the way. I anticipate trying a new technique or two. Perhaps, this will be the year that my "cold" daughter will finally be warmer!

My goals for the first quarter of the year are listed below.
#5. Get this project out of the fabric phase

#1. Finish the quilting of this mystery BOM that I started in 2015. Last quarter, I quilted the center and the square in a square border. I had planned to finish this project last quarter; but, was side tracked with a couple new projects. Sometimes, inspiration takes a long time to come to me!!
#6. A potential hat or purse?

#2. Finish the trio of sisters that I started last quarter. This is a book club quilt. It is the first time that I've drawn a figure and then painted the details on cloth. I had great help from my five year old grand to draw the faces.

#3. Finish this piece. It was the machine applique project in a Karen Kay Buckley class last May. Last quarter, I finished the top.


#7. Stitch a second selvage tote
#4. Stitch this gingham fabric into a skirt for one of the grands. It's been on the list for two years.

#5. Make some progress on this project. It's been in the fabric stage for over two years.

#6. I made a skirt and a vest out of this fabric for one grand. I still have leftovers. It may become a hat or a purse for the youngest grand.
#8. Quilt this star top

#7. Last year, I made a tote with these fabrics and selvages. I had planned to add a pocket to the back of the tote; but, didn't because I would have sewn over my inside pockets. I'd like to make another tote and put that pocket to good use! I'm not sure that I have enough of the rust. . . .but, I guess that is part of the journey to choose a fabric that will mix or another one all together!! Perhaps, I can use the lining fabric from the last tote to make the pockets. I will need to select a coordinating fabric for the lining.
#9. Bonnie Hunter Mystery
#8. Quilt this star top that I stitched last quarter. The whole project came from my stash. It started as a result from reading a blog post from Gigi's Thimble. Amber hosted a quilt a long making one of her patterns. I had fun piecing the top and I EVEN completed each step on time!!!

#9. Finish Bonnie Hunter's Good Fortune Mystery. This is the first year that I have participated. I enjoyed the process!

#10. Add some embroidery to the color block squiggle and get that piece finished! I've made a number of practice stitch outs of some words. I'm not confident enough to set up the embroidery so it is centered and I'm not totally happy with how the stitches look. Maybe this quarter will be the one that I get the project to the top stage!

#11. Finish the appliqué, quilt and bead this piece. It was on the list last quarter.
#10. Add some embroidery to this project
#11. Appliqué, quilt and bead


#12. Stitch another Stash and Go bag


#12. Make another stash and go bag. I'm determined to develop better skills with the binding!
#13. Raw edge applique

#13. Continue progress on the butterfly piece began in September in a Susan Carlson class.
#14. Miss J's embroidery project

#14. Work with Miss J to finish embroidering her artwork. Miss J will determine what it will be. . .!!

#15. Work with Miss K on her cross stitch project. She wants to gift it to a friend for Valentines Day.

#16. Stitch a second grocery tote bag with the black mesh that I bought at a quilt/craft show a couple years ago. I've a lot of mesh. . .some  black, some red, some yellow and some blue.

#15. Miss K's cross stitch project
#16. Make a grocery tote with these fabrics


#17. Skirt for Miss K to sew
#18. Make a pop up
#19. Potholders--4
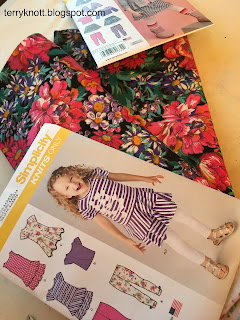
#20. and #21. Outfits for the grands

#17. Stitch a skirt with Miss K. This looks like a fun project and the supplies were given to me.

#18. Make a pop up container. I bought several of these at a show some time ago. It would make a nice gift.

#19. Make four potholders from this pattern. It was a Martha project.

#20. and #21. Make a couple outfits out of this knit fabric for the grands. My mother gifted me the fabric. I wonder what her original use was when she bought it.

#22. Make the bread basket, napkin and napkin rings to accessorize the placemats I made last month. I will need to purchase fabric for the napkins and bread basket.
#22. Stitch the accessories to the placemats
#23. Make a scarf
#24. Make a pair of shorts
#23. Make a scarf out of this fabric. My mother also gifted me this fabric. These colors are her colors so when it is finished, I'll gift it back to her. Again, I wonder what her intended purpose for it was. It will be fun to hear what she says when she sees her fabric returned to her in a different format! There are yards of this fabric so I could make several scarves. . .for now, I'm beginning with one!

#24. I picked up this sparkly green fabric from the free table last fall. I think I might be able to stitch a pair of shorts for Miss J.
#25. Stitch this bag

#25. I picked up this bag kit from the free table last fall. I think it might be an item that could be sold at the quilt show next fall.

It's a big list with many projects rolled over from last quarter.  I believe that there is a enough variety to keep me busy if I'm stumped on another project. Yes, the list includes, gasp, clothing items. I've been "gifted" clothing fabrics that I need to use as I just don't have space to store those fabric. . .nor do I want to store them!!

Actually, I'm not all that interested in garment sewing; but, sometimes, out of necessity I make clothes for myself. Of course, if a grand wants a piece of clothing, I'm all in!