Thursday, October 29, 2015

Packed for Retreat and a "Positively" update!

I'm excited about our fall retreat. I've been organizing, cutting and packing projects. These are the projects so far!! 
I cut the fabrics for the guild's mystery quilt. Two of the fabrics came from my stash!!! I purchased the top two fabrics. That print batik has been marinating in my stash for more than nine years!
I said to myself, "Enough petting!!! Use it!"


I determined how I was going to make the complimentary block to my churn dash. Click the link to read what promoted me to stitch these! I even stitched a sample so I know my idea will work. 


I packed my string geese project to add "wings" to the "geese." I was asked to provide a demo so decided this would be a great project to share. This is a Bonnie Hunter technique. The string pieced geese in this photo represent the contents of a two gallon plastic bag stuffed full of strings less than 1 1/2 inches wide. I'll know after retreat how many more I need to stitch! I'll also know how many blocks I've sewn!! (By the way, since emptying the two gallon bag, I've been filling a quart bag of strings!) Before Bonnie Hunter, I threw these away. Soon, I'm going to have enough blocks for a top! Who knew???


I packed "Positively too. 
This is what the top looked liked after I had the coins stitched to the sides and started to place the piano key border.


Here is the top with the piano keys. I like it!!!


Then, I pieced the remaining pieces.
I didn't have many left! 


I used 38 seven inch squares from the previous fall retreat exchange and I added two more squares of red and another neutral square that is featured in the second scrappy block. This was the fabric that I exchanged!


Then it was time to audition bigger fabric pieces for the back. I can't close the green drawer on my stash, so the back had to have some green! :) I sure like the interest a pieced back gives to a quilt.
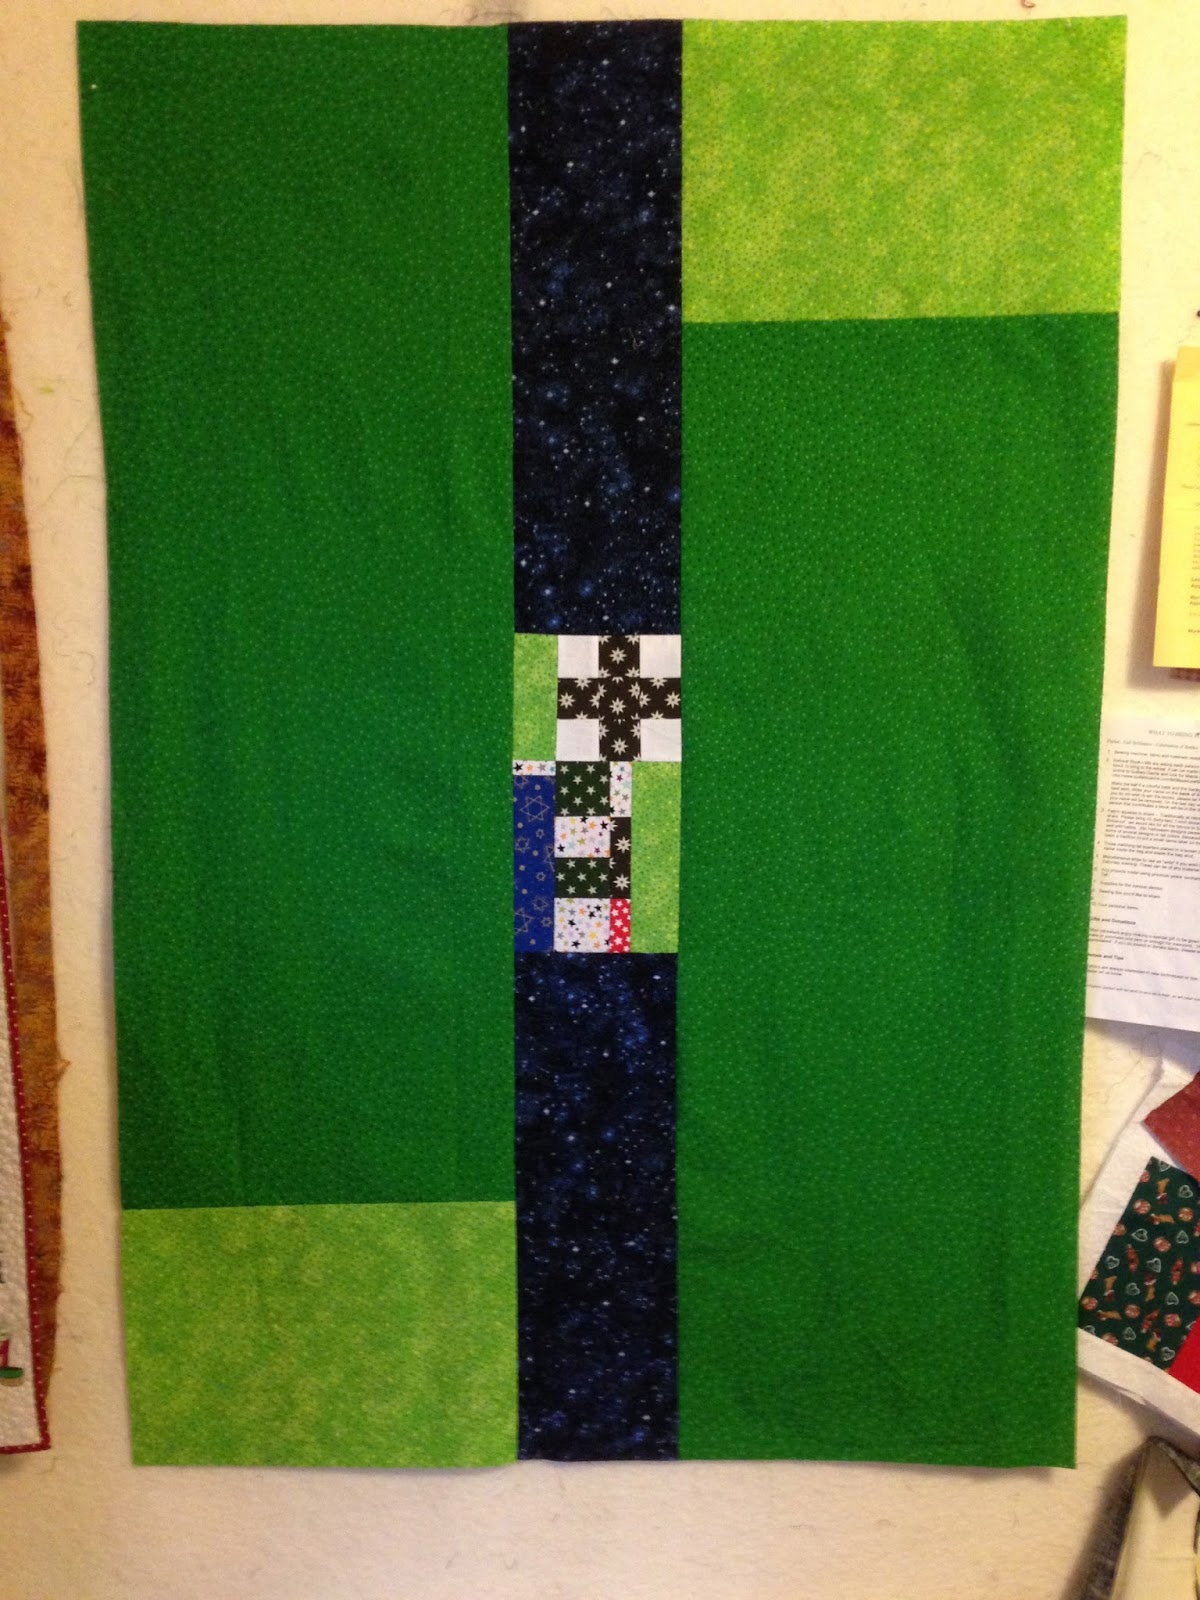


The dark fabric was a fat quarter that we received at retreat. I have a few "strings" left of the dark green; but, the lime green is gone!


Then I packed the project so I can pin baste it for quilting. It measures about 32"w x 49"h. 


I also cut the strips and triangles for the sashing for my hexagon BOM. I didn't realize when I decided to use both backgrounds how hard it would make finding sashing/border fabric!!! I've packed more; but, will save that for a later post. Let's see how much progress I can make!!!!


Saturday, October 17, 2015

Positively, PROGRESS!

Last weekend, I took a workshop from Jean Wells. Jean is from Sisters, Oregon and owns the Stitchin Post quilt shop there. She is a fabulous teacher. Perhaps, in a week or so, I'll post about how much fun I had.

She shared with us how she makes her curved piecing and her skinny inserts among lots of other tidbits! I've been slowly working on a past book club quilt; but, was stuck on what to do next. Well, I pulled some fabric and now I'm letting it talk to me about where it might want to live in the quilt! 

As I pulled the fabric, I noticed that it was time to get ready for fall retreat which begins at the end of the month.

So, I stitched the retreat block. Everyone is supposed to stitch a block. At the end of the retreat, a winner is drawn from the names of all who participated. This year, the theme is Autumn Brilliance. I enjoyed making the maple leaf block. It will be fun to see every one's creations! 

I cut my 7" squares that we exchange. In the past, I just collected the squares. The last two years, I made a quilt and made blocks from the squares of the last two retreats I attended. It is nice to have a memento of the activity. As I cut the squares for this year, I realized that I had done NOTHING with the squares from last year. 

Now, I have plenty of projects to FINISH; but, I really did want to make something to show when we share projects that we worked on at a past retreat. So, I pulled the bag of squares out of the darkness and into the light. 

Yes, I began something new!!!!

My challenge is to use ALL of the 36 squares of different fabric. Last year's theme was stars. Each fabric is printed with stars! I started with a Plus design. I liked it because it is a one block kind of design. Next, I cut one of the seven inch squares. Of course, as soon as I cut it, I decided that I could take out one seam, make the block a little bigger and be happier with the outcome! 

At the end of yesterday, I had pieces on the design wall:

This morning, I moved pieces around. The two red blocks came from my stash as the piece needed some sparkle! Then I started stitching.  
When I completed the blocks, the piece measured 33"x24". 


It looked boring. So I auditioned some green for a border. I liked the green border. Plus I was able to use some of the too small pieces as corner stones. Then, I decided I liked the portrait view over the landscape view!!

 Next, what to do with the scraps? I had a 2 1/2" x 3" piece and a 2" x 7" piece left of each fabric. These were "about" measurements as some of the squares were a little larger than seven inches and some were a little smaller!

I pieced the smaller scraps into coins and stopped for the day. You will have to check back next week to see where the coins are positioned! 

Oh, I also didn't pick a project for the seven inch squares I'll be receiving at the end of the month!!! Have you made a project from charms or layer cakes or seven inch squares? What was your inspiration? Please share! :) Happy Stitching!


Friday, October 9, 2015

Inspiration--where does it come from??

It use to be that when I would get stuck on a project, I would look for inspiration at a quilt show, or leaf through quilt magazines for options to get unstuck! What generally happened was that I became inspired. I would start a couple new projects while I waited for a solution to come to me for the initial project. I'd finish one project and have three or four started projects. . .hm mm. . .something was wrong with that picture!!!!! I'm supposed to be FINISHING projects. At the rate I was going, I was going to die with TONS of UFOs! :)

Thanks to working through The Artist Way exercises, I learned that it is important to have artist dates (AD) on a regular basis. ADs help keep fueling creativity. By regular, I mean one AD per week. At first, I felt that I wasn't worthy of taking time each week to get inspired. After a couple weeks, I also didn't want to spend a bunch of money on my artist date. In my post today, I'm sharing some inexpensive ADs!

I walk almost every morning. Meet Bailey, my walking partner. She is a year old Golden Retriever. She has such a sweet and loving temperament. If no one is walking or playing with her, she prefers taking a nap in the recliner. She is great at keeping me honest about meeting that walking commitment because she is so into routines! 
I've had some awesome ADs on morning walks.

For example, one morning, I was looking at the ripening blackberries and noticed that the berries ran the gamut of colors from a green, to pink, to red to dark purple. Even the dark purple had two shades with the duller shade being the ripest berry! I realized being more mindful of my surroundings can be inspiring

I took a trip to the local dollar store and budgeted three dollars to pick up something that inspired me. I bought a package of crayons, a package of construction paper, a tube of glue and then I PLAYED! Using simple art supplies can be inspiring.


I love sunrises. I snapped these photos with my phone during some morning walks.  These photos may inspire a quilt sometime soon. Photos can be inspiring. 


I have printed and mounted these photos on a piece of computer paper which I placed in sheet protectors. 


I wrote my impression of the photos on the computer paper. Words like: serene, bright, bold, warm, mysterious, happy and luminous came to mind. Sometimes, I'll write a paragraph about how that picture makes me feel. Words can be inspiring.


In the fall, I take pictures of leaves. I love the different colors of leaves both on the tree and off!
Color or lack of color can be inspiring.


I've pinned techniques, projects, quilting, etc on boards in Pinterest. Other people's works are so creative and interesting. Plus, I can pin in my pajamas and no one is the wiser! :) I also leaf through back issues of various quilting magazines. Sometimes an ad or a story will provide a solution! Other people's creativity is inspiring.

What inexpensive technique do you use to inspire yourself?? Do you have ADs?

Sunday, October 4, 2015

Block of the Month--Hexie Style

While I was waiting for the machine to embroider those pesky words, I made a couple pillow cases. My stash runneth over and since March, my goal has been to make at least one pillow case a month with fabrics from the over flow. At the end of the year, I'll be donating these to kids/families who need them. I'll share my stack when it is a little taller!

I also made lots more string geese blocks. Eventually, I'll sew the "wings" or side triangles and have lots more units that look like the two on the right. 

What is cool about the string piecing project is that I actually emptied one of two full 2 gallon bags! This string quilt is what I call mostly free as I used pieces that were generally less than 1 1/2 inches wide. Before I started saving these "tiny" pieces, I just tossed them and now, I've blocks for a quilt!


How I spent most of my time though, was working on the latest hexagon BOM (block of the month) block. I'm doing this through Pioneer Quilts with JoJo Hall as the instructor.

The snowflake was our January block. Learning how to English Paper Piece wasn't too hard although, working with those diamonds was tricky! 

In February, we made a heart. This was a tough block. . .working with

those tiny triangles was truly a challenge!!!

A bee hive was the March block and JoJo gave us two embroidered bees to add to the block. I'll add mine after I've quilted it.


April's block was a flower basket. I hope to quilt a design to make the basket appear to be more like a basket!!
Have you noticed that I'm using two different backgrounds? I couldn't decided between the two options so I just decided to use them both! In May, we made an anchor.


Kites were the theme for the June block. I used rick rack from my grandmother's stash for the kite tales!

A space rocket was the theme for July. So far, I've again used fabrics from my stash to create the blocks. 


Pinwheels were the focus for the August block. 

The September block is a tree. These are some of the fabrics I selected. We don't meet again until the end of October so I've some time to make the block.


This  is what the blocks look like so far. I'm thinking I made a mistake in choosing the two background colors because the background is more visual than the piecing design. I don't know what fabric I'll choose for the sashing; but, I've exhausted my stash so now it is time to go shopping!!!
This isn't the first BOM I've done; but, it is one of the few that I've kept up with the homework!!! Have you participated in a BOM? If so, did you keep up each month? 


Wednesday, September 23, 2015

A "Wild" Start and Finish

Yesterday, I started and almost finished my quilt for the book "Wild." Yes, you read that correctly!!! I finished stitching the label and sleeve today!

Rules of the group are. . . pretty much there aren't rules; but, you are encouraged to make at least one quilt a year. One or more members sign up to choose the book. They lead the discussions and determine where we reveal. Often we rent a meeting space for a couple hours and have a potluck; but, we have had high teas, met at restaurants that served dishes that went with the book too.

We started meeting in September of 2007 and we call ourselves, "Thread Tales." We number about 40 with 12-20 people producing something for each reveal. We have our book discussions at a Barnes and Noble. I haven't made quilts for all of the books we have read; but, I have made quite a few! If you would like me to share past book club quilts, let me know by leaving a comment! By the way, Ripples was a book club quilt!

The book we discussed in July was "Wild" by Cheryl Strayed. In August, we shared the imagery that might work for a reveal project. The project produced isn't always a quilt! It could be a pillow, a bag, a game, a coat, a . . .well, you get the idea!!! The reveal is the last Wednesday of September. We are having a potluck and I'm READY!! (I also made something else. . .but, will save that for another blog!!!)

I have too much green in my scrap drawer to close it easily so that became the source of my fabric. Well, I still can't close the green drawer; but, I'm three pieces of fabric lighter! My quilt measures 4 1/2" x 13 5/8". It is this size because that was the size of the left over polyester piece of batting I wanted to use! 


It has no piecing. Rather, I used Carol Ann Waugh's technique of using machine decorative stitches. It is a technique that I've wanted to try for years; but, haven't. She is the Stupendous Stitching teacher.

I picked threads that contrasted with the background fabric and selected some other fibers I might use. 

Then it was stitch using a few of the many machine decorative stitches that are on my machine. It was hard to not go back and free motion quilt!!!!


It was fun and I'm sorry that I limited myself to such a small size. . .although finished feels GREAT!!! I did chicken out and didn't use the fibers to try my hand at stab stitching. I'll save that experience for another project.

The back of the piece uses another green fabric. I picked up this 9x30 inch strip from the free table at our guild. It was luscious. I wanted the back to be the same fabric so I used smaller pieces to stitch a facing which finished the edge. I watched Vikki Pignatelli on episode 102 of "The Quilt Show"  where she demonstrated how to make a curved facing. I used a third fabric (left over from my package wall hanging) for the sleeve.
This is the label. I'm curious, how do you label your projects? I name each of my projects and then include a little information. Sometimes it is the time it took, what inspired the project, what materials I used and who received it. I also include the size. This year, I started a different numbering system. #920159 stands for: The first nine means I made it in September. 2015 is the year and the last 9 is the projects I completed this year. "Paths" is the ninth! Previously, I listed the date. I found people would ask me what I completed recently when I exhibited an older work. I've noticed that painters sign their work; but, it isn't dated so I've decided to follow suit! Also, it is the third in a series of "line" pieces I felt I needed to create. I've had fun exploring line in quilts. 

Thanks for dropping by for a visit. If you want me to share some other book quilts, let me know so in the comments! 

Tuesday, September 22, 2015

Words--The Finish!!

The wall hanging is FINISHED!!!!!! I named it Joyful One.

A little quilting on the packages. . .straight lines that followed the print. Remember, I challenged myself to use the pebble design and variations of it for the background quilting. The reason I chose pebbles because the pebbles shape reminded me of big fat snowflakes falling. That polka dot sashing makes me think of snowflakes. I stitched tear drops or paisleys on this package. Instead of making a roundish circle, I made a teardrop shape.
I followed the outline of the snowmen in the  print below. Next, I took the circles and made them swirl.


I quilted a grid on this print. Notice that all the ribbons are stitched similarly. Finally, I varied the paisleys and circles. . .sort of merged them together to get a circle within a circle!


It is easier to see the quilting on the back. On the right, is the paisley background.Then I decided to finish the sashing and border with actual pebbles.


Swirls with the pebbles
Circles within circles


Then it was on to add the label. This is going to be a Christmas gift!


It is GREAT to have a FINISHED project!!!

Sunday, September 13, 2015

Words about Words--The Sequel

Last week, I promised an update on my package wall hanging. First, I was successful with embroidering the words for the outer two borders. I backed the fabric with soft fuse which is a pellon product to initially stabilize the cotton. I spray basted the soft fused cotton to the hooped cut away stabilizer and placed two strips of medium weight tear away to the back of the cut away. Then I embroidered. 

My lesson at Quilting Delights was in valuable when it came time to rehoop. I learned how to make a cross hair to be my registration mark so I could line up the next stitching. Almost as important was learning how to program the machine to show me where the first stitch of the design would be. Lining up the center of the cross hair with that first stitch made each rehooping easy. The positioning also meant that the words lined up perfectly!

For each of the hoopings the estimated stitching time from the machine was 24-30 minutes. While the machine stitched, I made a couple pillow cases. Now, it definitely takes me more than half an hour to make two pillow cases and I almost finished when the machine finished stitching. So on the next hooping, I started a stop watch to time the stitching. Guess what I learned? It was about an hour and a half for the machine to finish the hooping so I learned that the estimated time can be way off!


There were nine total hoopings for the border so it took me a lot longer to stitch than I had anticipated! While the machine stitched, I made lots more string blocks for the string geese project. I actually had this left over from a two gallon plastic bag of strings. I still have a two gallon plastic bag of strings left to play with. It felt great to have one bag empty! But, I digress!!!


When the machine finished stitching and I removed the project from the hoop, the stitching was beautiful. It was flat with nary a pucker. However, when I removed the tear away and the cut away, the piece puckered. This puckering leads me to conclude that the heaviness of the embroidery coupled with the rigidness of the cotton is what causes the puckering. The section of the project backed with the soft fuse did pucker less. Unfortunately, I didn't take any photos to share here!

This week, I've been quilting the wall hanging. I challenged myself to take the basic pebble pattern and change it for the whole piece. Check back next week to see if I was able to stay true to the challenge!