 |
| Bingo block |
 |
| The plan |
 |
| "Precuts"pulled for the project |
As I listened, I stitched a couple BINGO blocks for a virtual retreat that I attended. I'll post more about that experience in a future post.
 |
| A block layout |
Every part of the exploration process was so difficult. It was as if they were navigating a huge maze and encountering many dead ends along the route.I was amazed that both explorers lived to tell the tale even though the tale didn't turn out for either as one would have thought. Between my amazement and the maze idea, I had found my inspiration.
 |
| Beginning to web a block |
I could stitch a maze. Blue fabric would represent the river. I even had a name: aMAZEd spelled that way because I wanted to draw attention to the concepts of maze. I also wanted to play on the word amazed.
A visit to Pinterest provided me some examples. I decided that I could map out my own maze using graph paper. So I decided I would make a 64x96 inch project using two and a half squares.Next, I drew a design on a piece of graph paper. I refined the first drawing because I had too many entrances and exits in and out of the maze. I also decided that I would stitch a total of 24 blocks with each block containing 64 squares. |
| Two blocks complete--the pattern begins to emerge |
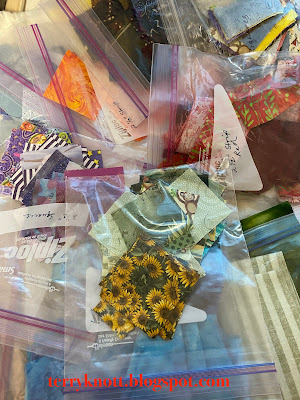
From the leftover backing of my Chilhowie quilt, I had about a yard of fabric that could represent water. I also had another piece of fabric leftover from a previous project that while it had more purple than the first fabric, I planned to make it work. I think I'll need about six and three quarters yard of fabric for the top. I pulled my pre-cuts stash of two and a half inch squares and strips. I cut the two blue fabrics into squares.
In an attempt to distribute fabrics evenly, I grouped 24 sets of 16 squares. I planned that after adding the blue fabric, I'd fill in the block with other squares from thestash. I decided that I would not use white or cream fabrics because they were too light.
I laid out block number one using my graph paper as my guide. I didn't pay attention to color except for the blue water squares. I tried to keep the value more in the medium range.Once I felt the prints/values were evenly distributed, I webbed the squares together and stitched them into the block. I pressed the rows up in block one. I moved on to stitching block two using the same process except I pressed block two rows down so that when it is time to stitch the two blocks together, the rows would nest.
One lesson learned was that I need to pay attention to the previous block as I lay out the next block so I don't end up with two of the same fabrics together. My fingers are crossed that this is going to work!
This was goal number five in March list.

3 comments:
Terry, this is fabulous! The book sounds so interesting - I'll have to ask if my book club wants to read it. What a quilt your idea is going to make! I'm thinking this is going to exercise your brain, too...
This is going to be so cool!
I like the ideas you have!
Quite an ambitious project! Original, too! I like how it was inspired by the book you listened to. And all the scraps you get to use!!!
Post a Comment