 |
| First border in place |
 |
| Preparing the second border |
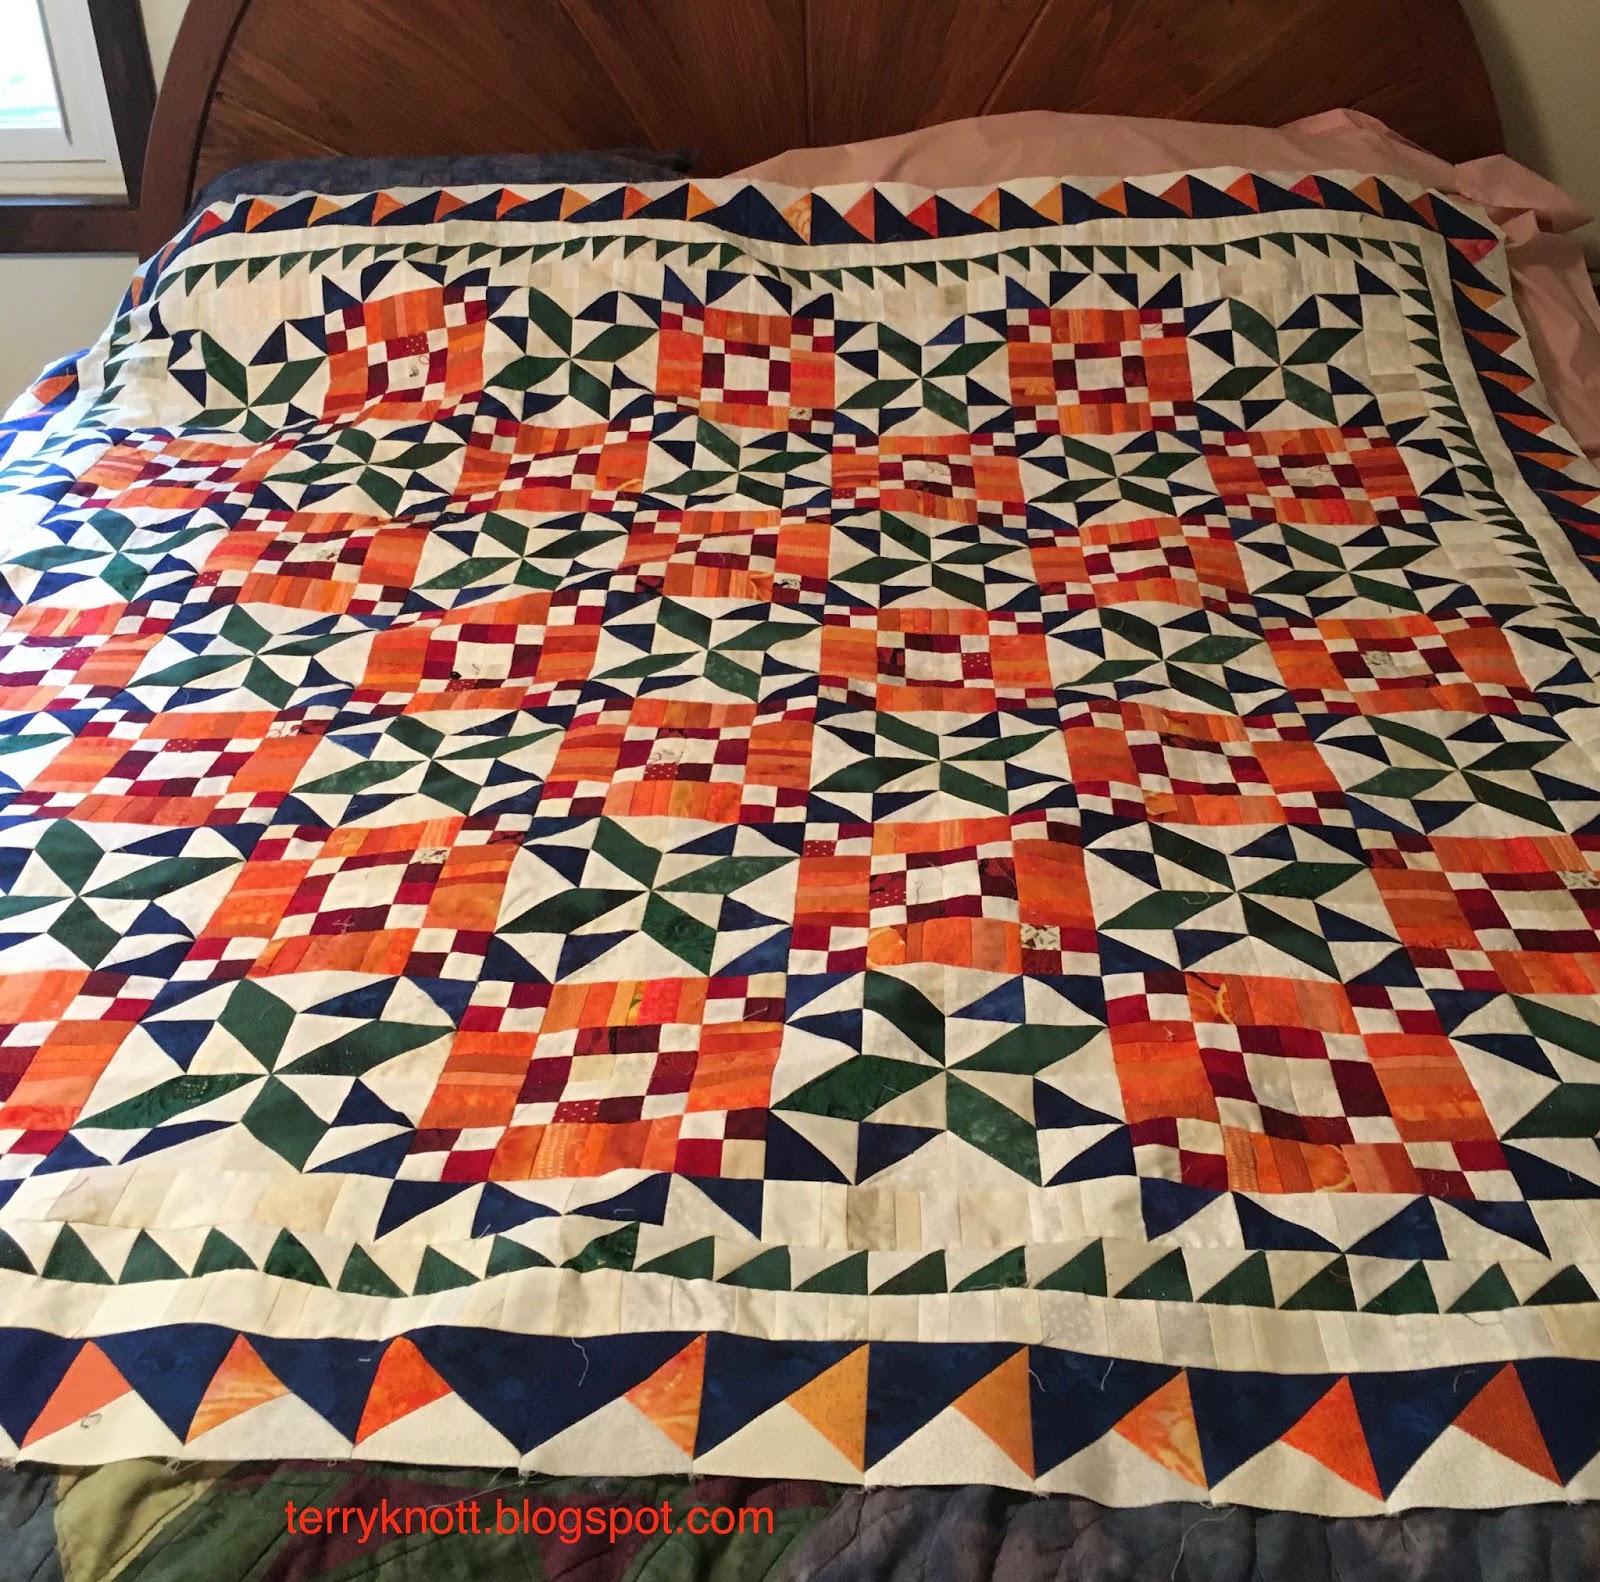
The second border incorporated the waste triangles from stitching the blades for the spinning pinwheels. I love it when "created parts" are used in the design!
I did lay out the HSTs (half square triangles) to ensure that I didn't end up with a bunch of the same fabrics all together in one section of the border. I stitched the appropriate number together and laid them on the quilt. . .it fit! I stitched the border to the quilt and I was excited the borders were going on without a hitch. . . .
 |
| Second and third border in place |
Then I looked at the photo of the border. . .there were places where the points matched a point in the previous border. My border did not look like Bonnie's. I could either leave the border as it was or I could rip and restitch so it looked like the photo. I decided I would be happier if I ripped and restitched.
It took some doing; but, in the end I managed to get the "joined" areas "in the neighborhood." Actually on two of the sides, I had no issues. It is a square quilt so I don't know why the other two sides had issues. I loved the interest those tiny half square triangles added to the top. Mostly, I saved the points too.
 |
| Last border in process |
Then it was on to the fourth and final border. Again, I laid out the blocks in each border so that I could sprinkle the various orange fabrics. I found matching the points to be a challenge because the seams were pressed in the same direction. I don't know if that was the direction or if I pressed incorrectly. Again, it took some time; but, I managed to get the intersections to mostly kiss each other.
 |
| Finished top |
These borders also fit without any issues. I was so impressed with how all of these pieces FIT! It measures 73 3/8 inches x 73 3/8 inches. As I looked at the top, it felt too small to be of service on a bed. Sigh. . .I really had planned that this border would be the last piecing I would do!
No comments:
Post a Comment