 |
| Completed pattern |
At the end of my first
post, I wrote that I combined the lines of text with the face drawing. I didn't redraw the face, I traced it in this manner:
I taped the original drawing on the sliding glass door. I taped the text lines on top of the drawing and I traced the face with a pencil line. Then I darkened areas and reshaped other areas until I felt that I had captured the expression of the face.
From there, I transferred the design to my fabric using a pencil with a number two lead. In my neck of the woods, this is an ordinary school pencil. I drew lightly. Again, I used the window as my light box to transfer the design to my fabric.
 |
| Basted project |
The fabric that I used for this project was on the guild free table years ago. I made a small wall hanging from a lot of it. I speculate that the fabric was once a tablecloth. I had enough to keep the front and the back the same.
 |
| Stitching the background |
Next I layered and basted the backing, wool batting and top. I pinned the layers together and then I basted the layers together with thread. The reason I basted with thread is that I didn't want my thread to catch on the pins. I stitched a grid with red basting thread.
 |
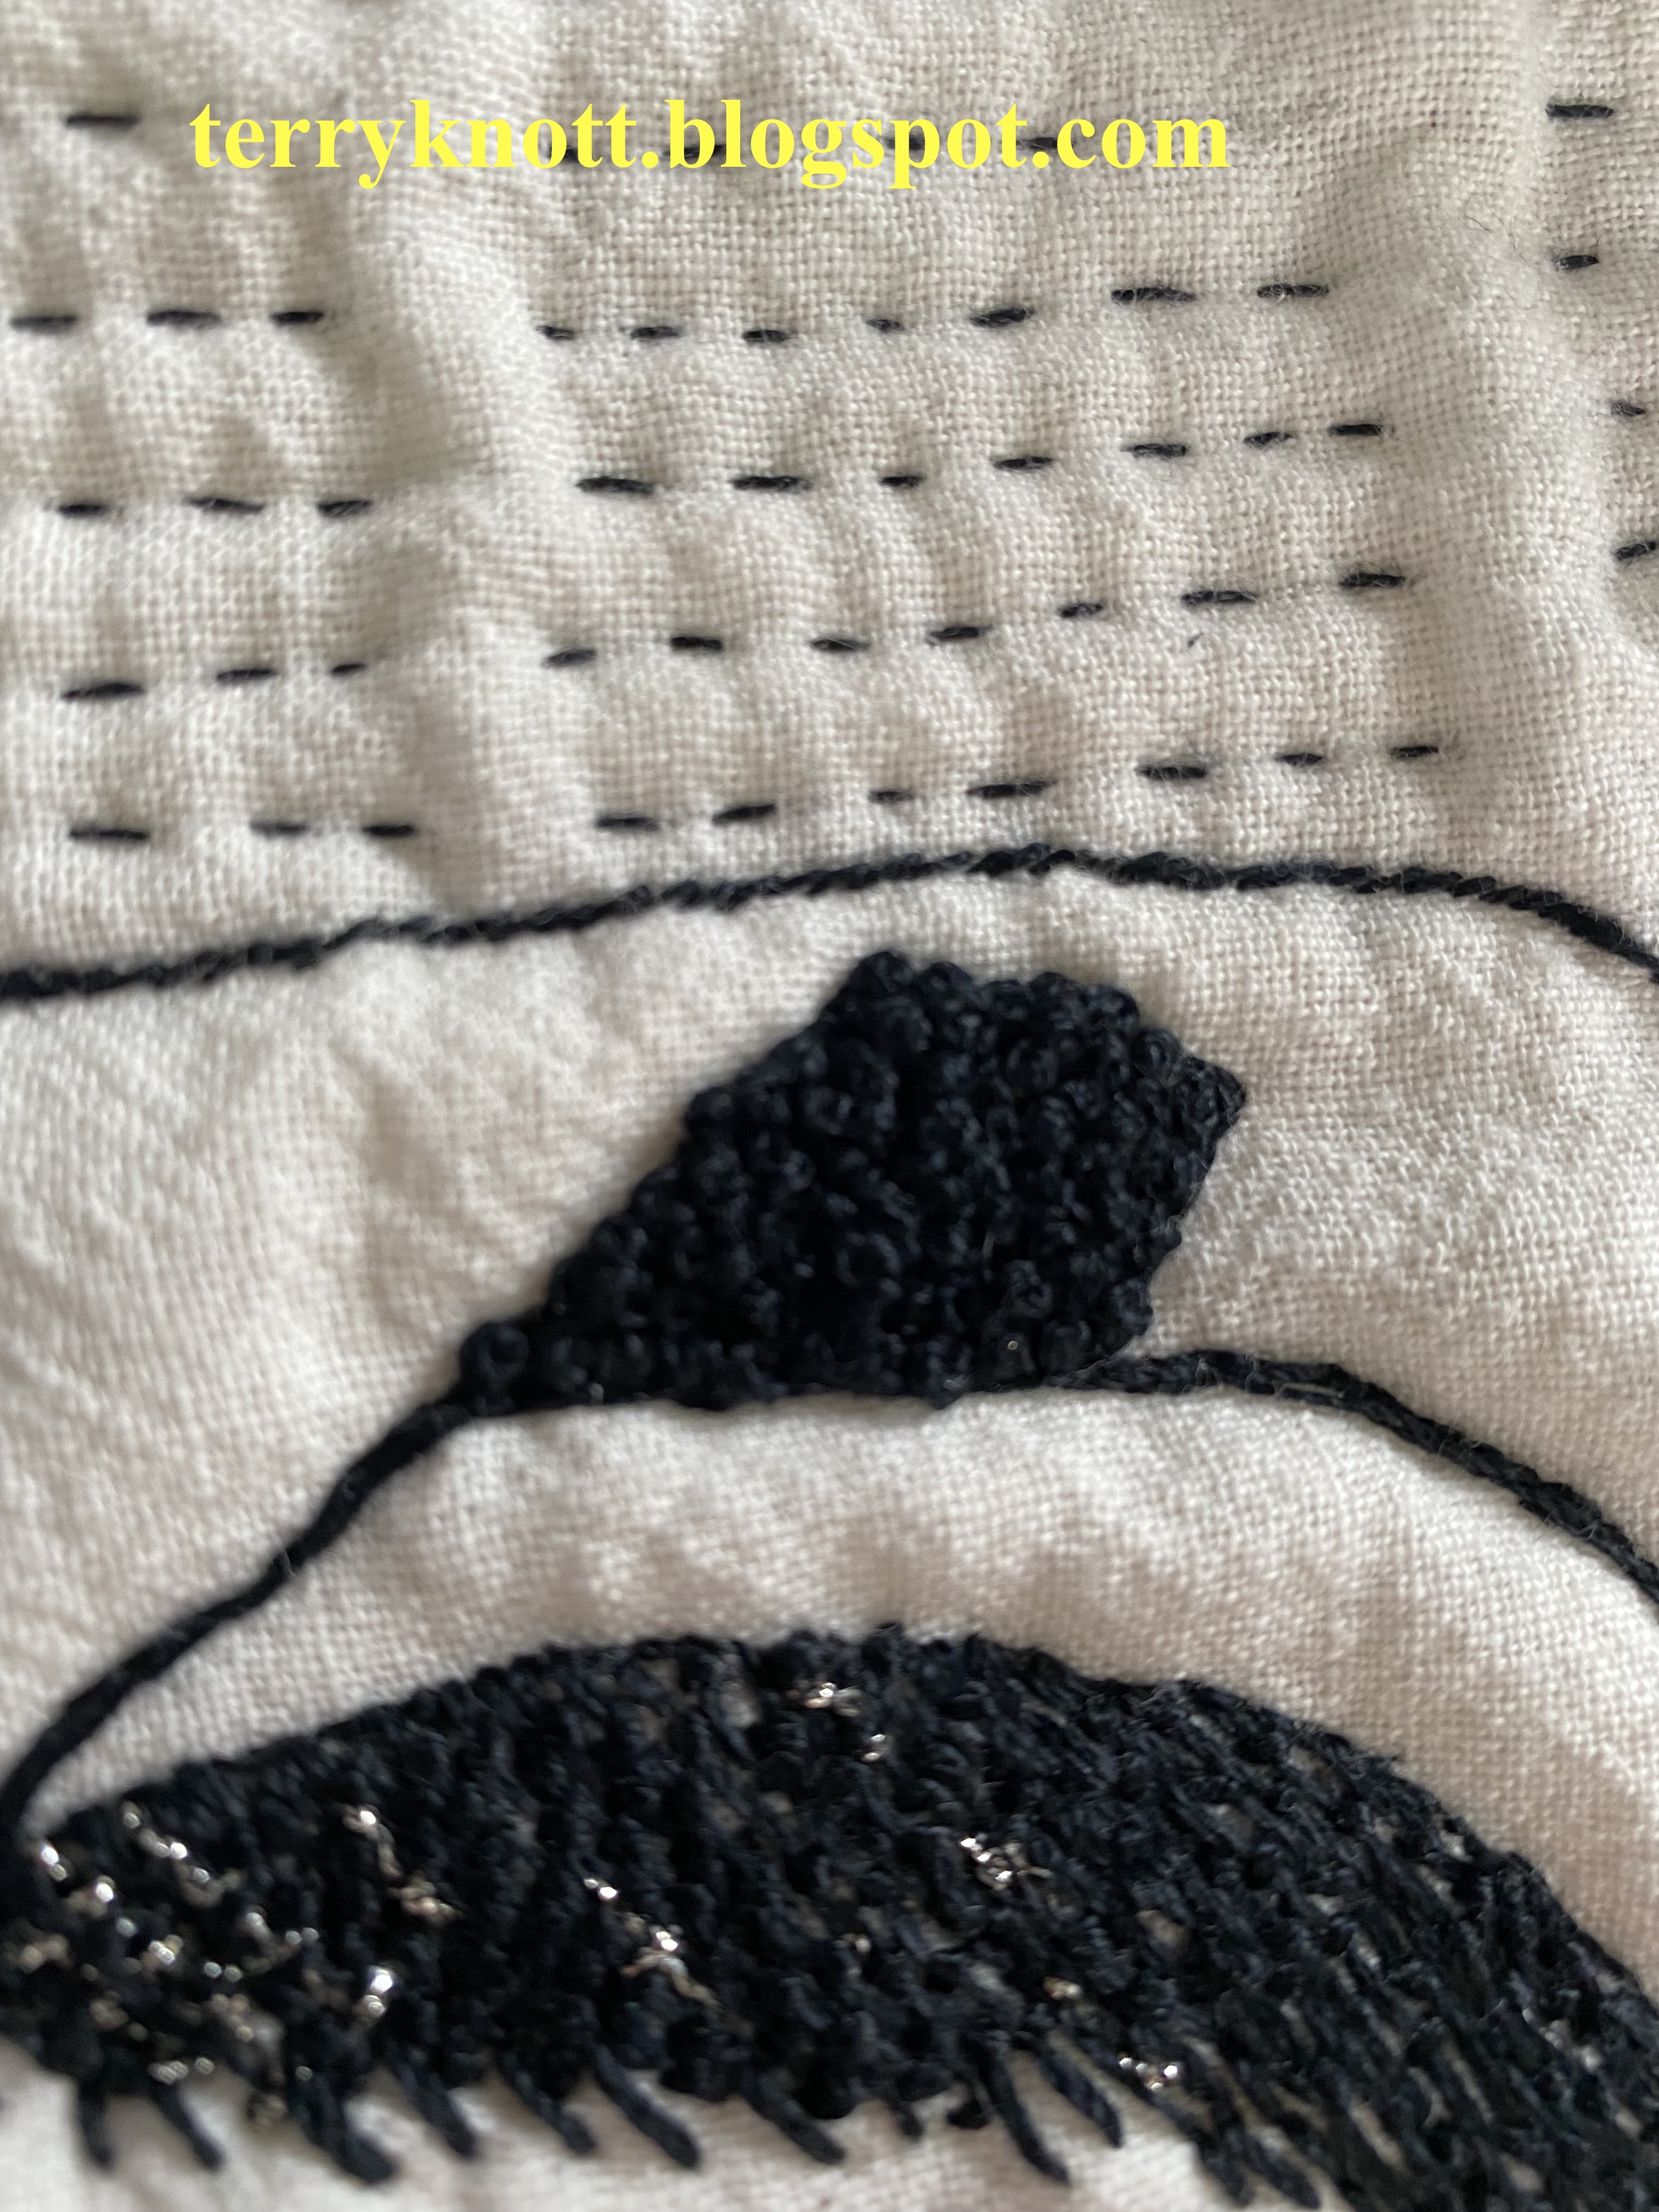
| Eye detail |
From that point, I selected my black 12 weight Aurifil thread and began filling the background with embroidery stitches. I made an effort to make my stitches even most of the time.
Although, on purpose, I made the stitches a bit uneven to represent that the character in the book was wary of being found out that she was a black woman working in a white world. Every day she walked a precarious path of fear!
When I left for London, my plan was to fill the fabric with a variety of hand embroider stitches in a design to reflect text. I decided not to stitch anything but a running stitch to represent text.
It was helpful to have basted the lines for the columns. I attempted to make my stitches similar looking on the back. I traveled my thread from one row to the next. I buried my knots. It was relaxing to complete this part of the project. Working on the background first, allowed me time to consider different stitches to use to develop the facial features.
 |
| Colonial knots and bang detail |
I did a
stem stitch for the eye brows. I used a
back stitch to outline the eyes and a satin stitch for the pupils. I used an
outline stitch to mark the areas of the hat and hair. I stitched
Colonial knots in the hat buckle. I stitched
coral stitches to give texture to the hair.
I found it interesting how several stitches made the thread look like it was a richer black I did add a few stitches combining the black thread with a metallic thread in the bang area of the hair. In my work, I like to add a little
something different for the eye to find.
At this point, I was stuck. I was finished embroidering the piece. I could have left it at that point and moved on to the edge finish. . . but, I wasn't happy with how puffy the unstitched areas of the face had become. In my next post regarding this project, I'll share my solution.
Yesterday, I received notification that my audio hold for this book was now available. Perhaps, I will be able to listen to the book before the reveal of projects in two weeks after all!
I've listened to two hours of the book. I smiled when I heard that she was attempting to smooth her curly hair in one passage. Choosing the coral stitch to represent hair was a great choice!


No comments:
Post a Comment