Wednesday, November 27, 2019

Leaves--post 2

Auditioning the leftovers for a back arrangement
Removing four blocks from the top was a good start to the back! I laid the length of the orange print fabric next to the pieced blocks. On the other side of the pieced blocks, I placed the remaining leaf print fabric. I also pieced a checkerboard chunk out of the leftover dark brown and red fabrics. This layout showed I needed to make the back longer and narrower. I cut the orange print fabric and then I cut it again to be the top and bottom. It was wide enough with the addition of a print chunk!

Finished back
It took me about six hours to piece the back. I like how the back looks. It could be a front. I like it when the back turns out that way!

When I first started piecing backs, it could take me as long as it took me to piece the front! The more I piece a back, the easier it become for me. Practice does help! I like making interesting backs. Often, the backs could be a front. I also like using the leftover bits from the front. It sure seems like a win all the way around!

I did cut the fabric for the hanging sleeve and I saved some fabric to make a pillow case. When I give a quilt as a gift, I like to make a pillow case for the project. I use that as the "wrapping." The pillow case protects the quilt too! Usually, I wait until the quilt is at the binding stage before I start cutting the remaining leftover fabrics into usable "parts."

This time, I decided to clean up early. I spent about 20 minutes and at the end, I had a few more bits to add to my "pre cuts." For 22 yards of fabric, there wasn't much remaining!
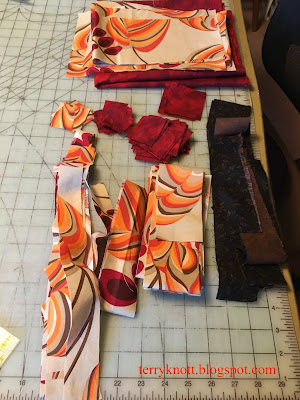
Bits ready to add to the pre-cut section

Piecing the batting with Bernie
There will be some backing that I'll trim into usable bits after I trim the quilt for the binding. This is a huge quilt. The top is 100 inches by 108 inches!

The roll of 80/20 cotton/poly batting that I had on hand was almost large enough. I did need to piece it.  I do save the leftover bits of batting. I generally put a lot quilting stitches into a project so pieced battings work fine for me. I also use the pieced battings for placemats, bags and other smaller projects. Any smaller bits that can't be pieced, I cut smaller. . .like shreds and use as stuffing. I also use some smaller pieces to dust surfaces and to clean my cutting mat. Rarely, do I throw away batting scraps. The next step was to layer and pin baste it.

To pin baste, I use a modified version of Cindy Needham's technique that I learned through a Craftsy (now Bluprint) class. I have used various brands of temporary spray adhesives to baste quilts. That process worked. I didn't like the smell and I didn't like having to be careful about over spray. (I managed to spray my floor which wasn't as easy to wash off as I had envisioned!) I decided that the cost wasn't worth the convenience. I did wonder if removing the spray from the finished product was as challenging as getting it off of my floor was. Although, I haven't noticed any issues with the quilts that I did spray baste. It has been years since I spray basted. In the end, I decided pin basting was my best option.
Pinned and ready to quilt!

My knees no longer can hold up to long periods of time on the floor so I baste my projects on the kitchen table. It took me about three hours to pin baste this quilt. I used all my pins which was not a surprise!

I worked in sections which equated to about a third of the quilt was on the table at any one time. Had my husband been at home, I would have used his help to pull the table apart and put in the leaves so I could have pinned a larger section at a time. Repositioning the backing and smoothing all the layers takes some effort. The less times this needs to be done the better!

I have about 40 hours in to this project. It will be a week before I can start quilting because my 790 Bernina Joie is working in my neighbor's studio. We purchased our machines at about the same time. Her thread cutter had to be repaired with a part from Bernina which was taking weeks to be shipped. She was worried that the craft items she agreed to embroider would not be ready for a craft fair she committed to vend. I offered to lend her my machine. After she thought about if, she took me up on the offer.

I worked on another project while I waited. Bernie, my twenty year old 1630 worked great to piece the batting and to compete the zig zag stitching I needed to do.

To all of my American readers, Happy Thanksgiving. We will be cooking dinner here for a couple friends and my mom. Yes, I do plan to do some Black Friday shopping as that is a tradition I have done for lots of years!


Sunday, November 24, 2019

Leaves--post 1

The fabrics and pattern
A couple months ago, I started washing and prepping fabric that I had purchased about a decade ago. The purpose of the purchase was to make a bed quilt for my daughter, N.

It is a Valori Wells fabric design that I loved because of the large scale; but, I had no idea of what sort of pattern to use. I purchased some additional fabrics because the colors or textures went with the print. In all, I purchased 22 yards. Looking back, I was crazy to purchase so many yards of fabrics with no idea of how to stitch them together! The fabrics are bright, bold, fun and beautiful which are all adjectives I would use describe my daughter!

Testing the block sizes
Over the years, I looked at Pinterest, quilt shows and websites for ideas. Yet, nothing excited me. Meanwhile, daughter N let me now how cold she was. You may remember her "thoughts" in comments to a variety of posts I had written!

A couple years ago when I visited her in London, I brought her a wall hanging. She appreciated the "art;" but explained the piece wasn't large enough to even serve as a shoulder warmer!  Earlier this year, she moved into a flat that she purchased. She let me know that she had several beds and a couch that needed a quilt. She took a twin size quilt back with her after a visit last spring.

I had seen a quilt a friend had made hanging in the local guild show that used a large scale print. She shared that it was a BQ pattern that she had enlarged. I asked her more about her process and she freely shared answers to all of my questions.
Top left block isn't correct

A few months later, she gifted me the pattern! Fast forward another year, I decided that I would get started on the project. I started with prewashing all of the fabrics. It takes a while to prewash and test all that yardage!!!
Correct orientation for these blocks

Once I had finished prewashing, I pieced a couple blocks to try out the pattern. I decided the small block was just right;
but, the print fabric in the large block scale was too large. I scaled down the size and restitched the block. I liked it. I made more.

Of course, I made errors at every step of the process! For a simple set of blocks, it sure took me a long time! I decided that I wanted the red flowers in the print to orient in the same direction. I ripped a few panels because the red flowers were in the wrong direction.
Add caption

When I started, I liked the profile orientation of the blocks. When I had stitched several panels, I viewed them on the bed. The day that I chose to do the viewing, the wind was blowing hard enough that the leaves were blowing across the lawn. I happened to lay the blocks on the bed in the landscape orientation.

I liked it better! I made a few extra panels thinking it might be nice if the quilt was large enough that it could be tucked under the mattress. I ran out of the dark brown. I pieced
the leftovers together much like our quilting ancestors would have. I was excited to have the
top finished. I put it on the bed. It was way too BIG! So, I ripped off two of the panels. Those panels will find a home on the quilt back! The top measurers about 108 inches long by 100 inches wide. This size will fit well on N's bed which is more like a queen size.

So far, I have about 30 hours of work in this quilt! The next step is to construct the back for the quilt.


Wednesday, November 20, 2019

Trio of Sisters--post 4 Second Finish 4th Quarter FAL 2019

Border quilting started; backing fabric choice
Finally. . . .A FINISH!!!!! I've been working on this project for a while.

Choosing the fabric for the back was a challenge! In the end, I chose a green fabric printed with cacti. The color green represented the green dress that Constance often wore and the prickly nature of the cactus represented Norma and the situations that Constance found herself. The wrong side of the fabric went better with the project than the right side of the fabric. Remember, when you buy fabric, you purchase both sides so it doesn't matter which side you choose to use!

Before I layered the top and pin basted the layers, I added a piece a wool batting and using a water soluble thread, I stitched around the figures. Then I trimmed the excess batting away so that I would have a trapunto effect to the sisters.

I did quilt in the ditch and then around the figures. I used a green cotton in the bobbin; but, I used various thread types, weights and colors on the top!

Threads used and view of the quilting
 Quilting the silk was a challenge because it was so slippery. I decided that I would quilt the border first. I chose a cotton thread that blended into the background and stitched straight lines around the piece.

For the background of the piece, I channeled the character Fleurette who liked "fancy" and quilted clam shells with a pink polyester thread. I used the papa sized clam shell stencil from Cindy Needham's ultimate background stencil set. I drew the lines and free motioned quilted them. I toyed with the idea of inserting additional lines in some of the clamshells; but, decided that I might add some beads instead.

Facing pinned into place for hand stitching
Then, I quilted the figures. I used polyester threads to free motion quilt their clothing and I stitched on the darker lines of my drawing.

For the facial features and hair, I used silk thread. Sometimes, the color was almost the same as the background for chin lines and sometimes, it was several shades darker for the noses, mouths and eyes. The thread effect was great! I spent about 10 hours quilting the piece.

From the waste of the backing, I was able to cut three strips of fabric to use for the facing finish. I was about 12 inches short of having enough for the entire facing. I decided to add decorative corners of the same fabric of the sleeve. I also could not resist using the right side of the fabric for a little contrast.

The label came from the guild free table. I chose the rooster because in the novel, Norma tended homing pigeons and chickens. She belonged to a group that raced the pigeons. She felt that pigeons would be a good way of sending information and she practiced her theory!

Finished trio of sisters
I had planned to add some hand stitching. I had planned to add beads; but, I decided the piece was finished. Sometimes, you've learned all that you can from a piece and it is time to move on. I will save embellishment for another project!

To read the first three posts, you can click the links below:

post 1 --drawing the figures
post 2 --painting the figures
post 3 --constructing the border

I used about a 1 1/2 yards of fabric for this project. So far this year, I have stitched 79 yards of fabric from my stash! This is my first finish of the fourth quarter Finish A Long. It was goal number #1 on my list.

Sunday, November 17, 2019

Hawaiian Vacation--post 4

Fish and reef life side one
Fish and reef line side two
Ice ledge
Charging devices
Sunday we snorkeled on our own. . .it felt weird to not to be a threesome! The cards above list the sea life available in the area. We saw so many varieties listed which was so cool!

We went to a couple craft/art fairs and did a little tourist shopping. We had a beer at Maui Brewery. Bob wanted to sit at the bar. When our beverages arrived, I understood why sitting at the bar was important. There was a three inch strip at the top of the bar that contained an icy strip. This is where you placed your drinks to keep them cold! Ingenious!
Mill House burger and fries
Portuguese Pork Sausages and sweet potato chips

Monday morning, we saw the most turtles ever. Bob counted 27!! I just enjoyed watching them swim, dive and surface so effortlessly. When we snorkeled in the afternoon, we saw an octopus moving in the crevices of the reef. We also saw a green spotted fish that wasn't on our fish card. We also saw 19 turtles. Many of these were not feeding in among the rocks; but, were swimming from the rocks to deeper areas of the ocean which was so cool to watch. Wow! I am going to miss turtle watching!

In the evening, we ate a few more fish tacos. We did a great job clearing out the refrigerator so we shopped well initially!

We spent Tuesday morning packing our bags and charging our electronic devices. While our devices charged, we enjoyed the last views on the beach front. We played a few more games of cribbage and most of the time, Bob won. I'll admit it. . .he skunked me on a regular basis!!!

Mill House grounds
This was a terrific vacation. We are planning to visit again. Warm temperatures and snorkeling are the big pulls for a return visit. . .spending some time with a couple daughters would make the trip awesome too!

We headed to the Mill Place for our last lunch. It still is my favorite place to eat on the island although, I missed our first waiter who was so great with the kids. I understand his name is Jared and he works the dinner shift. Next time we come to Maui,  dinner will be in our plans!!!


Border planting at the Mill House
Spider 

Wednesday, November 13, 2019

Hawaiian Vacation--post 3

Surfing Goat Diary photo by N Knott
Leftover grilled chicken became the base of our picnic lunch on Friday. We traveled to Surfing Goat Dairy. This is a farm that produces high end goat cheese. To learn more, click on the link.

The owners followed surfing competitions. When it came time to name the company, it became Surfing Goat. As competitors' boards wore out, they donated the boards to the dairy. It was fun to see the ways surfboards were added to the landscape!

We took the casual tour and learned the history of the farm. We saw where the cheese was processed and of course tasting was involved! I was surprised at how mild the cheese was. They use a vegetable rennet to make the cheese and our guide said that the rennet made the cheese acceptable to vegans.
Names of the cheeses photo by N Knott
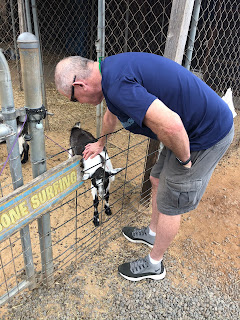
Petting a goat photo by N Knott
It was fun to see the goats. We feed a few some hay and we scratched others. We tasted some cheese from the tour and then we purchased a tasting of six cheeses. Three were soft cheeses and three were hard cheeses. My favorites were a chive and one called ping pong. We even sampled a piece of cheesecake. Unfortunately, we had eaten most of the evidence before we remembered to snap a photo!
Cheesecake photo by N Knott

After the Surfing Goat visit, we drove to Grandma's Coffee House to taste a Chai Latte. It was rumored to be the best on the island. We thought it was delicious. Then, we drove back to the condo and snorkeled. We had our picnic lunch on the grass looking out at the ocean and that was fun. I imagine the residents thought we were crazy. Usually, you would picnic on your lanai!

Another vacationer had been fishing and caught more than his family could eat. He and Bob chatted and Bob ended up with fish that he grilled for dinner. The fish were Wahoo also called Ono and Ahi. Both were delicious; but, we liked the Ahi best. There is nothing like fresh Ahi!

In addition to the fish, he also grilled some peppers. Fresh pineapple rounded out our dinner. We all agreed that Hawaiian pineapple is the sweetest when eaten on one of the islands!

Landscape near the dairy Photo by N Knott
Saturday, we had a laid back day. We snorkeled in the morning after we had walked to the market and checked out some shops. We purchased some "island" coffee at a small shop. I had an iced coffee. N had an iced chai latte and Bob had a brewed house coffee. We each liked our "brew."

We purchased a bag of flour tortillas, a container each of salsa and guacamole so we could make fish tacos for lunch with the fish leftover from our previous dinner. Those were delicious. Bob and N went for an afternoon snorkel session. I stayed home and worked on this post!

N's flight left at 11pm. We were sad to see her leave. It was great to share our adventure and I am so honored to have been surprised with her visit!


Saturday, November 9, 2019

Hawaiian Vacation--Hana post 2

Swimming pool with falls photo by N Knott
Trio of falls photo by N Knott
Stone bridge over falls photo by N Knott


Picnic lunch. . .perfect solution for lunch
Hiking to the ocean photo by N Knott 
Salmon leftovers from our dinner became a picnic lunch for our excursion to Hana. We were up early on Wednesday as it is recommended to leave early for the better options for parking. It is a twisty road. . .like not at all straight for the entire 65 miles! We left at 6am and returned around 4pm.

The scenery is beautiful. There are many picturesque waterfalls. Although we brought our suits, we didn't swim in any of the pools. People who did swim, said it wasn't as cold as they had expected.

Hana was one of the places we didn't go when we were in Maui with the family because all those twists and turn could have caused carsickness which would not have been pleasant!!!

I highly recommend the trip to Hana! The amount of cars and traffic on the road was a lot. I'm glad that we left as early as we did because we were a little ahead of the steady stream of traffic behind us!!!
Selfie gorgeous view in the background photo by N Knott

We did stop and sample the banana bread from Halfway to Hana. While it was good, the consensus was what I make is better. (Good comment because now I'll make more!)

The views were spectacular. All of the photos in this post were from our drive to Hana. Daughter, N, took the majority of the photos. She has a good eye to frame the scenery and she is quick to snap the shot. Also, she has long arms and long fingers so she is a master at taking selfies!

Scenic views photo by N Knott
We stopped at most of the sites listed in the guide book along the route. Sometimes, there wasn't space to park; so we waved and passed. On our way back, we stopped at a few of the places to make sure we saw it all!

At one point, we took a detour for a couple of miles. We drove to a small town. Along the way, there were stands with flowers and produce. You paid on the honor system. It was fun to see these!

At the end of the road, we parked and walked a bit to the ocean. Again, the views were spectacular!

Rocky outcrop photo by N Knott
Our salmon salad picnic lunch was just right. When we arrived back at our condo, we snorkeled from our condo beachfront. We saw even more fish and LOTS of turtles. For dinner, Bob barbecued some local fish that we had picked up at Costco. It was good and perfectly cooked.

Shoreline view photo by N Knott
Thursday was our day to take the Pacific Whale Foundation snorkeling trip to Molokini Crater and the Turtle Arches. When we took this trip with the family, it was too windy to go to the crater so seeing it this time was extra special. I can't say that we saw any different fish or more fish than we had seen off our beach; but, the water was crystal clear so that made viewing amazing. Unfortunately, there were no turtles at Turtle Arches for the second time. We did see some turtles in the ocean from the boat on our way back to port though.

Although it was windy and the water murky, we snorkeled again from our condo's beach. We did see a turtle; but, it was tough to see more than the its shape because the visibility was so poor.
One last view photo by N Knott

What was totally CRAZY about the trip was that when we were boarding, I heard N say, "Hey, I know you!" Turns out one of the crew members was a swim team mate from N's high school days. For as large a planet the earth is, it is also a small world! They were able to get in a little catch up during the trip.

Bob cooked chicken on the grill for dinner. It was delicious. Leftovers became the base for lunch the following day.


On the boat to the crater photo by N Knott


Costco fish and asparagus photo by N Knott
N and Jamie photo by N Knott

Wednesday, November 6, 2019

Cutting and Sewing Tips--Bust Your Stash post 3

Cutting and Sewing Tips—An Article to Support the Bust Your Stash Challenge

To prewash or not--I prewash
For those of you that are participating in this challenge, I hope that you have a pattern and fabric in mind. The post today contains a few tips designed to make the next steps in your process more efficient and effective.

Fabric Preparation—prewash or not. I prewash because fabrics shrink at different rates. I also don’t want to find out a fabric bled into a background after I’ve finished! If you don’t pre wash, do test the fabric so that you don’t have surprises later. 
Use a sharp blade for rotary cutting

After prewashing the fabrics, I use sizing and sometimes starch with an iron to add back “crispness” to the fabric that the laundry process removed. Click the link to read an article that addresses how to test a fabric for bleeding. Once I’ve ironed out the lumps and bumps, I trim away the selvages for another project. Then I line up the trimmed edges so there are no wrinkles.  

Cutting
Use a sharp blade. I am lax about changing the blade; but, honestly, a sharp blade allows me to cleanly cut the layers in one pass. 

Line your ruler up on the line rather than just shy of the line. Bonnie Hunter shares a tip about cutting here. You will also be looking at a portion of a block that contains a bunch of two inch squares. . .just saying in case you haven’t picked a design yet!

When cutting move your fingers on the ruler as you cut to maintain the ruler position. The Crafty Quilter shares some tips regarding rotary cutting here. I find that periodically cleaning the lint from around the blade and rotating the blade increases the longevity of the blade. Of course, you get to take the rotary cutter apart for those procedures!
Sewing a thread or two less than a quarter of an inch

Sewing
Test your seam allowance. Bonnie Hunter has a ruler specifically for testing for seam allowance. You can read about it here.  I personally stitch a thread or two less than a quarter of an inch because the thread takes up a little room in the seam! Do what works for you.

Use leader/enders as these are a great help to start and end your seam on the quarter inch mark. I started a leader/ender project in September. The cool part of the process is that by stitching block parts together instead of a stopping/starting strip, at some point, you have enough blocks stitched for a quilt! 

Check units for accuracy
Check your tension. Use the same weight of thread in the bobbin and in the needle; but, choose a different color for one of the threads. This way, it is easier to determine which of your threads needs adjustment. Superior Threads has an informative article in the education section of their website regarding tension. You can access it here.  

A slightly shorter stitch length seems to work well for me. When I’m piecing, I set my stitch length on my Bernina at 2.5 and at 12 stitches/inch on my Singer Featherweight. Yes, it takes a bit of effort to unstitch; but, I also have less seam popping or unraveling later in the process.

Check your units for accuracy as you stitch. It is easier to unstitch one unit and correct it than it is to unstitch many units!

Pressing—
Press not iron; use a little sizing; let the pressed seam cool before moving; weight it. . .these were some tips I picked up after attending a precision piecing class that Sally Collins taught. You can listen to her tips here.

Press not iron
Chocolate helps! 

Hang in there. Sew a little every week. It always surprises me that I can make progress on a project even if I stitch on it but a few minutes several days in a week! 


Next month our topic will be basting and quilting tips. Don’t forget to post a comment and/or photo at  #2020bustyourstashchallenge on instagram. Comments on this post are welcomed too! 

Sunday, November 3, 2019

October Recap

Chickens a viewers' and members' choice winner
October through December (actually, it will be through January 14th), I'm in charge of the book/discussion/activities/real for our Thread Tales book club. The book I chose is "Major Pettigrew's Last Stand" written by Helen Simonson.

I contacted her and she graciously agreed to be part of our discussion via FaceTime. It was an awesome experience to be able to ask the author various questions and hear her response. Additionally, we learned that when books are released in other countries, the cover is changed to reflect that country. She went on to describe several different covers for her book. Interesting!

At the October Mt. Hood Quilt guild meeting, it was announced that my "Chickens" quilt was tied for second place for Member's choice and was first place for Viewer's choice. I was surprised and honored. It is so special when the audience recognizes an entry with a vote.

 This month, I taught 31 kids swim lessons; 12 participants babysitter's training and 31 participants Healthcare Provider CPR. That is a total reach of 74 people!
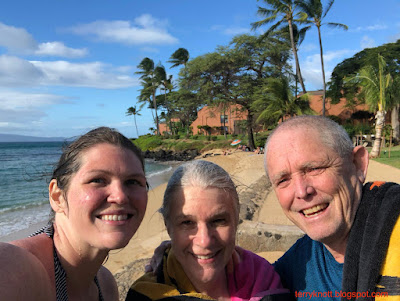
Us at the end of a snorkel session

I didn't manage to stitch my October embroidery lesson although, I did complete the software part of it. I completed seven of my 12 goals and made progress on three other goals.

The best part of the month was our trip to Maui, Hawaii. Daughter, N, surprised me at baggage claim. I had no idea that she planned to join us!!

The paint chips for Frolic
We snorkeled from the little beach behind our condo and saw many turtles. My husband, Bob, has the best eyes for spotting turtles! One morning we saw 27 in about forty minutes and that afternoon we saw 19! For me, the afternoon sightings were the best because the turtles were swimming from the rocks instead of being on the rocks. They are amazing creatures. We also saw lots of fish, an octopus, a moray eel, sea cucumbers, as well as unique varieties of coral and anemones.

I also started a Facebook group called Bonnie Hunter's Mystery Mavens. I thought members from the Mt. Hood guild who want to follow Bonnie's mystery might benefit from support to get their projects to the finish after the mystery ends. I'm still working on my mystery from last year so I'll be benefitting from the group support too!

If you want to play, Bonnie released her Frolic colors and fabric yardages November 1. You've about three weeks to locate your fabrics! She will be releasing the first clue the Friday after Thanksgiving. I picked up the paint chips. . .now to search the stash. . .