 |
| Supplies used to start the project |
About the time I ordered her kit and tools, our book club was reading "The Sweetness at the Bottom of the Pie" by Alan Bradley. The book is written for young readers and is a murder mystery. Eleven year old Flavia, the main character, finds a man taking his last breath in the family's cucumber patch. Her dad is arrested for the crime and Flavia sets out using her bicycle named Gladys to solve the murder. The author brings other sub plots into the story. You will have to read it to find out what happens.
 |
| Progress at the end of the first session |
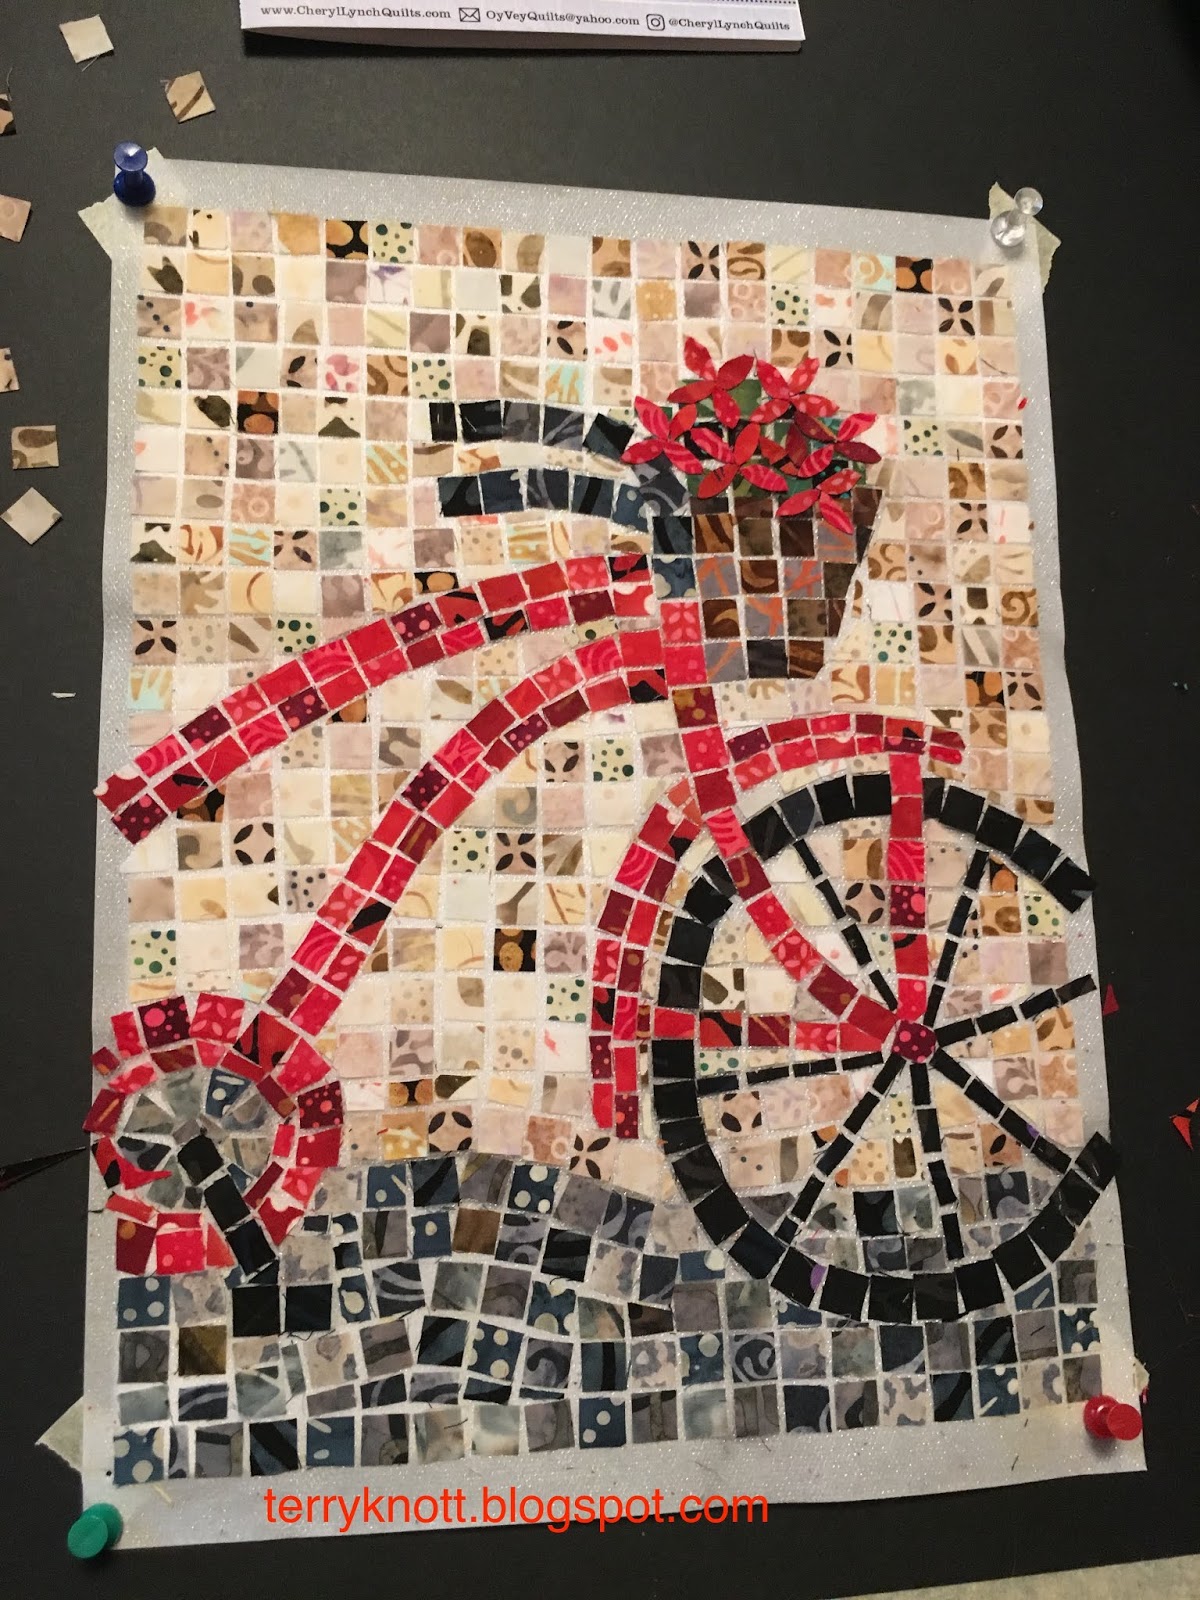
The kit contained the "grout" (fabric behind the pieces), more than enough two inch squares for the design, the sticky stabilizer, the pattern, a piece of white tulle and a detailed instruction booklet. I cut a piece of foam core board and taped it together as she suggested. I cut the 3/8 inch squares by color as per the directions. I used her ruler that she suggested. It worked like a charm. I'm glad that I purchased the ruler as cutting squares that small would have been a challenge! I put the little bits into muffin cups.
 |
| Ready to heat the fusible to all the pieces |
I taped the pattern to the foam core board in the four corners. Then I removed the release paper from one side of the stabilizer and used the push pins to anchor it sticky side up on top of the pattern.
Then, it was time to play! At the end of a couple hours of play time, I had about one fourth of the design placed. I had planned to work on the project at a sew day at a friend's house; but, then I decided the foam core board would take up too much space. It was better for me to continue filling in the design. After about seven hours, I had finished the design. I had left the basket empty; but, then decided I could put the flowers in it after all. I free hand cut the petals and used glue to adhere the petals to the background. I also reworked the basket--removing the squares that had a little orange in them and replacing them with a brown square instead.
There was plenty of fabric in the kit for this project. I had squares left over. There are probably enough for a good start on a second bicycle! I laid the tulle over the top of the project and was disappointed at how dull the project became. I might try a different color tulle or I might leave it off all together. I plan to think about it for a few days!
It took me about eight hours to finish this part of the top. I have selected a small inner border fabric and a larger outer border fabric. I am pleased with my progress.
7 comments:
I am really intrigued by the mosaic work you've been sharing lately - it looks FUN, like quilter mud-play! I didn't realize the squares for the bicycle are so tiny - super smart to use the muffin tin for them.
Lynette, it is FUN! Cheryl provided the tip of using the muffin tin and it was smart to use it in that manner although my granddaughter thought it was a little crazy to use the muffin tin in the studio! Thanks for taking time to reply!
Terry, i’m not sure what color tulle Cheryl included in the kit, but I would try a piece of white tulle.
I’m always loooking for books for my cousins; what ages would Alan Bradley’s book be appropriate for.
I commented and then almost immediately remembered that I had read that book. :-) i knew the title sounded familiar!
Janice, Cheryl included white tulle in the kit. I should take a photo of it on the bicycle and share in the next post. As for the book. . . .I think middle school would be a good age. . .maybe even 7th and 8th graders. I liked the author's writing style and thought he captured sibling relationships well.
I saw the same show and used the process for a very small quilt. I can certainly see how the ruler would have helped tremendously!
Joanne, the ruler was helpful. After I cut the squares, I couldn't imagine trying to do it without it! Those squares are tiny and at times unruly!!! :)
Post a Comment