 |
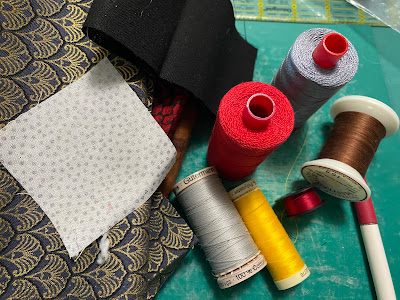
| Most of the supplies used for the project |
 |
| Layers together ready for handwork |
At three inches, this project is tiny! I thought it might be fun to put USB sticks or a needle pack in the pouch. Jo put a chocolate egg in her sample which was a good idea since the class was taught near Easter.
I gathered my materials and cut my fabrics. I used the wrong side of the metallic fabric in the photo for the decorative bands on the head. The black fabric is the underside of the wings. The small scrap that I used for the top side of wings was all that I had!
 |
| Colonial knots, running stitches |
 |
| View from the lining side |
The only difference between the chicken and the bird was the shape of the wings. After stitching the wings, I embellished them a running stitch, I stitched the body to the head. I added the wings and beak.
I layered the right side of the lining to the right side of the body/head with the batting on top of both. I did trim the batting so that it was barely caught in the stitching. I then stitched a quarter of an inch around the perimeter leaving a three inch opening for turning along one edge.
 |
| View of the seam. . .you can't see it! |
It was time to begin the hand work. I stitched colonial knots on the decorative bands and running stitches in a contrasting thread on the head and body. Next, I began to assemble the pouch. I did leave a hole to be able to thread a cord into the project. I turned up one end and hand stitched the lining edges together. What I learned from this step, was that when I moved the seam to form the triangle bottom, the edges covered my stitching on the lining. I did stitch the edges of the body with a matching thread to act as a reinforcement.
 |
| Side view |
over the lining!
Next, I stitched the edges of the head together and stitched the beak together. I also left a hole for threading the cord. I added the eyes. . .which are buttons from my grandmother's button box. Smaller ones would have been better; but, I used what I had. I added the decoration on the cord which could have been a bead; but, I used a toggle button that must have been on a coat at some point. It too came from my grandma's button box.
 |
| Other side view with the toggle button |
Threading the cord through the holes was a challenge. I used a thread loop to do the job. I added a knot to the bottom and I had a finish! The cord is a way to access the pouch inside as well as close it after you have accessed it. The project was a lot of work. I don't know that I would make a second one!
This was goal number two on my May list. Linking to Alycia at Finished or Not Friday.
6 comments:
Terry, that is so cute! It does look like it was a lot of work, but a good challenge for your brain, too. We need those sometimes! Do you think you'll make anything from the other classes?
It does look like a lot of work! But you can cross that one off your list and move onto the next;)
That turned out really cute!
I just love how Gertie entices you into new projects! LOL And this was a cute one! Now who can resist a chicken. Have a great weekend, Terry. Hugs.
Oh, what a fun little guy! Hiding a needle case inside seems like a great idea, it's a lovely pin holder! Thank you for sharing this fun project and linking up.
So very detailed - but so fun to try new things!!
Post a Comment