Monday, October 31, 2016

#FALQ4TerryKnott--Finish #2 Whale of a Tail/Tale

Batik triangles fused to wool batting.
I have a finish to report! I started with this background.  I thought that our book club was going to read "Moby Dick." So that was the initial inspiration behind this piece. I wanted to make a background that had a little orange in it to signify danger as well as use a lot of different fabrics to symbolize chaos.

I took a workshop last spring from Larkin VanHorn.  She was disappointed that I didn't use her technique to make a background. So a little later in the class, I did use her technique which was to fuse fabrics either to a background fabric or better yet, directly to batting.

To class, I brought some waste triangles that were gifted to me from making HST's. It was time consuming to apply fusible to the back of all those triangles; but, it was fun to place the fabric, and hit it with an iron! Yes, I missed a few places; so I just added a little more of those waste triangles!

The beaded tail and embellished propulsion
Our granddaughter was over one day and she had a mermaid doll with her that had the best shaped tail. I asked if I could copy it and she said yes. I think she thought it was crazy of me to draw the doll's tail because the best part of the toy was the part above the tail!

I cut out the tail and appliquéd it to the background that I had free motion quilted with a variegated thread around the triangle shapes. When I use raw edge appliqué, I use fusible; but, this piece had enough stabilizer; so I appliquéd it as it was. I got to thinking about the power of a whale's tale. I contemplated ways to represent that and I thought back to Larkin's class. She uses a lot of beads in her work. I thought about Abbie Dick's embellished work at the Featured Artist Show. I got inspired to get out the beads and I used some gold ones that were my husbands' grandmother's stash as well as some other beads that came from my grandmother's stash.

Facing on
I liked how the beading turned out although the background is really too busy to catch the propulsion reference; but, that power is what is creating the chaos. I added some hand stitching to add to the propulsion and moved on to finishing the piece with a facing. At this point, it was finished; but, it didn't excite me.


This sea green background was my favorite.
I've wanted to make a background quilt to use as a mount for a smaller piece. So I looked at fabrics in my stash.  I tried the orange; I tried a dark blue and then I found the winner--this sea blue! JoJo suggested adding a few skinny strips a la Jean Wells. I had taken a class from her a year ago this month!

I decided I could carry out that "danger" theme using three skinny orange curved strips. Besides, this piece of blue is two strips about 7" wide x 24" long. I've had this piece in my stash since about 1996! It was time to use it UP!


The top
Jean's technique is fun! Measuring isn't involved. You cut, stitch, press and repeat! It took no time at all to create this top.


The back

And then I needed a back. I used two pieces of orange and the scraps from the top that were left after I cut the top to the size I wanted.


Quilting lines with the walking foot
Then it was on to the quilting. I did free motion quilt in the ditch around the piecing; but, then I got out the walking foot and went to town stitching lines. That was fun and again I didn't have to think too much about what I was doing. I liked the texture. I used a sulky rayon thread and an 80/20 batting.


Finished back
Figuring out what to use for the facing was a challenge because I didn't think I had enough of that blue fabric to use as a facing; but, with some math calculations--I was thankful, the math worked--I could use that fabric after all! I used a piece of orange for the sleeve. So the back was finished.


My message
All that was left was to stitch the whale tail to the background quilt. I had a time thinking of how to do that stitching. In the end, I decided to leave three edges loose so I just stitched the top of the mini quilt. It was challenging getting it on the background. Leaving the three edges loose, one could look at the back of the mini quilt. . .which was fine. . .BUT, what if, I put a message there instead?? So that was what I did!!

This is going to hang in my studio. Just knowing that the message is there makes me smile. No pattern was followed with this project!

The finished quilt
This is the finished little quilt. It is my second finish of the quarter. It took me about 22 hours to make. I used about a yard of fabric from my stash which brings my total for the year to 21 1/2 yards stitched! I purchased NOTHING in terms of supplies for this project. All the supplies I used were left from other projects or gifted. You know where the beads originated!


This is my second Finish-A-Long 2016 for quarter number 4. You can read my list here.


Friday, October 28, 2016

Featured Artist Show

Cutting the ribbons is fast work with extra hands
Last weekend was the Featured Artist Show. It featured work of 21 past presidents!
A small group of us arrived early for set up because in the past the hall sported beautiful fall arrangements that we had to move and return which added about an hour to the set up and take down process. This year. . .the space was bare!
So while we waited for the equipment to arrive, we helped Karan cut the ribbons that divided the spaces.


Karan and the ribbons

To keep the ribbons organized, Karan just draped them around her neck . . .much like a measuring tape.

Then our equipment arrived and it was all hands on deck getting it put together! I had planned to take photos of the stages; but, honestly, I was just going from to level answering questions!

Miraculously, all the quilts that had stories fit. Some past presidents' used less space and some used more. There were a couple places that had much fewer quilts than was thought; but, with a little scooshing here and a little scooshing there as well as using someone's "extra" quilts, all the draped areas had quilts. Who could ask for more?

Phyllis' Yo-Yos
Of all the Featured Artist Shows I've attended, this one was my favorite because of the range of techniques. There was hand quilting, beading, paper piecing, micro quilting, intricate piecing, art quilts, painted quilts. . .well, you are getting the picture. Of course the colors were just as varied.
Diana's Bitty Quilt


Phyllis made this Yo-Yo coverlet. . .it was small. It also drew lots of comments! I like yo-yo's although I can't imagine myself making even half this many!!!

I heard people say that they liked the show because of the variety of types of quilts and fabrics used.  Diana used only fabrics from her scraps to make the blocks and sometimes, the piece she had to work with barely was large enough! I visited this quilt often! She said the quilt pattern came from a BOM through a quilt magazine last year.
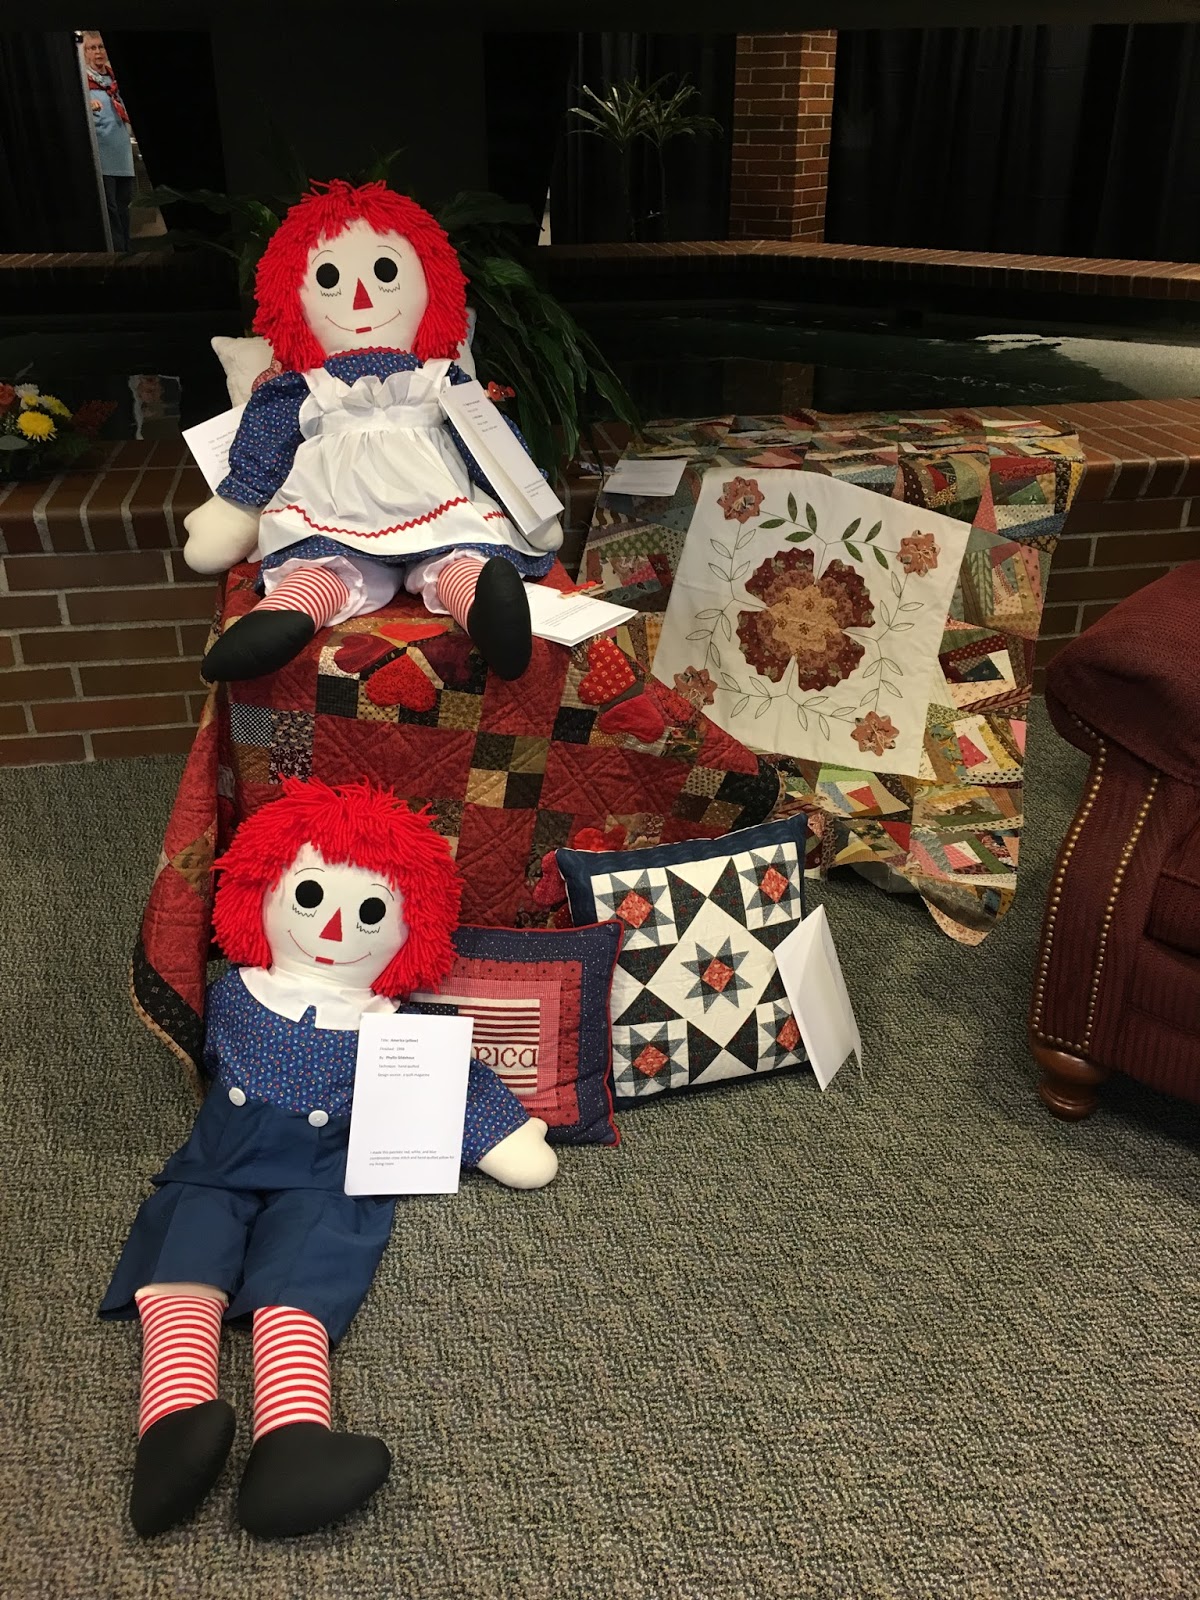
Phyllis' small items display

Phyllis brought some unique small items to fill a seating area. She said that she loved making dolls and that the Raggedy dolls in the photo were two of 600 she had made and given away over the years! The crazy patch quilt in the background was her work in progress. She received lots of ideas of what kind of border it needed next.


I liked the story behind Jan's round robin quilt. The rules were that you couldn't move anything once the block or section was sewn!
Jan's Round Robin


Chris' Honeymoon Beach


Chris and I were in the same class for her Honeymoon Beach class. Her's is finished. . .mine . . .well, I haven't even completed the pattern!!! At any rate, she made this quilt from a photo she took when she was on her honeymoon! It was so fun to see it again!


Jan's Santa's Big Night Quilt

Jan's embroidered Christmas quilt garnered a lot of attention too. That tiny candy cane border was the perfect accent to this quilt!

I thought that I had taken more photos than I did so you will just have to take my word for it about the variety in each president's display!

All too soon it was time to take down the show. It took us about two and a half hours to hang the 173 quilts and about 50 small items. It only took an hour to take it all down!


First step in taking down the quilts. . .lowering them!
Our hanging system is really cool. The uprights collapse so that you don't have to stand on a ladder or step stool to take the quilts down. But, team work is involved because the whole section needs to be lowered at the same time! It can be done differently, but it is easier it is lowered at the same time.

Once the quilts are at a reachable height, they are removed from the hanging bars, folded and removed from the area.

The lanyards, hanging bars are removed and stacked in a central area. The drapes are removed, folded and stacked. Next the cross bars come off the uprights, then the uprights
Ross beginning to load the bases in a cart.
are removed from the bases. Once there are piles of like equipment, the pieces are boxed. Each box has a label on it that lets you know how many go into that container! The last item to be picked up are the bases. These are heavy!

It is a good idea to wear gloves and closed toe shoes so that you don't get your fingers pinched! Ross is Sandie's husband. Once the boxes are packed, a moving crew that we hire packs the boxes in a truck and drives them to the storage unit and puts them in the unit. It is worth the $400 that costs to not be lifting and carrying those heavy boxes!

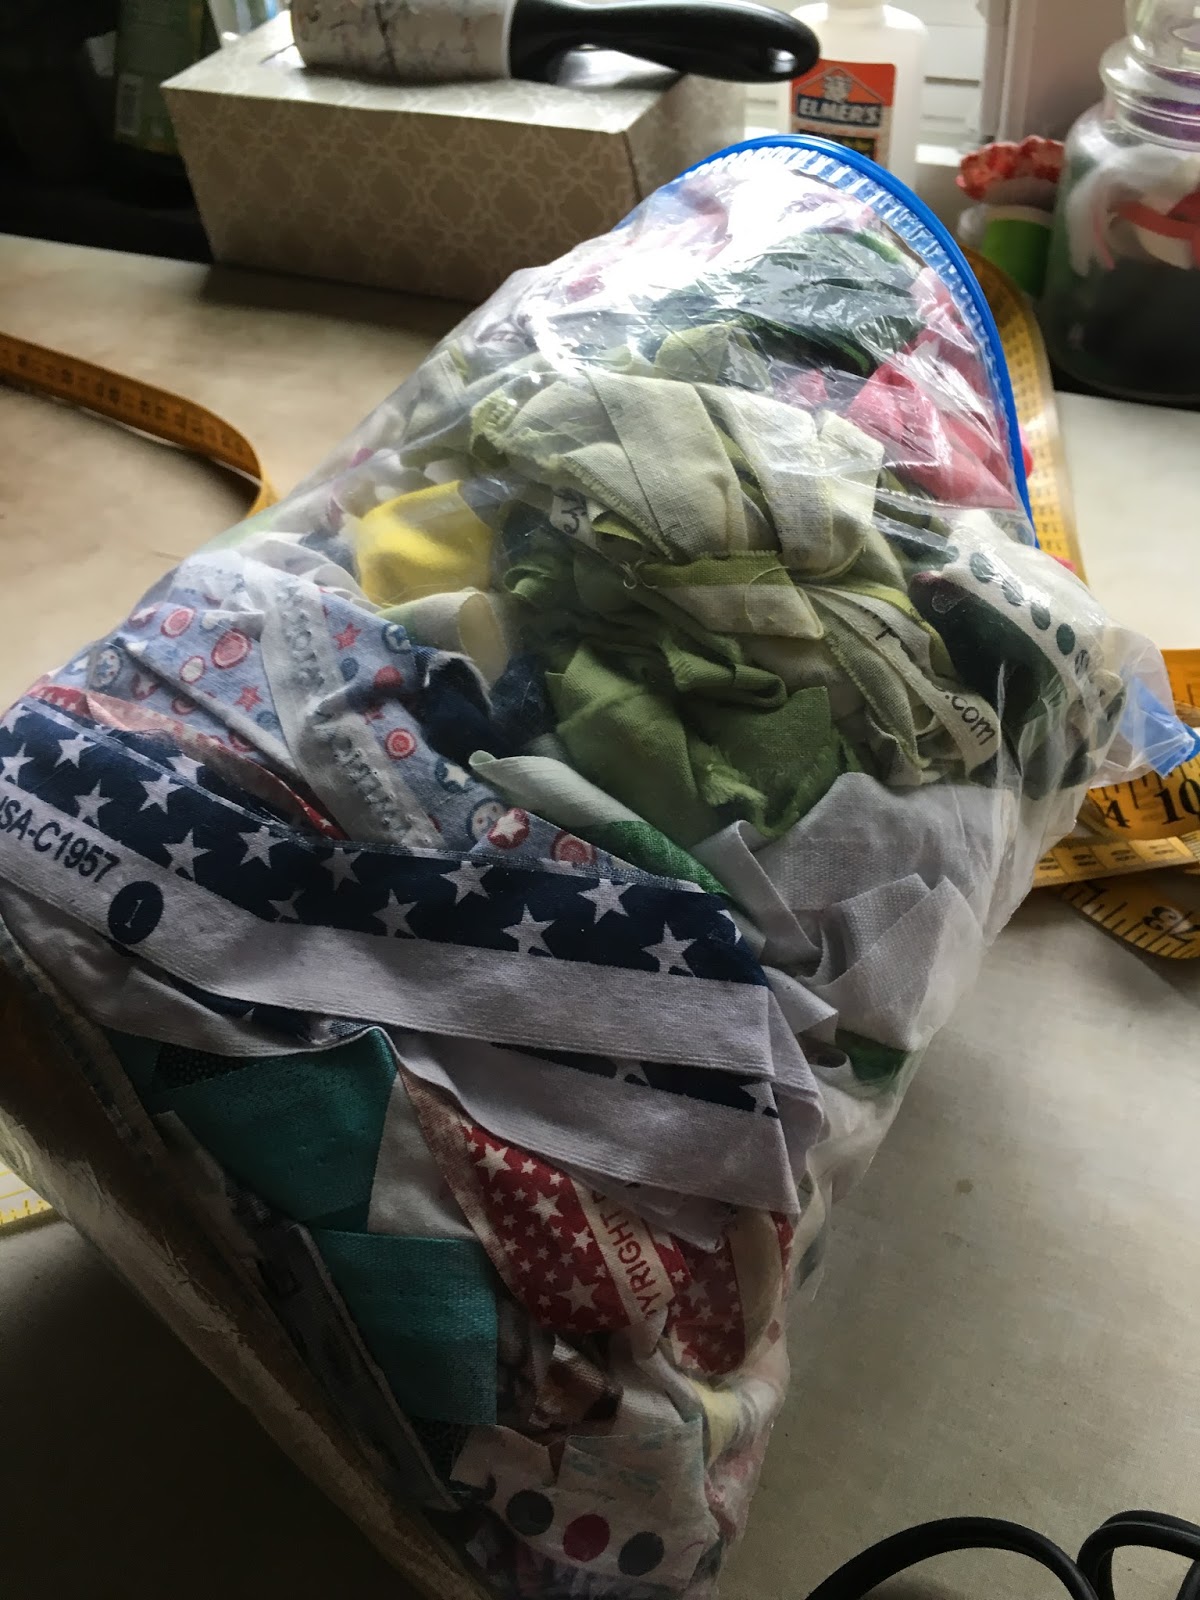
One of my partners in organizing this show was Sandie. She was the president who followed me. Although we knew each other, this was the first time we had worked so closely together. We used to laugh because we tend to problem solve the same way. For example, we each had brought a kit of maybe needed items. We didn't tell the other that we packed the kit. . .ha! The kits were identical right down to the lint roller brush!

Sandie, who helped organize the show!
I so enjoyed working with her. If she heard of an issue before me she took care of it and then let me know what she did. Every time, if I had encountered it first, I would have solved it the same way! Isn't that a hoot?

She recruited all the volunteers for the show. . .the overnighters (they sit and sew because the building is open to its tenants 24/7), the hostesses, the set up and take down crew.

Lots of people attended the show. We brought in $1096 in donations which was almost $300 more than we estimated! (We asked for $3 to see the quilts. Some gave more, some gave less, a few not at all; but that is how donations work!) We spent less than our budget and will add about $400 to our general fund. Life is good.

Now, I can get back to sewing. I do have another guild commitment; but, I'm thinking I'll be able to make progress on that list I made at the beginning of the month!  Cheers!!!


Monday, October 24, 2016

#FALQ4TerryKnott--Finish #1

"42 Minis" as a top!
"42 Minis"--AKA President's Blocks 2014 is FINISHED!!!

These were the blocks that guild members gifted me at the end of my president's term in 2014. I blogged about the start on June 16. As I made progress, I blogged about it. There was the post about the sashings and the one with the completed top/back. That post included the beginning of the documentation of the blocks. I had several posts about the quilting the blocks: here, here, here and here! I had a couple posts about the sashings: here and here.

Stitching the binding the first time with
the Bernina #71 foot. 

Then it was on to applying the binding. I saw a video on You Tube which Shelly Fitzgerald used the Bernina #71 foot to make a skinny binding. Her process looked achievable and as you know, I was up against the deadline to finish this project to hang in the featured artist show October 21-23. So, I tried it!


Corner view of binding from quilt back. 


If I were making a kid's quilt, I'd definitely use this technique again. I was impressed with how easy it was for the foot to do most of the work. By the time I passed the fourth corner, I had figured out how to make that work for me too. The downside of the process for me was that the binding wasn't quite full.


Corner view of binding from quilt front.


If I rolled the binding further over to accomplish the filling then, the stitching on the reverse side of the quilt showed how often I missed the ditch.


This is 2/3 of the pieced quilt back.


                                                                            I used lots of thread in this project--21 spools of silk thread and three spools of cotton thread to quilt and piece the top. I figure I spent about $60 for thread. The batting was about $32. I used 17 1/2 yards of fabric from my stash for the sashing, backing and pillow case. I did buy fabric for the binding. I placed a value of $6 a yard on the fabric for a total of $105. The binding was $4. Total cost for this project was $201.

My goal this year was to use 50 yards from my stash. So far, this makes 20 1/2 yards used. A few pieces that I used in this project had been in my stash for more than ten years. Seeing a little more space on the batik shelf is GREAT!

Plus, getting the pile this project created off the cutting table was great. I have moved fabrics for two years!!!

Not being able to crawl on the floor to block the quilt probably was why I have a little wave to the quilt edge. Also, it might not be as noticeable as I think; but, I don't have enough floor space in my house to lay it flat which makes not being able to crawl on the floor a moot point doesn't it?

Corner stone quilting example.
Had the quilt spoken to me earlier about quilting that motif in the white corner stones, it would have been easier. I should have quilted the motif after stitching in the ditch! Speaking of stitching in the ditch, for the seams that I pressed open, I left. On "Totally Hexed", I stitched in those spaces and felt that stitching with no ditch looked too messy. For this project, I thought that the unstitched seam areas puffed too much. So, now, I'm on the fence about how to treat open seams when quilting.

It would have been smarter to have chosen different quilting for those sashings. Leaving a 1/4 of an inch space on the outer edge of the binding was a sort of hit or miss deal for me. I liked the pieced back and I liked how the quilting shows on the back. I have my tension "dialed in" for free motion quilting with silk thread on the top and 60wt aurafil thread in the bobbin.


Fabrics cut for the pillow case.

I used a few leftover pieces of the sashing to add to my label.

Somehow, I need to quilt faster although, pushing and pulling the bulk of that quilt through the harp was hard and my thumb is still healing from not taking long enough breaks! I'm really thinking that a longarm is in my future although not the near future. I live in a house where the only room a 12 foot table would fit is the living room which would not be acceptable to my DH!


Next up are going to be some smaller projects! Actually, the first project I'm going to finish is the pillow case for this quilt! The fabrics are cut; I just need to sit and stitch!


For now, I'm excited to have completed this project. Here is the proof that I did finish it in time to hang at the Featured Artist Quilt show. It is fairly flat too! I love how the red and white pieced sashing blocks make the blocks pop! I still want to incorporate my president's name badge somehow into the front of the quilt. I'll ponder that a while. . .

This is my first Finish-A-Long 2016 for quarter number 4. You can read my list here.

Wednesday, October 19, 2016

Visiting an Art Gallery


Since the end of August, the grands spend Mondays and Wednesdays with us. I get to play princess, mama/kid (sometimes, I'm the baby and sometimes I get to be a little girl), coffee shop and restaurant. It is an absolute hoot! In the afternoon, DH takes them to meet up with their mama who works at an elementary school. (She is the special education teacher.)
"Please take our picture here, Gran!"
If it is a nice day, we often go to the park. Monday, it was rainy, so we went to an art gallery.  My friend, Joanne, is part of a quilt group that makes wonderful art pieces. She posted about the exhibit here.

This art gallery is located on the Mt. Hood Community College campus in Gresham, Oregon. Joanne told me that three times a year, the gallery hosts an exhibit other than student work. It is a nice gallery and I will check out the student work at other times in the year.

We walked through campus to the gallery which was good for those young legs! Those legs jumped, hopped and bounced to the gallery and back! The youngest legs NEVER miss the opportunity to splash in a puddle!

The oldest's favorite was "Green Washing."

At the end of the visit, I asked what was their favorite piece and then took their picture by it. It is important to them that I send the photo to their mama! The oldest, loves dresses--the fancier the better! So I wasn't surprised at her choice at all!
The description. . .


The youngest's favorite was "Egg-Actly."


The youngest loves animals. I thought she would pick the pig exhibit; but, I had to agree with her about how cool these eggs were. They were 3-D!

The description. . .


The piece I came to see!
I'm thinking that one of the rules the makers placed on themselves for this exhibit was that at least 50% of the materials had to be "green" for each piece.

"The North Side" was the piece that I came to see as Joanne had blogged about it sometime ago. It is amazing because looking at it sure gave me the feeling of one of those old growths deep in the woods covered with moss. There was no moss used; but it sure looked like it!!

There were some interesting materials used in the pieces. I snapped a few photos; but, I had to be quick as the attention spans of an almost 4 1/2 year old and an almost three year old are ever changing!

Seeing the exhibit was inspiring. I have wanted to experiment with paint. . .who knows when I will get to that!  First, I am finishing the "42 Minis" and then I'm planning to finish a couple small projects. . . .although, plans change! :)

The description. . .
As for the grands, they think they are going to see quilts when we go to an art gallery! Remember, I'm doing my best to infect each of them with the "quilt pox!"


Sunday, October 16, 2016

Featured Artist Show

Shazam, a quilt pieced to use up scraps!
In between grandkids, quilting, working, rehabbing the knees and having fun with hubby, I've been organizing the Featured Artist Show for our guild. The show, "Showcasing Quilts of Our Past Presidents," will be held October 21-23 at the HH Hall Building in Vancouver, Washington. Show hours are 3-8 on 10/21; 10-5 on 10/22 and 10-4 on 10/23.  Suggested admission is a $3 donation. If you are in the area, please come and visit!

We will have works from 21 past presidents who led the guild from 1985 to 2016! I am also one of the featured artists. Sadly, one of our past presidents, died last July. With the support of her family, I have her quilts to display.

One might think working with 21 leaders would be challenging based on the fact that they are all leaders! I've tried to not send too many e-mails, I tried to foresee problems and asked for solutions. Most of all I have been so thankful to all the past presidents who stepped forward to take on tasks for the show. (At this point, I have  have perturbed only one past president. So I must be doing okay!)
Inspired by the book, "The DaVinci Code."

We will have about 200 quilted projects--most of them quilts. The photos I'm posting today, will be of some of the items that I will have in the show. At the guild meeting last Thursday, I asked those past presidents in attendance to stand on the stage with me during our committee reports. The most recent past presidents shared their completed President's blocks quilt while I reminded members about the show and introduced the past presidents.

I wrote what I wanted to say so that I wouldn't forget any names--speaking in front of a large audience is always a challenge for me although few people would ever know how much of a challenge it is for me! What I forgot to say was that many of our past presidents have continued to be active in the guild, chairing a committee, teaching classes, leading a subcommittee and stepping in to help when asked.
Inspired by the book, "Snowflower and the
Secret Fan"

When I was president in 2013-2014, our membership was about 525 and there were 60 board members. Yes, you read that correctly! Although, attendance at a board meeting averaged 30 people.  My goal was to leave the guild's finances a little better than when I came and to keep the ball rolling!

Today, I attended a new member tea and promoted this event to those present. Fingers crossed that lots of people will come see the show.  Fingers crossed that the quilts fit in the space allotted. Fingers crossed that I bring all that I'm supposed to bring. Fingers crossed that "42 Minis" AKA President's Blocks is finished in time to be hung with the other quilts at the show on Thursday!

Tomorrow, I'll be finishing the handwork on the label and running the lint roller over it the remove hair from my friend, Bailey AKA our dog!

Wednesday, October 12, 2016

4th Quarter QAL Goals

My fourth quarter goals are:
Quilt this mystery project that is a top!


Finish the binding, label and sleeve on my president's blocks AKA "42 Minis" Of course, I thought that I would finish that six weeks ago at LEAST!!

butterfly quilt--get it pin basted


TQS BOM--figure out the embroidery for the border that I want to add, 


Six past book club and one current book club projects:

Finish this little top.


Add the skinny pieces to liven up the background and appliqué the flowers to finish the top.


Add the quilting to this project. I also want to add some beads which will be a first for me!


Quilt this piece of linen that has been in my stash for about 30 years!


Figure out how to fit the bridge on this piece and what to do with the open bottom right corner:


These are two starts to book club quilts. . .Are you seeing a pattern??? I must return to my word for the year. . .FOCUS on finishing!!!


Keep putting in a little time each month on appliquéing the pieces that over lap the blocks on this chicken wall hanging. I only stitched on it three times in the last quarter. I'm thinking that I need to designate a day to work on it each week to really make progress!


Finish the online mystery BOM top. I just have the last clue to complete!


Start new projects.


This is the fabric for a pieced, appliqué and embroidered project! I have it cut out; but, haven't started stitching!

The granddaughter asked to make a skirt. . .well, we picked the fabric and the pattern. . .also fabric for a skirt for her sister!!


Finish this bag that I started in a class on how to use various machine feet and machine embroidery stitches.


I also need a new bag to carry my quilt projects. I have this bag of selvages to work with:


Sew another 50 yards from my stash during the year. I've been using fabrics from my stash; but, since I haven't completed much using them, I haven't listed where I am on that goal. 


Make more of these bags using some scraps. This is a scrap from the backing of my president's blocks AKA 42 Minis quilt that might work.


Make a pillowcase to store 42 Minis.

Have FUN!

This is a lot for a list and many of the projects are hold overs from the first quarter. I'm okay with that. As long as I'm making progress, I don't mind having long lists!  Also, I have found that if I am more specific about the result of the progress, I make more progress!